この記事はand factory.inc Advent Calendar 2022 19日目の記事です。
昨日は @arusu0629 さんの個人開発アプリに Swift Package Manager を導入してみたでした。
はじめに
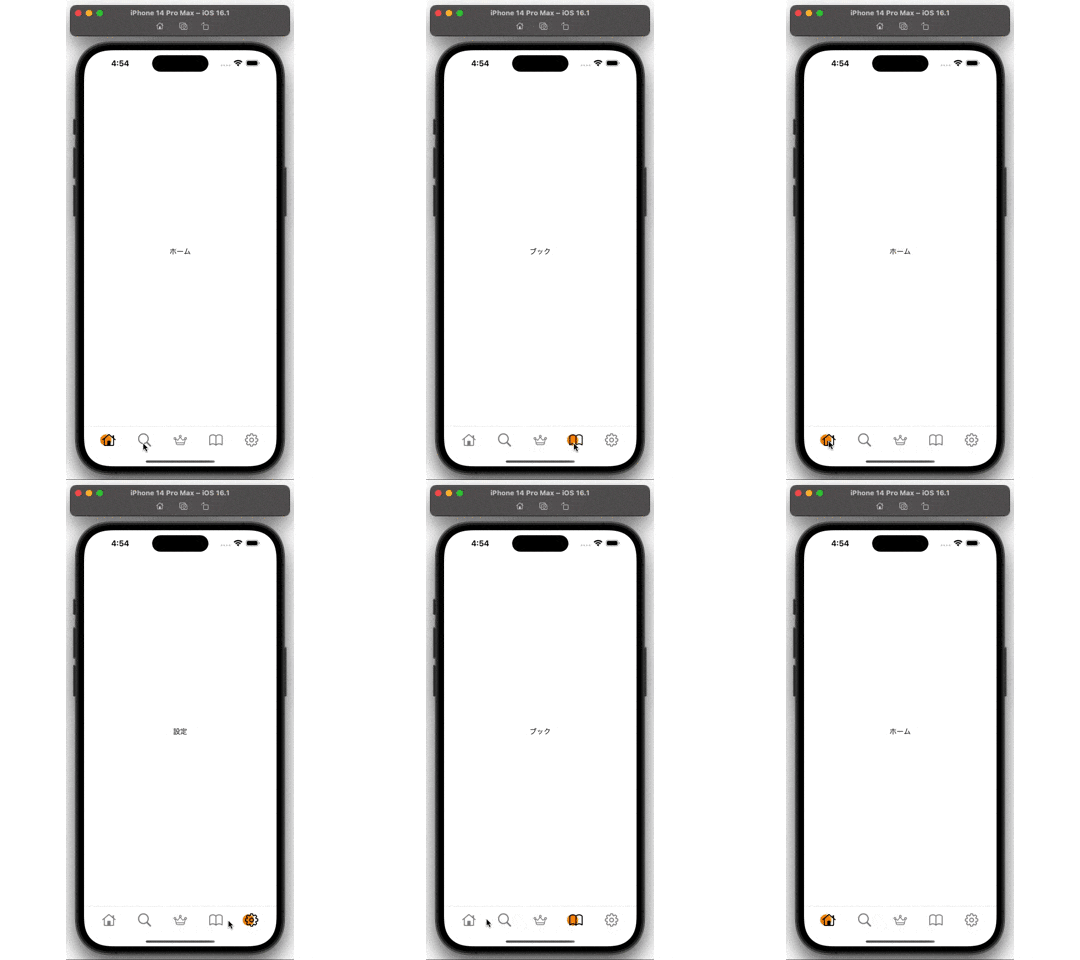
基本的な実装は経験があったので今回は少しアニメーションなども加えたカスタムなTabViewの実装を行ってみました。
完成形
開発環境
- Xcode 14.1
- iOS 16.1
TabのModelを作成
TabBarに表示するenumを定義
enum Tab: CaseIterable {
    case home
    case search
    case ranking
    case book
    case setting
}
// MARK: - SF Symbols Name
extension Tab {
    func symbolName() -> String {
        switch self {
        case .home:
            return "house"
        case .search:
            return "magnifyingglass"
        case .ranking:
            return "crown"
        case .book:
            return "book"
        case .setting:
            return "gearshape"
        }
    }
}
-
allCasesを使用したいためCaseIterableプロトコルを使用 -
TabBarに表示する画像はSFSymbolsを参照するのでそれもここで書いておく
表示画面の作成
メインのContentViewは以下のように定義しました、この時点ではまだTabBarは実装してません
struct ContentView: View {
    init() {
        // デフォルトのTabBarは使用しないので隠しておく
        UITabBar.appearance().isHidden = true
    }
    @State var currentTab: Tab = .home
    var body: some View {
        VStack(spacing: 0) {
            TabView(selection: $currentTab) {
                Text("ホーム")
                    .tag(Tab.home)
                Text("検索")
                    .tag(Tab.search)
                Text("ランキング")
                    .tag(Tab.ranking)
                Text("ブック")
                    .tag(Tab.book)
                Text("設定")
                    .tag(Tab.setting)
            }
            Divider()  // 区切り線
        }
    }
}
- 状態監視のため
@State var currentTab: Tabを定義
(初期値は.homeとしています) -
Tab切り替えにより画面が変化している事を知りたいためText()にて表示名をつける
TabBarの実装
TabBarの実装は以下のように行いました。
struct CustomTabBar: View {

    @Binding var currentTab: Tab

    var body: some View {
        GeometryReader { proxy in
            HStack(spacing: 0) {
                ForEach(Tab.allCases, id: \.hashValue) { tab in
                    Button {
                        currentTab = tab
                    } label: {
                        Image(systemName: tab.symbolName())
                            .renderingMode(.template)
                            .resizable()
                            .aspectRatio(contentMode: .fit)
                            .frame(width: 30, height: 30)
                            .frame(maxWidth: .infinity)
                            .foregroundColor(currentTab == tab ? .black : .gray)
                    }
                }
            }
            .frame(maxWidth: .infinity)
        }
        .frame(height: 30)
        .padding(.bottom, 10)
        .padding([.horizontal, .top])
    }
}
ContentViewのcurrentTabとの紐付けの為、@Bindingを定義
@Binding var currentTab: Tab
HStackの要素が知りたい為、GeometryReaderを使用
GeometryReader { proxy in
-
ForEachでenumで定義したTabの要素数を回して、Imageやタップした処理などを設定する - 下記処理にてTabの選択状態の色を変更
.foregroundColor(currentTab == tab ? .black : .gray)
途中経過
- この時点で普通のTabViewのような動きにはなるので
CustomTabViewをメインのContentViewで呼び出し -
currentTabをここで紐付ける
struct ContentView: View {
    init() {
        UITabBar.appearance().isHidden = true
    }
    @State var currentTab: Tab = .home
    var body: some View {
        VStack(spacing: 0) {
            TabView(selection: $currentTab) {
                Text("ホーム")
                    .tag(Tab.home)
                Text("検索")
                    .tag(Tab.search)
                Text("ランキング")
                    .tag(Tab.ranking)
                Text("ブック")
                    .tag(Tab.book)
                Text("設定")
                    .tag(Tab.setting)
            }
            Divider()
            CustomTabBar(currentTab: $currentTab)    // ここで呼び出す
        }
    }
}
今の時点での動きはこんな感じ
アニメーションつけてみる
-
HStackの横幅を取得
    var body: some View {
        GeometryReader { proxy in
            /// HStackの横幅
            let width = proxy.size.width

            HStack(spacing: 0) {
-
TabごとのIndexを取得する関数の作成
func getIndex() -> Int {
        switch currentTab {
        case .home:
            return 0
        case .search:
            return 1
        case .ranking:
            return 2
        case .book:
            return 3
        case .setting:
            return 4
        }
    }
- タップされたTabの位置を返す関数を作成、先程作成した
getIndex()はここで呼び出す - 引数の
widthはHStackの横幅
func indicatorOffset(width: CGFloat) -> CGFloat {
        let index = CGFloat(getIndex())
        if index == 0 {
            return 0
        }
        /// Tabアイテムの横幅
        let buttonWidth = width / CGFloat(Tab.allCases.count)

        return index * buttonWidth
    }
最後にCustomTabViewへの実装は以下のようになってます。
            HStack(spacing: 0) {
                ForEach(Tab.allCases, id: \.hashValue) { tab in
                    Button {
                        // ここで更新
                        withAnimation(.easeInOut(duration: 0.2)) {
                            currentTab = tab
                        }
                    } label: {
                        Image(systemName: tab.symbolName())
                            .renderingMode(.template)
                            .resizable()
                            .aspectRatio(contentMode: .fit)
                            .frame(width: 30, height: 30)
                            .frame(maxWidth: .infinity)
                            .foregroundColor(currentTab == tab ? .black : .gray)
                    }
                }
            }
            .frame(maxWidth: .infinity)
            .background(alignment: .leading) {    // ここでアニメーションさせたいオブジェクトを定義
                Circle()
                    .fill(.orange)
                    .frame(width: 25, height: 25)
                    .offset(x: 20) // 初期x座標
                    .offset(x: indicatorOffset(width: width)) // 移動後x座標
            }
-
HStackのbackgroundにCircle()を表示。 -
offset(x:にてCircle()の初期x座標、移動後のx座標を書いておく。
(初期: 固定値20、移動後: 先程作成したindicatorOffset()より位置座標を取得表示) -
Tabをタップしたタイミングでwithanimation(_:_:)内でcurrentTabの更新を行う
withAnimation(::)については、弊社エンジニアの @ichikawa7ss が記事 (【SwiftUI】明示的アニメーションと暗黙的アニメーションを理解して使い分けよう)を書いてますのでそちらをご参照ください。
最後に
思っていたよりアニメーションが簡単に実装できたのが驚きでした。
今回は簡単なカスタムTabViewを作成しましたが、まだまだ応用が効きそうなので面白い実装ができたらまた記事にしてみます。
最後まで読んでいただきありがとうございます。
明日のAdvent Calendarの記事もお楽しみに![]()

