2019/07/16更新 記事の画像を大幅に充実。DiscoveryのCollection作成(GUI版)に対応。また、サンプルプログラムが動かなくなっていたため大幅にリニューアル!
このページについて
このページはハッカソンを迅速にお楽しみいただくために開発した開発レシピ集です。レシピのまとめページはIBM Cloudのビギナー開発者向け「最初のレシピ」集になります。
あくまで個人の活動として掲載しているので、IBM ソーシャル・コンピューティング・ガイドラインに則っています。
すなわち、このサイトの掲載内容は私自身の見解であり、必ずしもIBMの立場、戦略、意見を代表するものではありません。
はじめに
IBM CloudとはIBM社が提供するクラウドサービスです。
クラウドとは・・・と紙で理解するよりは、実際に使って理解したほうが早いです。
そのため、ここでは言語系サービスであるDiscovery&Translatorについてレシピとしてまとめます。
なお、ここの記事は、単体でも実行環境は構築できますが、Node-RED自体については、別記事を参考いただいたほうがわかりやすいかもしれません。
Visual Recognitonを利用する最初のレシピ
Watson Discovery Service環境の構築
IBM Cloud環境上にDiscovery Serviceを構築します。
IBM Cloudにログイン
ログイン後の画面が下記です。ここで、画面上部のカタログを選びます
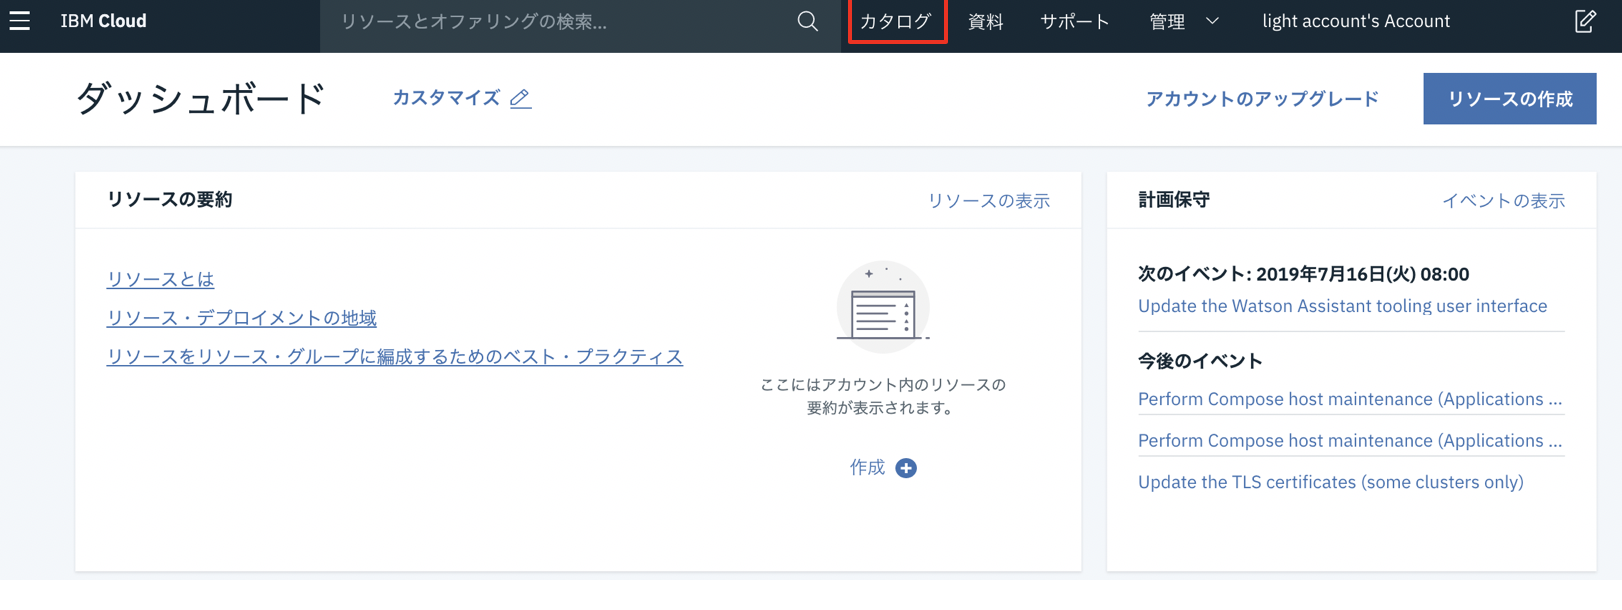
Watson Discovery Serviceを構築する
「label:ライト discovery」で検索すると「Discovery」のタイルが出現するので、これをクリックします。

その後、Discoveryの説明があるので、「作成」ボタンを押します。
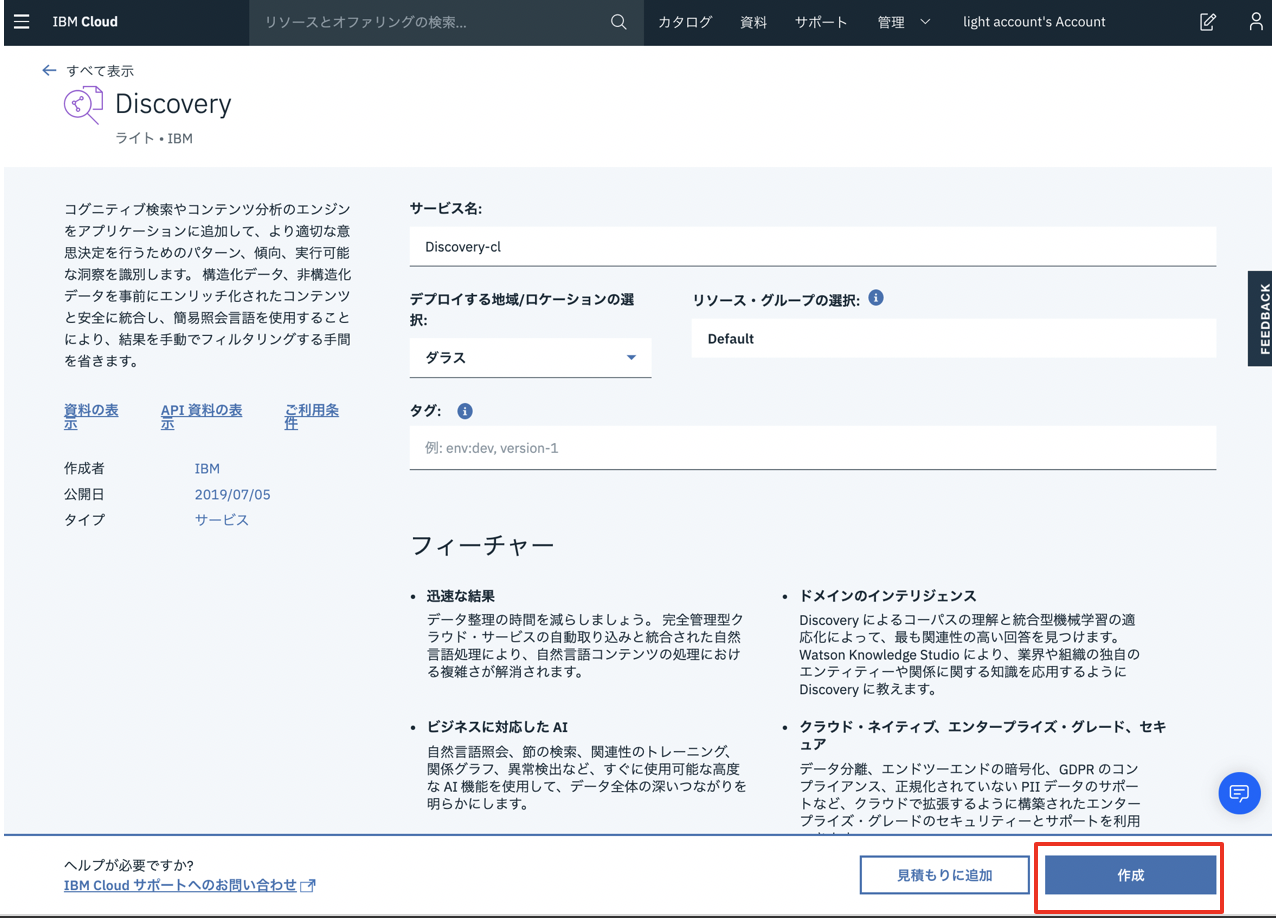
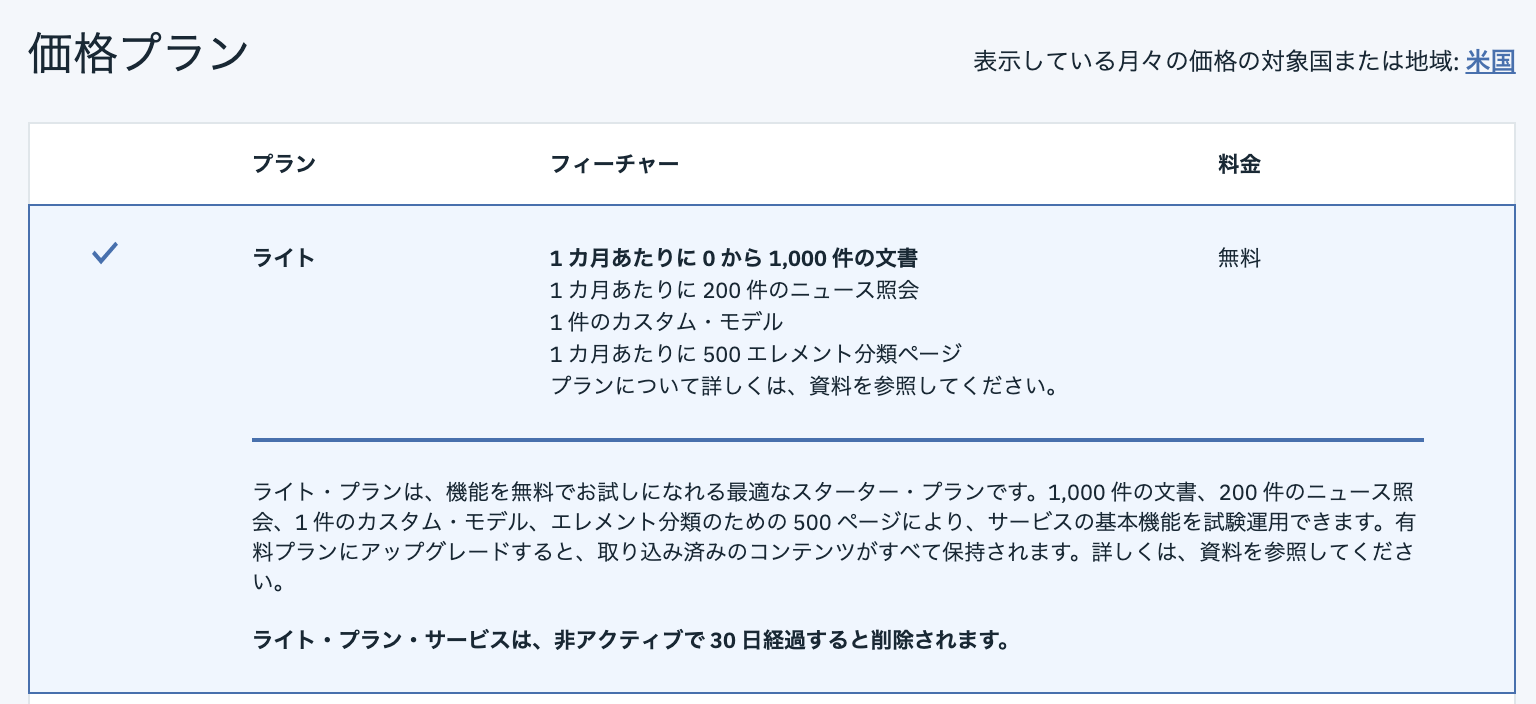
*ライトアカウントの場合は無料枠のサービスがデフォルト設定されますので、ご安心ください。
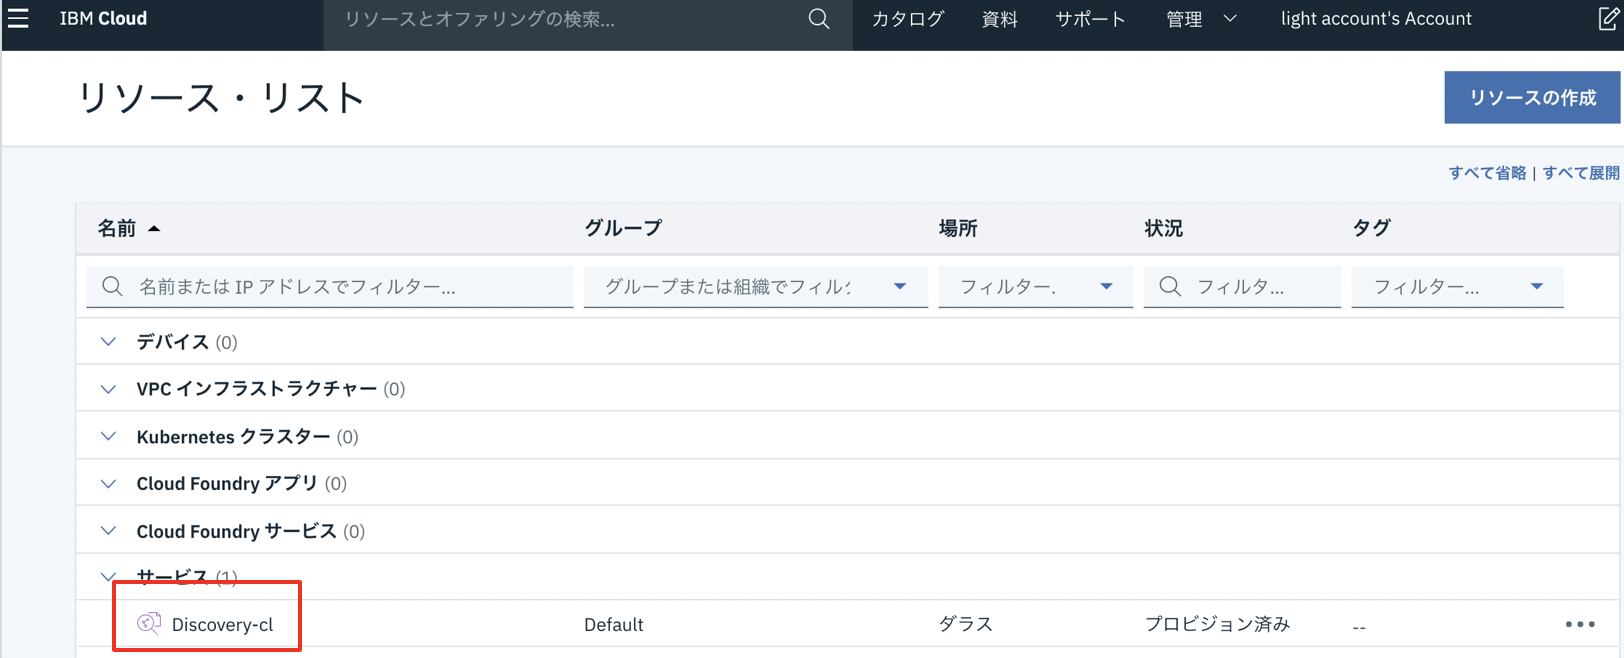
*作成後、画面が切り替わり、「リソースリスト」に戻ってくると思います。そのとき、Discoveryは「プロビジョニング進行中」となっていると思いますので、しばらくおまちください。
なお、「プロビジョニング進行中」となって画面が切り替わらないようであれば、ブラウザ環境の問題で、画面の表示が切り替わっていないだけかもしれないので、画面を更新するようにお願いします。いつのまにか「プロビジョニング済」となっている場合があります。

Watson Discovery Serviceを開く
Discoveryを設定して、Watson Discovery Serviceを利用するための実行環境を構築します。
「Watson Discoveryの起動」を選択します

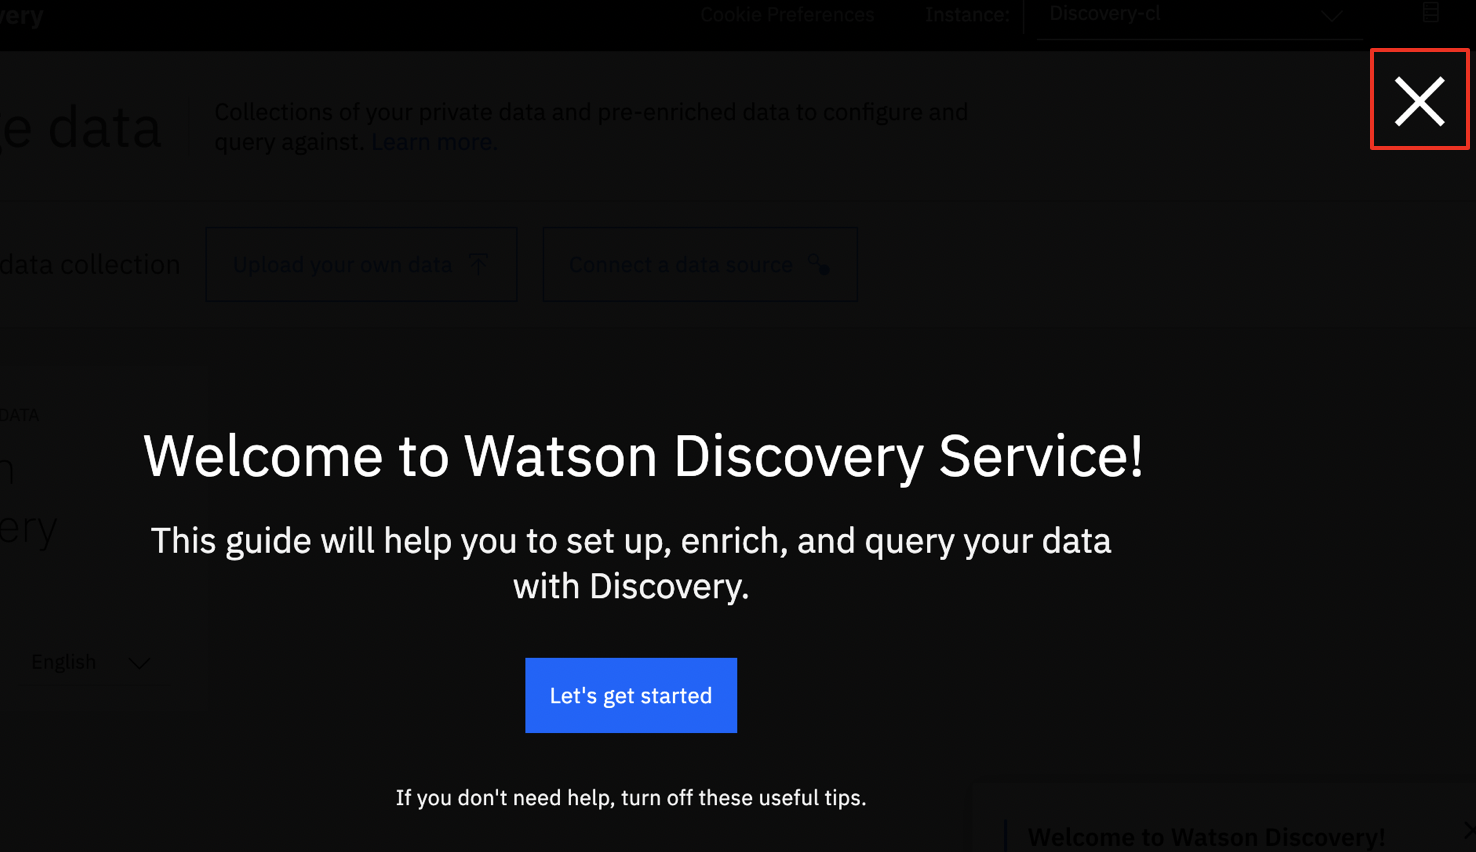
Watson Discovery Serviceの画面が出たら、初期説明が不要であれば「X」を選択してください。
ご参考:Watson Discovery Newsについて
Watson Discovery Serviceには、日本の著名な記事を解析したWatson Discovery Newsが着いてきます。
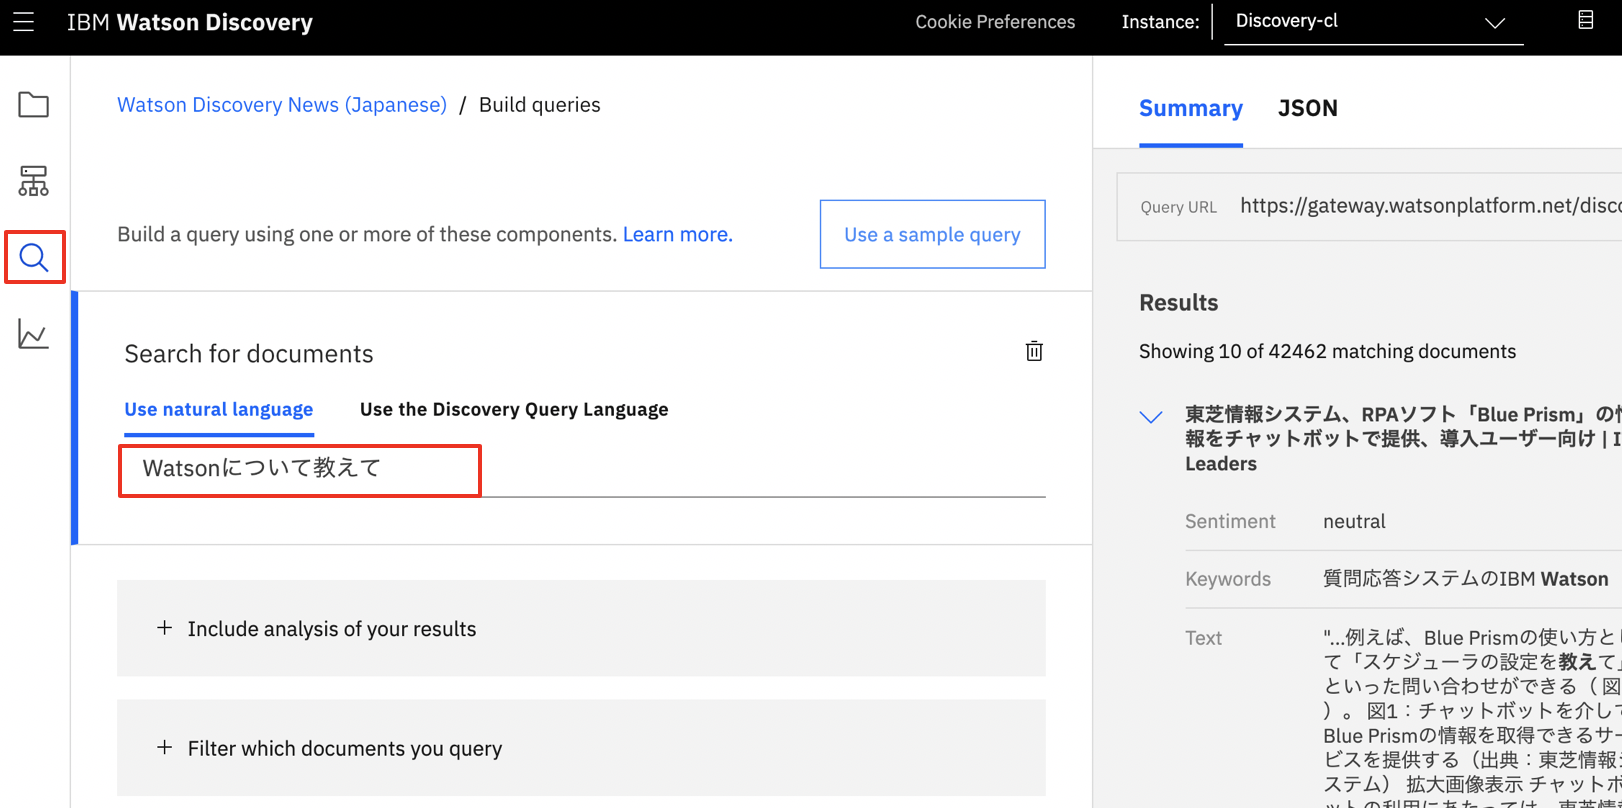
設定を「English」から「Japanese」に変更してクリックすると、IBM社が収集したニュースデータをDiscoveryで解析した情報が見れます。


クエリー画面に移動して「Watsonについて教えて」といった一般的な質問文にて、記事を検索することができます。しかも、検索結果にはキーワードやポジティブ記事なのかなどの洞察も含めて応答してくれます。ここでは付加情報は少しですが、条件を高度にすれば他の付加情報も取得できるかもしれません。
Watson Discovery Serviceの実行環境を構築する
実行環境は画面右上の「Create Enviroment」で構築します。

注意画面が出ますが「現在のプラン(ライトプランのこと)」である「set up current plan」を選択します。
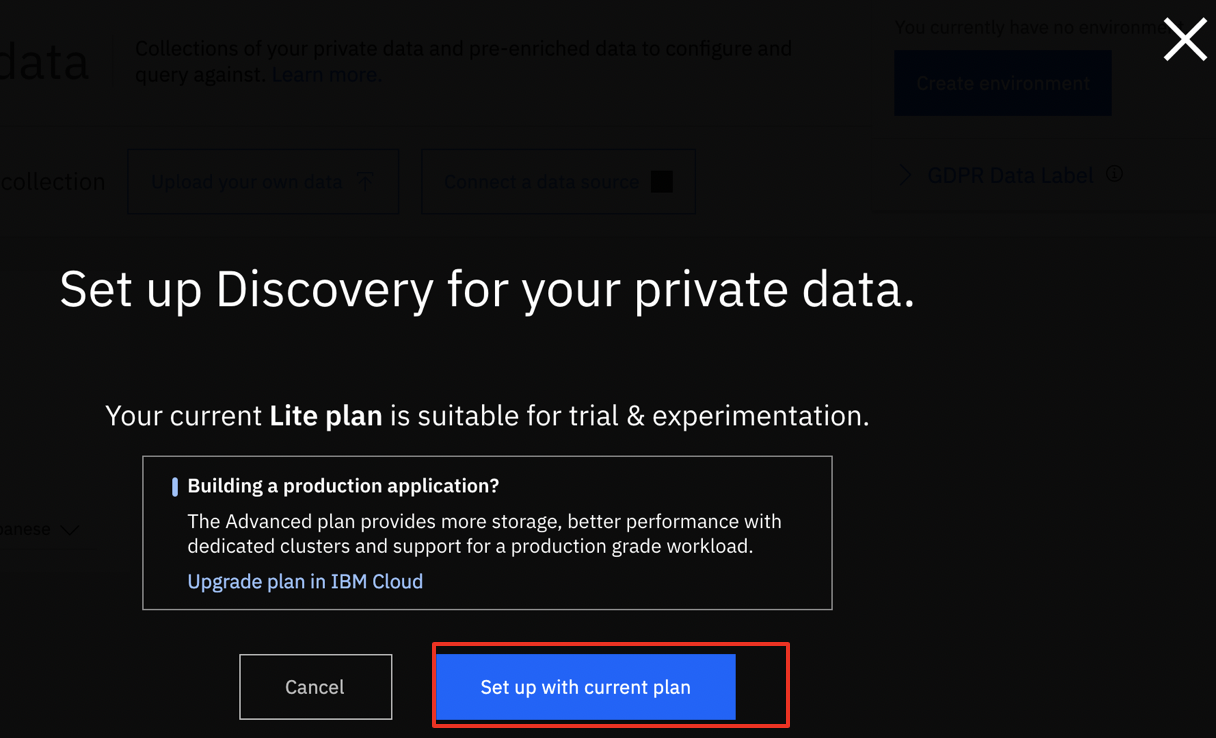
その後、元の画面に自動的に戻ると思います。一見何も変わっていないように見えますが、先程選んだ右上のボタンを押すと「Enviroment」が構築されていることが確認できます。

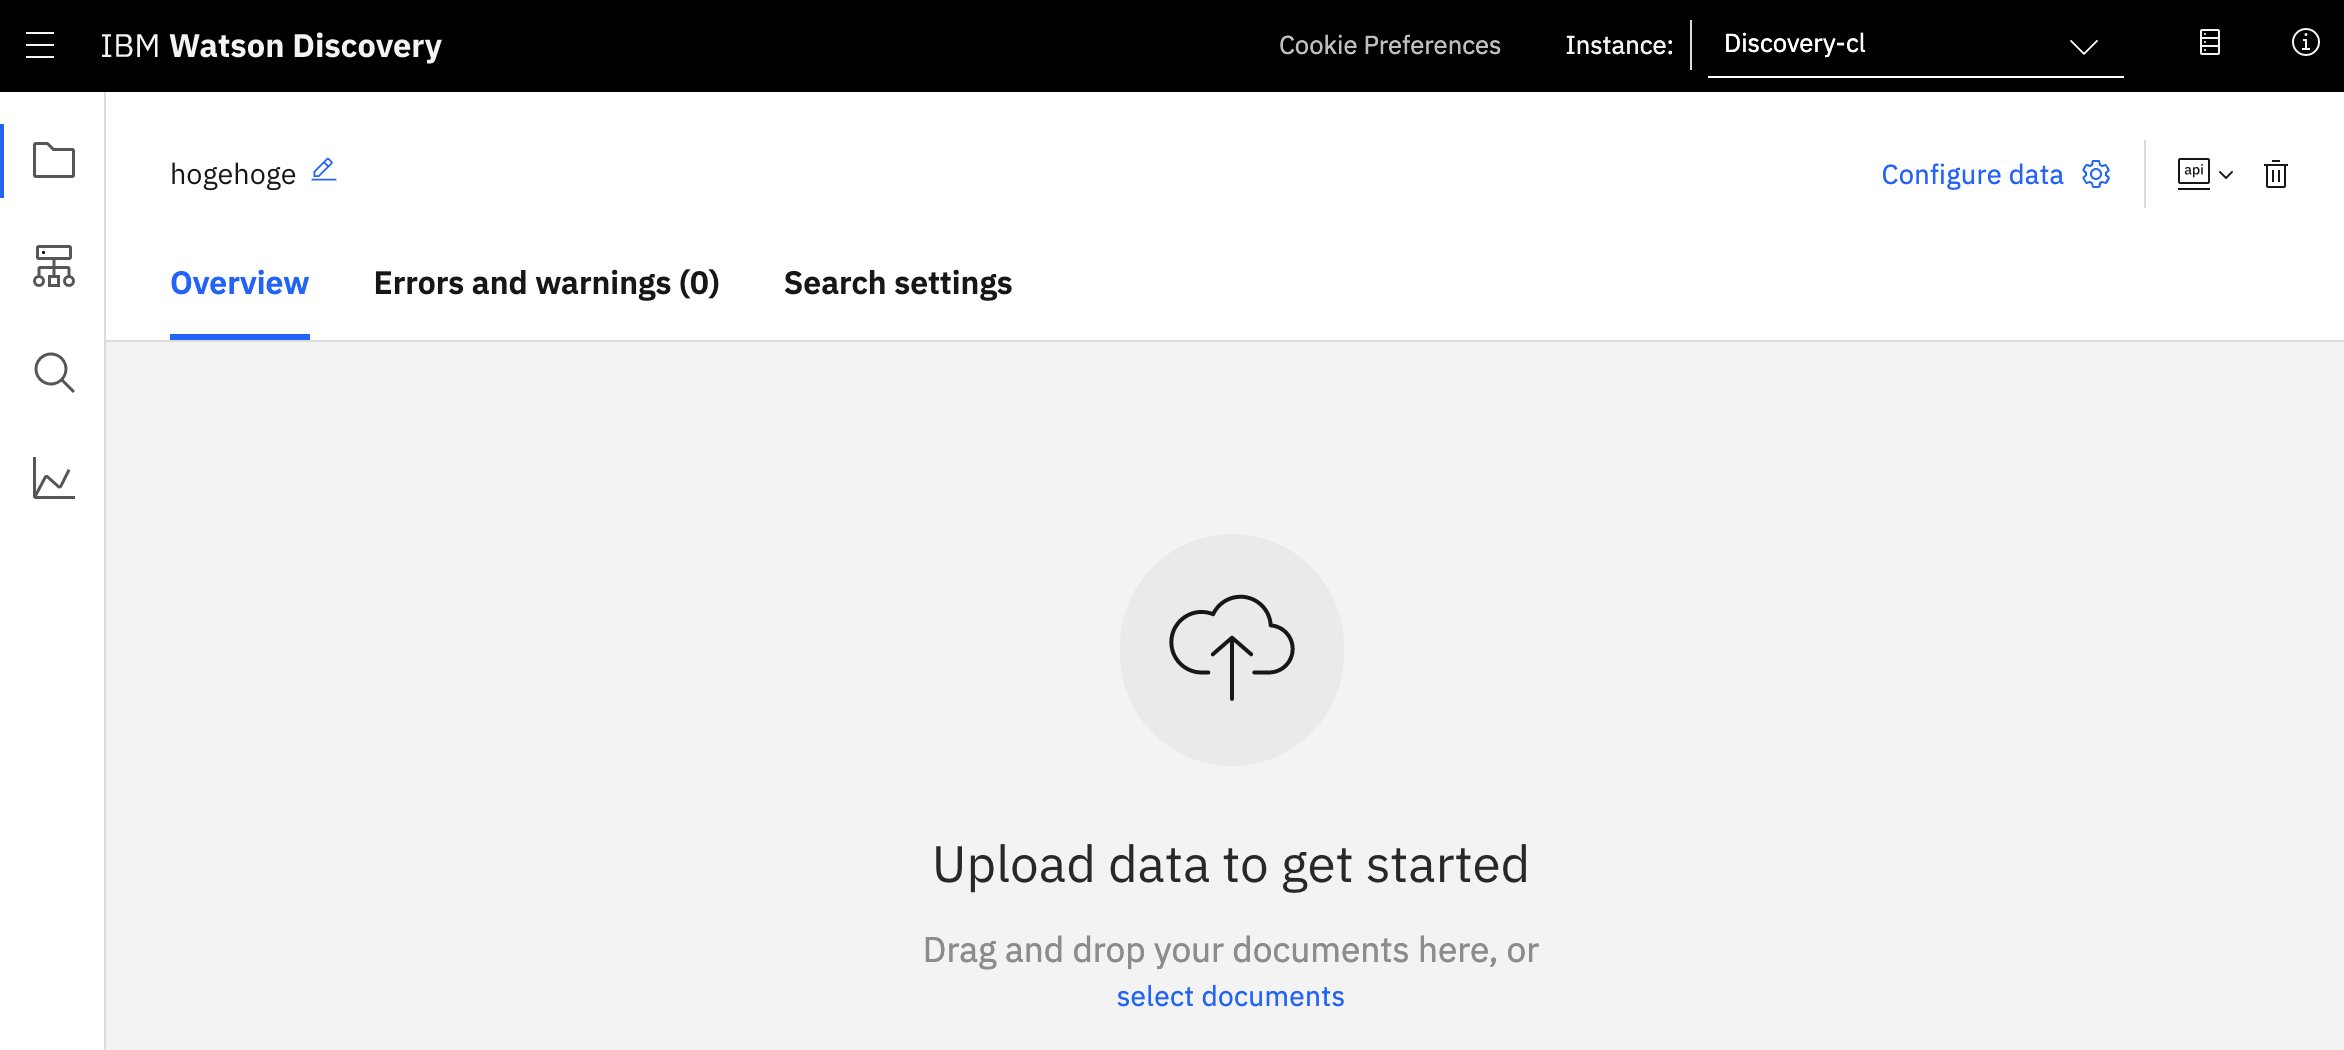
create a new data collectionの右にある「Upload your own data」を選択します。これでWatson Collectionが構築できます。

Collectionの設定画面が出ると思いますが、[collection name]は好きな名前を入力してください。[select language]は日本のドキュメントを扱う時は日本語がいいでしょう
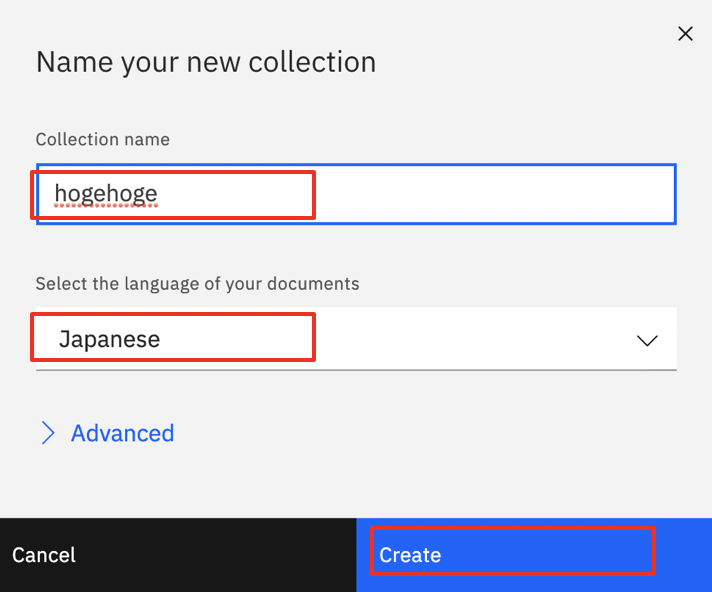
ちなみに、次回からは初期画面から新しい名前のCollection名のタイルができていると思います。そこをクリックすれば上記と同じ、文書のアップロード画面に移動できます。
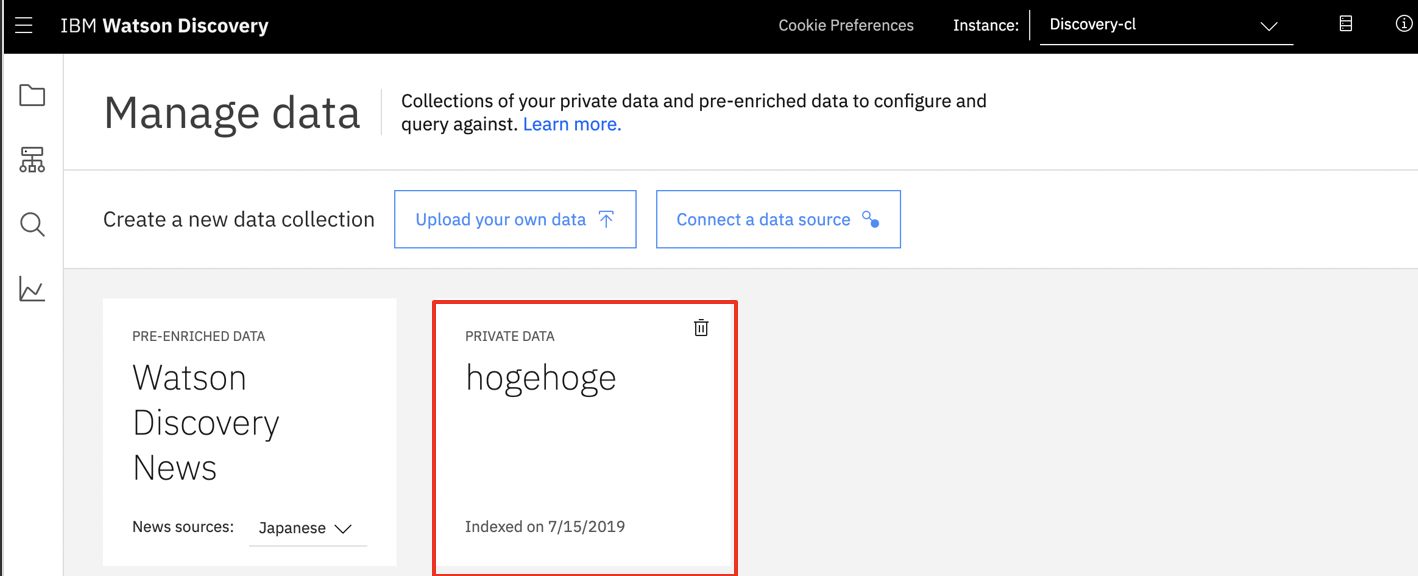
Documentを追加する。
Watson Discoveryサービスの管理画面にて「ツールを起動」を押す。
すると、Discoveryの管理画面が出ます。
ここで、文書(今回はJSON)を登録します。
ドキュメントの例。こういうのを3個用意してみました。
下記のようなファイルをご準備ください。
{
  "title": "本人確認書類に記載された住所と現住所が違う場合、口座開設できますか?"
}
画像をドラッグ&ドロップとありますが、ダイアログでアップロードするのが無難です。
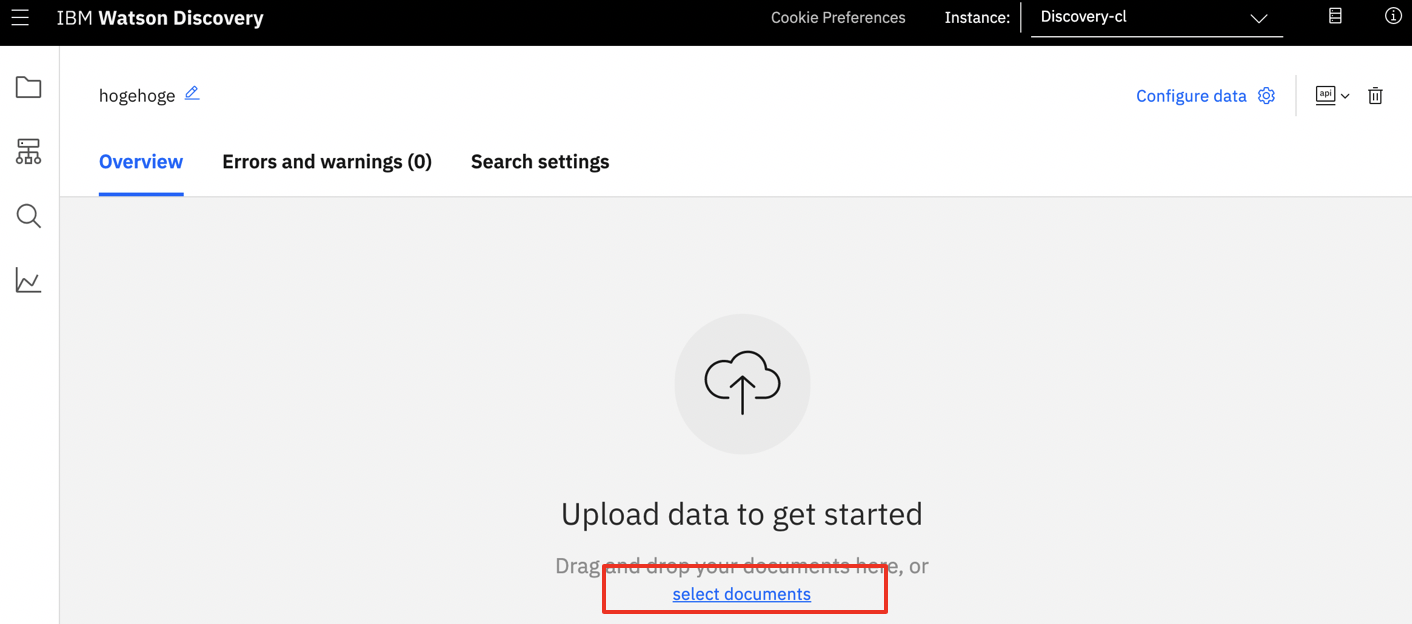
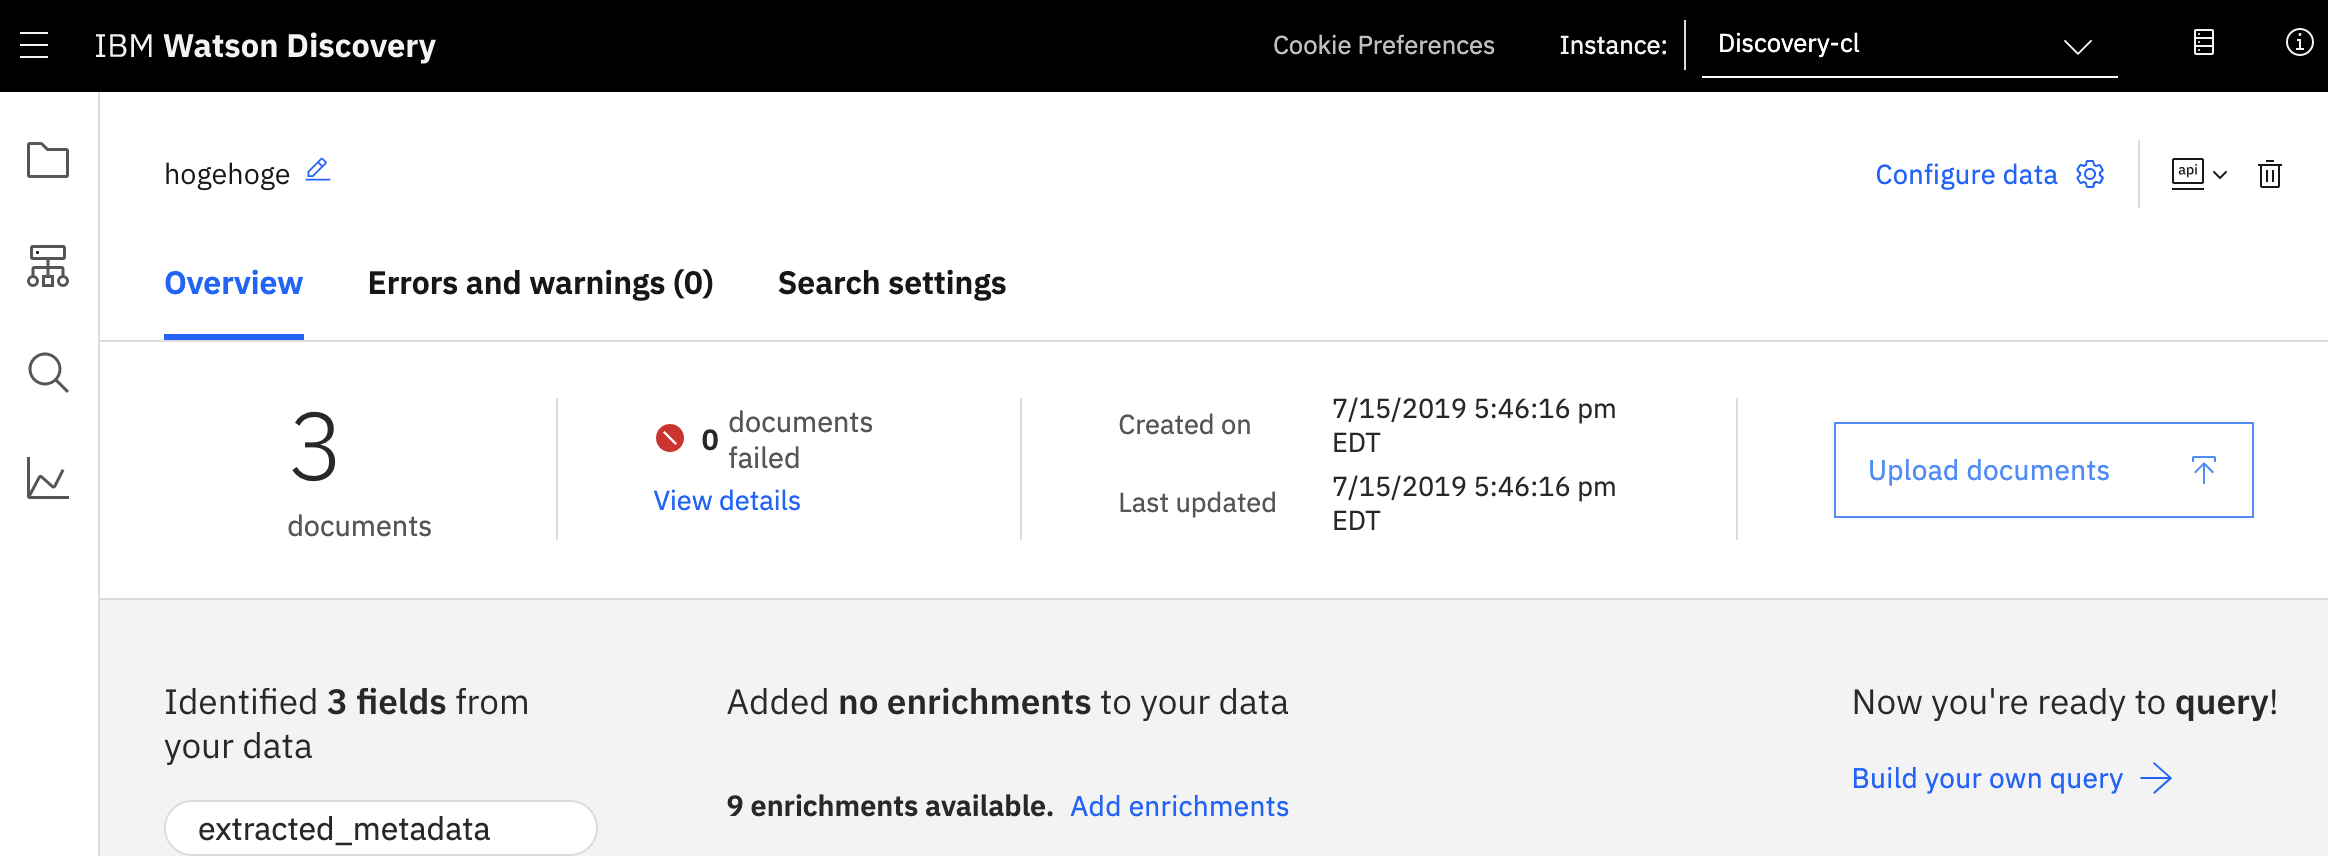
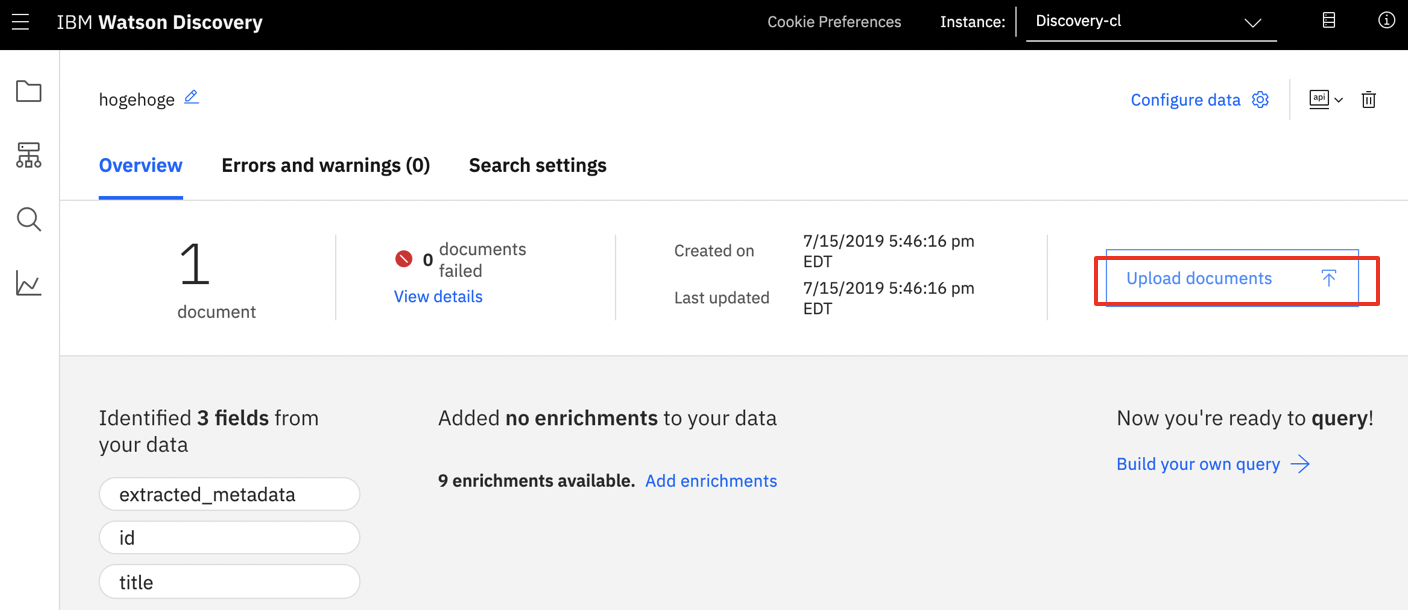
アップロード後、Collection名を選択した画面が下記のように変わります。文書を登録する時は、右側のボタンを押せば同じように追加登録できます。
2つめ、3つめのドキュメントを登録してみましょう。
{
  "title": "口座開設申し込みに必要な本人確認書類はなんですか?"
}
{
  "title": "家族も一緒に口座開設をしますが、本人確認書類は同じものなので1通でいいですか?"
}
なお、この画面で「Configure data」を選ぶと、環境設定のキーとなるIDが取得できます。
アプリを開発するときに必要になりますので、控えておくようにしてください
(*注意1)

検索してみる
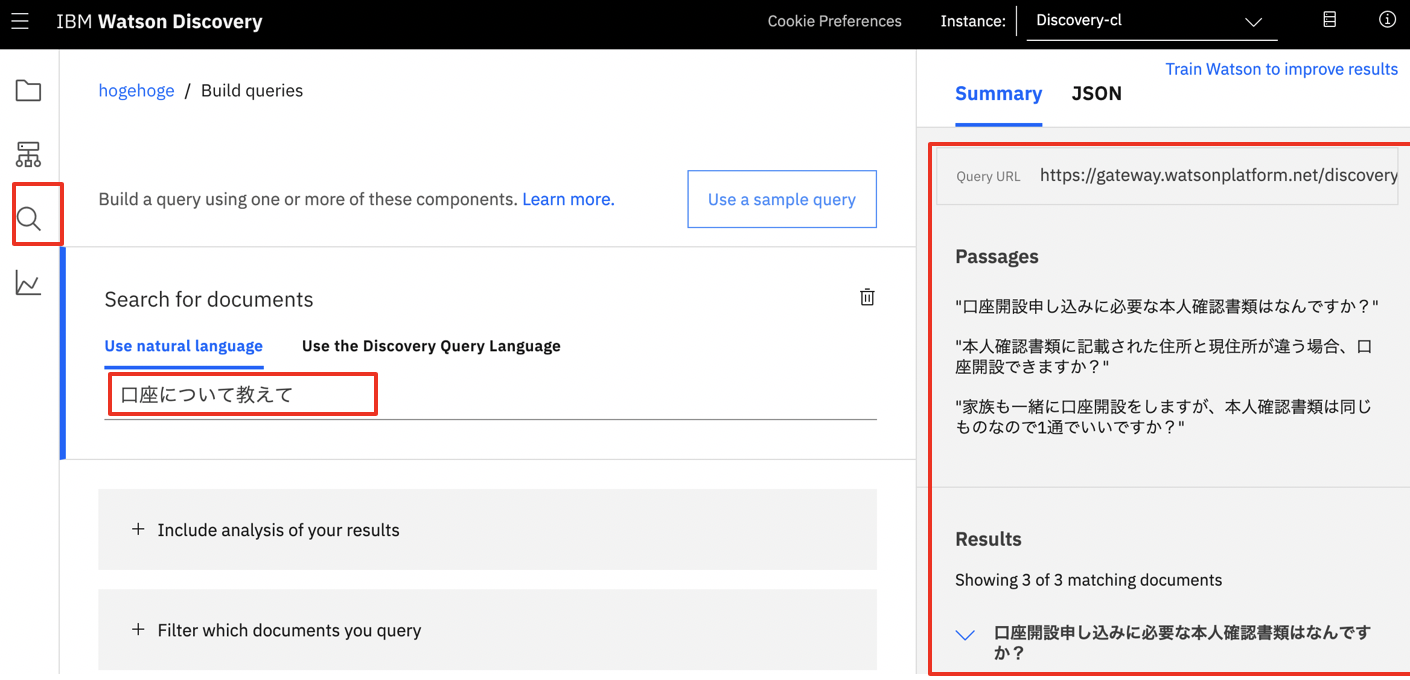
余談ですが、実際に検索するテストを行うことができます。
Newsのときと同じように検索アイコンの画面を開き、「口座について教えて」と入力し、Enterを押すと、検索結果が出ると思います。
Watson Translatorを使う
Discoveryのときと同様に、IBM Cloudの画面(カタログ)画面に移動します。
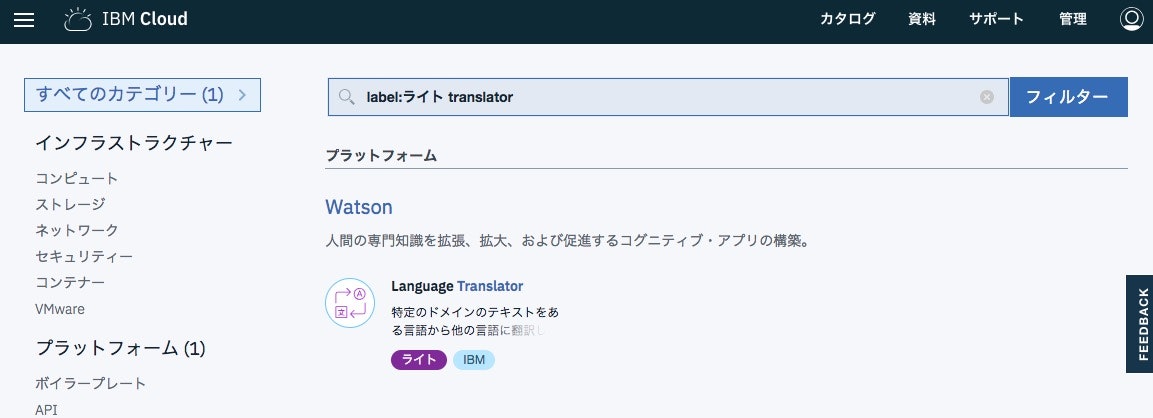
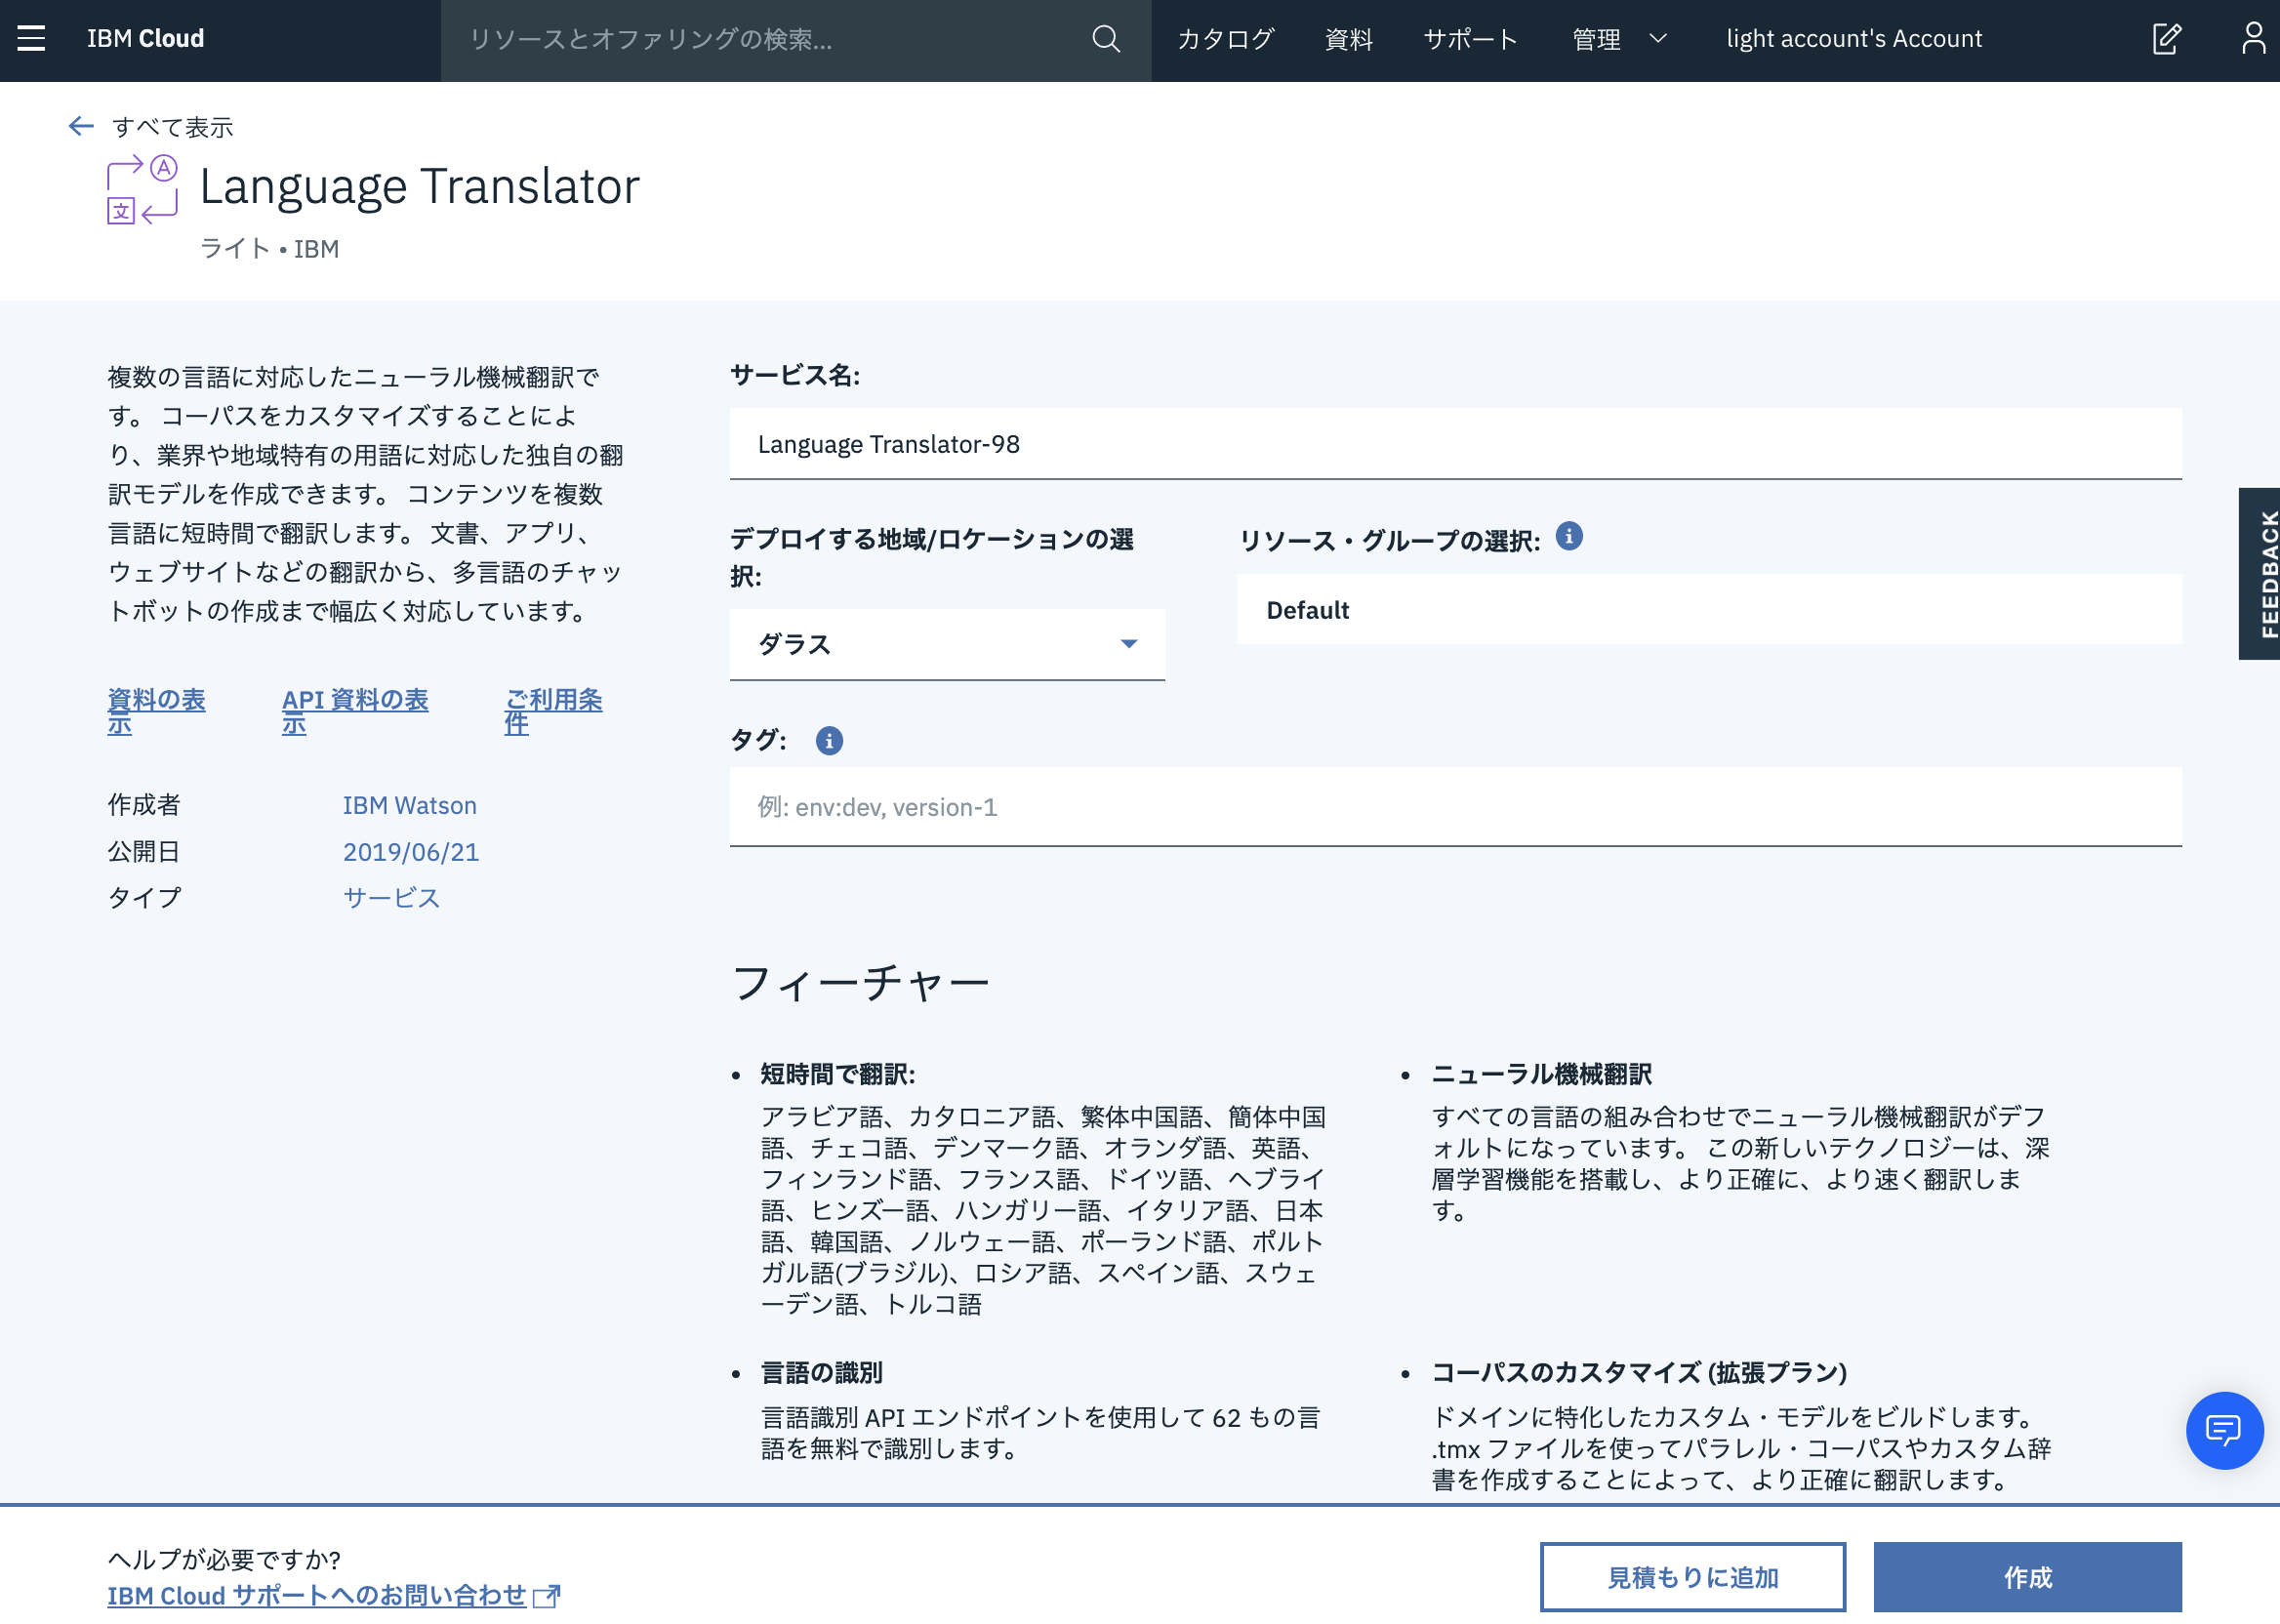
そして、検索キーに「Translator」を追記して出てくる、Language Translatorを追加します。
(全角の空白文字が入ると検索結果が0件になるのでご注意ください)
Node-RED開発環境と関連付ける。
Discoveryのときと同様に、IBM Cloudの画面(カタログ)画面に移動します。
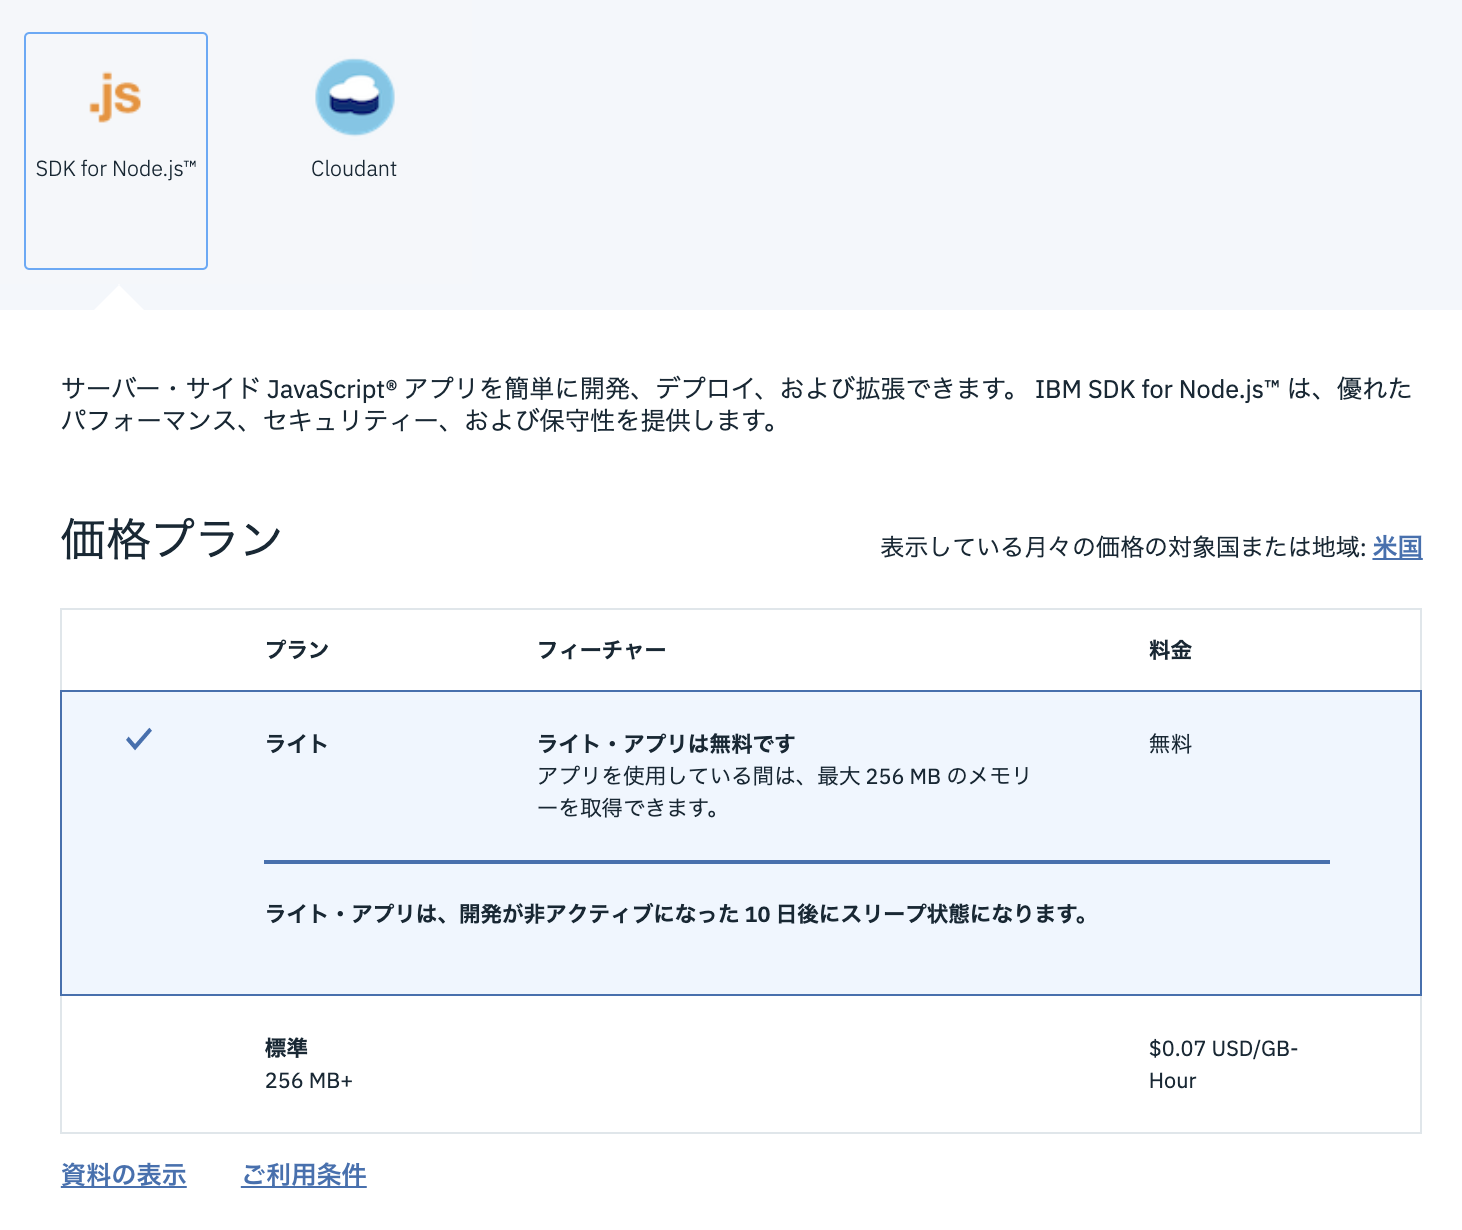
そして、検索キーに「node-red」を追記して出てくる、Node-RED StarterKitを追加します。
(全角の空白文字が入ると検索結果が0件になるのでご注意ください)
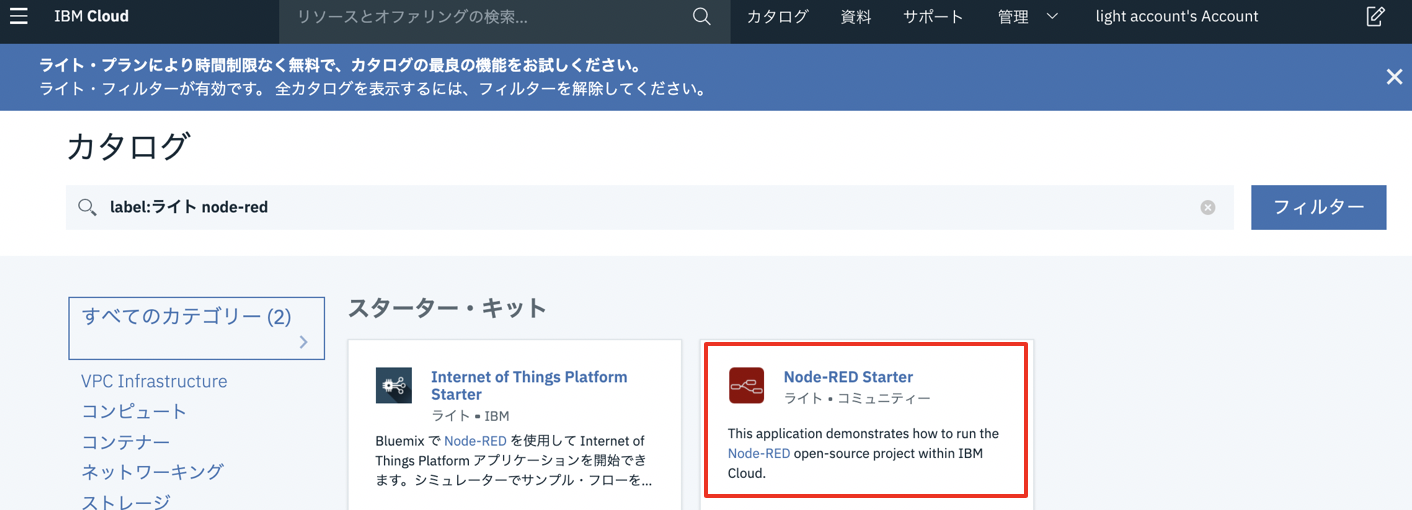
Node-REDスターターキットはWebアプリを提供するため、URLの名称(ドメイン)を設定する必要があります。下記のように、アルファベットで名前を好きに入力した後で、「作成」ボタンを押してください。
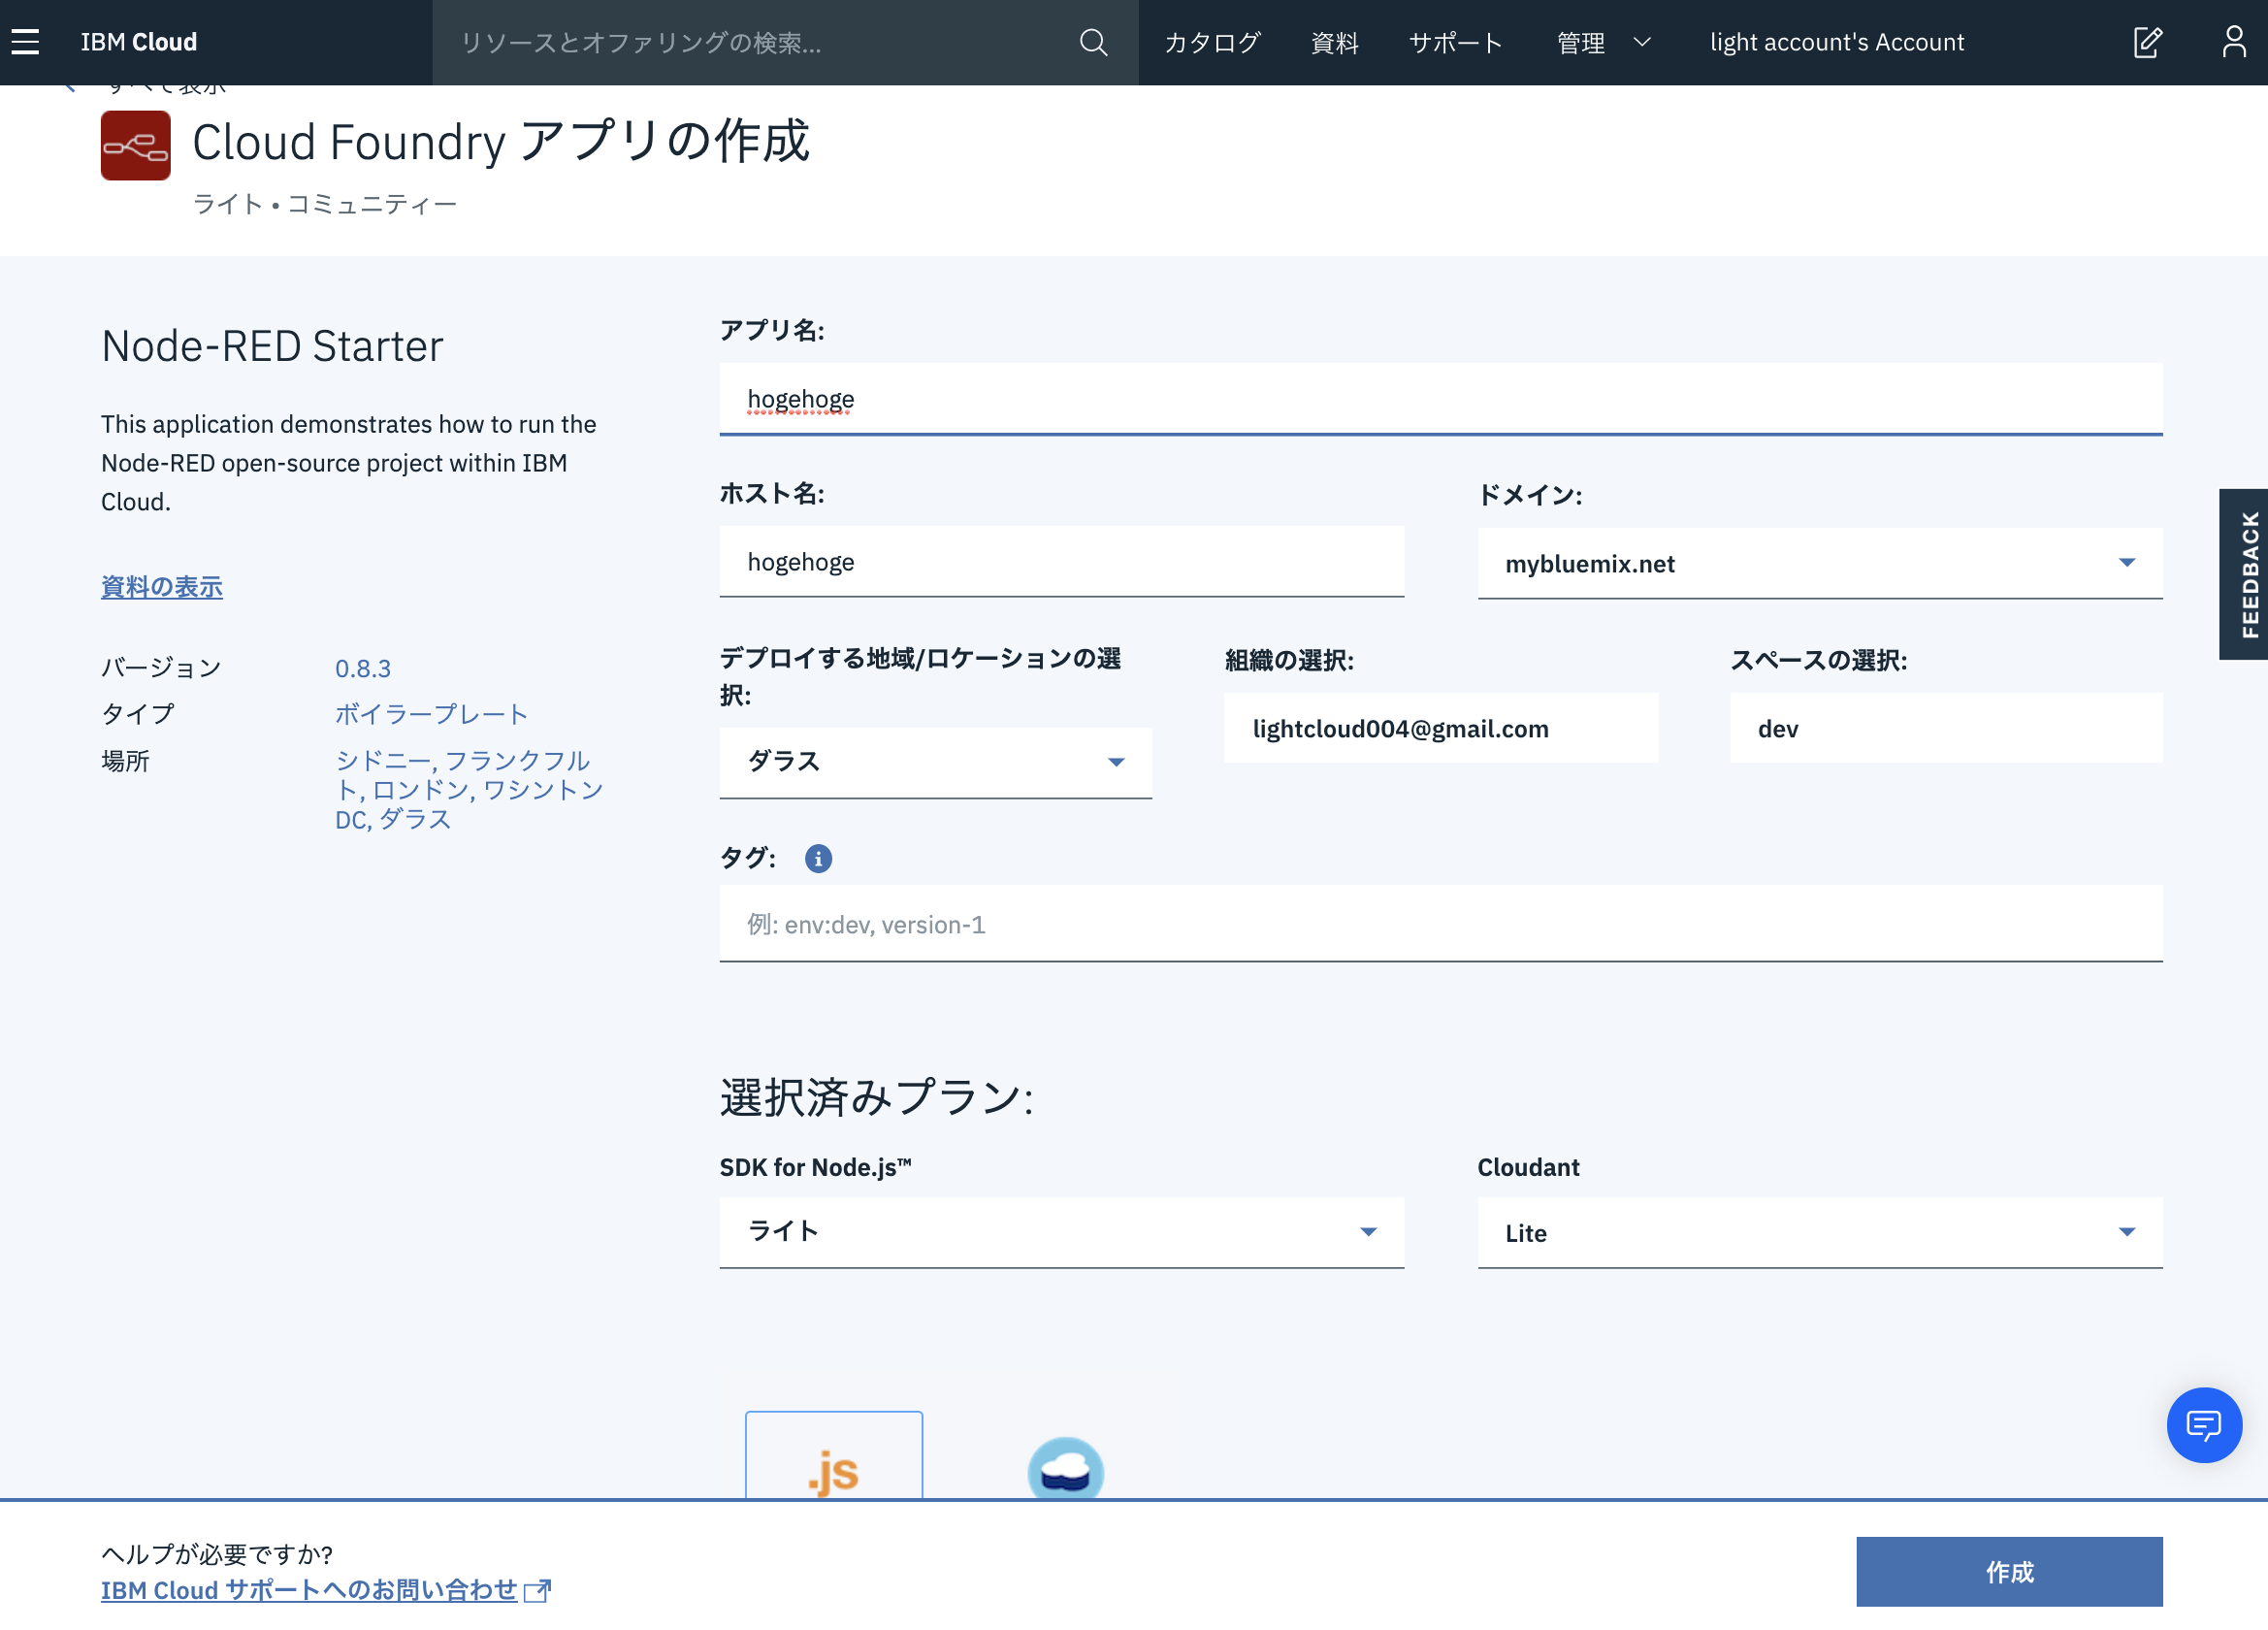
なお、このスターターキットでは、Web上で開発できるNode-REDという環境と、データベースであるCloudantDBがセットで構築できます。
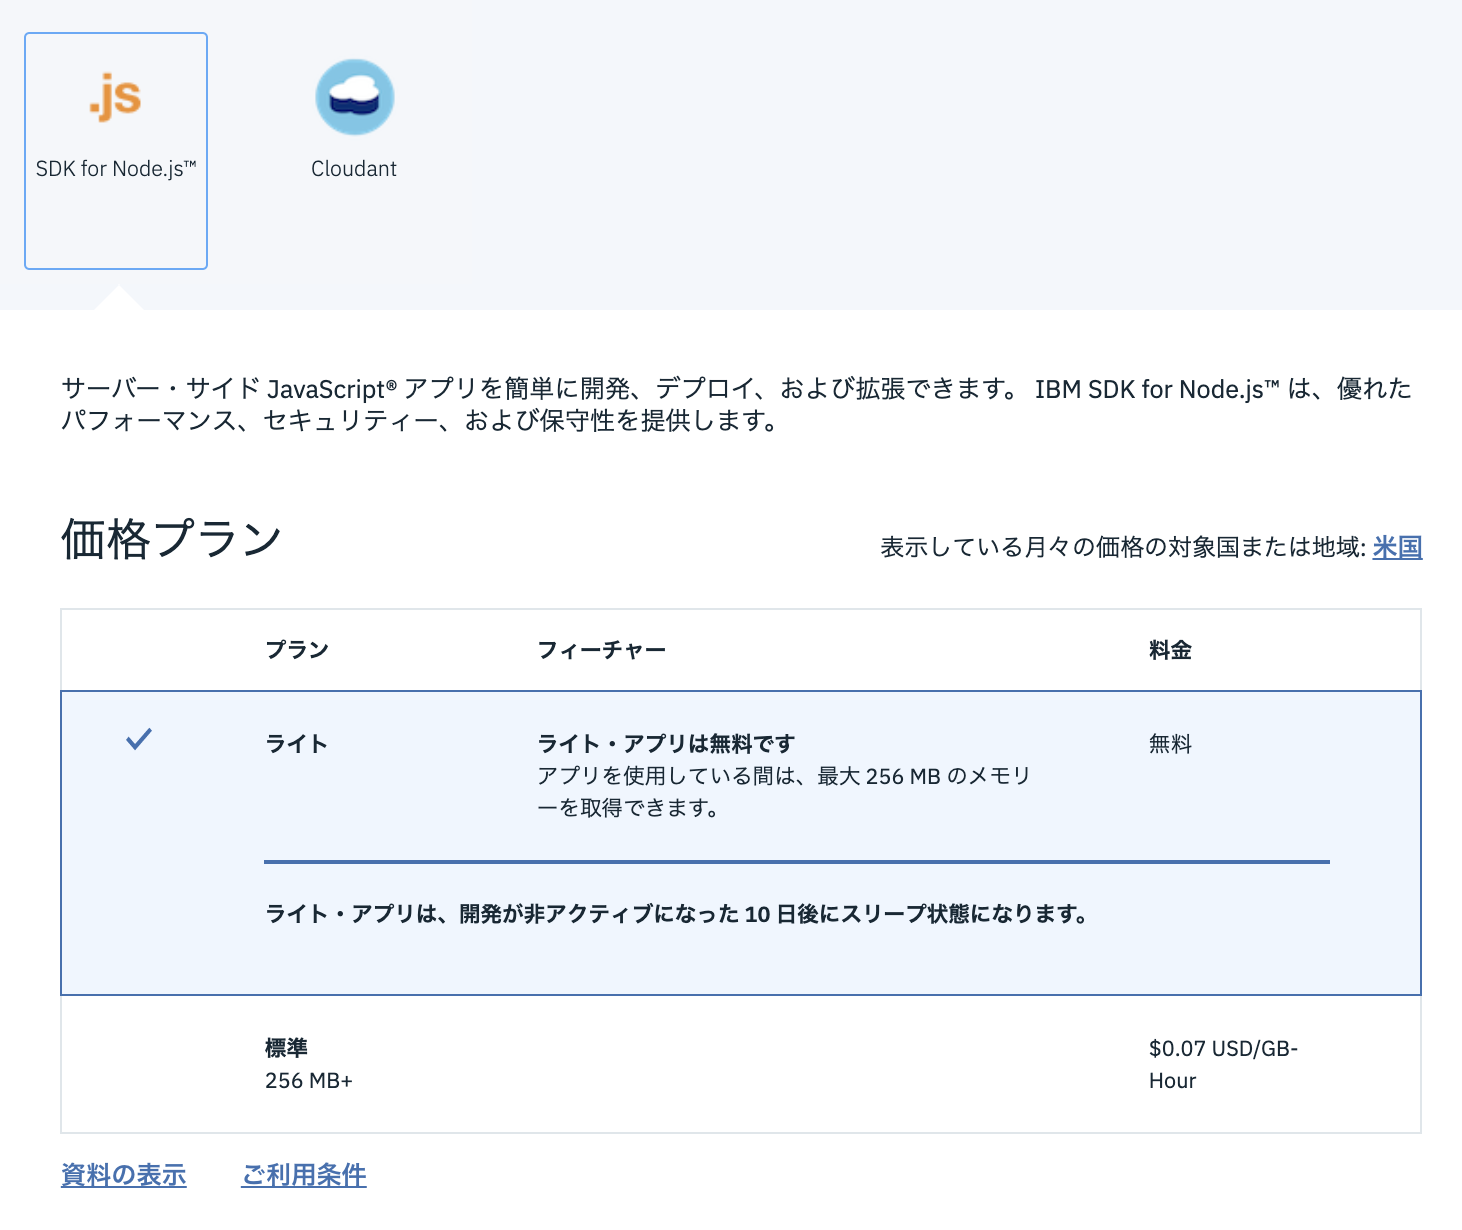
Node-RED環境とWatsonの関連付け
Node-REDスターターキットを作成したら、サービスを関連付けます。
初見の人向け
説明は読みたい人が読めばいいと思いますが、次に進めるために、左上のメニューを選んで、「リソースリスト」を選択します。

リソースリストの画面では、今まで「カタログ」で追加した、アプリ実行環境やサービスが一覧化されています。
ここで、「Cloud Foundaryアプリ」の「Node-REDのときに入力した名前」を選択します。
(先の画面キャプチャーでは、hogehogeとしていましたが、値重複でエラーになってしまったので、ここからは心機一転、hogehoge002でキャプチャーしていきます)

Node-RED環境の画面が出てきます。
ここでは、ランタイムという実行環境に割り当てられたメモリサイズなどが見れます。
今回は、Watsonと連携させたいので、「接続」ボタンを押します。
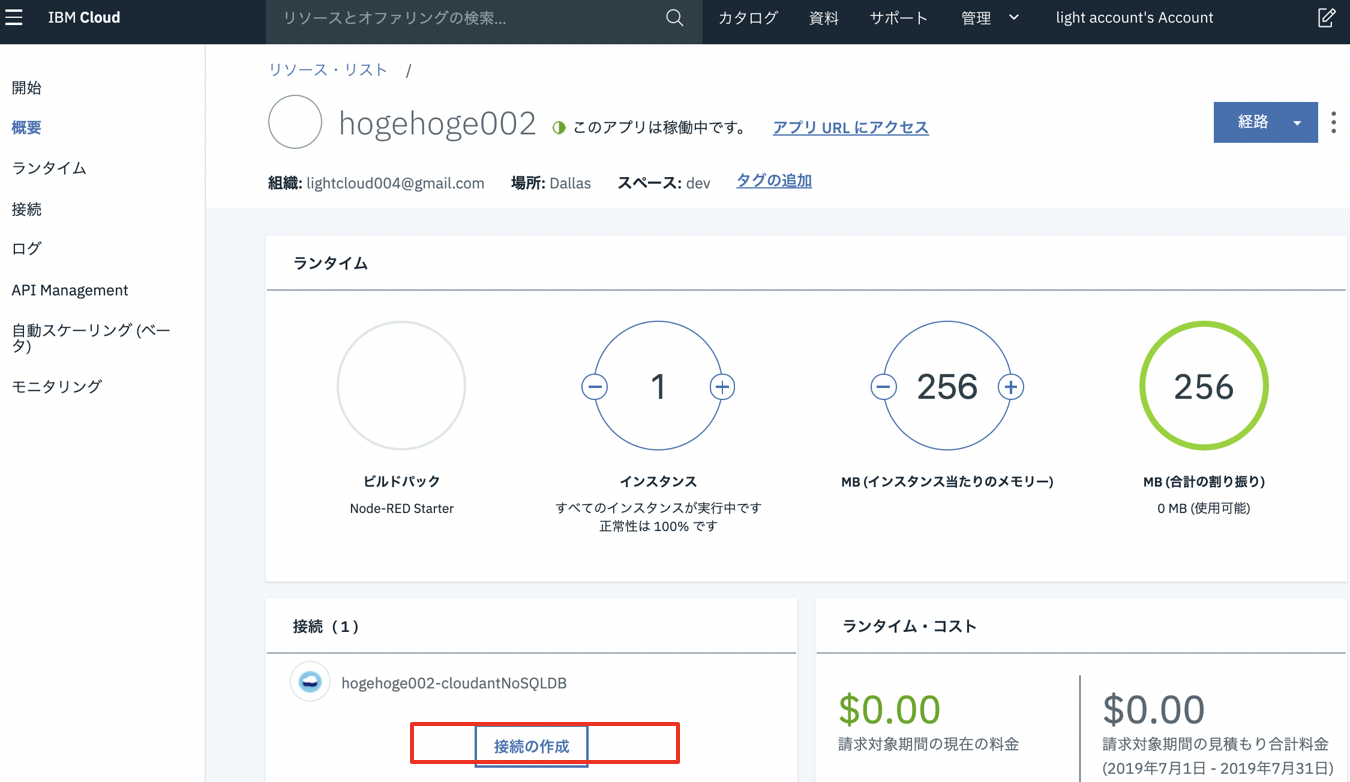
そうすると、今まで「カタログ」を使って作成してきたWatsonサービス(Discovery、Translator)が出現します。
まずはDiscoveryサービスを接続してみましょう。Discoveryサービスの行にある「接続」を選択します。

接続の設定画面が出てきますが、初期設定で問題ないので、そのまま「接続」ボタンを押します。

「再ステージ」の確認が出たら、「再ステージ」のボタンを選択します。
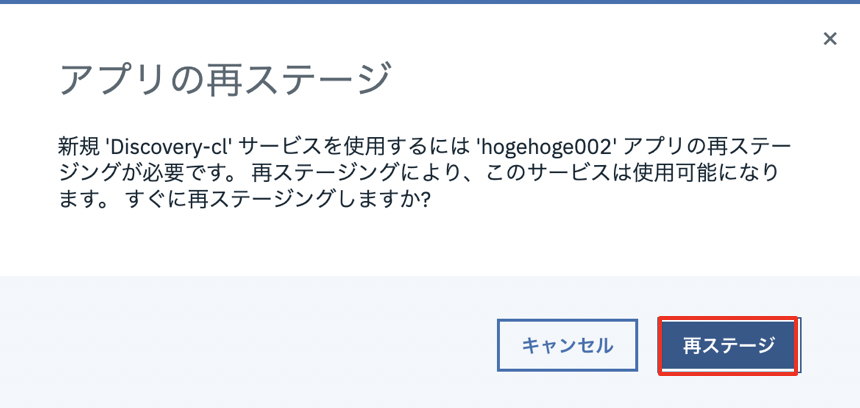
その後、先ほどと同じようにまたリソースリストに移動し、Node-RED名前を選び、接続ボタンを選択し、下記の画面に戻ってきたら、Language Translatorの接続を選択しましょう。

もちろん、その後の作業もDiscoveryの接続と同じです。
これで環境が整いました!
Node-REDを使う
Node-REDは「アプリURLにアクセス」リンクから開くことができます。
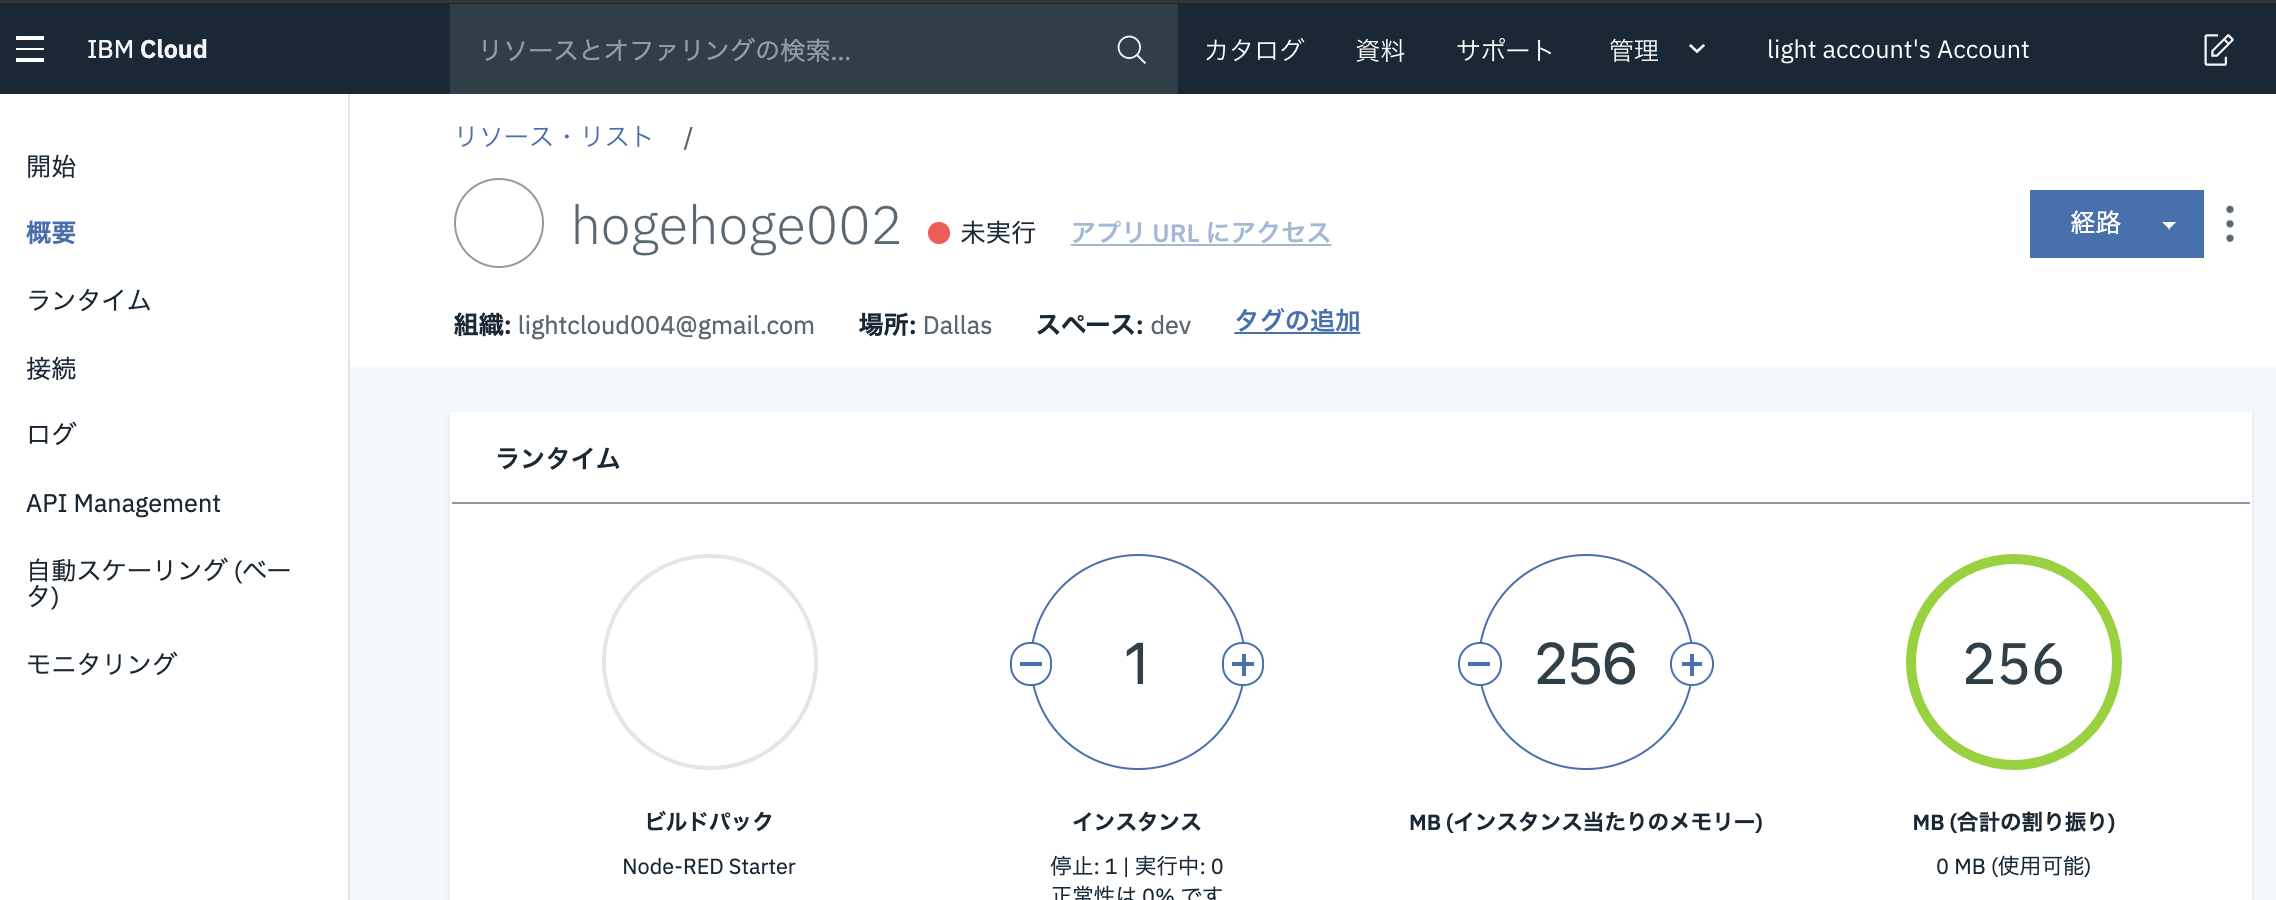
初心者向け
Node-REDの初期設定
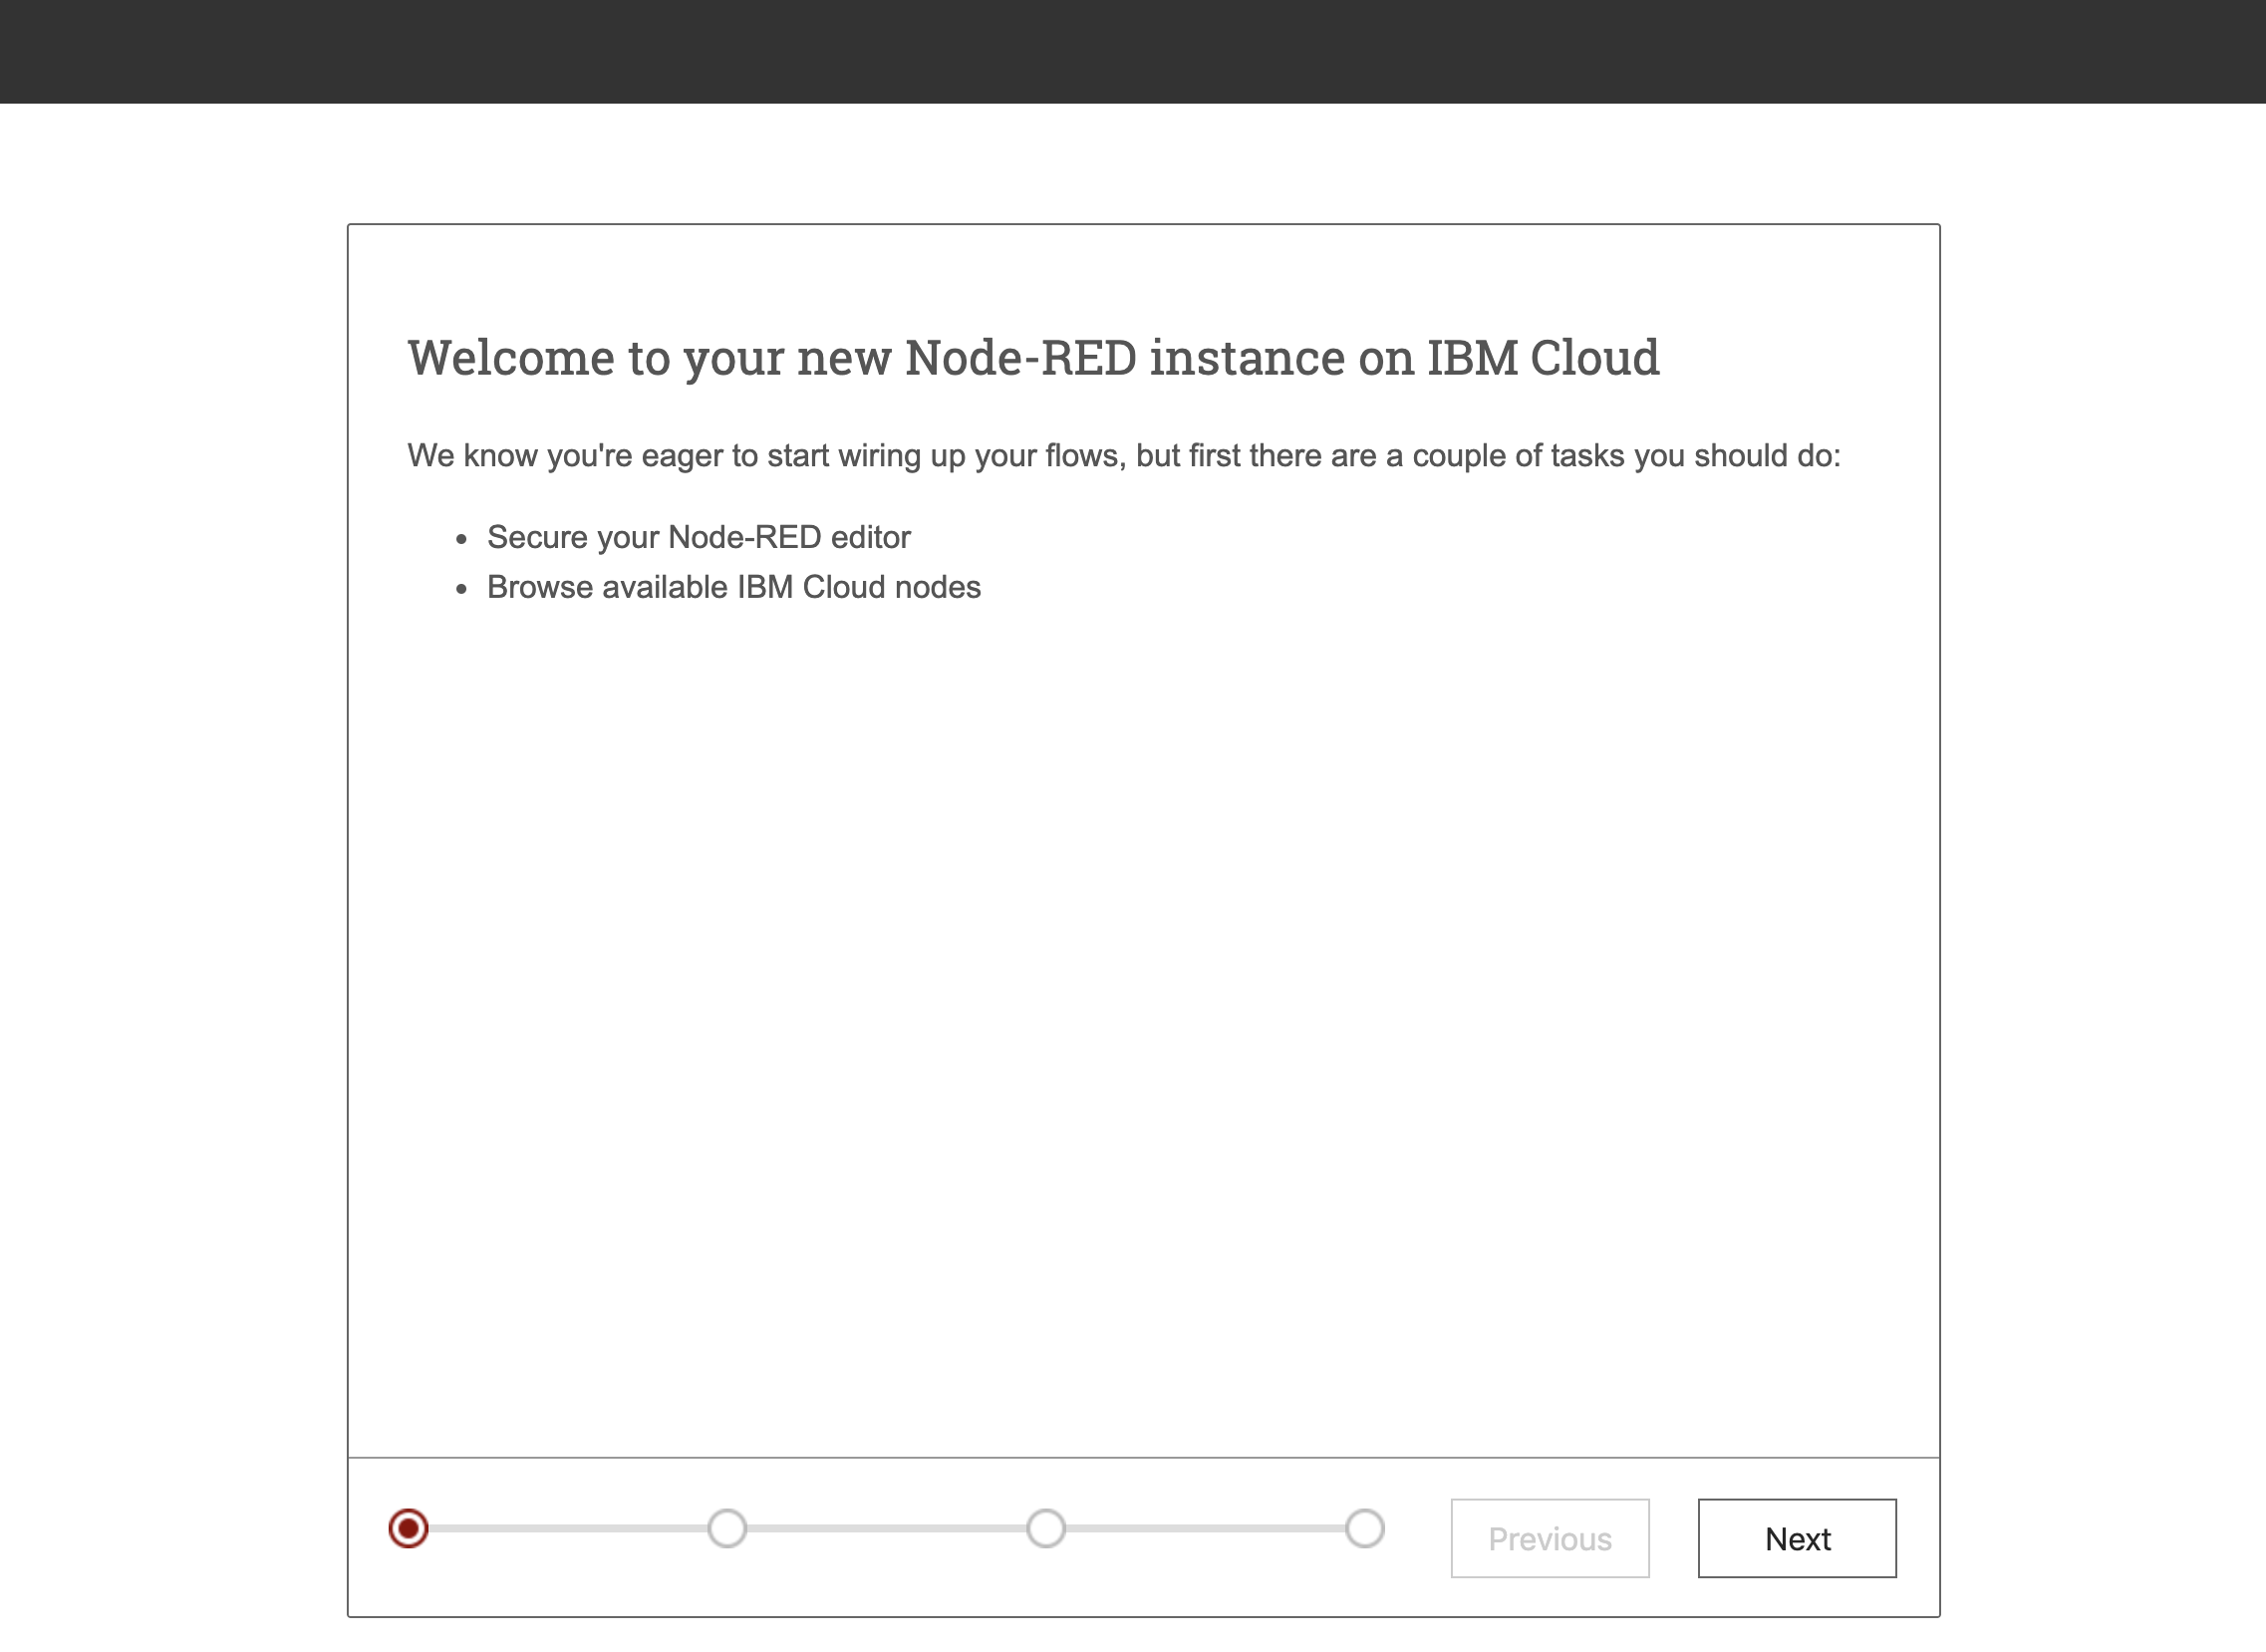
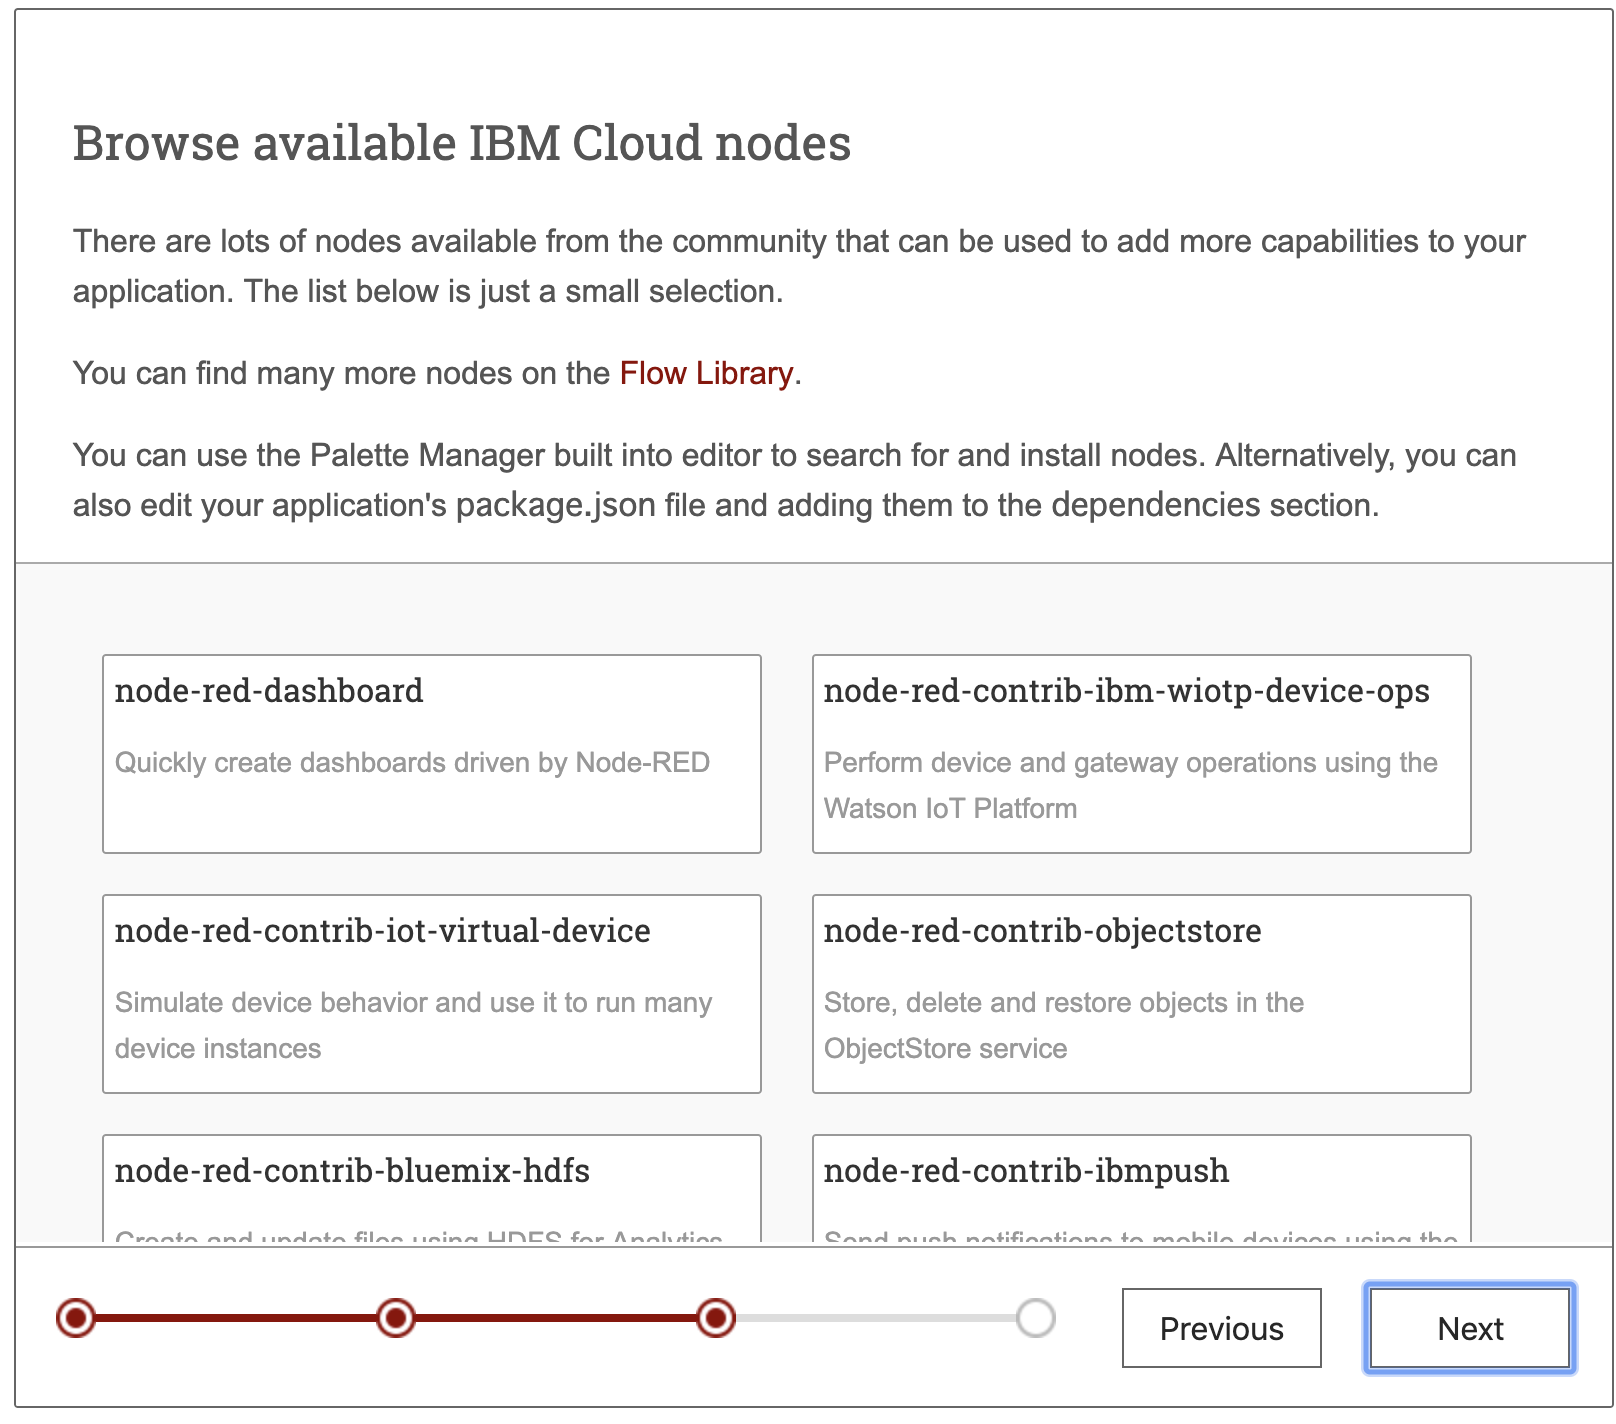
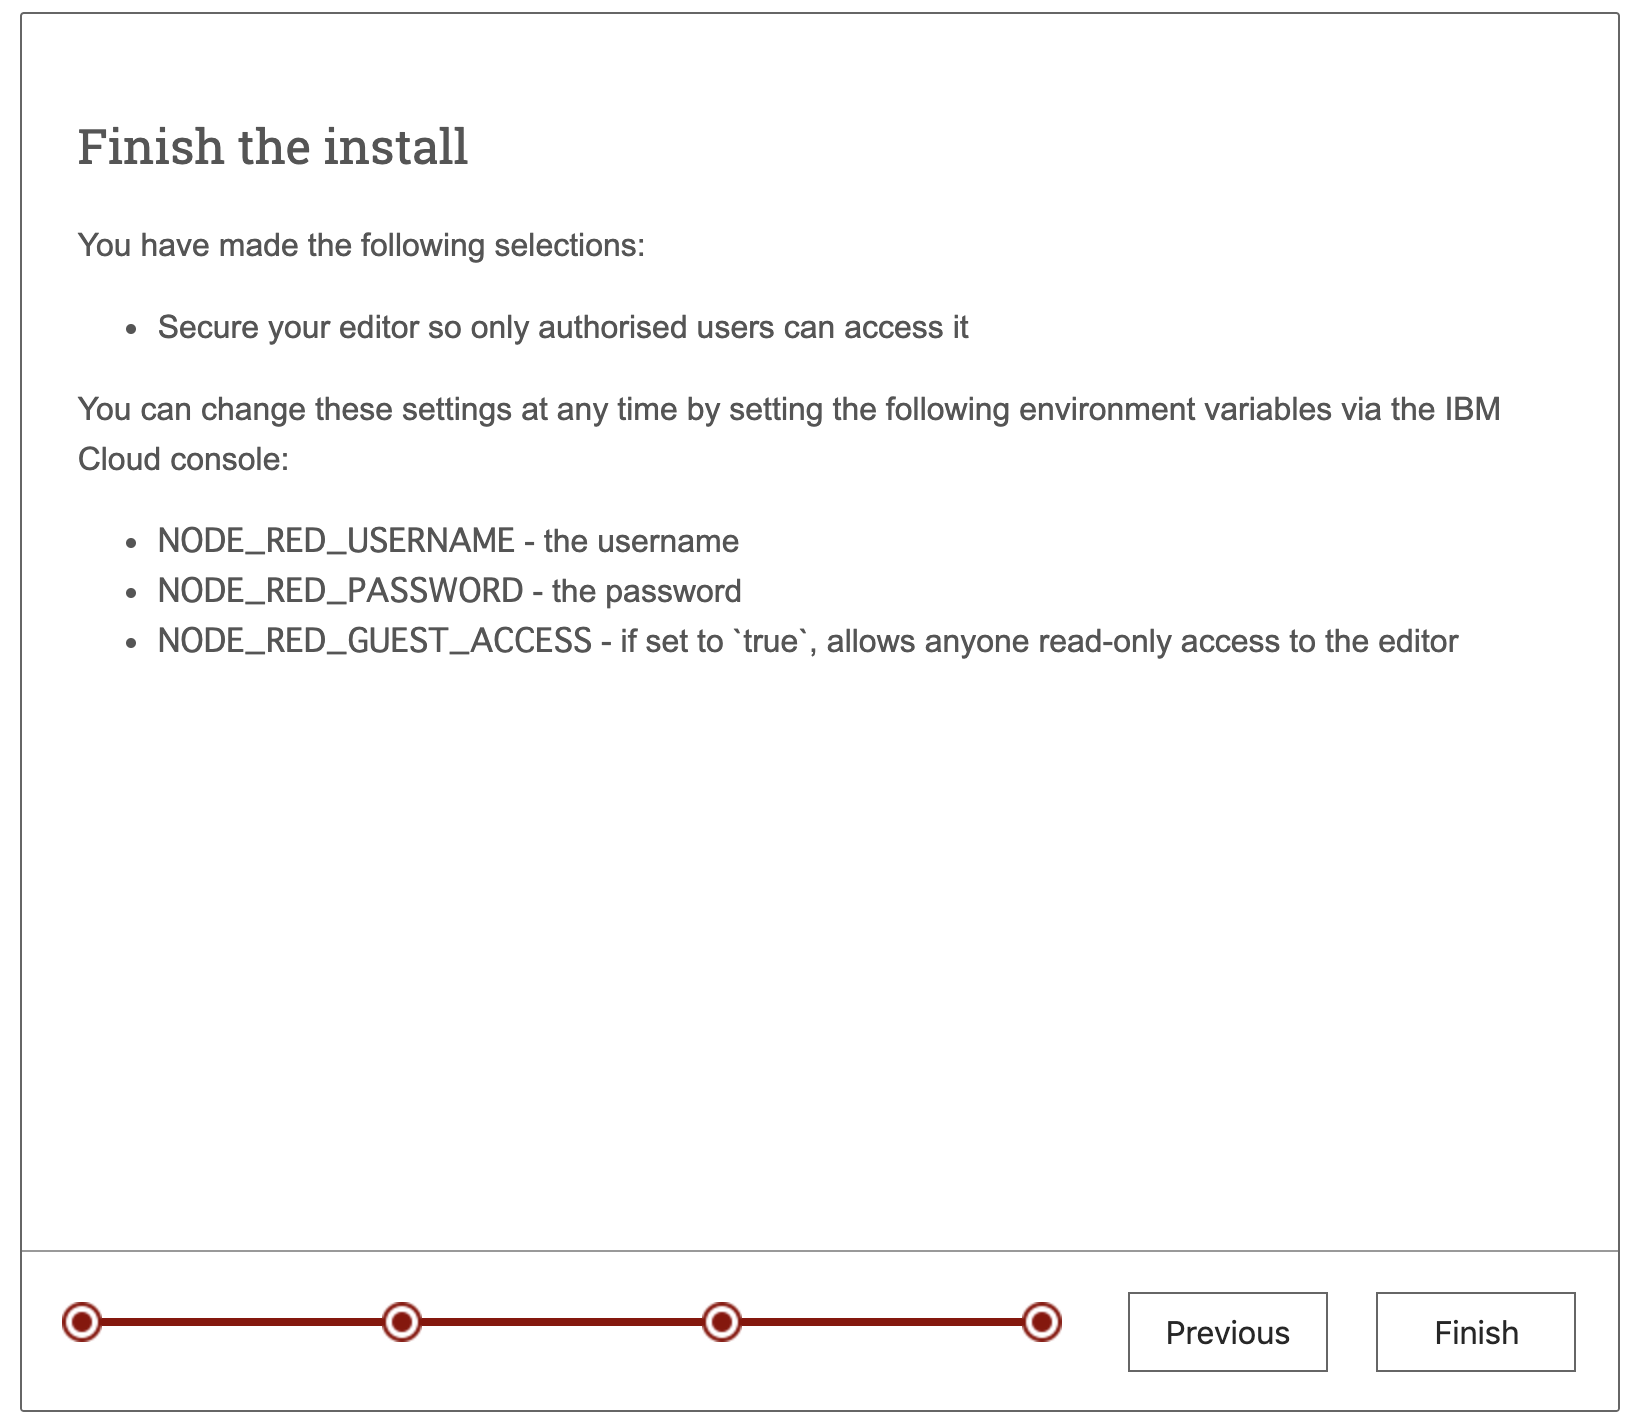
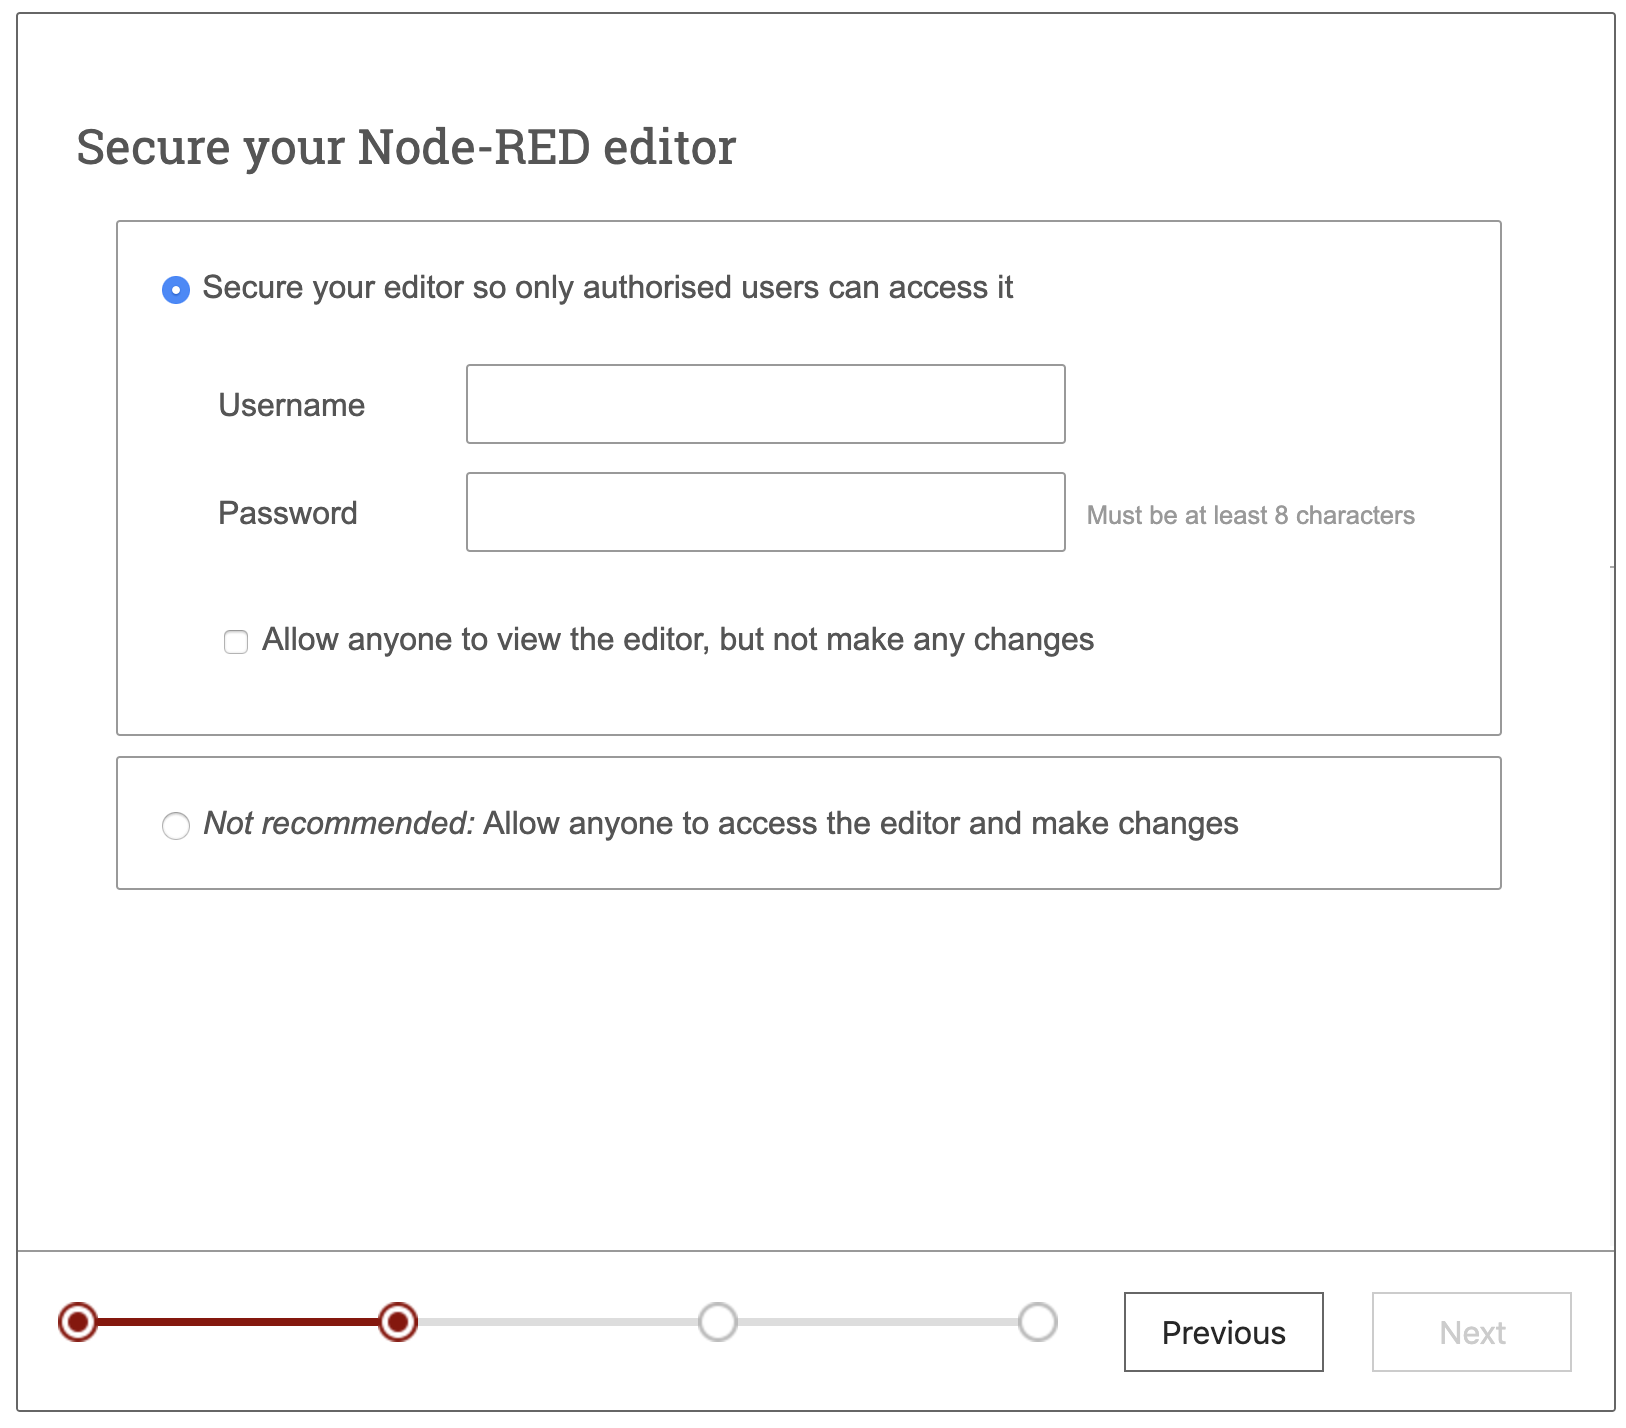
URLを開くと初期設定画面になります。
2画面目はユーザーIDとパスワードを任意で設定してください。
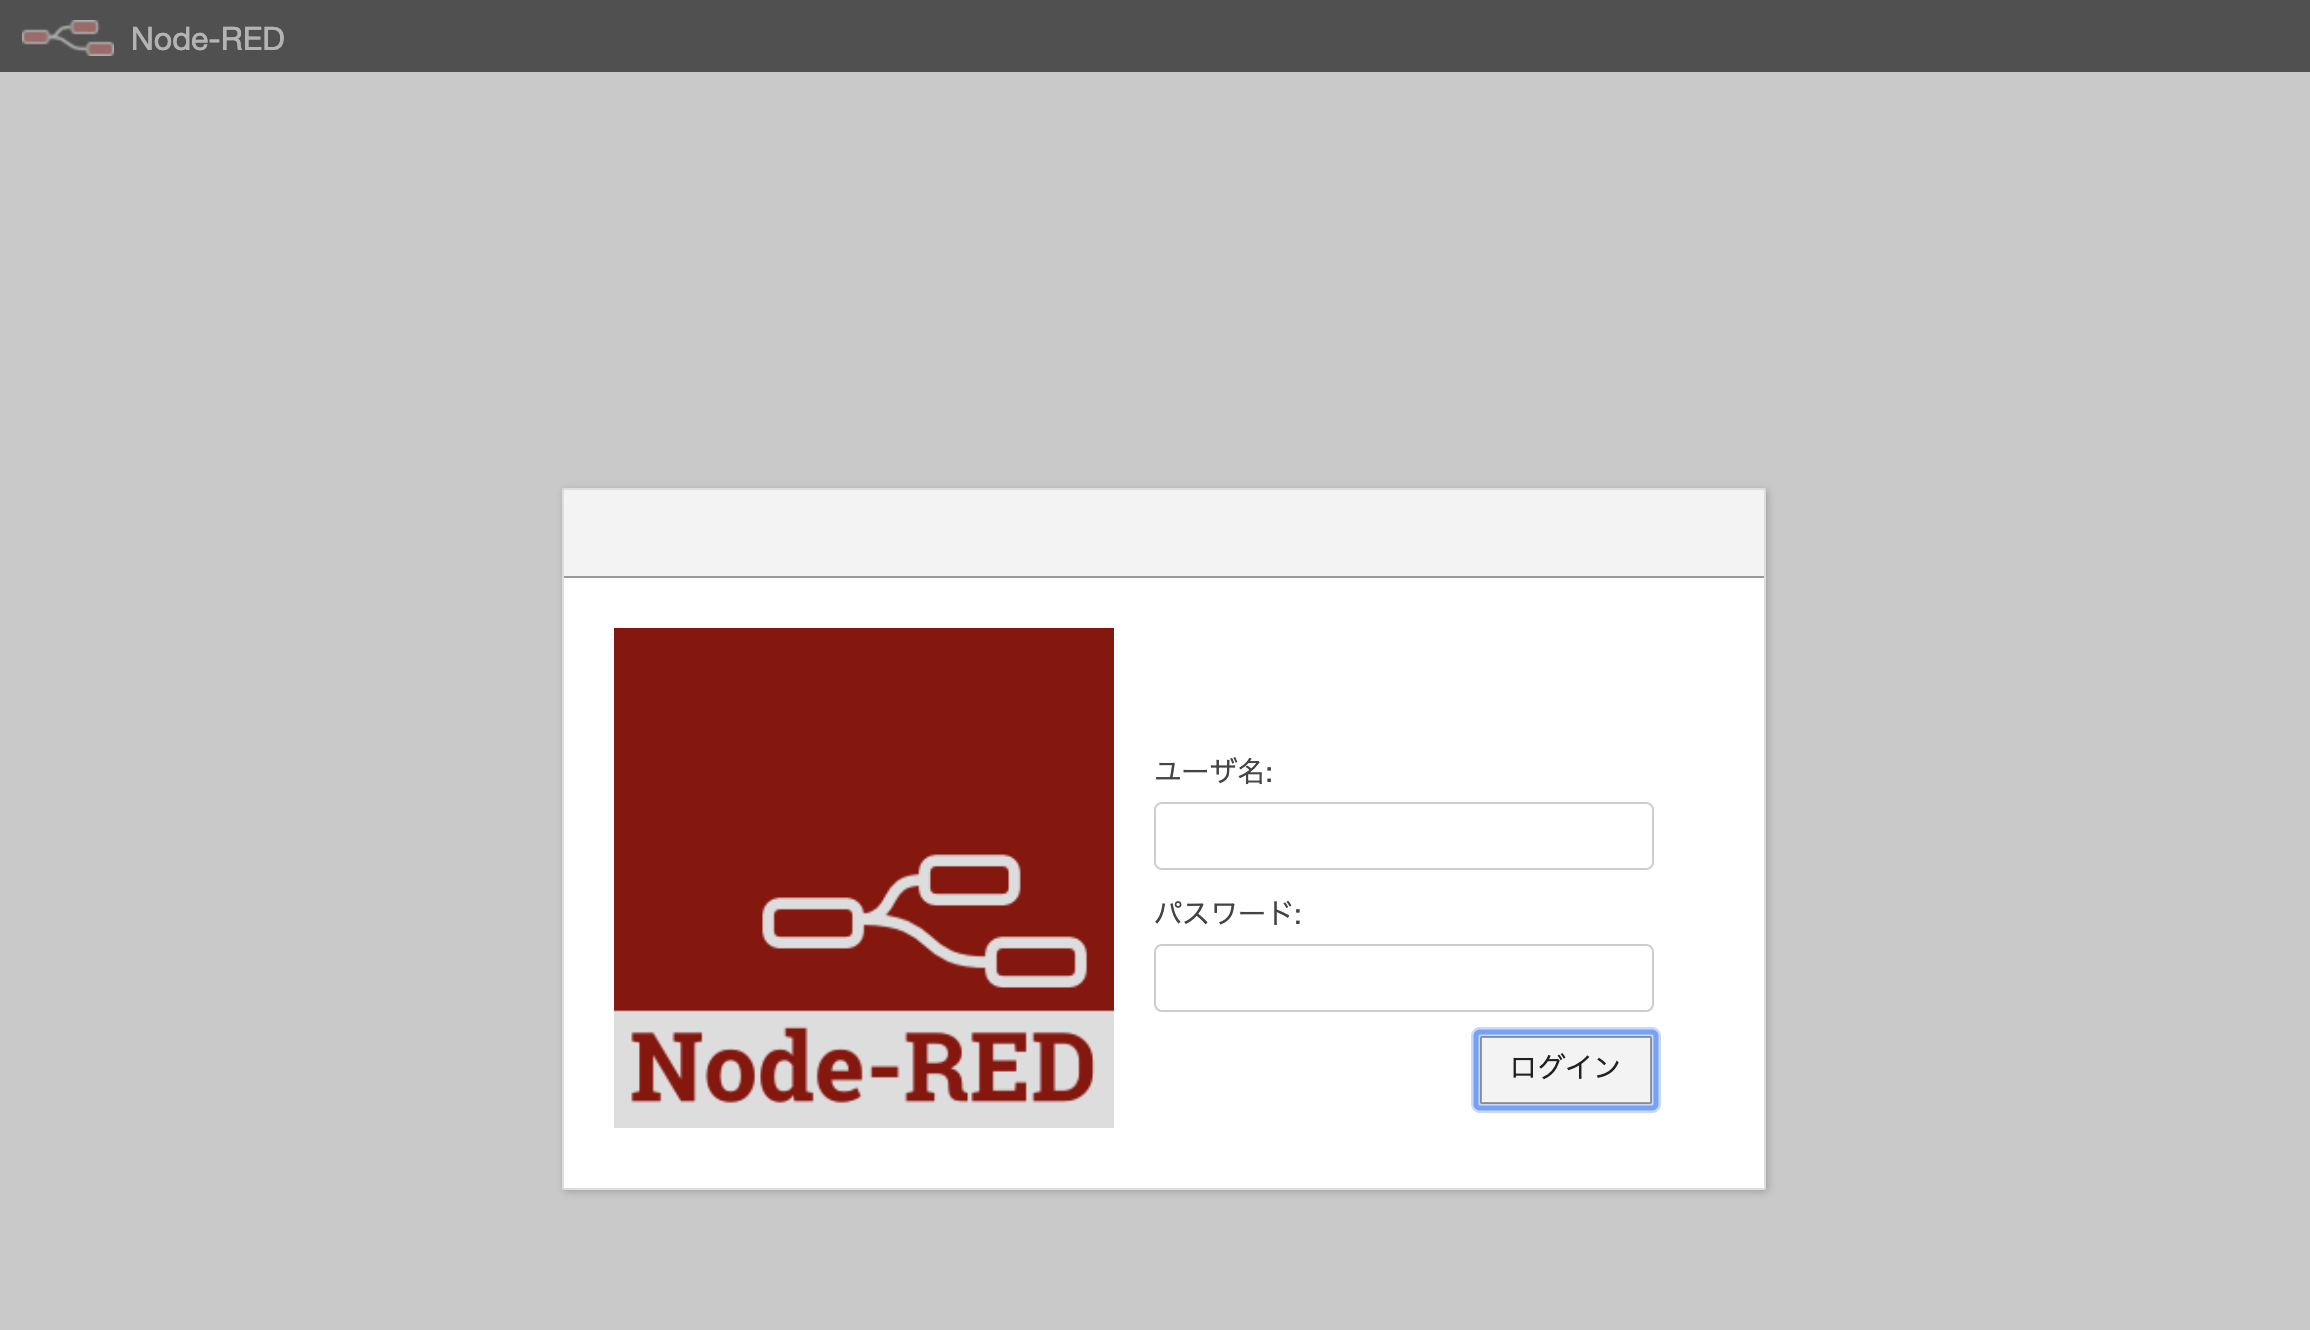
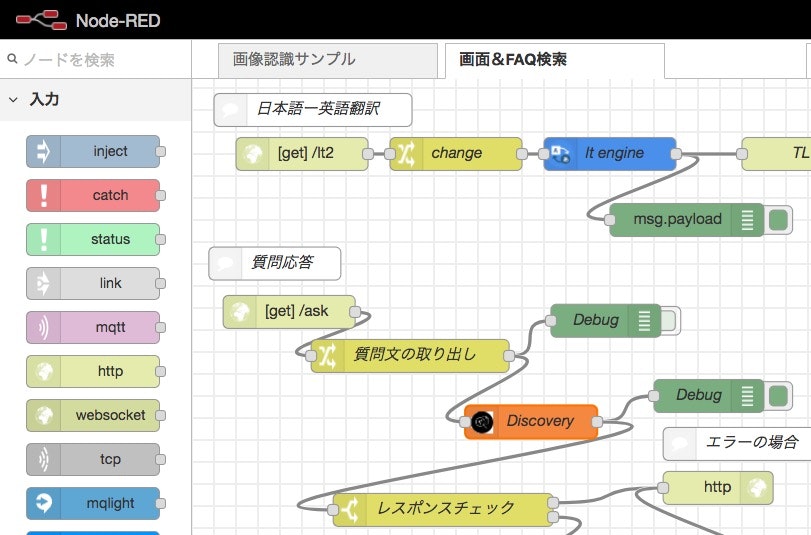
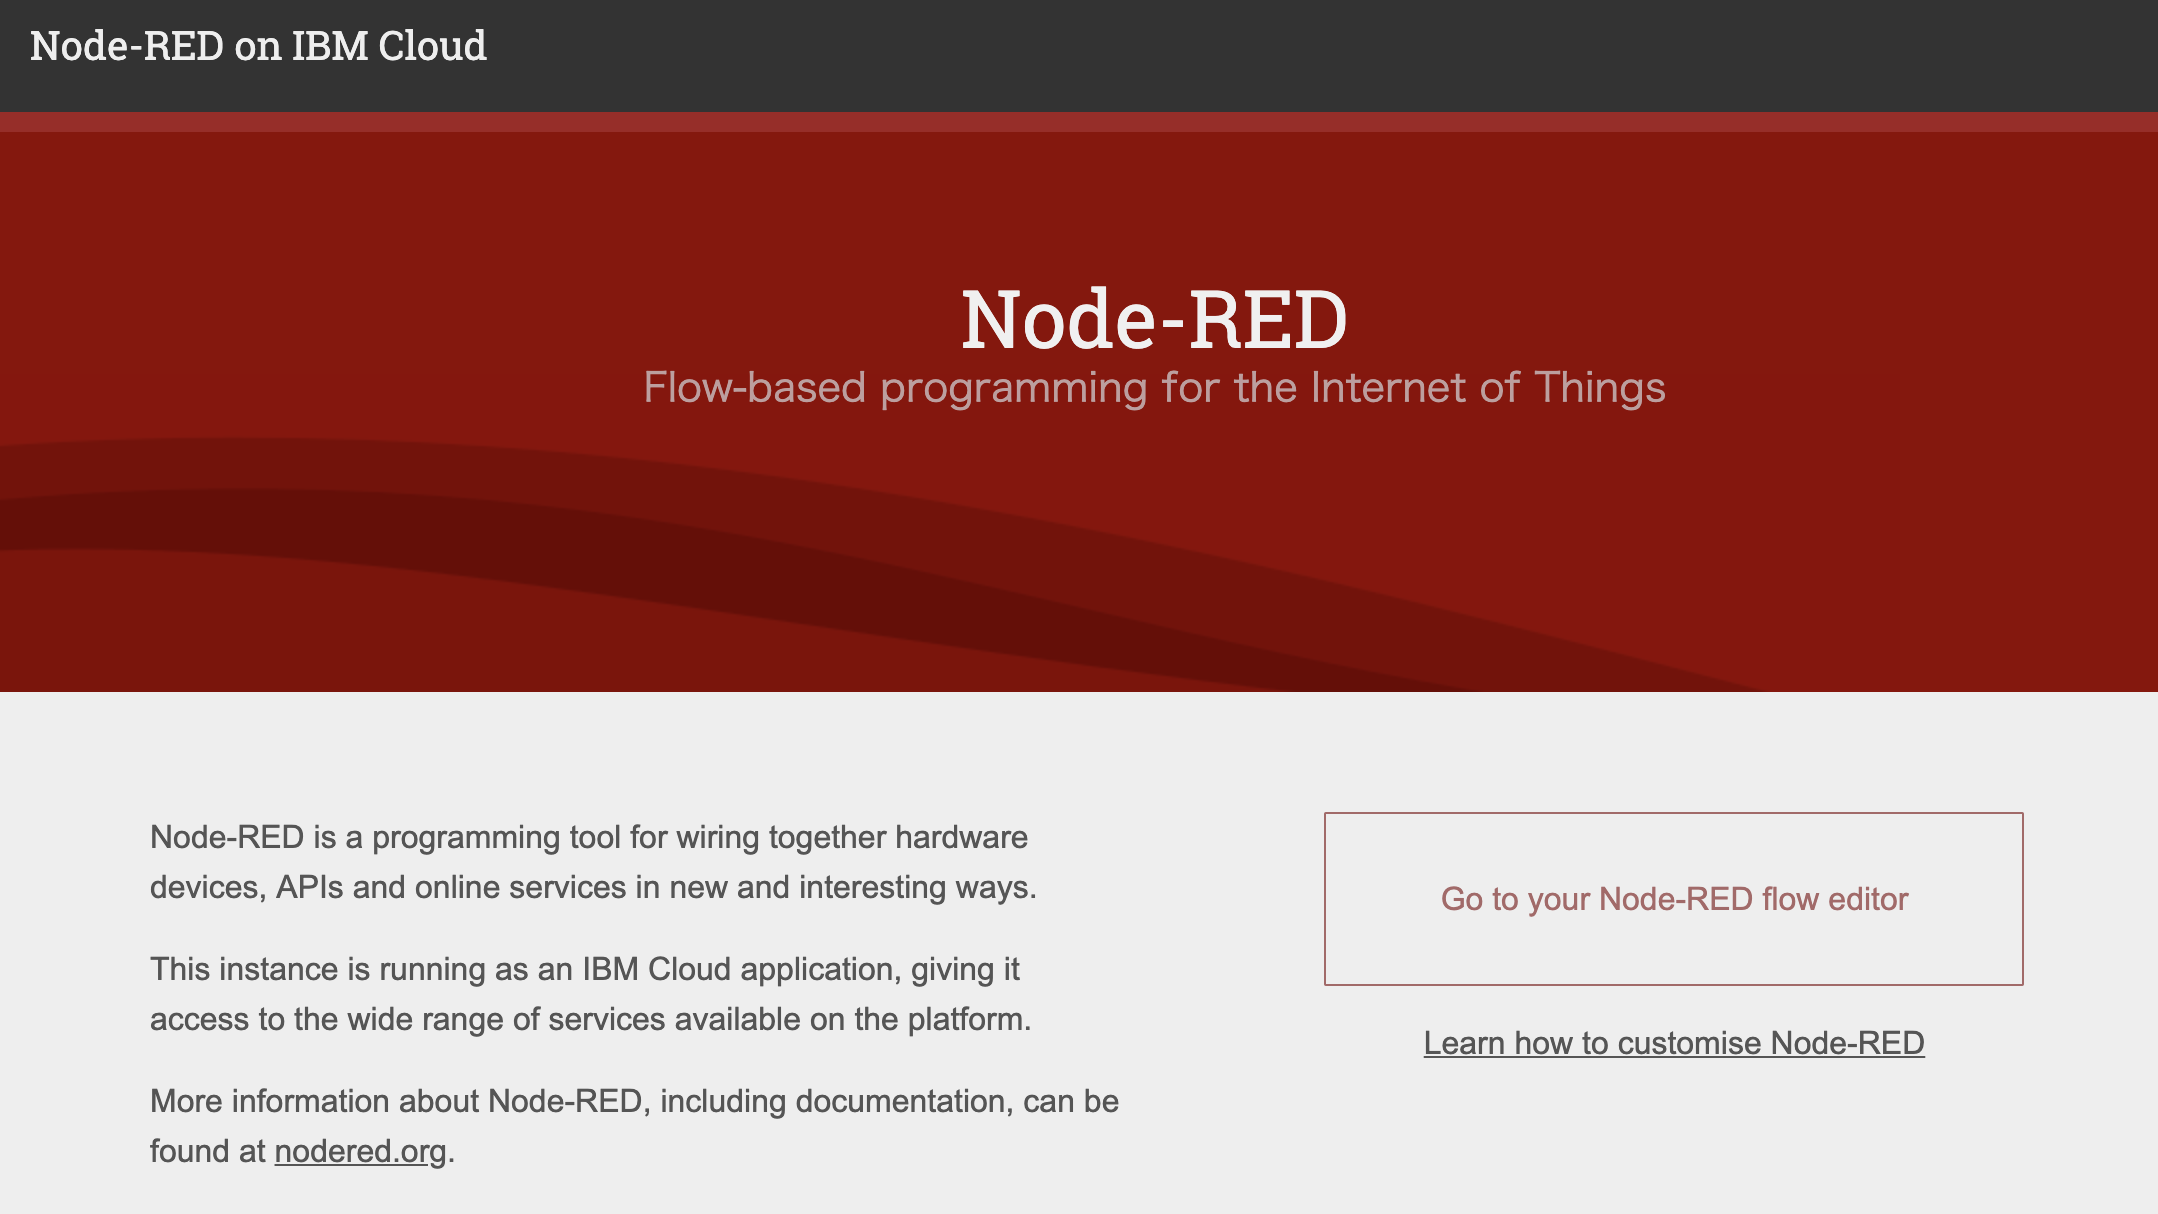
Node-RED開発画面が表示されたら準備完了です。今後は「アプリのURLを開く」で開くと、この画面が出てきます。「Get to your Node-RED」を選択して、ログインしましょう。
プログラムをロードする
以下のプログラムをNode-REDの読み込みを行います。
[{"id":"82ffd03b.6bc1f","type":"tab","label":"Discovery&Translatorサンプル","disabled":false,"info":""},{"id":"c6534a0c.9ea638","type":"comment","z":"82ffd03b.6bc1f","name":"質問応答機能","info":"","x":85.312255859375,"y":279.58636474609375,"wires":[]},{"id":"893ce6a6.305358","type":"http in","z":"82ffd03b.6bc1f","name":"","url":"/index","method":"get","upload":false,"swaggerDoc":"","x":100,"y":80,"wires":[["e3ff3da3.fc724"]]},{"id":"e3ff3da3.fc724","type":"template","z":"82ffd03b.6bc1f","name":"view program","field":"payload","fieldType":"msg","syntax":"mustache","template":"\n<!DOCTYPE html>\n<html lang=\"ja\" class=\"no-js\">\n\n<head>\n<meta charset=\"UTF-8\" />\n<meta http-equiv=\"X-UA-Compatible\" content=\"IE=edge\" />\n\n<!-- Bootstrap CSS -->\n<link rel=\"stylesheet\" href=\"https://maxcdn.bootstrapcdn.com/bootstrap/3.2.0/css/bootstrap.min.css\">\n\n<style>\n body{\n font-size: 28px;\n }\n #container {\n position : relative;\n width : 370px;\n margin : 0px auto;\n }\n\n /* Watson Discover Answer */\n #ans_p{\n border: 1px solid #000000;\n padding-right: 5px;\n color: #00F;\n text-decoration: underline;\n }\n #ans_score {\n text-align: right;\n color: #000;\n font-size: 24px;\n }\n #answer_list{\n overflow: scroll;\n font-size: 20px;\n }\n\n</style>\n\n<!-- jQuery -->\n<script src=\"https://code.jquery.com/jquery-1.11.2.min.js\" crossorigin=\"anonymous\"></script>\n\n<!-- Bootstrap and Bootcards JS -->\n<script src=\"https://maxcdn.bootstrapcdn.com/bootstrap/3.2.0/js/bootstrap.min.js\"></script>\n\n</head>\n\n<body>\n<!-- <body class=\"fadeout\" onload=\"displayLineChart();\"> -->\n<section class=\"page\">\n <article>\n\n \t<div class=\"container-fluid\" id=\"page-3-1\" style=\"display: block;\">\n \t\t<div class=\"row\">\n\n <div class=\"col-sm-12\">\n <div class=\"panel panel-success\">\n <div class=\"panel-heading\">\n FAQ候補\n <a class=\"btn btn-primary pull-right btn-xs\" href=\"#\" value=\"\" onclick=\"requestWatson()\" id=\"requestWatson\">\n <i class=\"fa fa-pencil\" id=\"videoStart\" >入力文字<br>解析</i>\n </a>\n <a class=\"btn btn-danger pull-right btn-xs\" href=\"#\" value=\"\" onclick=\"startRecognition()\" id=\"startRecognition\">\n <i class=\"fa fa-pencil\" id=\"videoStart\" >顧客の声<br>音声処理</i>\n </a>\n </div>\n <div class=\"panel-body\">\n <div\n <div class=\"col-sm-12\" style=\"height:80px;text-align:left;background-color: #FFF;\">\n <input type=\"text\" id=\"recognizedText\" size=\"40\" value=\"\">\n <div id=\"translator\"></div>\n </div>\n <div class=\"row\">\n <div class=\"col-sm-12\" style=\"height:500px;text-align:left;background-color: #FFF;\">\n<!-- <div id=\"answer_list\" onclick=\"sendNextPages('page-3-3')\"></div> -->\n <div id=\"answer_list\"></div>\n </div>\n </div>\n\n <!-- 音声認識エリア(利用していない) -->\n <div class=\"row\" style=\"display:none;\">\n <div class=\"col-sm-12\" style=\"height:50px;text-align:left;background-color: #FFF;\">\n <div style=\"display:none;\">\n<!-- 連続認識<input id=\"continuous\" type=\"checkbox\" checked=\"checked\"> -->\n 連続認識<input id=\"continuous\" type=\"checkbox\">\n 中間結果の表示<input id=\"interim\" type=\"checkbox\" checked=\"checked\">\n </div>\n <div class=\"col-sm-12\" style=\"height:100px;text-align:left;background-color: #FFF; \">\n <p>Debug詳細情報</p>\n <div id=\"recognizedDetail\"></div>\n </div>\n </div>\n </div>\n\n </div>\n\n <div class=\"panel-footer\">\n <div id=\"state\">ステータス:停止中</div>\n </div>\n </div>\n </div>\n\n \t\t</div>\n \t</div>\n\n<script>\n var recognition = new webkitSpeechRecognition();\n recognition.lang = \"ja-JP\";\n recognition.maxAlternatives = 2;\n //認識停止\n function stopRecognition(){\n $(\"#state\").text(\"ステータス:停止\");\n recognition.stop();\n }\n //認識開始+設定の変更\n function startRecognition(){\n //連続認識\n if($(\"#continuous\").prop(\"checked\") == true) recognition.continuous = true;\n else recognition.continuous = false;\n //中間結果の表示\n if($(\"#interim\").prop(\"checked\") == true) recognition.interimResults = true;\n else recognition.interimResults = false;\n\n $(\"#state\").text(\"ステータス:発話待ち\");\n recognition.start();\n }\n //話し声の認識中\n recognition.onsoundstart = function(){\n $(\"#state\").text(\"ステータス:認識中\");\n };\n //マッチする認識が無い\n recognition.onnomatch = function(){\n // $(\"#state\").text(\"ステータス:認識できない言葉が検出されました\");\n console.log(\"recognition.onnomatch発生\");\n\n //連続認識の場合は再度実行する\n //0.01秒後に停止\n setTimeout(\"stopRecognition()\",10);\n if($(\"#continuous\").prop(\"checked\") == true){\n //0.01秒後に再接続\n setTimeout(\"startRecognition()\",300);\n }\n };\n //エラー\n recognition.onerror= function(){\n // $(\"#state\").text(\"ステータス:認識に失敗しました\");\n console.log(\"recognition.onerror発生\");\n\n //連続認識の場合は再度実行する\n //0.01秒後に停止\n setTimeout(\"stopRecognition()\",10);\n if($(\"#continuous\").prop(\"checked\") == true){\n //0.01秒後に再接続\n setTimeout(\"startRecognition()\",300);\n }\n };\n //話し声の認識終了\n recognition.onsoundend = function(){\n $(\"#state\").text(\"ステータス:認識終了\");\n\n //連続認識の場合は再度実行する\n //0.01秒後に停止\n setTimeout(\"stopRecognition()\",10);\n if($(\"#continuous\").prop(\"checked\") == true){\n //0.01秒後に再接続\n setTimeout(\"startRecognition()\",300);\n }\n };\n //認識が終了したときのイベント\n recognition.onresult = function(event){\n var results = event.results;\n for (var i = event.resultIndex; i<results.length; i++){\n //認識の最終結果\n if(results[i].isFinal){\n $(\"#state\").text(\"ステータス:認識終了時、結果\");\n $(\"#recognizedText\").val(results[i][0].transcript);\n\n //WebSocket通知&翻訳サービスへ送信する\n //sendMessage();\n requestWatson();\n\n //0.01秒後に停止\n setTimeout(\"stopRecognition()\",10);\n }\n //認識の中間結果\n else{\n $(\"#state\").text(\"ステータス:認識中、中間結果\");\n $(\"#recognizedText\").val(results[i][0].transcript);\n //console.log(results[i][0].transcript);\n }\n }\n //トップ10の認識仮説の表示\n $(\"#recognizedDetail\").empty();\n for (var i = event.resultIndex; i<results.length; i++){\n if(results[i].isFinal){\n for (var j = 0; j<Math.min(recognition.maxAlternatives,results[i].length); j++){\n $(\"#recognizedDetail\").append(\"<p>\" + \"ランク\" + j + \" \" + results[i][j].transcript +\n \": \" + results[i][j].confidence +\n \"</p>\");\n }\n }\n }\n };\n</script>\n\n\n<script>\nfunction requestWatson() {\n translatorWatson();\n askWatson();\n}\n</script>\n<script type=\"text/javascript\">\n // Node-REDのWeb API連携\n var translatorWatson = function() {\n // Watson連携\n $.ajax({\n type: \"GET\",\n url: \"./lt2\",\n dataType: \"text\",\n timeout: 10000,\n data: {\n //質問文を取得してパラメータとして渡す\n text: $(\"#recognizedText\").val()\n }\n })\n .done(function(data, textStatus, jqXHR) {\n // 通信成功\n var message;\n if ( data.length < 70 ){\n message = document.createTextNode(data);\n }else{\n message = document.createTextNode(data.substr(0, 70) + \"...\");\n }\n var messageBox = document.createElement('p');\n messageBox.className = 'system';\n messageBox.appendChild(message);\n\n var translator = document.getElementById('translator');\n // 子ノードを全削除\n if (translator.hasChildNodes()){\n \t\tfor (var i=translator.childNodes.length-1; i>=0; i--) {\n \t\t\ttranslator.removeChild(translator.childNodes[i]);\n \t\t}\n \t}\n translator.appendChild(messageBox);\n })\n .fail(function(jqXHR, textStatus, errorThrown) {\n // 通信エラー\n //$(\"#answer\").val(\"通信エラー \" + jqXHR.status + \" : \" + jqXHR.statusText);\n return;\n })\n .always(function(data) {\n // Debug\n console.log(data);\n });\n }\n</script>\n\n<script type=\"text/javascript\">\n // Node-REDのWeb API連携\n var askWatson = function() {\n var const_disp_num = 5;\n var msgP,msgPBox;\n var msgDocId,msgDocIdBox;\n var msgPText,msgPTextBox;\n var score,msgScore,msgScoreBox;\n var br;\n\n // Watson連携\n $.ajax({\n type: \"GET\",\n url: \"./ask\",\n dataType: \"text\",\n timeout: 10000,\n data: {\n //質問文を取得してパラメータとして渡す\n q: $(\"#recognizedText\").val()\n }\n })\n .done(function(data, textStatus, jqXHR) {\n // 通信成功\n // 応答データをリスト化して表示\n // リスト要素を取得\n var anserList = document.getElementById('answer_list');\n // 子ノードを全削除\n if (anserList.hasChildNodes()){\n \t\tfor (var i=anserList.childNodes.length-1; i>=0; i--) {\n \t\t\tanserList.removeChild(anserList.childNodes[i]);\n \t\t}\n \t}\n\n // Discovery 検索0件対応\n if (data=='404'){\n msgPBox = document.createElement('div');\n msgPBox.className = 'row';\n msgPBox.id = 'ans_p';\n\n msgPText = document.createTextNode('該当候補がありませんでした。');\n msgPBox.appendChild(msgPText);\n // 表示領域に子要素として追加する\n anserList.appendChild(msgPBox);\n return;\n }\n\n var objAnswer = JSON.parse(data);\n console.log('objAnswer');\n console.log(objAnswer);\n\n objAnswer.results.forEach(function(match_doc) {\n msgPBox = document.createElement('div');\n msgPBox.className = 'row';\n msgPBox.id = 'ans_p';\n\n // add passage_text\n msgPTextBox = document.createElement('div');\n msgPTextBox.className = 'col-sm-8';\n msgPTextBox.id = 'ans_text';\n\n // Passage Text\n msgPText = document.createTextNode(match_doc.title);\n msgPTextBox.appendChild(msgPText);\n\n msgPBox.appendChild(msgPTextBox);\n\n // add score\n msgScoreBox = document.createElement('div');\n msgScoreBox.className = 'col-sm-4';\n msgScoreBox.id = 'ans_score';\n\n score = Math.floor(match_doc.result_metadata.score * 100) / 100;\n msgScore = document.createTextNode(score+\"%\");\n msgScoreBox.appendChild(msgScore);\n msgPBox.appendChild(msgScoreBox);\n\n // 表示領域に子要素として追加する\n anserList.appendChild(msgPBox);\n });\n\n })\n .fail(function(jqXHR, textStatus, errorThrown) {\n // 応答データをリスト化して表示\n // リスト要素を取得\n var anserList = document.getElementById('answer_list');\n // 子ノードを全削除\n if (anserList.hasChildNodes()){\n \t\tfor (var i=anserList.childNodes.length-1; i>=0; i--) {\n \t\t\tanserList.removeChild(anserList.childNodes[i]);\n \t\t}\n \t}\n\n msgPBox = document.createElement('div');\n msgPBox.className = 'row';\n msgPBox.id = 'ans_p';\n\n msgPText = document.createTextNode(\"通信エラー \" + jqXHR.status + \" : \" + jqXHR.statusText);\n msgPBox.appendChild(msgPText);\n // 表示領域に子要素として追加する\n anserList.appendChild(msgPBox);\n return;\n })\n .always(function(data) {\n // console.log(data);\n });\n }\n</script>\n\n </article>\n</section>\n\n</body>\n</html>\n","x":280,"y":80,"wires":[["462eede.3d9e114"]]},{"id":"462eede.3d9e114","type":"http response","z":"82ffd03b.6bc1f","name":"","x":450,"y":80,"wires":[]},{"id":"5cc66977.5acd18","type":"comment","z":"82ffd03b.6bc1f","name":"画面プログラム","info":"","x":100,"y":20,"wires":[]},{"id":"485fd422.ae9fbc","type":"http in","z":"82ffd03b.6bc1f","name":"","url":"/lt2","method":"get","upload":false,"swaggerDoc":"","x":100,"y":180,"wires":[["e3c834b1.f40be8"]]},{"id":"e7bef9e6.66ded8","type":"watson-translator","z":"82ffd03b.6bc1f","name":"lt engine","action":"translate","basemodel":"es-en","domain":"news","srclang":"ja","destlang":"en","password":"maRuto9905","custom":"","domainhidden":"news","srclanghidden":"ja","destlanghidden":"en","basemodelhidden":"","customhidden":"","filetype":"forcedglossary","trainid":"","lgparams2":true,"neural":false,"default-endpoint":true,"service-endpoint":"https://gateway.watsonplatform.net/language-translator/api","x":380,"y":180,"wires":[["538016bd.28db48","a0165932.4ae288"]]},{"id":"a0165932.4ae288","type":"http response","z":"82ffd03b.6bc1f","name":"TL","statusCode":"","headers":{},"x":550,"y":180,"wires":[]},{"id":"e3c834b1.f40be8","type":"change","z":"82ffd03b.6bc1f","name":"change","rules":[{"t":"set","p":"payload","pt":"msg","to":"payload.text","tot":"msg"}],"action":"","property":"","from":"","to":"","reg":false,"x":240,"y":180,"wires":[["e7bef9e6.66ded8"]]},{"id":"ee76095b.621408","type":"comment","z":"82ffd03b.6bc1f","name":"日本語ー英語翻訳機能","info":"","x":120,"y":140,"wires":[]},{"id":"538016bd.28db48","type":"debug","z":"82ffd03b.6bc1f","name":"","active":true,"tosidebar":true,"console":false,"tostatus":false,"complete":"payload","x":450,"y":240,"wires":[]},{"id":"271d68c.7e38198","type":"template","z":"82ffd03b.6bc1f","name":"bk_view program","field":"payload","fieldType":"msg","syntax":"mustache","template":"\n<!DOCTYPE html>\n<html lang=\"ja\" class=\"no-js\">\n\n<head>\n<meta charset=\"UTF-8\" />\n<meta http-equiv=\"X-UA-Compatible\" content=\"IE=edge\" />\n\n<!-- Bootstrap CSS -->\n<link rel=\"stylesheet\" href=\"https://sm0002contents.mybluemix.net/css/lib/bootstrap.min.css\">\n<!-- Bootcards CSS for desktop: -->\n<link rel=\"stylesheet\" href=\"https://sm0002contents.mybluemix.net/css/lib/bootcards-desktop.min.css\">\n\n<!-- Custom CSS -->\n<link rel=\"stylesheet\" href=\"https://sm0002contents.mybluemix.net/css/counseling_list.css\">\n<link rel='stylesheet' href=\"https://sm0002contents.mybluemix.net/css/transition.css\" type='text/css' media='all' />\n\n\n\n<!-- <link href=\"https://fonts.googleapis.com/css?family=Work+Sans:200\" rel=\"stylesheet\"> -->\n<style>\n body{\n font-size: 28px;\n }\n #container {\n position : relative;\n width : 370px;\n margin : 0px auto;\n }\n\n /* Watson Discover Answer */\n #ans_p{\n border: 1px solid #000000;\n padding-right: 5px;\n color: #00F;\n text-decoration: underline;\n }\n #ans_score {\n text-align: right;\n color: #000;\n font-size: 24px;\n }\n #answer_list{\n overflow: scroll;\n font-size: 20px;\n }\n\n</style>\n\n<!-- jQuery -->\n<script src=\"https://code.jquery.com/jquery-1.11.2.min.js\" crossorigin=\"anonymous\"></script>\n\n<!-- Bootstrap and Bootcards JS -->\n<script src=\"https://sm0002contents.mybluemix.net/js/lib/bootstrap.min.js\"></script>\n<script src=\"https://sm0002contents.mybluemix.net/js/lib/bootcards.min.js\"></script>\n\n</head>\n\n<body>\n<!-- <body class=\"fadeout\" onload=\"displayLineChart();\"> -->\n<section class=\"page\">\n <article>\n\n \t<div class=\"container-fluid\" id=\"page-3-1\" style=\"display: block;\">\n \t\t<div class=\"row\">\n\n <div class=\"col-sm-12\">\n <div class=\"panel panel-success\">\n <div class=\"panel-heading\">\n FAQ候補\n <a class=\"btn btn-primary pull-right btn-xs\" href=\"#\" value=\"\" onclick=\"requestWatson()\" id=\"requestWatson\">\n <i class=\"fa fa-pencil\" id=\"videoStart\" >入力文字<br>解析</i>\n </a>\n <a class=\"btn btn-danger pull-right btn-xs\" href=\"#\" value=\"\" onclick=\"startRecognition()\" id=\"startRecognition\">\n <i class=\"fa fa-pencil\" id=\"videoStart\" >顧客の声<br>音声処理</i>\n </a>\n </div>\n <div class=\"panel-body\">\n <div\n <div class=\"col-sm-12\" style=\"height:80px;text-align:left;background-color: #FFF;\">\n <input type=\"text\" id=\"recognizedText\" size=\"40\" value=\"\">\n <div id=\"translator\"></div>\n </div>\n <div class=\"row\">\n <div class=\"col-sm-12\" style=\"height:500px;text-align:left;background-color: #FFF;\">\n<!-- <div id=\"answer_list\" onclick=\"sendNextPages('page-3-3')\"></div> -->\n <div id=\"answer_list\"></div>\n </div>\n </div>\n\n <!-- 音声認識エリア(利用していない) -->\n <div class=\"row\" style=\"display:none;\">\n <div class=\"col-sm-12\" style=\"height:50px;text-align:left;background-color: #FFF;\">\n <div style=\"display:none;\">\n<!-- 連続認識<input id=\"continuous\" type=\"checkbox\" checked=\"checked\"> -->\n 連続認識<input id=\"continuous\" type=\"checkbox\">\n 中間結果の表示<input id=\"interim\" type=\"checkbox\" checked=\"checked\">\n </div>\n <div class=\"col-sm-12\" style=\"height:100px;text-align:left;background-color: #FFF; \">\n <p>Debug詳細情報</p>\n <div id=\"recognizedDetail\"></div>\n </div>\n </div>\n </div>\n\n </div>\n\n <div class=\"panel-footer\">\n <div id=\"state\">ステータス:停止中</div>\n </div>\n </div>\n </div>\n\n \t\t</div>\n \t</div>\n\n<script>\n var recognition = new webkitSpeechRecognition();\n recognition.lang = \"ja-JP\";\n recognition.maxAlternatives = 2;\n //認識停止\n function stopRecognition(){\n $(\"#state\").text(\"ステータス:停止\");\n recognition.stop();\n }\n //認識開始+設定の変更\n function startRecognition(){\n //連続認識\n if($(\"#continuous\").prop(\"checked\") == true) recognition.continuous = true;\n else recognition.continuous = false;\n //中間結果の表示\n if($(\"#interim\").prop(\"checked\") == true) recognition.interimResults = true;\n else recognition.interimResults = false;\n\n $(\"#state\").text(\"ステータス:発話待ち\");\n recognition.start();\n }\n //話し声の認識中\n recognition.onsoundstart = function(){\n $(\"#state\").text(\"ステータス:認識中\");\n };\n //マッチする認識が無い\n recognition.onnomatch = function(){\n // $(\"#state\").text(\"ステータス:認識できない言葉が検出されました\");\n console.log(\"recognition.onnomatch発生\");\n\n //連続認識の場合は再度実行する\n //0.01秒後に停止\n setTimeout(\"stopRecognition()\",10);\n if($(\"#continuous\").prop(\"checked\") == true){\n //0.01秒後に再接続\n setTimeout(\"startRecognition()\",300);\n }\n };\n //エラー\n recognition.onerror= function(){\n // $(\"#state\").text(\"ステータス:認識に失敗しました\");\n console.log(\"recognition.onerror発生\");\n\n //連続認識の場合は再度実行する\n //0.01秒後に停止\n setTimeout(\"stopRecognition()\",10);\n if($(\"#continuous\").prop(\"checked\") == true){\n //0.01秒後に再接続\n setTimeout(\"startRecognition()\",300);\n }\n };\n //話し声の認識終了\n recognition.onsoundend = function(){\n $(\"#state\").text(\"ステータス:認識終了\");\n\n //連続認識の場合は再度実行する\n //0.01秒後に停止\n setTimeout(\"stopRecognition()\",10);\n if($(\"#continuous\").prop(\"checked\") == true){\n //0.01秒後に再接続\n setTimeout(\"startRecognition()\",300);\n }\n };\n //認識が終了したときのイベント\n recognition.onresult = function(event){\n var results = event.results;\n for (var i = event.resultIndex; i<results.length; i++){\n //認識の最終結果\n if(results[i].isFinal){\n $(\"#state\").text(\"ステータス:認識終了時、結果\");\n $(\"#recognizedText\").val(results[i][0].transcript);\n\n //WebSocket通知&翻訳サービスへ送信する\n //sendMessage();\n requestWatson();\n\n //0.01秒後に停止\n setTimeout(\"stopRecognition()\",10);\n }\n //認識の中間結果\n else{\n $(\"#state\").text(\"ステータス:認識中、中間結果\");\n $(\"#recognizedText\").val(results[i][0].transcript);\n //console.log(results[i][0].transcript);\n }\n }\n //トップ10の認識仮説の表示\n $(\"#recognizedDetail\").empty();\n for (var i = event.resultIndex; i<results.length; i++){\n if(results[i].isFinal){\n for (var j = 0; j<Math.min(recognition.maxAlternatives,results[i].length); j++){\n $(\"#recognizedDetail\").append(\"<p>\" + \"ランク\" + j + \" \" + results[i][j].transcript +\n \": \" + results[i][j].confidence +\n \"</p>\");\n }\n }\n }\n };\n</script>\n\n\n<script>\nfunction requestWatson() {\n translatorWatson();\n askWatson();\n}\n</script>\n<script type=\"text/javascript\">\n // Node-REDのWeb API連携\n var translatorWatson = function() {\n // Watson連携\n $.ajax({\n type: \"GET\",\n url: \"./lt2\",\n dataType: \"text\",\n timeout: 10000,\n data: {\n //質問文を取得してパラメータとして渡す\n text: $(\"#recognizedText\").val()\n }\n })\n .done(function(data, textStatus, jqXHR) {\n // 通信成功\n var message;\n if ( data.length < 70 ){\n message = document.createTextNode(data);\n }else{\n message = document.createTextNode(data.substr(0, 70) + \"...\");\n }\n var messageBox = document.createElement('p');\n messageBox.className = 'system';\n messageBox.appendChild(message);\n\n var translator = document.getElementById('translator');\n // 子ノードを全削除\n if (translator.hasChildNodes()){\n \t\tfor (var i=translator.childNodes.length-1; i>=0; i--) {\n \t\t\ttranslator.removeChild(translator.childNodes[i]);\n \t\t}\n \t}\n translator.appendChild(messageBox);\n })\n .fail(function(jqXHR, textStatus, errorThrown) {\n // 通信エラー\n //$(\"#answer\").val(\"通信エラー \" + jqXHR.status + \" : \" + jqXHR.statusText);\n return;\n })\n .always(function(data) {\n // Debug\n console.log(data);\n });\n }\n</script>\n\n<script type=\"text/javascript\">\n // Node-REDのWeb API連携\n var askWatson = function() {\n var const_disp_num = 5;\n var msgP,msgPBox;\n var msgDocId,msgDocIdBox;\n var msgPText,msgPTextBox;\n var score,msgScore,msgScoreBox;\n var br;\n\n // Watson連携\n $.ajax({\n type: \"GET\",\n url: \"./ask\",\n dataType: \"text\",\n timeout: 10000,\n data: {\n //質問文を取得してパラメータとして渡す\n q: $(\"#recognizedText\").val()\n }\n })\n .done(function(data, textStatus, jqXHR) {\n // 通信成功\n // フローから返ってきた結果をanswerに入れる\n // $(\"#answer\").val(data);\n\n // 応答データをリスト化して表示\n // リスト要素を取得\n var anserList = document.getElementById('answer_list');\n\n // 子ノードを全削除\n if (anserList.hasChildNodes()){\n \t\tfor (var i=anserList.childNodes.length-1; i>=0; i--) {\n \t\t\tanserList.removeChild(anserList.childNodes[i]);\n \t\t}\n \t}\n\n // Discovery 検索0件対応\n if (data=='404'){\n msgPBox = document.createElement('div');\n msgPBox.className = 'row';\n msgPBox.id = 'ans_p';\n\n msgPText = document.createTextNode('該当候補がありませんでした。');\n msgPBox.appendChild(msgPText);\n // 表示領域に子要素として追加する\n anserList.appendChild(msgPBox);\n return;\n }\n\n var objAnswer = JSON.parse(data);\n console.log(objAnswer);\n\n // tree表示\n /*\n $('#tree1').jstree({ 'core' : {\n 'data' :data,\n autoOpen: true\n ,\n openedIcon:'-',\n closedIcon:'+',\n autoEscape:false,\n selectable:false,\n dragAndDrop:true\n });\n */\n\n // for (var i=0; i<Math.min(const_disp_num, objAnswer.matching_results); i++) {\n objAnswer.results.forEach(function(match_doc) {\n msgPBox = document.createElement('div');\n msgPBox.className = 'row';\n msgPBox.id = 'ans_p';\n\n // add passage_text\n msgPTextBox = document.createElement('div');\n msgPTextBox.className = 'col-sm-8';\n msgPTextBox.id = 'ans_text';\n\n /*\n // Doc Id\n msgDocId = document.createTextNode(objAnswer.passages[i].document_id);\n msgPTextBox.appendChild(msgDocId);\n\n br = document.createElement('br');\n msgPTextBox.appendChild(br);\n */\n\n // Passage Text\n msgPText = document.createTextNode(\"[\" + match_doc.category + \"] \" + match_doc.title);\n msgPTextBox.appendChild(msgPText);\n\n msgPBox.appendChild(msgPTextBox);\n\n // add score\n msgScoreBox = document.createElement('div');\n msgScoreBox.className = 'col-sm-4';\n msgScoreBox.id = 'ans_score';\n\n score = Math.floor(match_doc.result_metadata.score * 100) / 100;\n msgScore = document.createTextNode(score+\"%\");\n msgScoreBox.appendChild(msgScore);\n msgPBox.appendChild(msgScoreBox);\n\n // 表示領域に子要素として追加する\n anserList.appendChild(msgPBox);\n });\n\n })\n .fail(function(jqXHR, textStatus, errorThrown) {\n // 通信エラー\n //$(\"#answer\").val(\"通信エラー \" + jqXHR.status + \" : \" + jqXHR.statusText);\n\n // 応答データをリスト化して表示\n // リスト要素を取得\n var anserList = document.getElementById('answer_list');\n // 子ノードを全削除\n if (anserList.hasChildNodes()){\n \t\tfor (var i=anserList.childNodes.length-1; i>=0; i--) {\n \t\t\tanserList.removeChild(anserList.childNodes[i]);\n \t\t}\n \t}\n\n\n msgPBox = document.createElement('div');\n msgPBox.className = 'row';\n msgPBox.id = 'ans_p';\n\n msgPText = document.createTextNode(\"通信エラー \" + jqXHR.status + \" : \" + jqXHR.statusText);\n msgPBox.appendChild(msgPText);\n // 表示領域に子要素として追加する\n anserList.appendChild(msgPBox);\n return;\n })\n .always(function(data) {\n // Debug\n // console.log(data);\n });\n }\n/*\n // 質問文入力済み判定\n var checkLengthQ = function() {\n if ($(\"#recognizedText\").val().length > 0) {\n // ボタン有効\n $(\".btn\").removeClass(\"disabled\").removeClass(\"btn-default\").addClass(\"btn-primary\");\n } else {\n // ボタン無効\n $(\".btn\").addClass(\"disabled\").addClass(\"btn-default\").removeClass(\"btn-primary\");\n }\n }\n */\n</script>\n\n\n\n </article>\n</section>\n\n</body>\n</html>\n","x":350,"y":120,"wires":[[]]},{"id":"60d3b9bb.7870e8","type":"watson-discovery-v1","z":"82ffd03b.6bc1f","name":"Discovery","environmentname":"","environment_id":"","collection_id":"","configurationname":"","configuration_id":"","collection_name":"","count":"","passages":false,"nlp_query":false,"query":"","filter":"","aggregation":"","return":"","description":"","size":"","discovery-method":"query","default-endpoint":true,"service-endpoint":"","x":200,"y":380,"wires":[["8d5d7c4e.c5046","81f8b248.dab24"]]},{"id":"45b8e692.f4a4d8","type":"change","z":"82ffd03b.6bc1f","name":"質問文の取り出し","rules":[{"t":"set","p":"discoveryparams.query","pt":"msg","to":"payload.q","tot":"msg"}],"action":"","property":"","from":"","to":"","reg":false,"x":270,"y":320,"wires":[["60d3b9bb.7870e8","7619eb65.3da124"]]},{"id":"8d5d7c4e.c5046","type":"debug","z":"82ffd03b.6bc1f","name":"Debug","active":true,"tosidebar":true,"console":false,"complete":"search_results","x":510,"y":400,"wires":[]},{"id":"81f8b248.dab24","type":"function","z":"82ffd03b.6bc1f","name":"回答取り出し","func":"if (msg.search_results.results.length > 0 ) {\n msg.payload = msg.search_results;\n} else {\n msg.payload = \"404\";\n}\nreturn msg;\n","outputs":1,"noerr":0,"x":280,"y":420,"wires":[["bb33fae7.9bb7f8"]]},{"id":"7619eb65.3da124","type":"debug","z":"82ffd03b.6bc1f","name":"Debug","active":false,"console":"false","complete":"payload","x":490,"y":320,"wires":[]},{"id":"15f417ea.a3b448","type":"http in","z":"82ffd03b.6bc1f","name":"","url":"/ask","method":"get","upload":false,"swaggerDoc":"","x":88.312255859375,"y":323.58636474609375,"wires":[["45b8e692.f4a4d8"]]},{"id":"bb33fae7.9bb7f8","type":"json","z":"82ffd03b.6bc1f","name":"","property":"payload","action":"str","pretty":false,"x":410,"y":460,"wires":[["a84b52f8.30823"]]},{"id":"a84b52f8.30823","type":"http response","z":"82ffd03b.6bc1f","name":"","x":510,"y":500,"wires":[]}]
次にNodeが読み込めたら、Discoveryをダブルクリック。
Discoveryの環境を変更する。
ここの設定は (*注意1) にあった設定値になります。
enviroment_idとcollection_idは作成したときの戻りで得た値をコピーする。
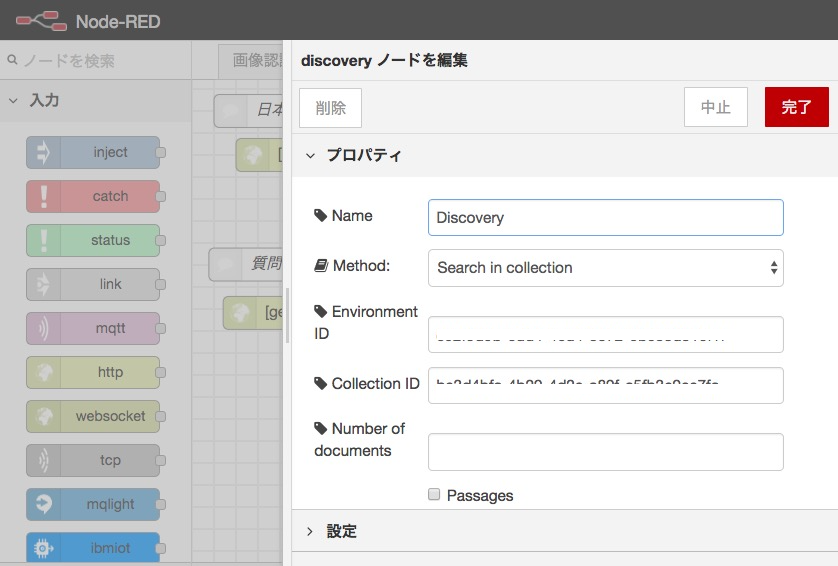
「デプロイボタンを押す」
アプリの稼働確認
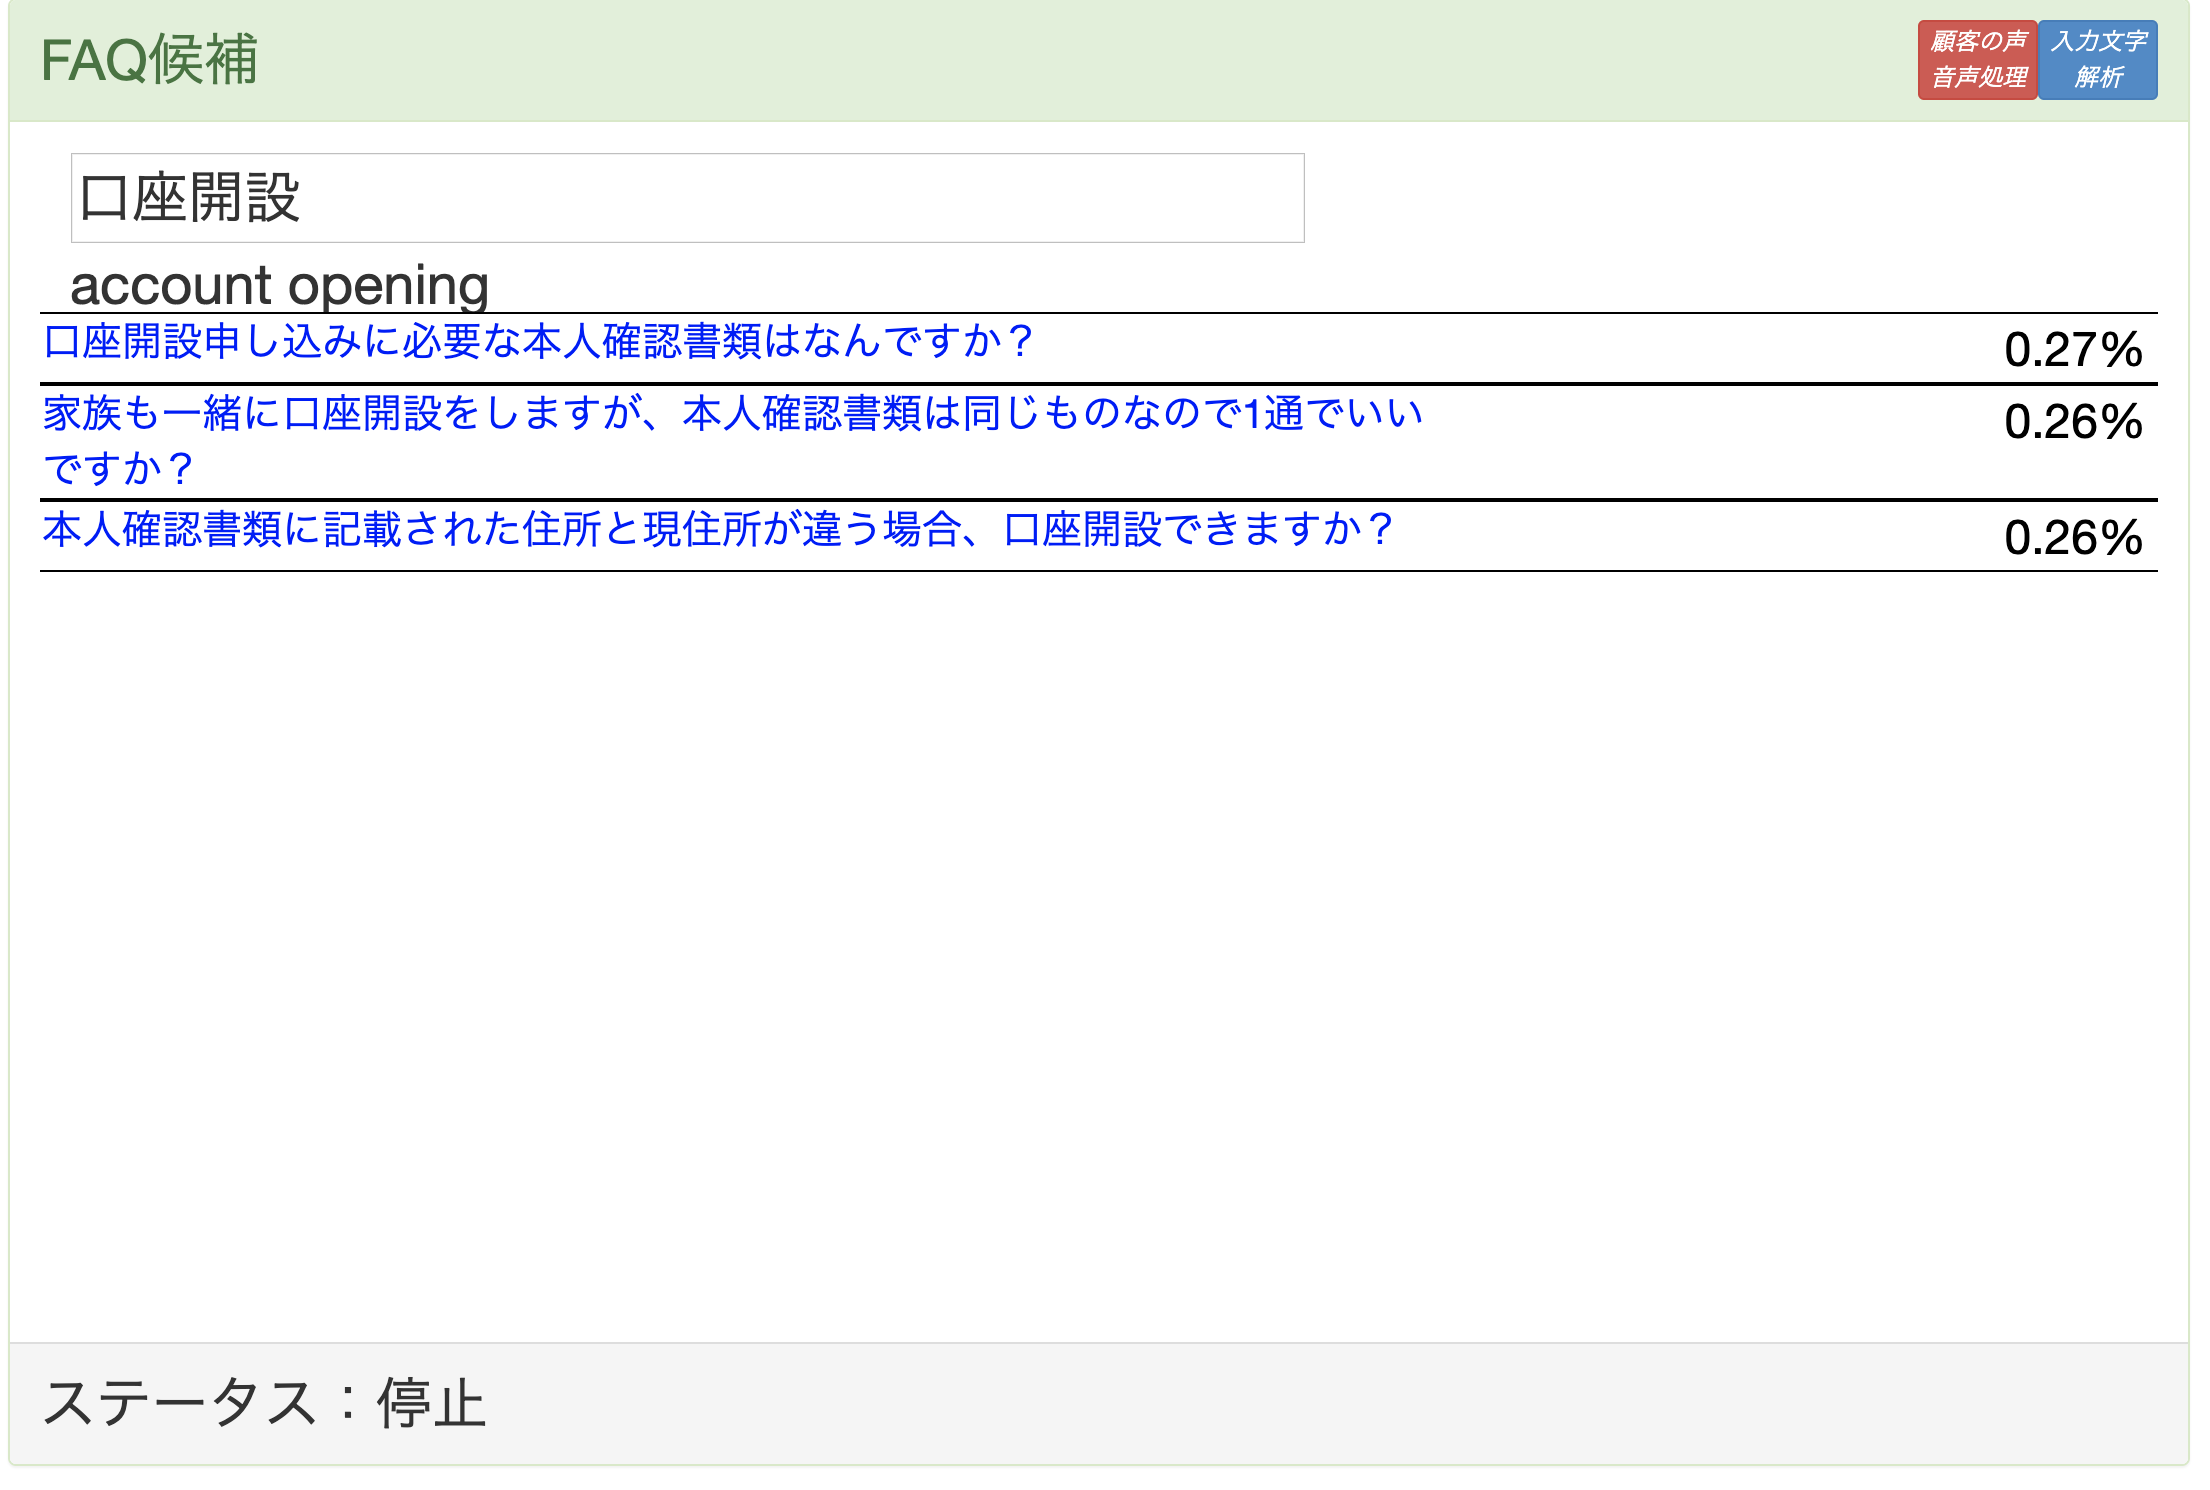
アプリを起動して、テキストボックスに文字を入れたら、「入力文字解析」のボタンを押します。
そうすると、1秒前後ぐらいで翻訳された英語と、Discoveryで検索された情報が出てきます。
*おまけ
「顧客の声 音声処理」を選ぶと、Chrome限定だけど、Web Speech APIに基づいた音声認識(Chromeに実装された音声認識)が楽しめます。
リファレンス情報
今後いろいろ拡張するので、リンクまとめページのレシピ集もご参考ください。
それでは。
特別付録:Watson DiscoveryのCollectionのコマンドライン作成編
日本語版は最初の下ごしらえとして、コマンドで実行する必要があるので、以下を実行します。
Discoveryを追加する
Discoveryを使います。まずは、Discoveryから、カタログから選び、購入します。
費用がかからない、ライトアカウントから使うことが出来ます。
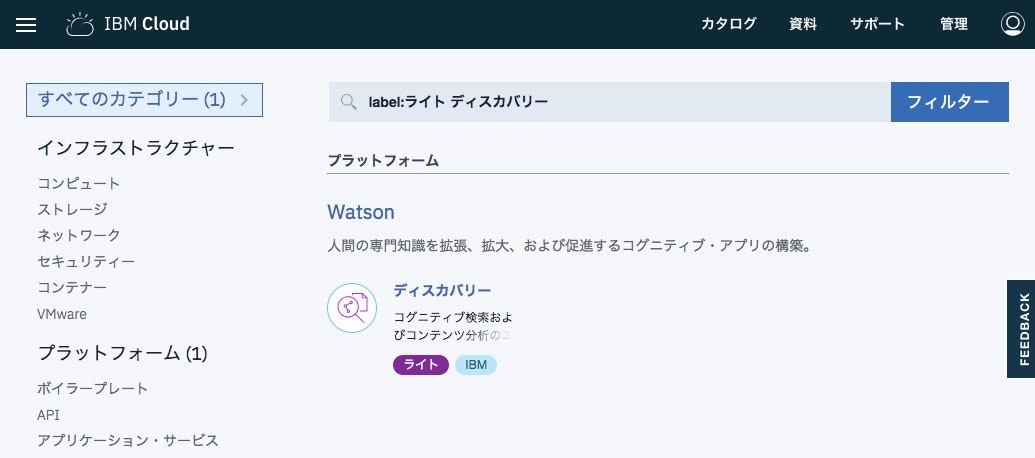
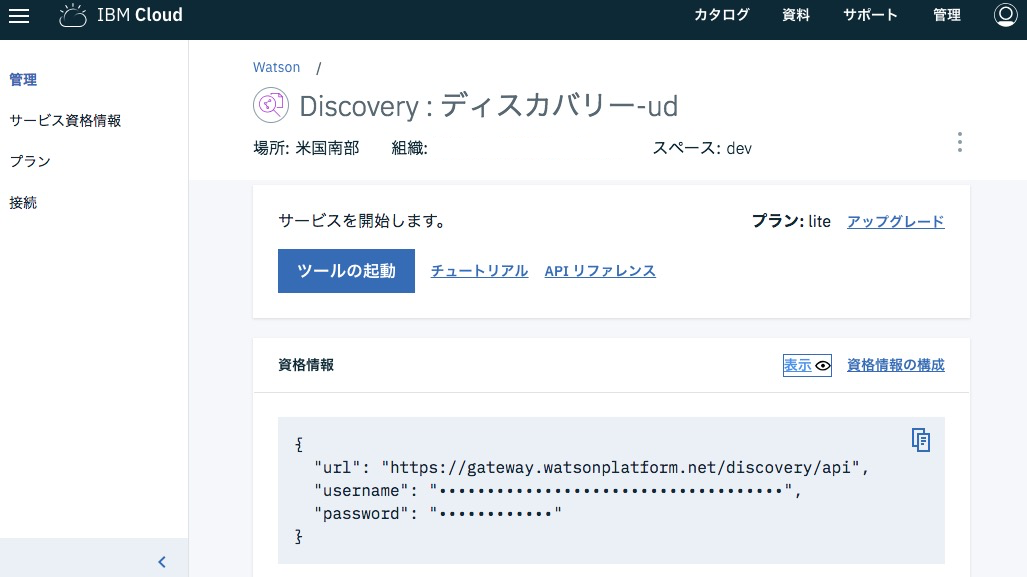
サービスを選ぶと、資格情報が見れます。
ここは後々のコマンドで使うので覚えておくこと!
今後はこのような伏せ字でコマンド説明をします。
{
  "url": "https://gateway.watsonplatform.net/discovery/api",
  "username": "[user]",
  "password": "[pass]"
}
Discoveryに覚え込ませるドキュメントの日本語用の格納庫(Collection)はコマンドでしか作れないので、コマンドを使います。
コマンドは、CURLというソフトを用いたコマンドを実行します。
2019/7/13追記:いつのまにか、コマンド無しで環境構築できるようになりました。いつかこのチュートリアルもコマンド無し版に変更予定です
ソフトは個人の判断でインストールいただければと思います。macOSなら初期から入っているかもしれません。
DiscoveryのCollectionを作る(旧認証方式)
- コマンドを使う時に必要な認証情報は仕様がかわりつつあります。
- user / passが資格情報から取得できず、IAM方式になっていたら、後述のIAM認証方式を参照してください。
IBMCloudにサービスを登録して、少し待てば以下のコマンドでenviroment_idが得られます。
環境を構築する
curl -u "[user]":"[pass]" "https://gateway.watsonplatform.net/discovery/api/v1/environments?version=2017-11-07"
{
  "environments" : [ {
    "environment_id" : "system",
    "name" : "Watson System Environment",
    "description" : "Shared system data sources",
    "read_only" : true
  }, {
    "environment_id" : "[env-id]",
    "name" : "byod",
    "description" : "",
    "created" : "2018-06-11T06:41:32.582Z",
    "updated" : "2018-06-11T06:41:32.582Z",
    "read_only" : false
  } ]
}
このenv_idは後で使います。
環境の設定を作る
environment_idを指定して日本語にカスタムしたconfiguration_idを作成します。
curl -u "[user]":"[pass]" "https://gateway.watsonplatform.net/discovery/api/v1/environments/[env_id]/configurations?version=2017-11-07"
応答はこんな感じです。
{
  "configurations": [
    {
      "configuration_id": "[config_id]",
      "name": "Default Configuration",
      "description": "The configuration used by default when creating a new collection without specifying a configuration_id.",
      "created": "2018-06-11T06:41:32.618Z",
      "updated": "2018-06-11T06:41:32.618Z"
    },
    {
      "configuration_id": "[collection_id]",
      "name": "Default Contract Configuration",
      "description": "Extract party, nature, and category from elements in PDFs.",
      "created": "2018-06-11T06:41:35.169Z",
      "updated": "2018-06-11T06:41:35.169Z"
    }
  ]
}
コレクション(文書の保管場所)を作る
日本語にカスタムしconfiguration_idを指定して日本語のcollectionを作成します。
curl -X POST -u "[user]":"[pass]" -H "Content-Type: application/json" -d '{ "name": "ja-collection", "description": "japanese collection", "configuration_id": "[collection_id]", "language": "ja"}' "https://gateway.watsonplatform.net/discovery/api/v1/environments/[env_id]/collections?version=2017-11-07"
応答はこちら。
{
  "name" : "ja-collection",
  "collection_id" : "[collection_id]",
  "description" : "japanese collection",
  "created" : "2018-06-11T06:48:49.084Z",
  "updated" : "2018-06-11T06:48:49.084Z",
  "configuration_id" : "392511be-07df-415a-8041-686a4df0285f",
  "language" : "ja",
  "status" : "active"
}
これで、Collectionが作成されます。
最初のコマンドで取得した[env_id]と今回のコマンドで取得した[collection_id]は後で使います。
DiscoveryのCollectionを作る(IAM認証方式)
IAM認証方式だと資格情報は以下のような情報になっていると思います。
{
  "apikey": [api_key],
  "iam_apikey_description": "hoge",
  "iam_apikey_name": "hoge",
  "iam_role_crn": "hoge",
  "iam_serviceid_crn": "hoge",
  "url": [api_url]
}
ユーザーパスワードの情報がなくなっていますね。
これは、パスワードをトークンという情報でAPI呼び出しの認証を行う方式に変わった影響です。
APIを呼び出す時は少し面倒になりますが、パスワードが固定化されないので、よりセキュアになったと前向きに考えたほうが良いと思います。
コマンドの仕様はコチラを参照ください。
Authenticating with IAM tokens
認証を行い、トークンを取得する。
まずはトークンを取得し、APIを呼び出せるようにします。
認証取得
curl -k -X POST --header "Authorization: Basic Yng6Yng="  --header "Content-Type: application/x-www-form-urlencoded"   --header "Accept: application/json"  --data-urlencode "grant_type=urn:ibm:params:oauth:grant-type:apikey"   --data-urlencode "apikey=[api_key]"   "https://iam.bluemix.net/identity/token"
はい、api_key以外は固定値です。
実行が成功すると、以下のような結果が帰ってきます。
{
"access_token":[token]",
"refresh_token":[refresh_token]",
"token_type":"Bearer",
"expires_in":3600,
"expiration":1530419009,
"scope":"ibm openid"
}
基本的には[token]のみを利用します。
環境を構築する
以下のコマンドで環境を構築します。
{
curl -X POST --header "Authorization: Bearer [token]"
-H "Content-Type: application/json" -d '{ "name":"my-first-environment", "description":"exploring environments"}'
"[api_url]/v1/environments?version=2017-11-07"
実行が成功すると以下のとおりです。
{
  "environment_id" : "[enviroment_id]",
  "name" : "my-first-environment",
  "description" : "exploring environments",
  "created" : "2018-07-01T03:24:47.805Z",
  "updated" : "2018-07-01T03:24:47.805Z",
  "status" : "active",
  "read_only" : false,
  "index_capacity" : {
    "documents" : {
      "available" : 0,
      "maximum_allowed" : 2000
    },
    "disk_usage" : {
      "used_bytes" : 0,
      "maximum_allowed_bytes" : 200000000
    },
    "collections" : {
      "available" : 0,
      "maximum_allowed" : 0
    }
  }
}
環境の設定を行う
以下のコマンドを使って、環境設定を行います。
curl -X GET --header "Authorization: Bearer [token]" "[api_url]/v1/environments/[enviroment_id]/configurations?version=2017-11-07"
結果はこのようになります。
{
  "configurations": [
    {
      "configuration_id": "[configuration_id]",
      "name": "Default Configuration",
      "description": "The configuration used by default when creating a new collection without specifying a configuration_id.",
      "created": "2018-07-01T03:24:47.900Z",
      "updated": "2018-07-01T03:24:47.900Z"
    }
  ]
}
コレクション(文書を保管する箇所)を構築する
以下のコマンドを用いてコレクションを作成します。
curl -X POST --header "Authorization: Bearer [token]"
-H "Content-Type: application/json" -d '{ "name": "ja-collection-sj",  "description": "japanese collection for SJ",  "configuration_id": "[configuration_id]", "language": "ja"}'
"[api_url]/v1/environments/[enviroment_id]/collections?version=2017-11-07"
結果はこのようになります。
{
  "name" : "ja-collection-sj",
  "collection_id" : "[collection_id]",
  "description" : "japanese collection for SJ",
  "created" : "2018-07-01T03:39:18.034Z",
  "updated" : "2018-07-01T03:39:18.034Z",
  "configuration_id" : "[configuration_id]",
  "language" : "ja",
  "status" : "active"
}
この[collection_id]はNode-REDでも利用するのでメモしておいてください。
