PlayCanvas Editorを使って、UIをどんな感じにするか?は結構悩むと思いますが、
そこに対して最近自分が使い始めた構成がこちらになります。
- Mithril.js
軽量なJavaScriptのフレームワークです。
https://mithril-ja.js.org/ - Tailwind.css
https://tailwindcss.com/
新規プロジェクトにCSSとHTMLを埋め込みます。
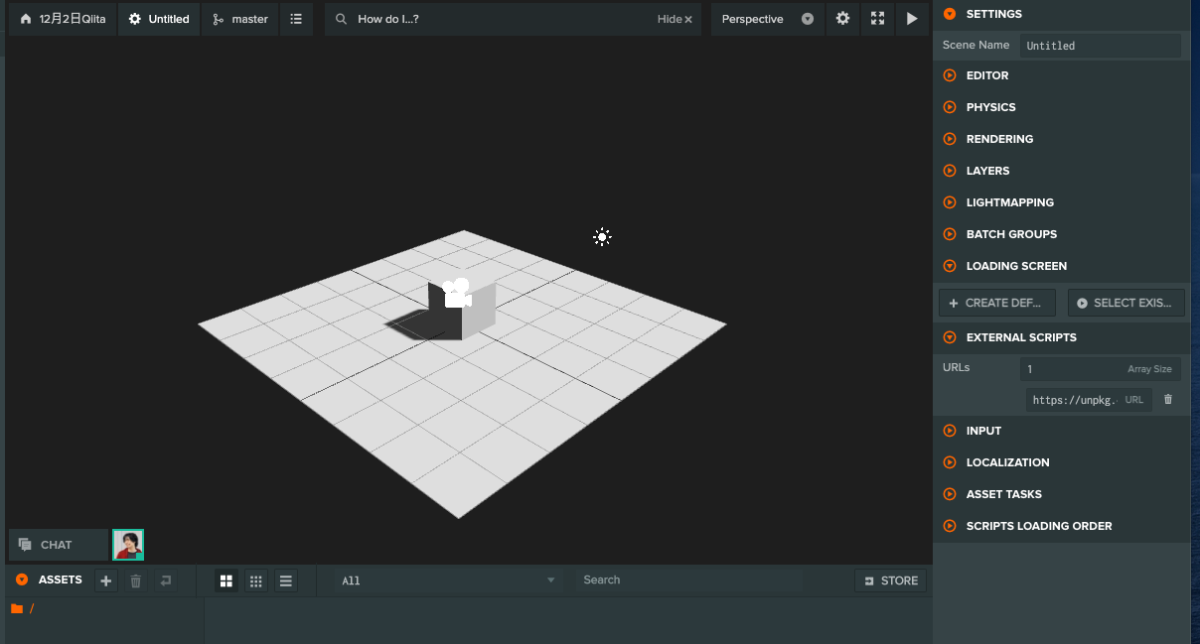
1. mithril.jsをCDNから読み込みます。
SETTINGS → EXTERNAL SCRIPTにmithril.jsの値を設定します。
https://unpkg.com/mithril/mithril.js
2. CSSとHTMLを埋め込む元となるスクリプト(ui.js)を追加します。
/*jshint esversion: 6, asi: true, laxbreak: true*/

class UI extends pc.ScriptType{
    initialize(){
        this.insertHTML();
        this.insertCSS();
            this.app.on("render", this.render, this)
        this.app.on("clear", this.clear, this)
    }

    insertHTML(){
      const body = document.getElementsByTagName("body")[0];
      this.rootElement = document.createElement("div")
      this.rootElement.setAttribute("id", this.rootElementId)
      body.insertAdjacentElement("afterbegin",this.rootElement);
    }

    insertCSS(){
       const head = document.getElementsByTagName("head")[0];
       for(let  asset of this.css){
       if(!asset && !asset.resource) return
       const style = `<style>${asset && asset.resource}</style>`;
       head.insertAdjacentHTML("afterbegin", style);
       }
    }
    render(component){
        m.render(this.rootElement, component)
    }
    clear(){
        m.render(this.rootElement, null)
    }
}

pc.registerScript(UI)
UI.attributes.add("rootElementId", {type: "string", default: "root",})
UI.attributes.add("css", {type: "asset",assetType: "css",title: "CSS Asset",array:true});
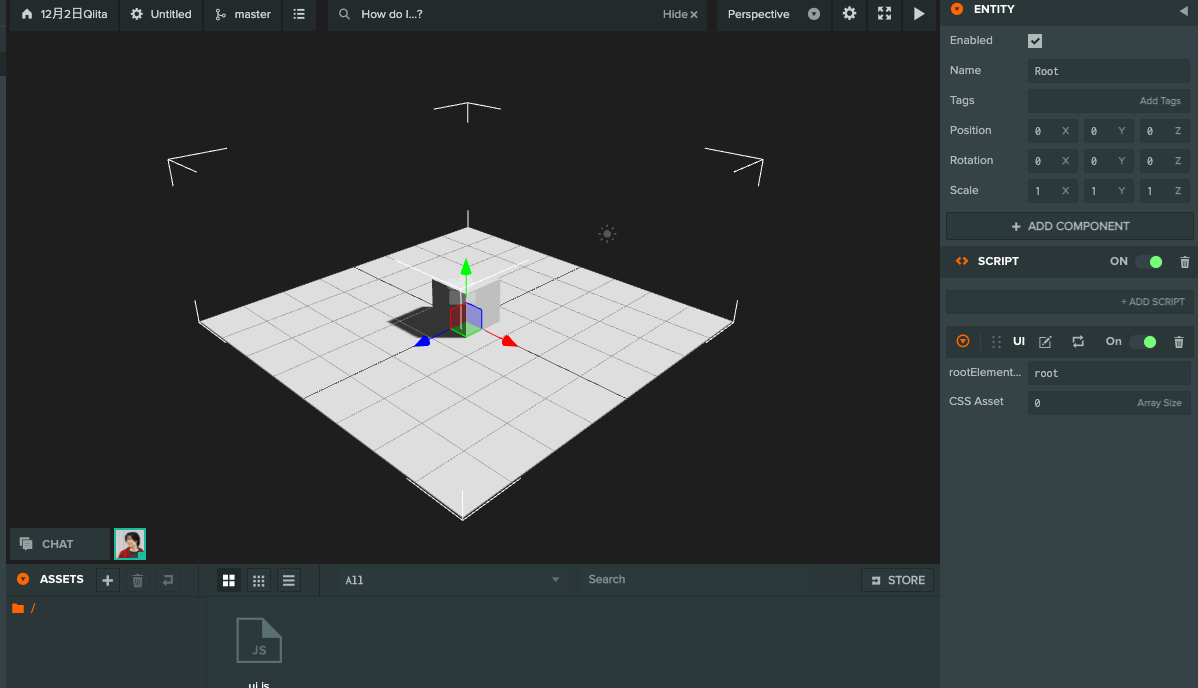
3. RootエンティティにUi.jsを追加します

4. style.cssを追加します
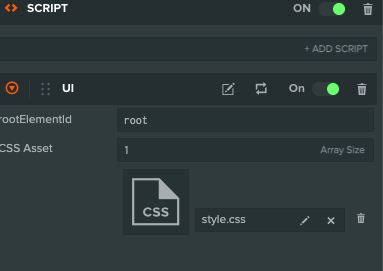
Ui.jsのスクリプト属性にstyle.cssを追加します。
#root {
    position:absolute;
    background: #fff;
    z-index: 1;
}

.main{
    width: 100vw;
    height: 100vh;
}
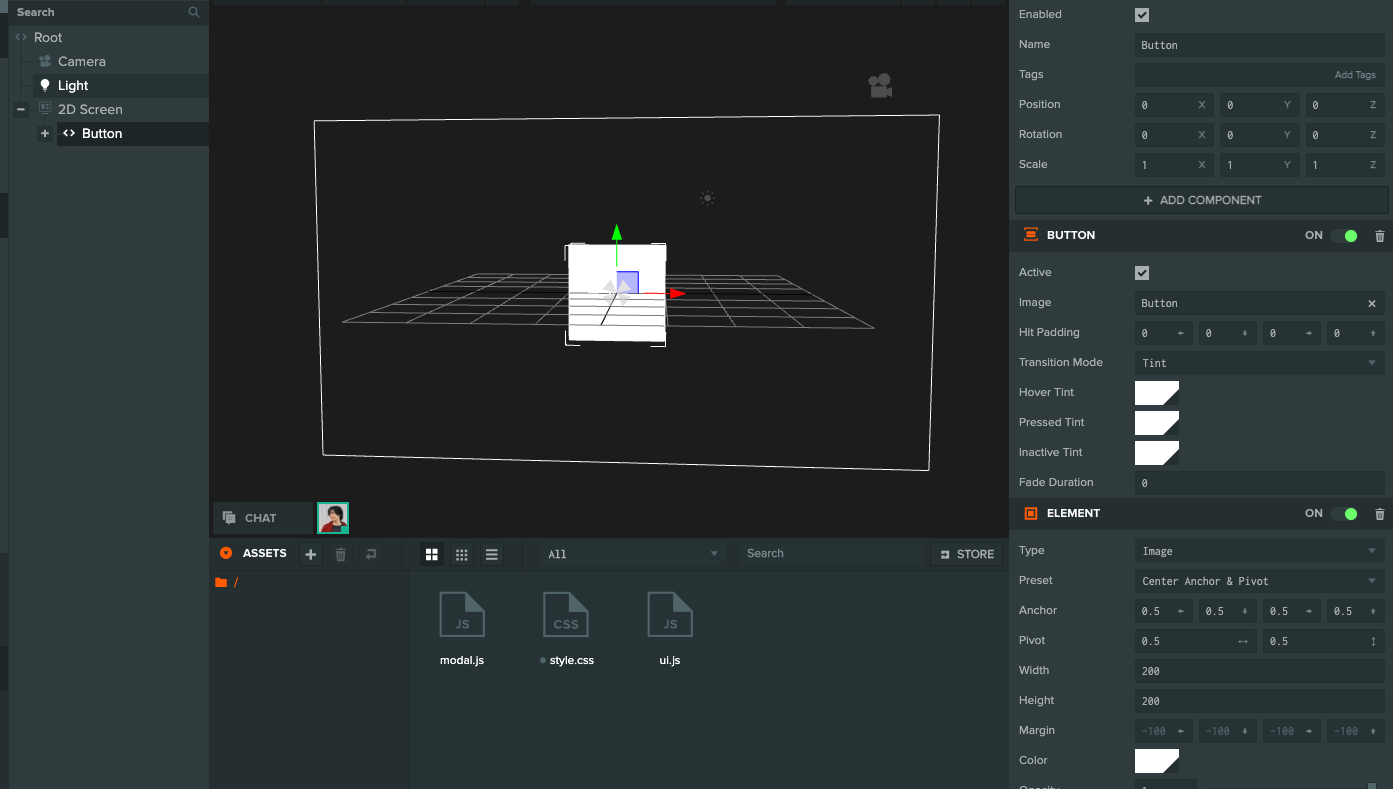
5. ボタンコンポーネントを追加します。
クリックをしたらモーダルを表示するためのボタンを追加します。
2D Screen-
Button Elementの2つを追加します。
6. クリックしたらモダルが表示される仕組みを追加します

追加したボタンに、modal.jsを追加します。
/*jshint esversion: 6, asi: true, laxbreak: true*/
class Modal extends  pc.ScriptType {
  initialize(){
      this.hideElement = {onclick: ()=> {this.hide()}}
      this.entity.element.on(pc.EVENT_MOUSEDOWN, this.show, this)
      this.entity.element.on(pc.EVENT_TOUCHSTART,this.show, this)
  }

  show(){
      const component = m('div', { class: 'main', ...this.hideElement}, [
        m('div', { class: 'title' }, 'HTML+ CSSのサンプルです'),
        m('div', { class: 'content' }, 'テストテストテストテスト')
      ])
      this.app.fire("render", component)
  }

  hide(){
      this.app.fire("clear")
  }
}

pc.registerScript(Modal)
componentについて
componentはHTMLをコンバーターで変換したものになります。
https://arthurclemens.github.io/mithril-template-converter/index.html
起動する

起動すると、HTMLが標示されていることが分かります。
次に、tailwind.cssを使ったデザインを追加します。
tailwind.cssとPlayCanvasを連携する
1. tailwind.cssをダウンロード
tailwindの公式サイトにアクセスします。
https://tailwindcss.com/
公式サイトから、tailwindのCSSをダウンロードします。
https://unpkg.com/tailwindcss@^2/dist/tailwind.min.css
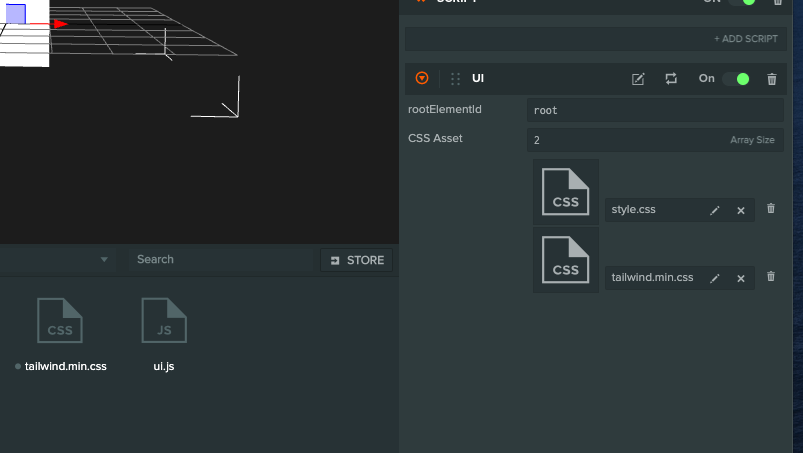
2. tailwind.cssをPlayCanvasにアップロードして、Ui.jsのスクリプト属性に追加します。
- CSSをエディターにドラッグアンドドロップし、PlayCanvasにアップロード
- CSS Assetにtailwindを追加します。
3. tailwindのサンプルをPlayCanvasに追加
Modalコンポーネントのサンプルにアクセスをします。
https://tailwindui.com/components/application-ui/overlays/modals
Codeの内容をコンバーターでMithril.jsの形式に変換します。
https://arthurclemens.github.io/mithril-template-converter/index.html
TailwindのCSSをモーダルのサンプル適用した新しいmodal.jsはこちらになります。
/*jshint esversion: 6, asi: true, laxbreak: true*/
class Modal extends pc.ScriptType {
  initialize() {
    this.hideElement = {
      onclick: () => {
        this.hide()
      },
    }
    this.entity.element.on(pc.EVENT_MOUSEDOWN, this.show, this)
    this.entity.element.on(pc.EVENT_TOUCHSTART, this.show, this)
  }
  show() {
    const component = m("div", {
      class: "fixed z-10 inset-0 overflow-y-auto"
    }, m("div", {
      class: "flex items-end justify-center min-h-screen pt-4 px-4 pb-20 text-center sm:block sm:p-0",
    }, [
      m("div", {
        class: "fixed inset-0 transition-opacity",
        "aria-hidden": "true",
      }, m("div", {
        class: "absolute inset-0 bg-gray-500 opacity-75"
      })),
      m("span", {
        class: "hidden sm:inline-block sm:align-middle sm:h-screen",
        "aria-hidden": "true",
      }, m.trust("​")),
      m("div", {
        class: "inline-block align-bottom bg-white rounded-lg text-left overflow-hidden shadow-xl transform transition-all sm:my-8 sm:align-middle sm:max-w-lg sm:w-full",
        role: "dialog",
        "aria-modal": "true",
        "aria-labelledby": "modal-headline",
      }, [
        m("div", {
          class: "bg-white px-4 pt-5 pb-4 sm:p-6 sm:pb-4"
        }, m("div", {
          class: "sm:flex sm:items-start"
        }, [
          m("div", {
            class: "mx-auto flex-shrink-0 flex items-center justify-center h-12 w-12 rounded-full bg-red-100 sm:mx-0 sm:h-10 sm:w-10",
          }, m("svg", {
            class: "h-6 w-6 text-red-600",
            xmlns: "http://www.w3.org/2000/svg",
            fill: "none",
            viewBox: "0 0 24 24",
            stroke: "currentColor",
            "aria-hidden": "true",
          }, m("path", {
            "stroke-linecap": "round",
            "stroke-linejoin": "round",
            "stroke-width": "2",
            d: "M12 9v2m0 4h.01m-6.938 4h13.856c1.54 0 2.502-1.667 1.732-3L13.732 4c-.77-1.333-2.694-1.333-3.464 0L3.34 16c-.77 1.333.192 3 1.732 3z",
          }))),
          m("div", {
            class: "mt-3 text-center sm:mt-0 sm:ml-4 sm:text-left"
          }, [
            m("h3", {
              class: "text-lg leading-6 font-medium text-gray-900",
              id: "modal-headline",
            }, " Deactivate account "),
            m("div", {
              class: "mt-2"
            }, m("p", {
              class: "text-sm text-gray-500"
            }, " Are you sure you want to deactivate your account? All of your data will be permanently removed. This action cannot be undone. ")),
          ]),
        ])),
        m("div", {
          class: "bg-gray-50 px-4 py-3 sm:px-6 sm:flex sm:flex-row-reverse",
        }, [
          m("button", {
            class: "w-full inline-flex justify-center rounded-md border border-transparent shadow-sm px-4 py-2 bg-red-600 text-base font-medium text-white hover:bg-red-700 focus:outline-none focus:ring-2 focus:ring-offset-2 focus:ring-red-500 sm:ml-3 sm:w-auto sm:text-sm",
            type: "button",
            ...this.hideElement // 追加
          }, " Deactivate "),
          m("button", {
            class: "mt-3 w-full inline-flex justify-center rounded-md border border-gray-300 shadow-sm px-4 py-2 bg-white text-base font-medium text-gray-700 hover:bg-gray-50 focus:outline-none focus:ring-2 focus:ring-offset-2 focus:ring-indigo-500 sm:mt-0 sm:ml-3 sm:w-auto sm:text-sm",
            type: "button",
            ...this.hideElement // 追加
          }, " Cancel "),
        ]),
      ]),
    ]))
    this.app.fire("render", component)
  }
  hide() {
    this.app.fire("clear")
  }
}
pc.registerScript(Modal)
ボタンにモダルを閉じるスクリプトを追加します。
button要素をクリックしたら閉じるスクリプトを追加します。
m("button", {"class":"w-full inline-flex justify-center rounded-md border border-transparent shadow-sm px-4 py-2 bg-red-600 text-base font-medium text-white hover:bg-red-700 focus:outline-none focus:ring-2 focus:ring-offset-2 focus:ring-red-500 sm:ml-3 sm:w-auto sm:text-sm","type":"button",
...this.hideElement // スクリプトを追加
}, " Deactivate "),

m("button", {"class":"mt-3 w-full inline-flex justify-center rounded-md border border-gray-300 shadow-sm px-4 py-2 bg-white text-base font-medium text-gray-700 hover:bg-gray-50 focus:outline-none focus:ring-2 focus:ring-offset-2 focus:ring-indigo-500 sm:mt-0 sm:ml-3 sm:w-auto sm:text-sm","type":"button",
...this.hideElement // スクリプトを追加

}, " Cancel ")
起動する
これでPlayCanvas EditorとCSS + HTMLを連携させることが出来ました。