PlayCanvasでカスタムポストエフェクトを作成する方法
PlayCanvasでプロジェクトを作成した際にポストエフェクトを作成したい場合があります、その時に使える便利なスクリプトとなります。Engine単体での利用についてはExamplesに用意されています。また、BloomやFXAAのポストエフェクトについては、PlayCanvasのStoreからインポートして利用することができます。
こちらのストア、GitHubに公開されているポストエフェクトをまとめたプロジェクトはこちらに作成したものがあります。
https://playcanvas.com/project/907474
この記事では、GLSLを記述し、自作のポストエフェクトを作成する際の手順を紹介致します。
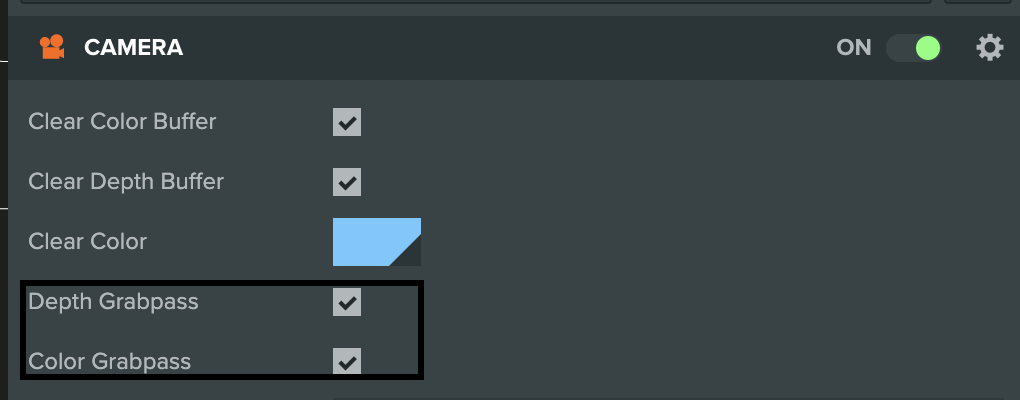
1. 準備 - カメラコンポーネントの準備
ポストエフェクトを利用するには、PlayCanvasのカメラコンポーネントを利用する必要があります。一週間前にアップデートされたPlayCanvas Editor v1.23.3からColor Grabpass, Depth Grabpassのプロパティ追加されました。こちらにチェックを入れることでPostEffectのシェーダー側でUniform値としてuniform sampler2D uSceneDepthMapとuniform sampler2D uSceneColorMapが利用できるようになります。
2. スクリプトの追加
ポストエフェクトを作成するには、この3つのファイルを利用します。
- スクリプトファイル(PlayCanvas Editorから作成)
-
バーテックスシェーダ(posteffect.vert)(2023年 5月pc.PostEffect.quadVertexShaderで代用可能になりました。) - フラグメントシェーダ(posteffect.frag)
JavaScriptファイル
class PostEffectRenderer extends pc.PostEffect {
    constructor(props) {
        const { graphicsDevice, fshader } = props;

        super(graphicsDevice);

        this.customShader = pc.createShaderFromCode(graphicsDevice, pc.PostEffect.quadVertexShader, fshader, 'CustomPostEffect', {
            aPosition: pc.SEMANTIC_POSITION
        });

    }
    render(inputTarget, outputTarget, rect) {
        this.device.scope.resolve("uColorBuffer").setValue(inputTarget.colorBuffer);
        pc.drawFullscreenQuad(
            this.device,
            outputTarget,
            this.vertexBuffer,
            this.customShader,
            rect
        );
    }
}

class CustomPostEffect extends pc.ScriptType {
    initialize() {
        const fshader = this.frag.resource;

        this.time = 0;
        this.effect = new PostEffectRenderer({
            graphicsDevice: this.app.graphicsDevice,
            vshader: pc.PostEffect.quadVertexShader,
            fshader
        });
        const queue = this.entity.camera.postEffects;
        queue.addEffect(this.effect);

        this.app.mouse.on(pc.EVENT_MOUSEMOVE, (e) => {
            this.app.graphicsDevice.scope.resolve("iMouse").setValue([e.x, e.y]);
        });


        this.on("state", function (enabled) {
            if (enabled) {
                queue.addEffect(this.effect);
            } else {
                queue.removeEffect(this.effect);
            }
        });
        this.on("destroy", function () {
            queue.removeEffect(this.effect);
        });
    }
    update(dt) {
        this.time += dt;
        this.app.graphicsDevice.scope.resolve("iTime").setValue(this.time);
        this.app.graphicsDevice.scope.resolve("iTimeDelta").setValue(dt);
    }
}
pc.registerScript(CustomPostEffect)
CustomPostEffect.attributes.add("frag", { type: "asset" });
バーテックスシェーダー (2023年 5月 pc.PostEffect.quadVertexShader で代用可能になりました。)
pc.PostEffect.quadVertexShader で代用可能になりました。)詳細はこちら
https://developer.playcanvas.com/en/api/pc.PostEffect.html#quadVertexShader
#version 300 es
precision highp float;

in vec2 aVertexPosition;
out vec2 vUv0;

void main(void){
    gl_Position = vec4(aVertexPosition, 0.0, 1.0);
    vUv0 = (aVertexPosition.xy + 1.0) * 0.5;
}
フラグメントシェーダ
基本的にはこちらを記述していきます。
(今回は小さいコードとなっております)
precision highp float;
uniform vec4 uScreenSize;
uniform vec2 iMouse;

uniform float iTime;
uniform sampler2D uSceneColorMap; // Grab Texture without cubemap;
uniform sampler2D uSceneDepthMap; // Depth Map
uniform sampler2D uColorBuffer; // Grab Texture

varying vec2 vUv0;

void main(){
  float t = sin(iTime);
  vec4 color = texture2D(uSceneColorMap, vUv0);
  gl_FragColor = vec4(color * t);
}
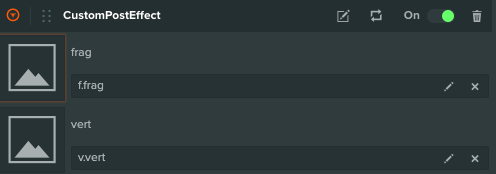
PlayCanvas Editorからカメラのスクリプト属性に バーテックスシェーダ とフラグメントシェーダーを設定

fragおよび に対してカスタムシェーダーを追加することで利用することができます。vert
GitHubのExamplesでは、フラグメントシェーダとバーテックスシェーダについては文字列としてそのまま定義されている場合がありますが今回はresourcesとして利用します。
※補足(分かること)
Engineのソースコードを見るとuDepthMap、texture_grabPassも追加されるようです。(こちらはduprecatedですが、まだ利用はできます)
Uniformの値についてはLaunchなどでPlayCanvas実行中にコンソールでこちらを見ると色々な値確認ができます。
詳細はこちらの記事を御覧ください
// this.app.graphicsDevice.scope.variables
pc.app.graphicsDevice.scope.variables // Uniform値を取得
WebGL2で実行される場合には varyingの記述はinなど、WebGL2の記述に置き換わります。
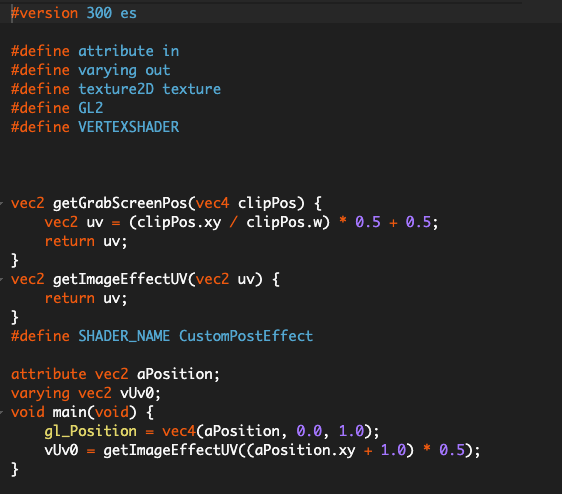
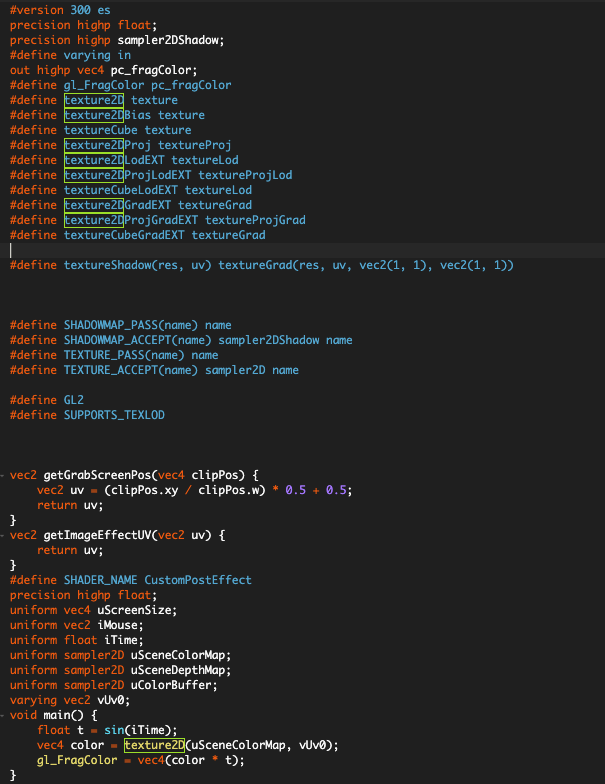
Spector.jsのデバッガーでの確認
Spector.jsを利用して、PlayCanvasが利用するWebGLのコードを確認するとこのようなコードとなります。


