
TencentCloudビデオ通話SDKを使ってオンライン会議サービスをつくってみました。
解決したいこと
オンラインミーティングやオンライン飲み会って、時間どおりに人が集まらなくてなかなかスタートできない時ってありますよね?
定刻に始まらない理由は色々とあると思いますが、ミーティングのURLを探している間に時間が過ぎちゃった、とか、いつものことだらかどうせまだ始まらないだろう...とか、あっ・ミーティング忘れてた!というのもありがちだと思います。
解決方法
これを解決するために、TencentCloudを使用した「必ず定刻に始まるオンラインミーティングサービス」を作ってみました。
- ミーティングの開始時間になったら、端末にPushコール&ウェークアップ着信
強制的に呼び出しがかかるので、もう電話に出るしかありません。着信に応答するとその場でビデオミーティングが始まります。あれこれ面倒な手間はいりません。 - 携帯電話やLINE通話みたいにネイティブUIで着信
端末がスリープ状態だったり、アプリを終了していても大丈夫です。圏外やコールドOFFでない限り着信するので見逃しません。もし、その時に応答できなかったとしても、アプリ上のミーティングルームから未参加のメンバーに対して追っかけコールもできます。
つくったもの
今回、端末機能はTencentCloudビデオ通話SDKとCallKitを組み合わせて実装しました。iPadでもCallKitが使えるためiPhoneと同様に電話UIで着信します。
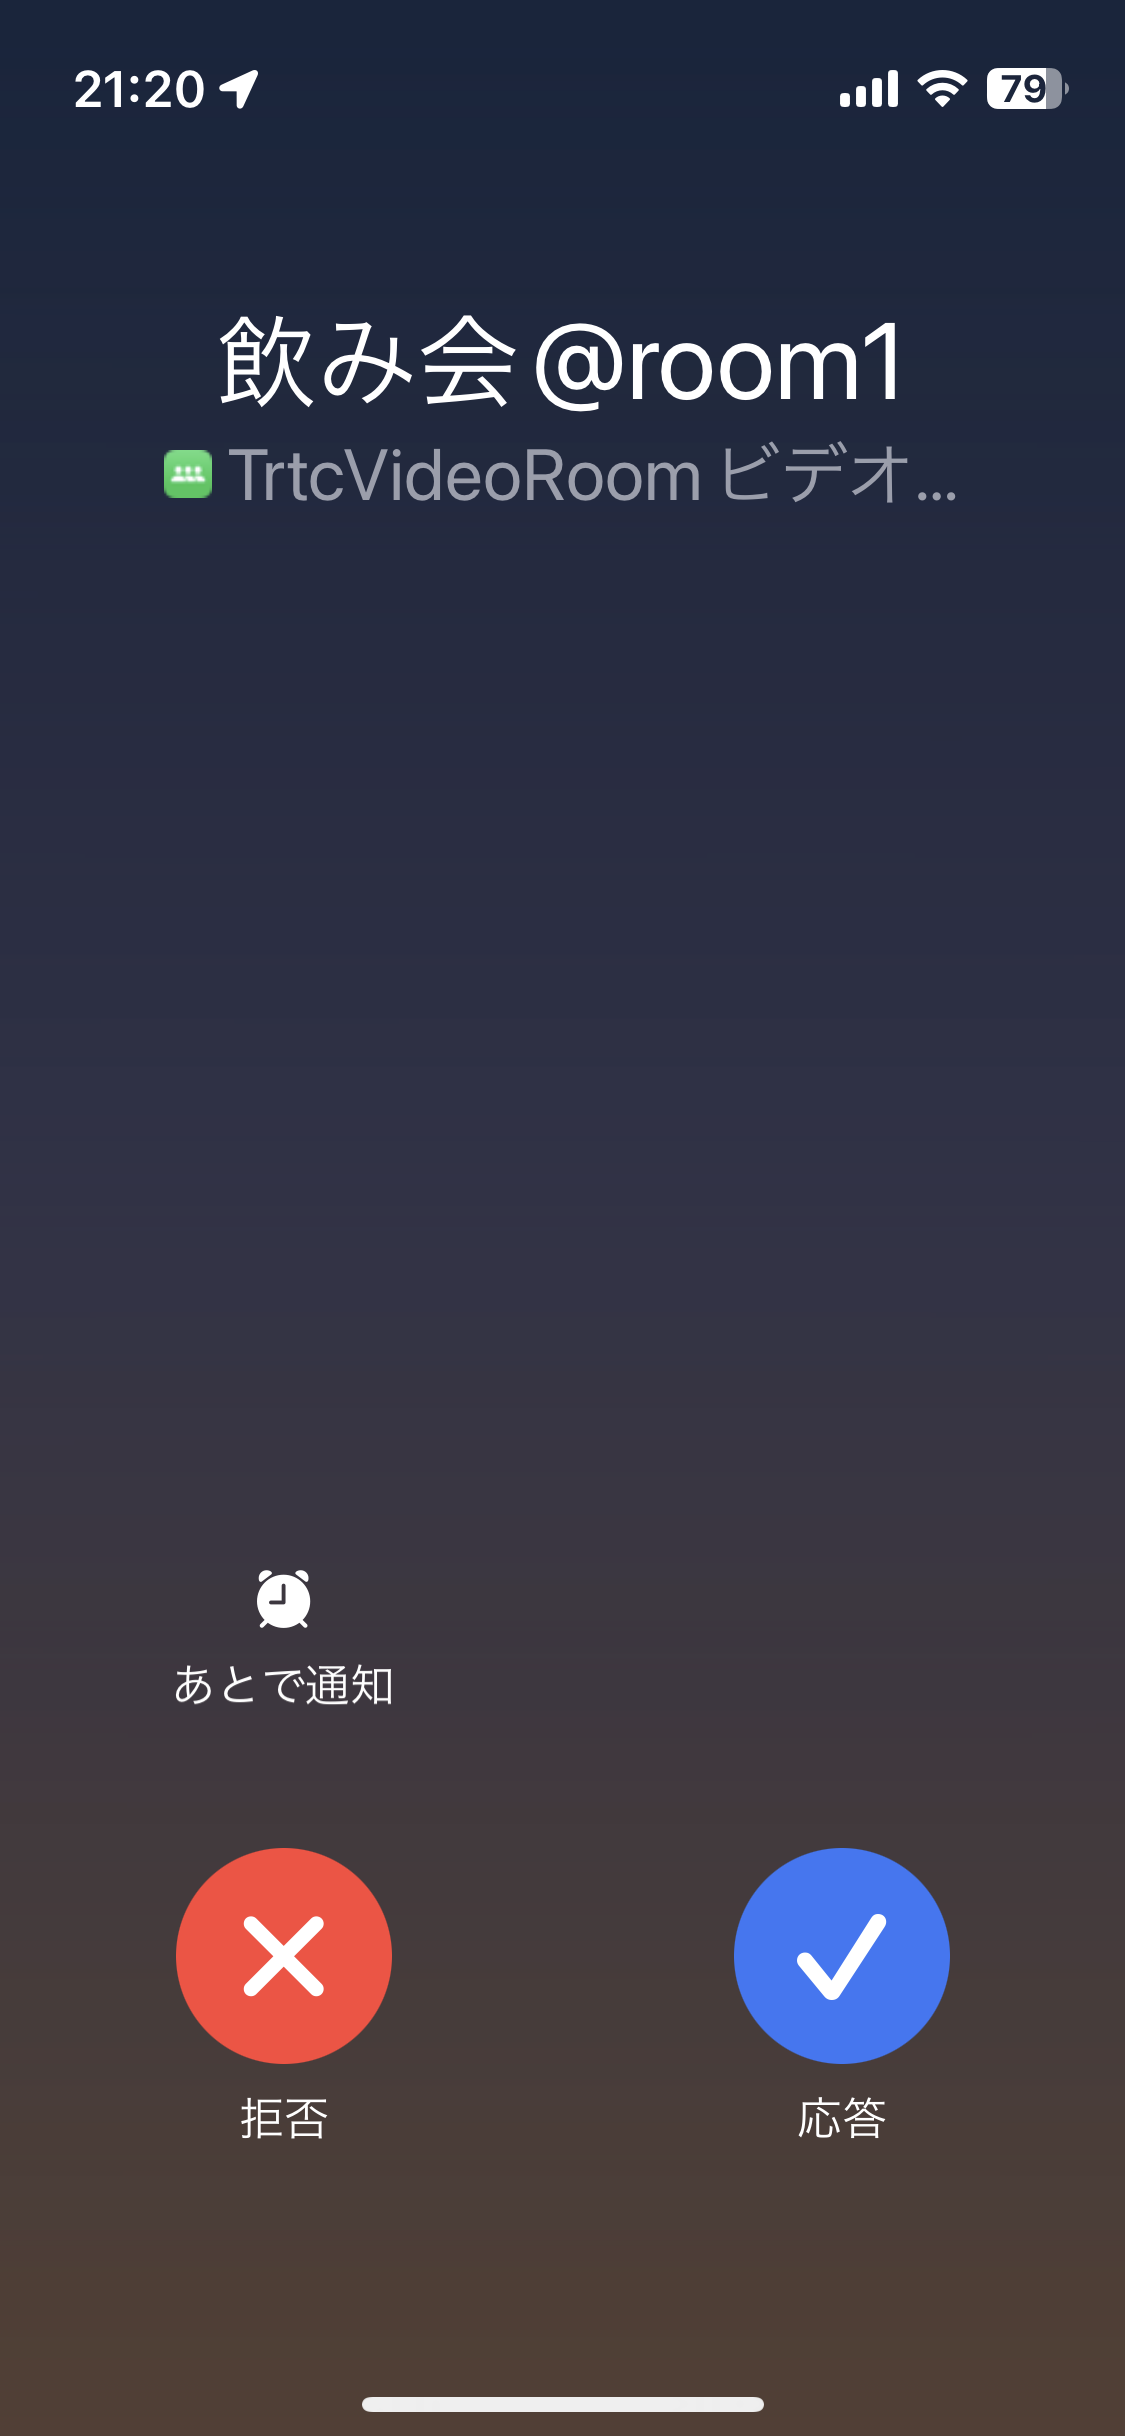
着信から応答までの流れ
-
スリープから復帰
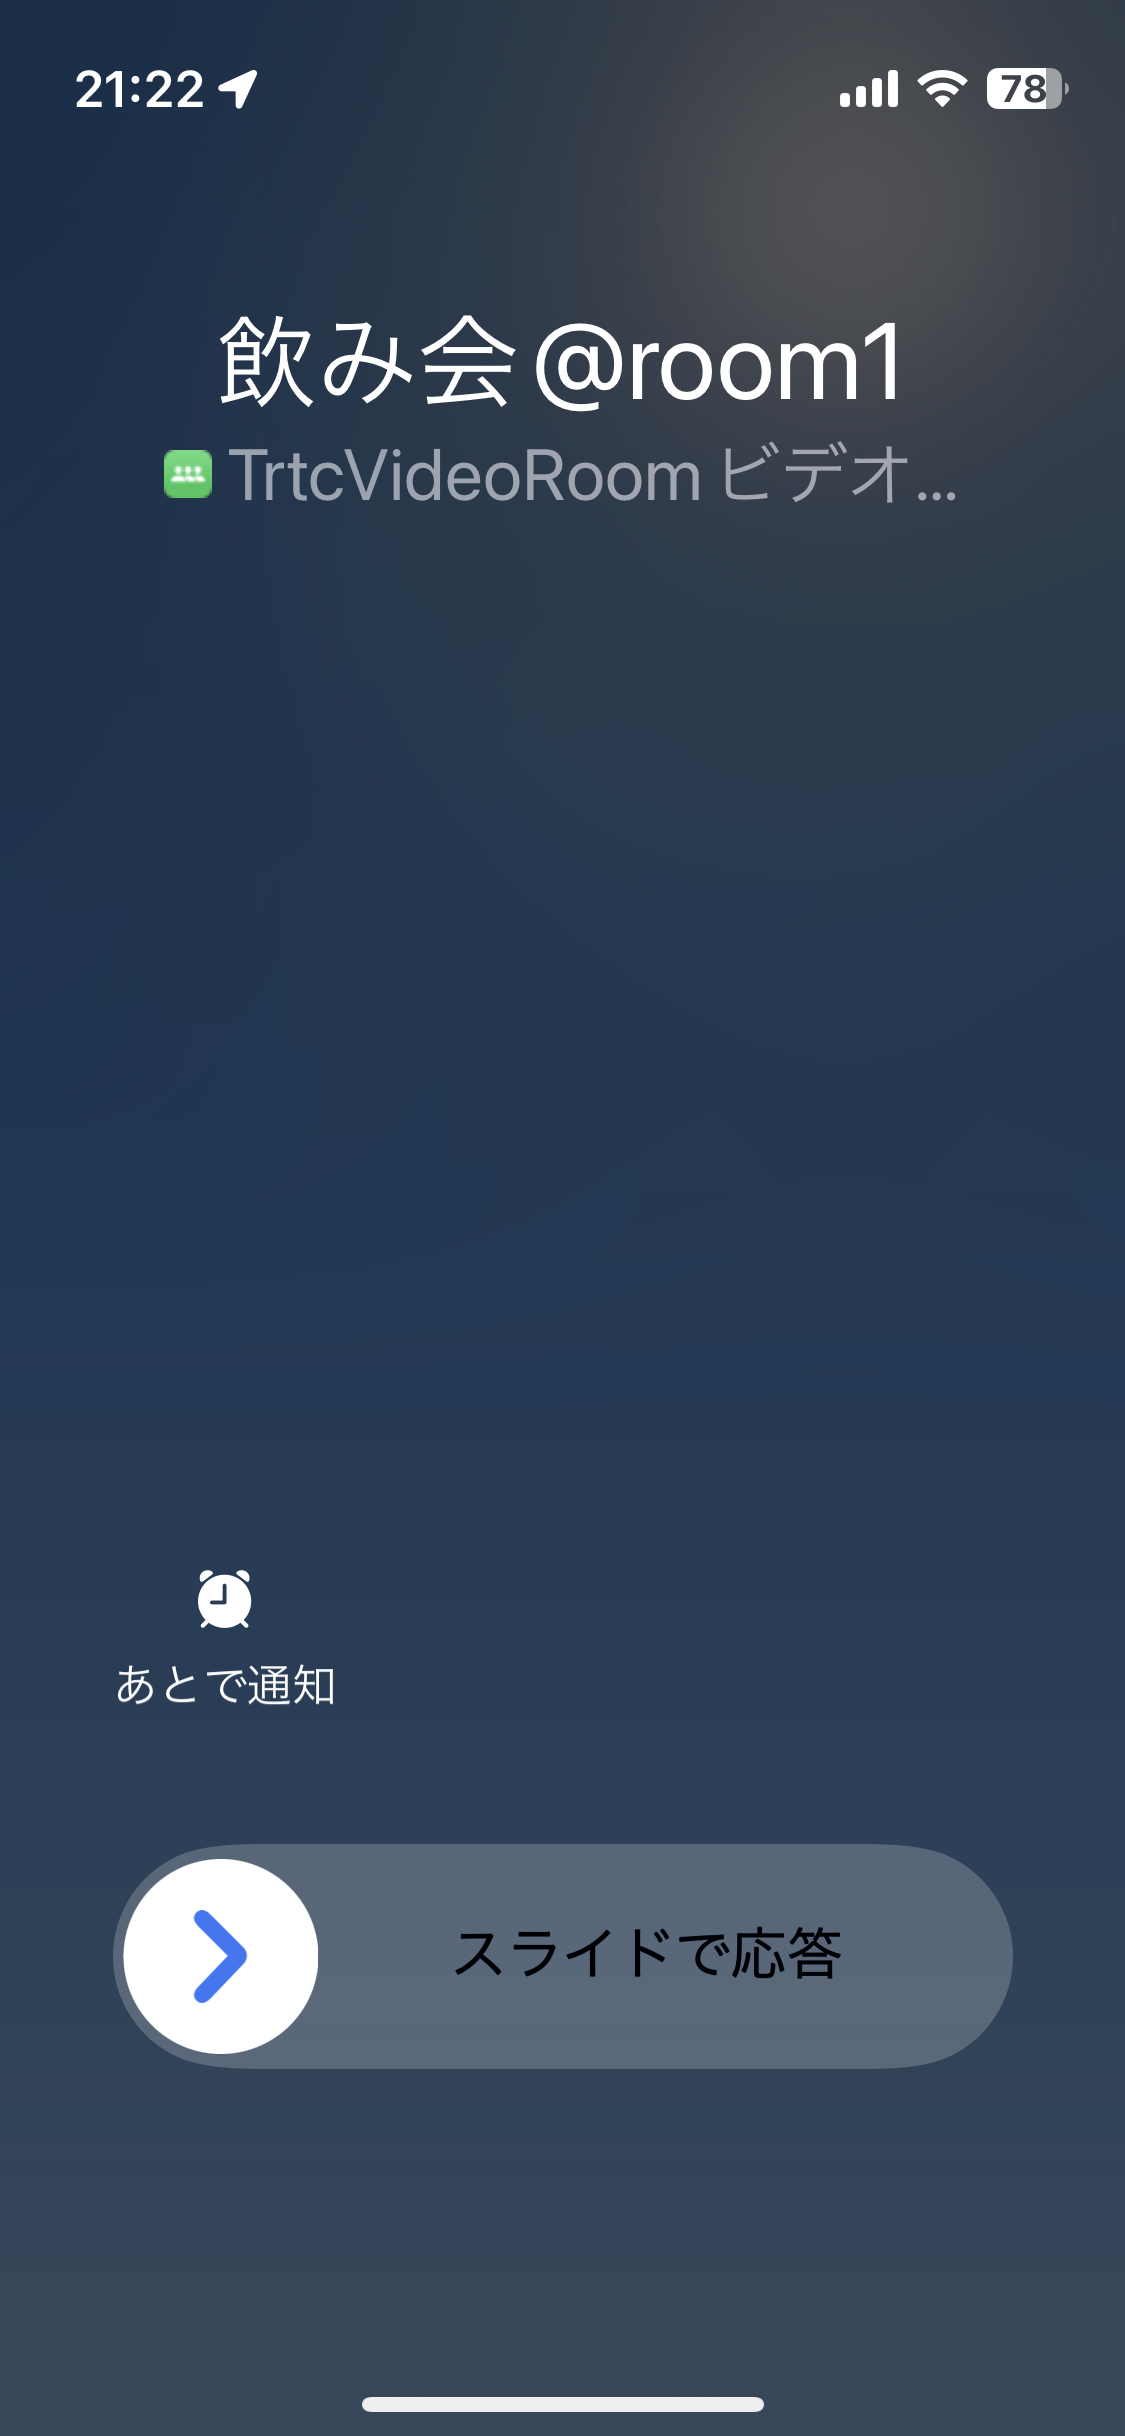
-
スライドで応答
-
応答をタップ

-
オンラインミーティングが始まります
iPadだとこんな感じです。↓

今回の実装機能
- 通話呼び出し
- Pushコール&ウェークアップ着信
- 特定メンバーへの追っかけ発信
- ミーティング管理
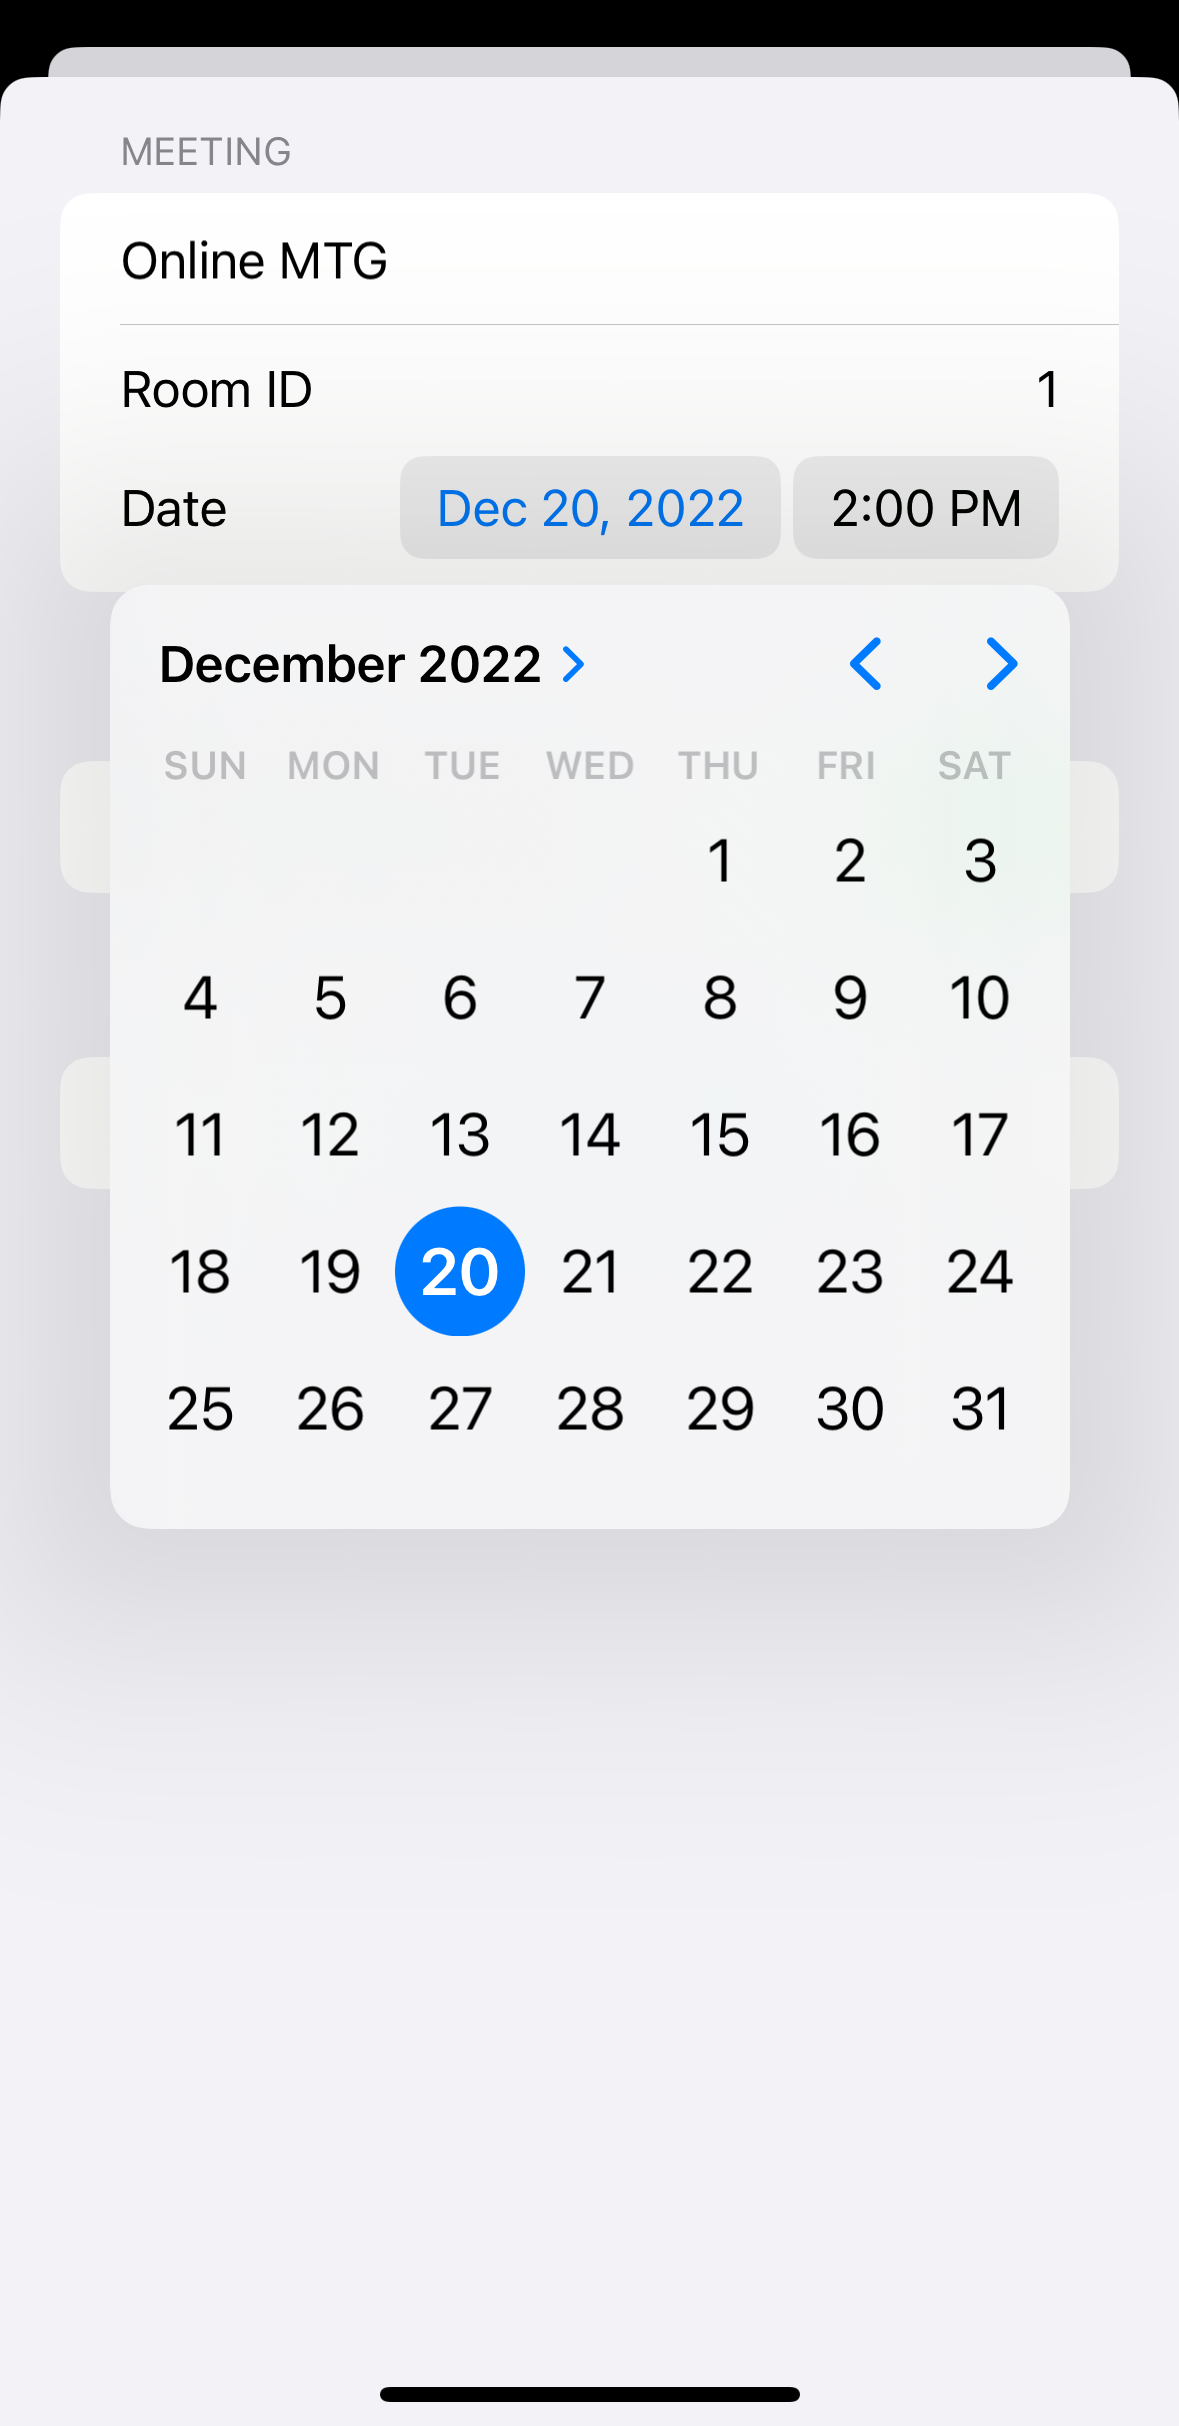
- スケジュール作成
- スケジュール一覧表示
- コミュニケーション機能
- 参加メンバーの一覧
- 音声会話
- ビデオ会話
- テキストチャット
実装のポイント
クラウド側と端末側の主な実装内容について説明します。
- 音声・ビデオ通話 - TencentCloud
- Pushコール - AWS + Apple VoIP Services
- 端末アプリ - SwiftUI + TencentCloudビデオ通話SDK
今回のソースコード一式はGitHubに上げておきました。
TRTC SDKの基本的な使用方法は前回の記事を参考にしてください。
システム構成
オンラインミーティング機能はTencent Real-Time Communication(TRTC)で音声通話、ビデオ通話、テキストチャット機能が一体で提供されています。TRTC SDKを使うことでTRTCの機能を自分のアプリケーションに組み込むことができます。
PushコールはAWSのSNS(Simple Notification Service)でApple VoIP Serviceが使えたのでAWSとTencentCloudを併用したシステム構成にしました。

Pushコール(VoIP Push)の実装
端末側とクラウド側でそれぞれ実装しています。
端末側の実装
- ApplicationDelegate
スリープからのウェークアップに対応するために、CallKitのdelegateをApplicationDelegateに実装します。今回の端末アプリはSwiftUIで実装したため、SwiftUIの@UIApplicationDelegateAdaptorを使用してプロトコルに適合させました。delegateはViewModel内に実装しSwiftUIの環境変数としてインスタンスを保持し、イベントの発生とともにUIを更新します。
@main
struct TrtcVideoRoomApp: App {
    @UIApplicationDelegateAdaptor(TrtcViewModel.self) var viewModel

    var body: some Scene {
        WindowGroup {
            ContentView()
                .environmentObject(viewModel)
        }
    }
}
- CallKitのPKPushRegistryDelegateの実装例
PKPushCredentialsで端末のトークンが通知されるので、AWSのSNSエンドポイントに登録します。PushコールはdidReceiveIncomingPushWithで通知されます。SNSエンドポイントに登録したユーザデータはpayloadに入っているので、メッセージやルームIDを取り出し、TencentCloudにログインします。
extension TrtcViewModel: PKPushRegistryDelegate {
    func pushRegistry(_ registry: PKPushRegistry, didUpdate pushCredentials: PKPushCredentials, for type: PKPushType) {
        let deviceToken = pushCredentials.token.map { String(format: "%02.2hhx", $0) }.joined()
        print("*** device token: \(deviceToken)")

        if defaults.awsEnabled {
            // register device token on AWS
            registerDeviceToken(deviceToken: deviceToken)
        }
    }

    func pushRegistry(_ registry: PKPushRegistry, didInvalidatePushTokenFor type: PKPushType) {
        print("*** didInvalidatePushTokenFor")
    }

    func pushRegistry(_ registry: PKPushRegistry, didReceiveIncomingPushWith payload: PKPushPayload, for type: PKPushType) {
        print("*** didReceiveIncomingPushWith")
        let dictionary = payload.dictionaryPayload as NSDictionary
        let aps = dictionary["aps"] as! NSDictionary
        let alert = aps["alert"]
        if let message = alert as? String {
            callModel.IncomingCall(true, displayText: "\(message)@room\(defaults.roomId)")
        } else {
            callModel.IncomingCall(true, displayText: "room\(defaults.roomId)")
        }
        enterRoom(userId: defaults.userId, roomId: defaults.roomId)
    }
}
ルームメンバーとデバイストークンとの紐付け
CallKitで払い出されるデバイストークンとユーザーの紐付けはDBを用意するのが良いと思いますが、今回は手軽な方法としてAWSのSNSエンドポイント内のユーザーデータに保存しました。ユーザーデータは文字列しか格納できませんが、JSON文字列にしておくことで階層的にデータを保存することができます。

- Lambda側の実装コード例
TRTC SDKのユーザーIDから該当するエンドポイントを検索(力技でループ検索w)して、AWS SNS経由でVoIP Pushを送信します。
import { SNSClient, PublishCommand, ListEndpointsByPlatformApplicationCommand } from "@aws-sdk/client-sns";
const client = new SNSClient();
const snsArn = 'arn:aws:sns:XXX/APNS_VOIP_SANDBOX/TrtcVideoRoom';

export const handler = async(event) => {
    try {
        const result = await pushCall(event.userIds, event.message);
        const response = {
            statusCode: 200,
            body: JSON.stringify(result),
        };
        return response;
    } catch (error) {
        const response = {
            statusCode: 400,
            body: JSON.stringify(error),
        };
        return response;
    }
};

async function pushCall(userIds, message) {
    const response = await listEndpoints();
    for (const endpoint of response.Endpoints) {
        const userData = JSON.parse(endpoint.Attributes.CustomUserData);
        for (const userId of userIds) {
            if (userData.userId == userId) {
                await publish(endpoint.EndpointArn, message);
            }
        }
    }
    return 'OK';
}

async function listEndpoints() {
    const input = {
        'PlatformApplicationArn': snsArn
    };
    const command = new ListEndpointsByPlatformApplicationCommand(input);
    const response = await client.send(command);
    return response;
}

async function publish(arn, message) {
    const messageAttributes = {
        'AWS.SNS.MOBILE.APNS.PUSH_TYPE': {
            'DataType': 'String',
            'StringValue': 'voip'
        }
    };
    const input = {
        'TargetArn': arn,
        'Message': message,
        'Subject': 'subject1',
        'MessageAttributes': messageAttributes
    };
    const command = new PublishCommand(input);
    const response = await client.send(command);
    return response;
}
- 端末側の実装コードです
AWS API Gateway経由でVoIP Pushを送信します。
import Foundation

let apiGateway = MY_apiGateway

struct AwsResponseHeader: Codable {
    let statusCode: Int
    let body: String
}

struct PushCallRequest: Codable {
    var command: String = "PushCall"
    let userIds: [String]
    let message: String
}
struct PushCallResponse: Codable {
}

class AwsModel {
    func pushCall(userIds: [String], message: String) async throws {
        // request parameter
        let input = PushCallRequest(userIds: userIds, message: message)
        let encoder = JSONEncoder()
        let json = try encoder.encode(input)

        // post request
        let data = try await HttpModel.shared.post(urlString: apiGateway, body: json)
    }
}
スケジュールの日時が到来したらPushコールを発火
端末アプリで設定したミーティングスケジュールの時刻にメンバーにPushコールを発生させます。
- クラウド側の実装例
発火のタイミングはAWSのEventBridgeのタイマーイベントでDynamoDBに保存されたスケジュール情報を参照し、日時が一致していれば(タイマー誤差があるのでマージンをもたせておく)、ルームIDに紐づいているメンバーの端末へVoIP Pushを送ります。通知後はスケジュールのステータスを「done」に変更してスケジュールを完了状態にします。
import { SNSClient, PublishCommand, ListEndpointsByPlatformApplicationCommand } from "@aws-sdk/client-sns";
const client = new SNSClient();
const snsArn = 'arn:aws:sns:XXX/APNS_VOIP_SANDBOX/TrtcVideoRoom';

import { DynamoDBClient, ScanCommand } from "@aws-sdk/client-dynamodb";
import { UpdateCommand } from "@aws-sdk/lib-dynamodb";
const dynamoClient = new DynamoDBClient();

export const handler = async(event) => {
    try {
        const result = await OnTimer();
        const response = {
            statusCode: 200,
            body: JSON.stringify(result),
        };
        return response;
    } catch (error) {
        const response = {
            statusCode: 400,
            body: JSON.stringify(error),
        };
        return response;
    }
};

async function OnTimer() {
    const response = await scanUpcomingMeetings();

    var count = 0;
    for (const item of response.Items) {
        const idString = item.id.N;
        const roomId = item.roomId.S;
        const subject = item.subject.S;
        const startDateString = item.startDate.S;
        const startDate = parseInt(startDateString, 10);

        const date = new Date();
        const now = date.getTime();
        const elapsed = now - startDate;
        const timeMargin1 = 10 * 60 * 1000; // 10 minutes ago
        const timeMargin2 = 1 * 60 * 1000; // 1 minutes later
        if (elapsed <= timeMargin1 && -elapsed <= timeMargin2) {
            // VOIP Push
            await pushCallByRoomId(roomId, subject);

            // mark done
            const id = parseInt(idString, 10);
            await updateMeetingStatus(id, 'done');
            count++;
        }
    }
    return { count: count };
}

async function pushCallByRoomId(roomId, message) {
    const response = await listEndpoints();
    for (const endpoint of response.Endpoints) {
        const userData = JSON.parse(endpoint.Attributes.CustomUserData);
        if (userData.roomId == roomId) {
            await publish(endpoint.EndpointArn, message);
        }
    }
    return 'OK';
}

async function scanUpcomingMeetings() {
    const params = {
        FilterExpression: "meetingStatus = :topic",
        ExpressionAttributeValues: {
            ":topic": { S: "upcoming" },
        },
        TableName: "TrtcVideoMeeting",
    };

    const command = new ScanCommand(params);
    const response = await dynamoClient.send(command);
    return response;
}

async function updateMeetingStatus(id, meetingStatus) {
    const params = {
        Key: { id: id },
        UpdateExpression: 'set #a = :x',
        ExpressionAttributeNames: {
            '#a': 'meetingStatus'
        },
        ExpressionAttributeValues: {
            ':x': meetingStatus
        },
        TableName: "TrtcVideoMeeting",
    };

    const command = new UpdateCommand(params);
    const response = await dynamoClient.send(command);
    return response;
}
端末側のUI実装
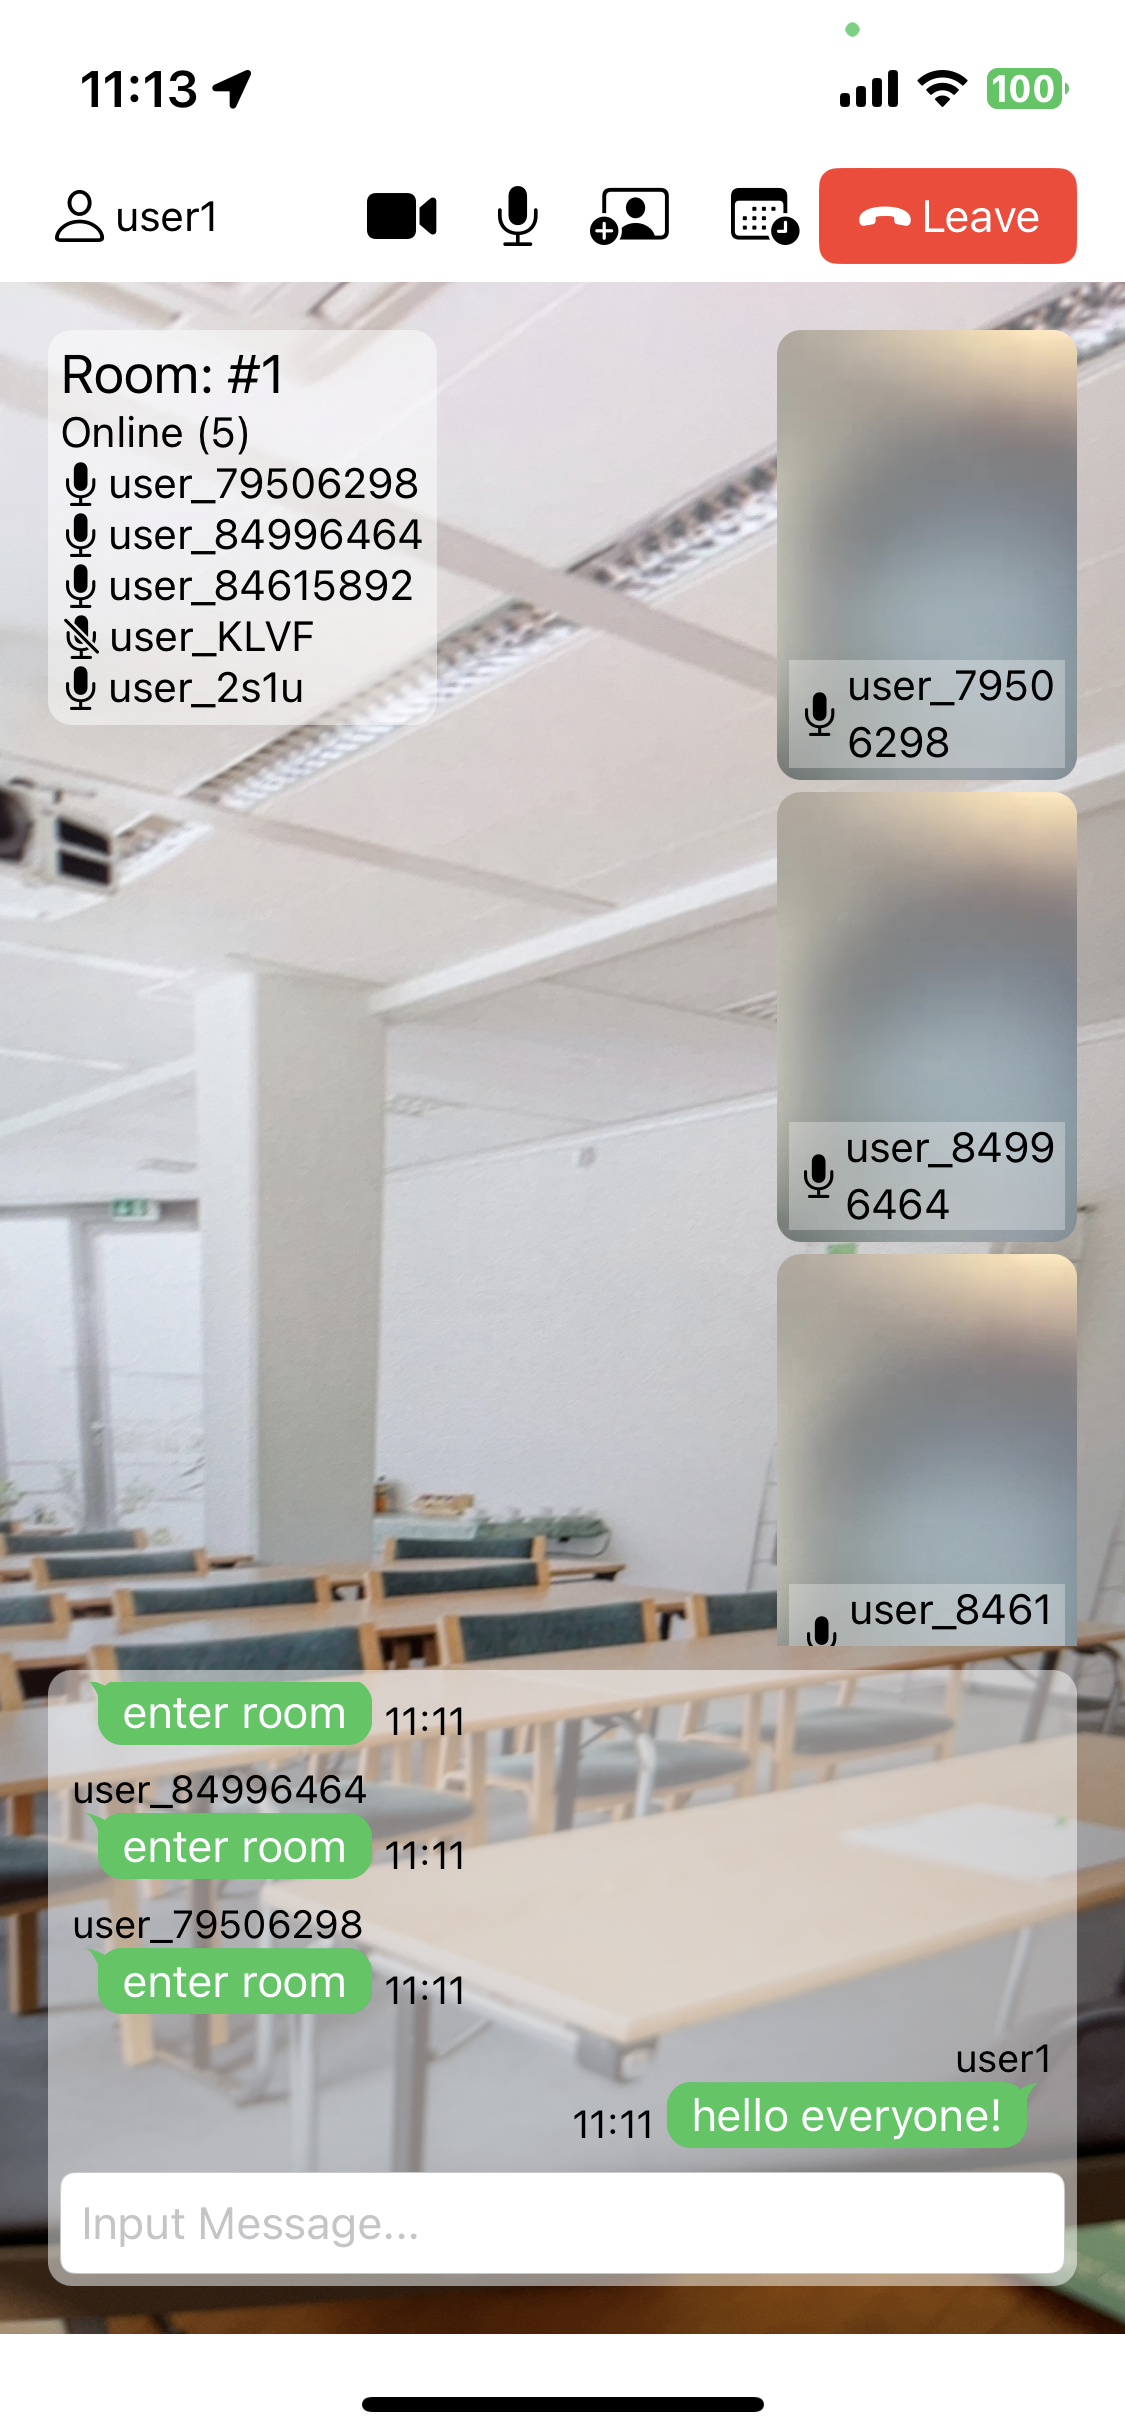
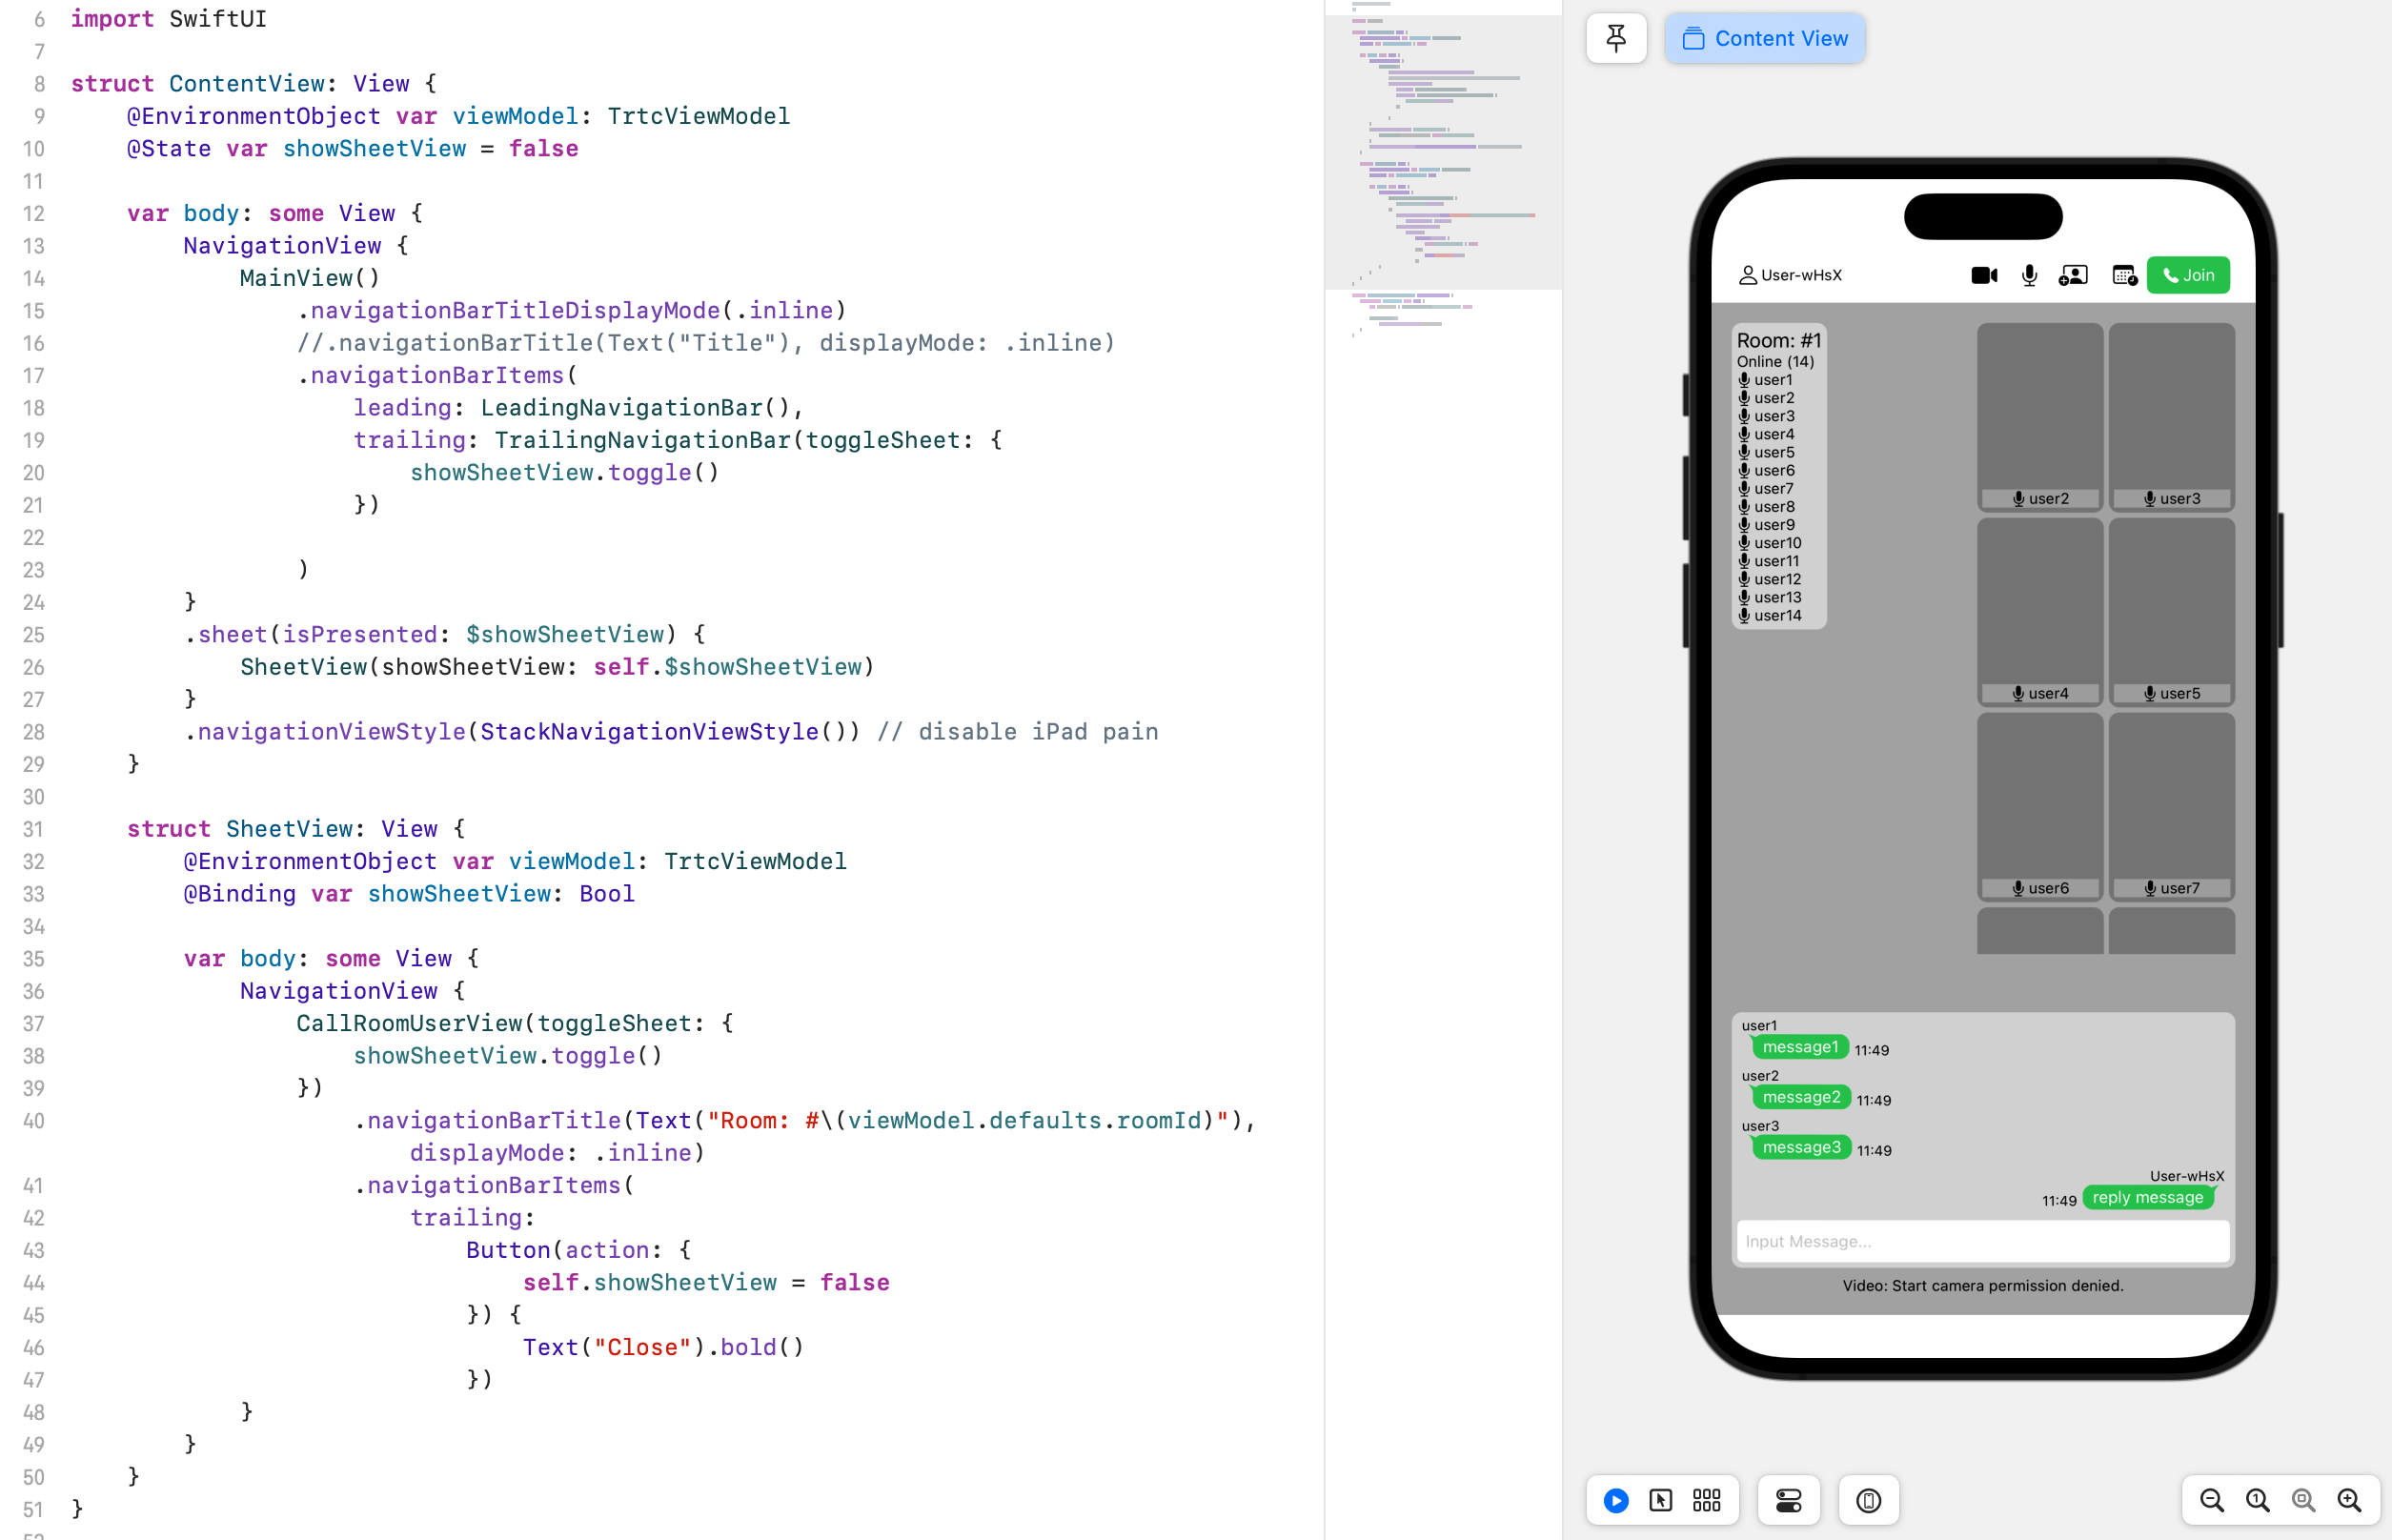
前回練習用に作成したSwiftUIアプリをベースに機能を追加しました。ルームの参加者の一覧、ビデオ映像一覧、チャットビューを配置しています。
追っかけコールUI
Pushコールがかかったのにもかかわらず、まだルームに参加していないメンバーへ追っかけコールができます。メンバーの参加状況はTRTC SDKのルームイベントを拾ってUIに反映します。特定のメンバーをコールするか、まとめて複数のメンバーを呼び出せます。

チャットビュー
以前作成した吹き出しテキストをScrollViewに入れてチャットビューを作成。テキストメッセージの送受信処理はTRTC SDKのCustomCmdMsgを使うと数行で実装できます。
- テキストメッセージの送信
    func sendMessage(text: String) {
        do {
            let userId = defaults.userId
            let msg = CustomCmdMsg(userId: userId, text: text)
            let encoder = JSONEncoder()
            let json = try encoder.encode(msg)
            trtcCloud.sendCustomCmdMsg(1, data: json, reliable: false, ordered: false)
        } catch {
            errMessage = error.localizedDescription
        }
    }
- テキストメッセージ受信
    func onRecvCustomCmdMsgUserId(_ userId: String, cmdID: Int, seq: UInt32, message: Data) {
        print("*** onRecvCustomCmdMsgUserId: userId: \(userId), cmdID: \(cmdID), seq: \(seq)")
        do {
            let decoder = JSONDecoder()
            let msg = try decoder.decode(CustomCmdMsg.self, from: message)
            room.messages.append(RoomMessage(userName: msg.userId, text: msg.text))
        } catch {
            errMessage = error.localizedDescription
        }
    }
これで完成です。
おまけ
また、複数人の通話アプリのデバッグする際は端末をたくさん用意する必要がありますが、それも限界があるので、TRTC SDKに入っているWeb/base-js/index.htmlサンプルがめっちゃ役立ちました。今回は参加人数に応じてビデオViewの列数を変えるUIを実装をしたのでその確認がやりやすかったです。
- TRTC SDKに入っているWeb版サンプルの動作イメージ

まとめ
TRTC SDKは他のサービスやライブラリーとの依存性がなく、要件にあった個々のアプリケーションやサービスに組み込みやすいと思います。今回はAWSやApple Push Servicesなどのクラウドサービスと、端末側はSwift/SwiftUIで実装しましたがスムーズに音声ビデオ通話機能を組み込むことができました。
開発用に無料枠が用意されているのも嬉しい点です。デバッグ中にルームセッションを開放せずに終了することが何度かありましたが、自動的にセッションがパージされるので無料枠を消費することなく安心してデバッグすることができました。アプリの開発段階でもTRTCクラウド、TRTC SDKともに安定動作していたのが印象的です。
まだまだTencentCloudの豊富な機能を使い切れていないので、これからも色々な機能を実装していきたと思います!
作成物一式