目的と前提
認証/認可について少しづつですが備忘録としてまとめようシリーズ2つめです。
前回はSAML2.0の仕様についてまとめてみました。
https://qiita.com/yuna-s/items/8aa318ca5426c3d9c7e6
今回は、Nodejsを使ったRPの作成[1]です。
OpenID Connectのアクセストークン取得まで実装しています。
(UserInfoを取得するところは実装していません)
IdPの作成にはオープンソースソフトのOpenAM[2]を使用しています。
認証/認可、基礎的なOpenID Connectの知識があることを前提としています。
環境
macOS Catalina v10.15.5
OpenAM 14.5.1 Build d8b8db3cac (2020-March-11 23:25)
node v13.13.0
利用モジュール
"dependencies": {
"cookie-parser": "~1.4.4",
"debug": "~2.6.9",
"express": "~4.16.1",
"http-errors": "~1.6.3",
"jade": "~1.11.0",
"morgan": "~1.9.1",
"passport-openidconnect": "0.0.2"
}
OpenAMの起動と初期設定
IdPはDockerで提供されているOpenAMを利用して作成します。
OpenAMのイメージはDockerHubよりゲットできます。
$ docker pull openidentityplatform/openam
$ docker run -h openam-01.domain.com -p 8080:8080 --name openam-01 openidentityplatform/openam
これでOpenAMが起動したはずです。
念のため、起動しているか確認してみます。
下記のような表示が出れば、問題なく起動できています。
$ docker container ls
CONTAINER ID        IMAGE                         COMMAND                  CREATED             STATUS              PORTS                    NAMES
91d60b3e3538        openidentityplatform/openam   "/usr/local/tomcat/b…"   2 hours ago         Up 2 hours          0.0.0.0:8080->8080/tcp   openam-01
それではOpenAMにアクセスしてみましょう。
http://localhost:8080/openam
初回起動では設定事項がいろいろあるので、私は、OpenAMコンソーシアムの資料を参考に設定しました。
※設定オプションは、カスタム設定ではなく、デフォルト設定を選択しました。
https://www.openam.jp/wp-content/uploads/techtips_vol1.pdf
IdPの作成
まずOpenAMにamAdminでログインします。
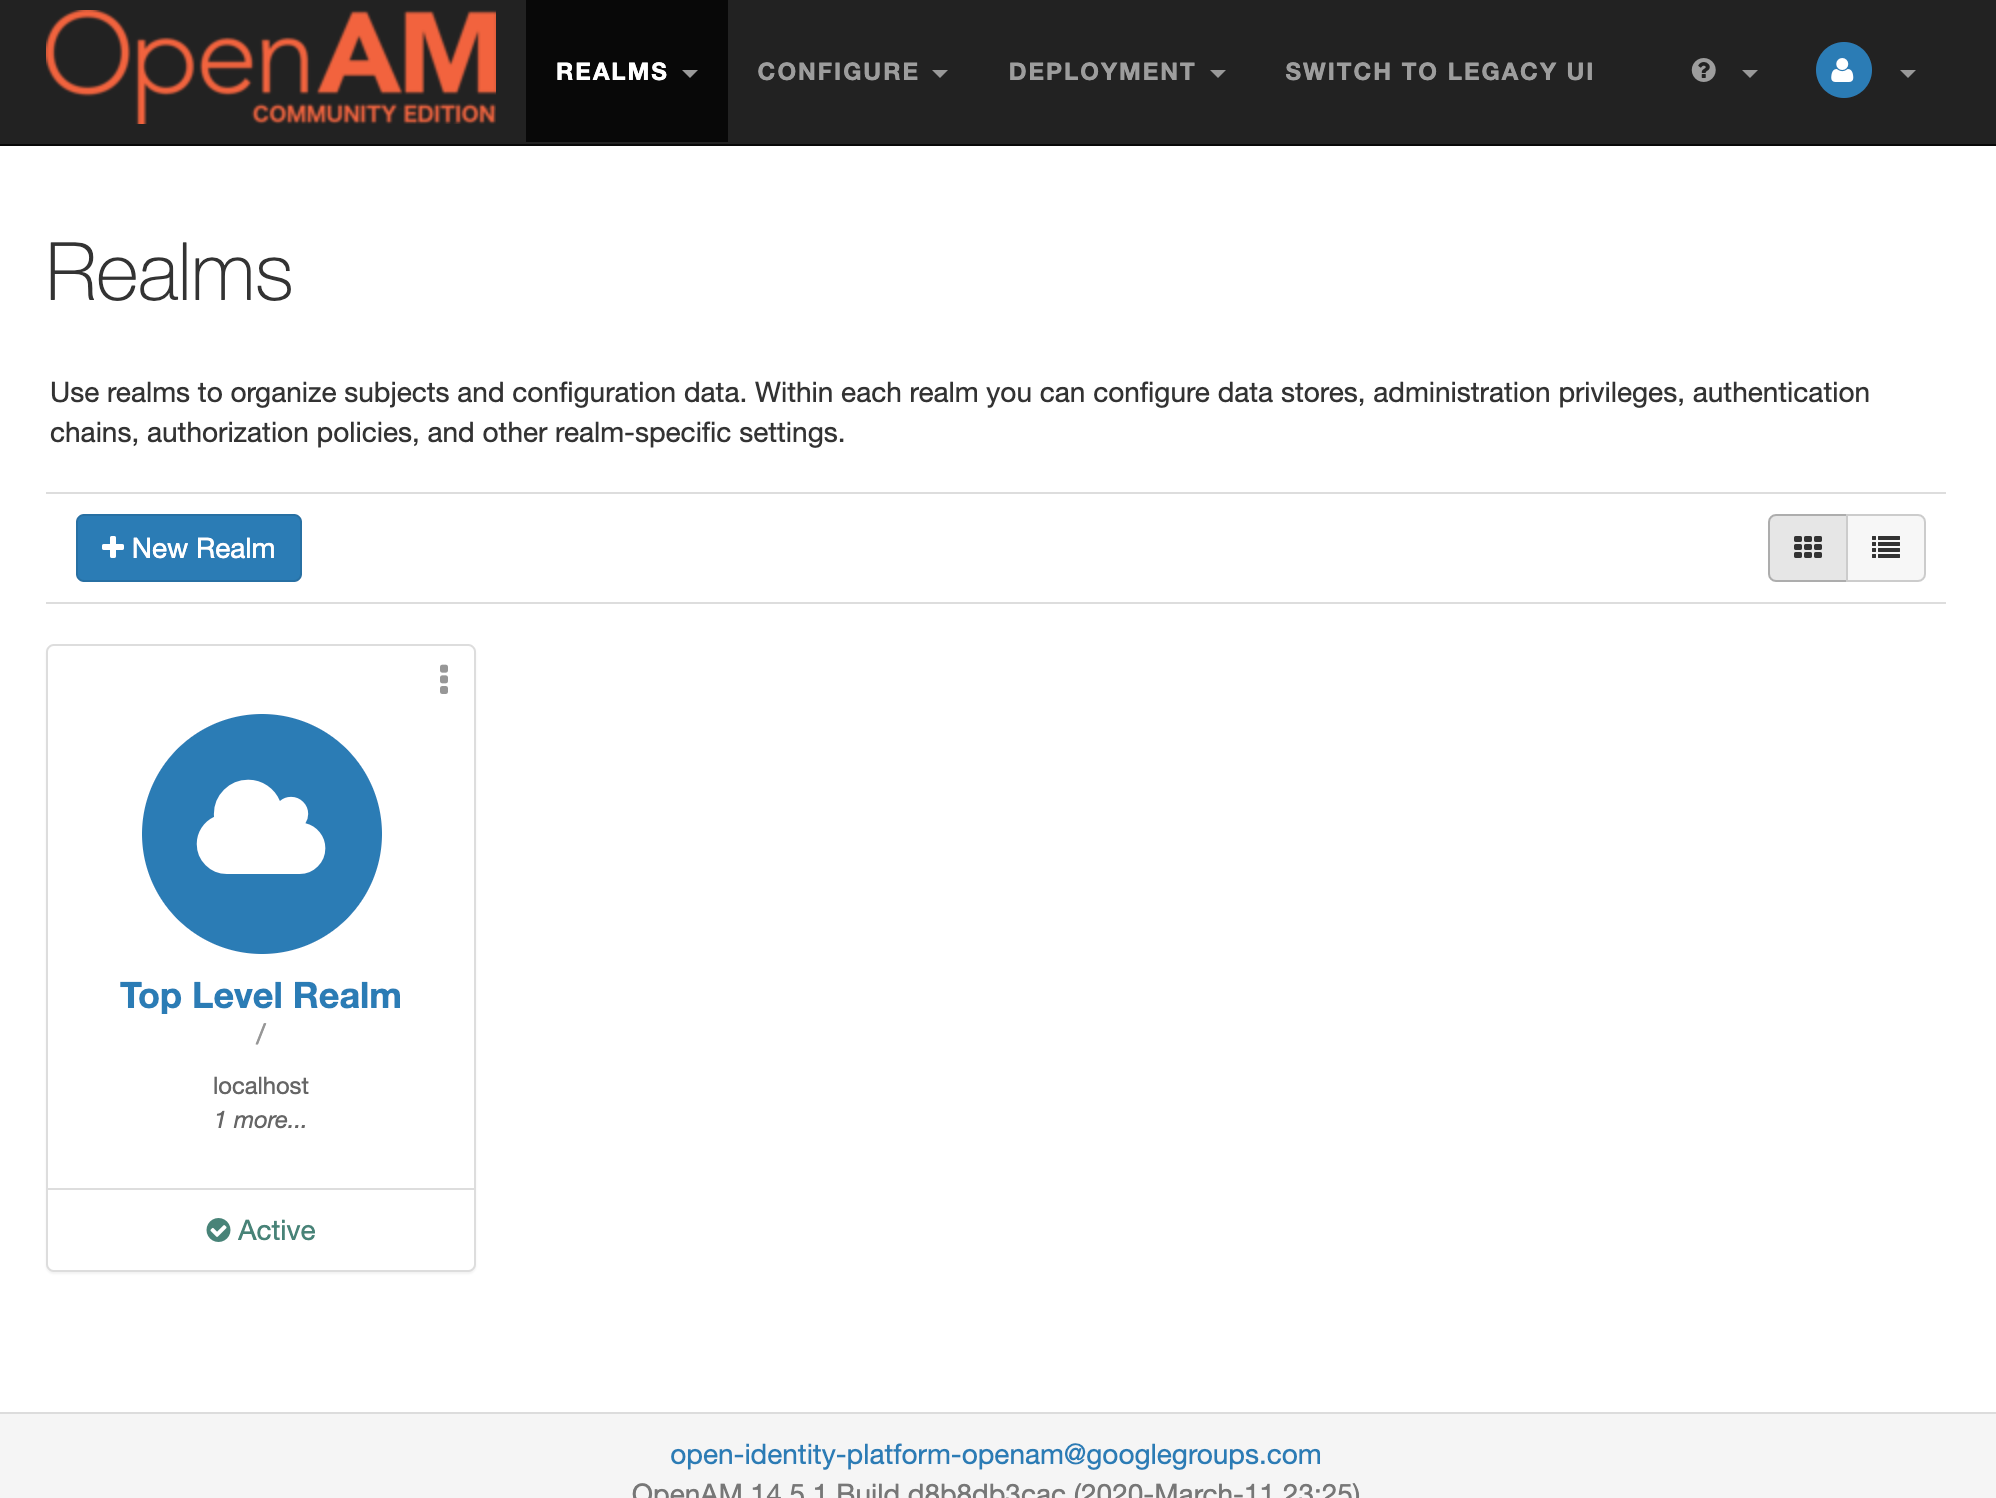
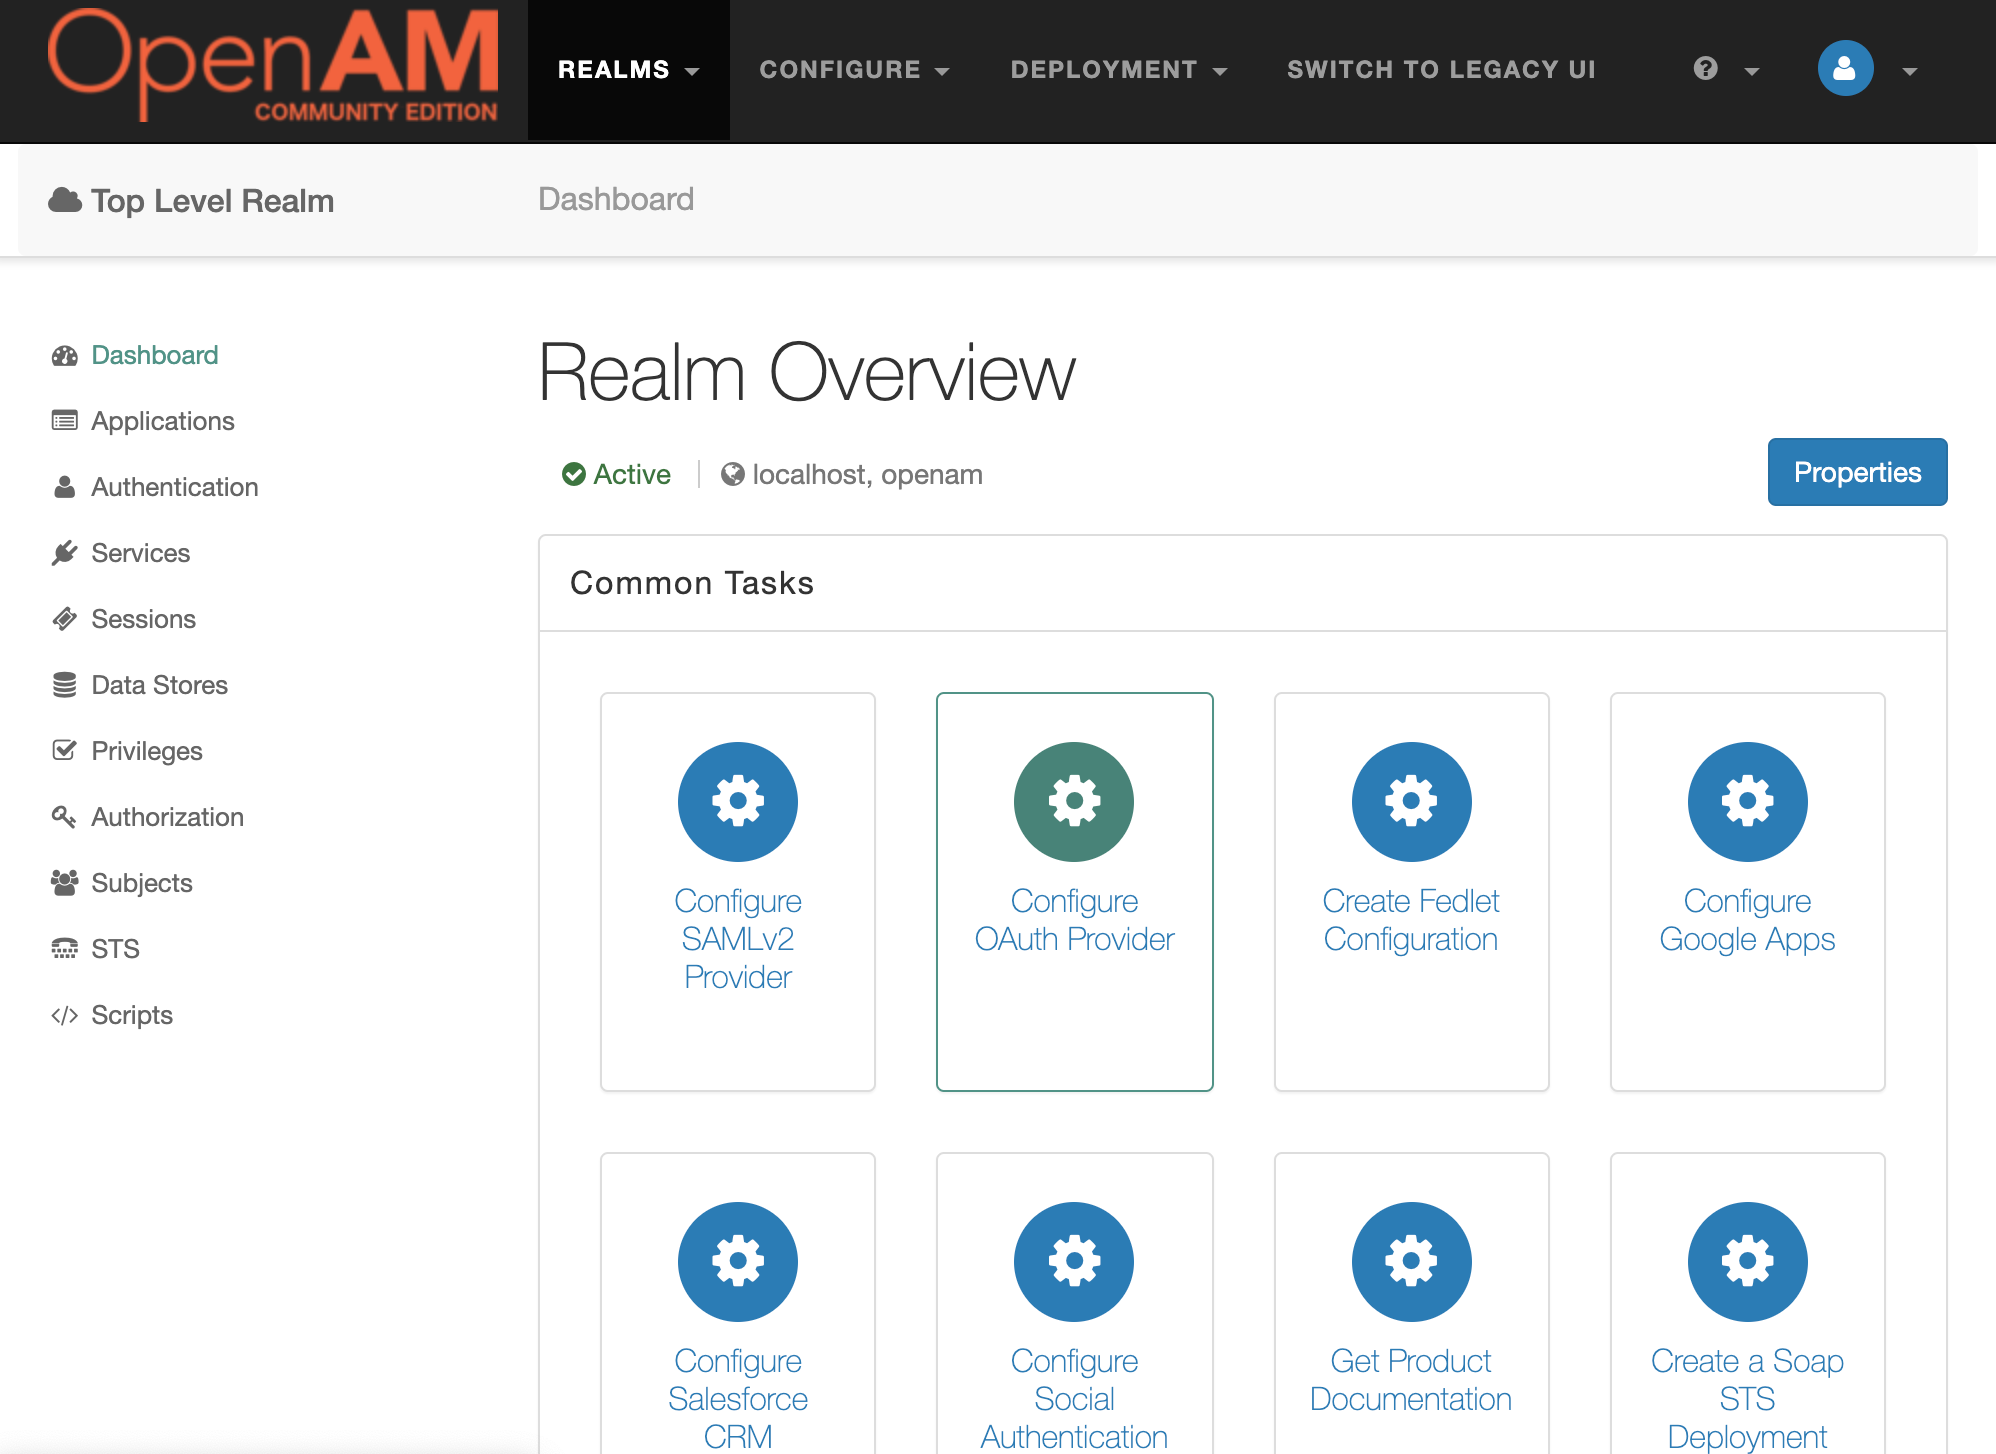
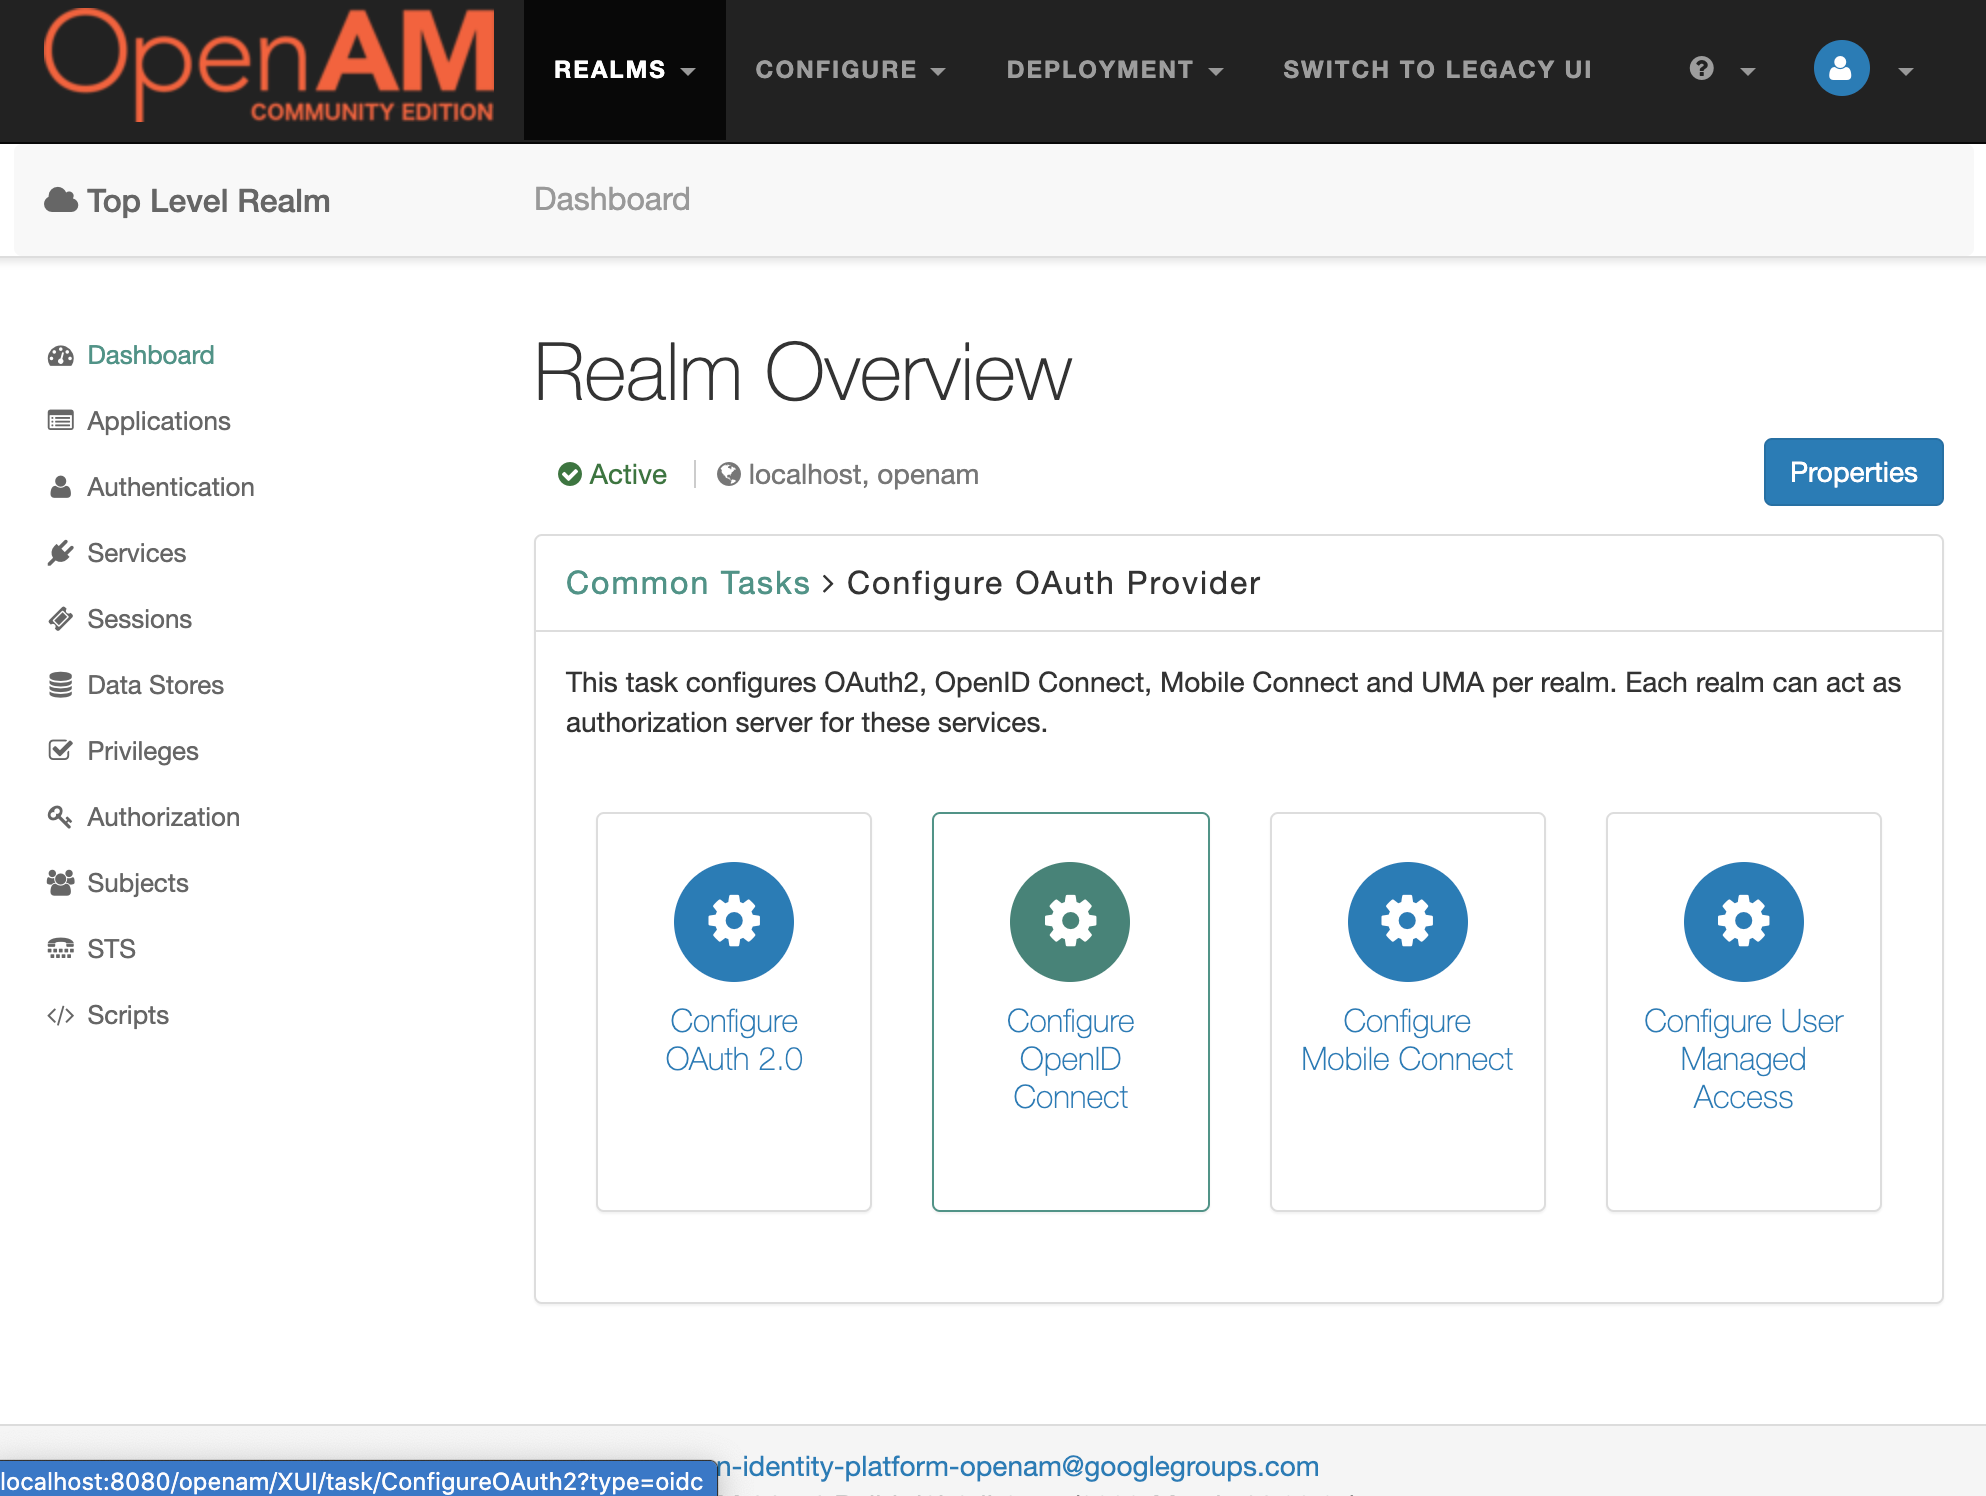
その後、Top Level Realm(トップレベルレルム)にアクセス後、Configure OAuth Providerを選択します。
Configure OpenID Connectを選択します。
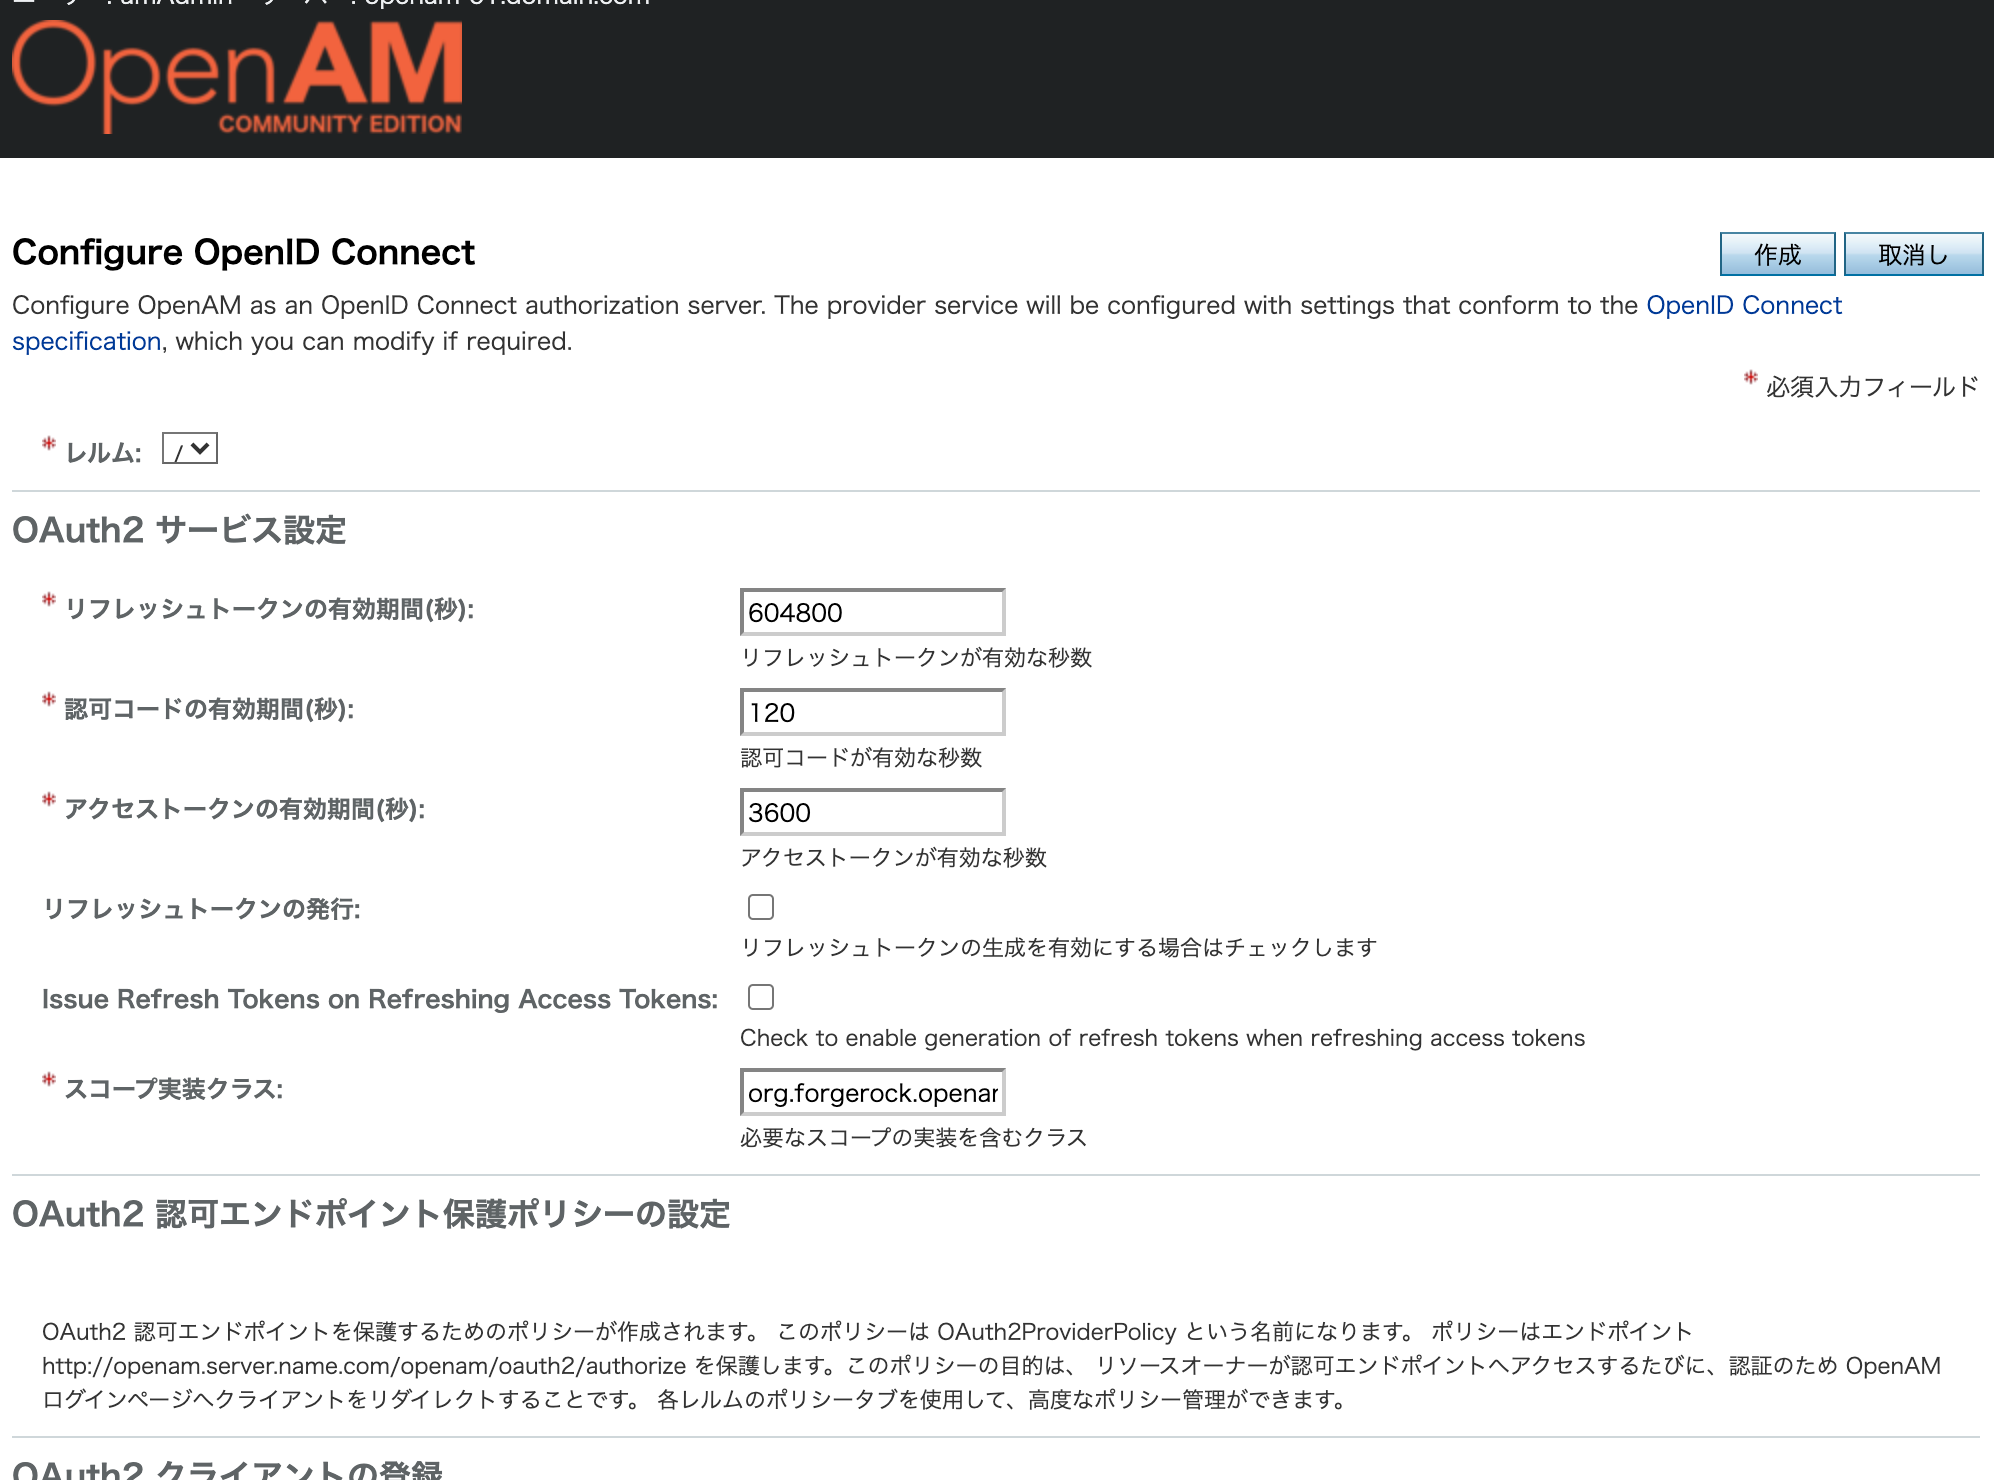
認可コードやアクセストークンの有効期限をチェックして、問題なければ作成を押します。
リフレッシュトークンを発行させたい場合は、リフレッシュトークンの発行にチェックを入れてください。
これでIdPが作成できました〜
下記URLにアクセスしてIdPができていることを確認します。
http://localhost:8080/openam/oauth2/.well-known/openid-configuration
{"response_types_supported":["code token id_token","code","code id_token","id_token","code token","token","token id_token"],"claims_parameter_supported":false,"end_session_endpoint":"http://localhost:8080/openam/oauth2/connect/endSession","version":"3.0","check_session_iframe":"http://localhost:8080/openam/oauth2/connect/checkSession","scopes_supported":["address","phone","openid","profile","email"],"issuer":"http://localhost:8080/openam/oauth2","id_token_encryption_enc_values_supported":["A256GCM","A192GCM","A128GCM","A128CBC-HS256","A192CBC-HS384","A256CBC-HS512"],"acr_values_supported":[],"authorization_endpoint":"http://localhost:8080/openam/oauth2/authorize","userinfo_endpoint":"http://localhost:8080/openam/oauth2/userinfo","device_authorization_endpoint":"http://localhost:8080/openam/oauth2/device/code","claims_supported":["zoneinfo","address","profile","name","phone_number","given_name","locale","family_name","email"],"id_token_encryption_alg_values_supported":["RSA-OAEP","RSA-OAEP-256","A128KW","RSA1_5","A256KW","dir","A192KW"],"jwks_uri":"http://localhost:8080/openam/oauth2/connect/jwk_uri","subject_types_supported":["public"],"id_token_signing_alg_values_supported":["ES384","HS256","HS512","ES256","RS256","HS384","ES512"],"registration_endpoint":"http://localhost:8080/openam/oauth2/connect/register","token_endpoint_auth_methods_supported":["client_secret_post","private_key_jwt","client_secret_basic"],"token_endpoint":"http://localhost:8080/openam/oauth2/access_token"}
こんな風に表示されればOK!
RPの作成
初期設定
express公式サイトのGetting startedに従って、まずサンプルのWebアプリケーションを作成します。
$ mkdir myapp
$ npx express-generator
こんな感じのディレクトリ構成になっているはず
$ ls
app.js                  node_modules            package.json            routes
bin                     package-lock.json       public                  views
実装
実装はForgeRockのOpenIDConnectのサンプルRP[3]を参考にしながら作成していきます。(非常に分かり易かったのでオススメ!)
SSO連携というリンクをクリックすると、
OpenIDConnectのフローが開始されるようにしていきます。
見た目はこんな感じ

viewsにリンクのボタンを加えます。
extends layout

block content
  h1= title
  p Welcome to #{title}

  hoge-button
    a(href="http://localhost:3000/auth/openidconnect", target="_blank") SSO連携
var express = require("express");
var router = express.Router();

/* GET home page. */
router.get("/", function (req, res, next) {
  res.render("index", { title: "Express" });
});

module.exports = router;
コントローラー(app.js)にロジックを直接追加しちゃいます。
気になる方は分けていただいても問題ないです。
// 参考:https://github.com/ForgeRock/exampleOAuth2Clients/tree/master/node-passport-openidconnect

// 各モジュールをインポート
var createError = require("http-errors");
var express = require("express");
var path = require("path");
// sessionを使うのに求められる
var cookieParser = require("cookie-parser");
var logger = require("morgan");

// pathを定義
// indexにログインボタンを設置
// ログイン失敗時 → loginfail
// ログイン成功時 → login
// に遷移するようにする
var indexRouter = require("./routes/index");
var loginFRouter = require("./routes/loginfail");
var loginRouter = require("./routes/login");

var app = express();

//session有効
var session = require("express-session");
app.use(
  session({
    //クッキー改ざん検証用ID
    secret: "YOUR_PASSWORD",
    //未初期化のセッションを保存するか
    saveUninitialized: false,
    //他にもsessionの寿命とか、httpsならsecureも設定できる
  })
);

// view engine setup
app.set("views", path.join(__dirname, "views"));
app.set("view engine", "jade");

app.use(logger("dev"));
app.use(express.json());
app.use(express.urlencoded({ extended: false }));
app.use(cookieParser());
app.use(express.static(path.join(__dirname, "public")));

app.use("/", indexRouter);

//追記ここから
app.use("/loginfail", loginFRouter);
app.use("/login", loginRouter);

//認証セクション
var passport = require("passport");
const { token } = require("morgan");
var OpenidConnectStrategy = require("passport-openidconnect").Strategy;

app.use(passport.initialize());
app.use(passport.session());

passport.use(
  new OpenidConnectStrategy(
    {
      issuer: "http://localhost:8080/openam/oauth2",
      authorizationURL: "http://localhost:8080/openam/oauth2/authorize",
      tokenURL: "http://localhost:8080/openam/oauth2/access_token",
      userInfoURL: "http://localhost:8080/openam/oauth2/userinfo",
      clientID: "sampleRP",
      clientSecret: "RP_PASSWORD",
      callbackURL: "http://localhost:3000/oauth2callback",
      scope: ["openid", "email", "profile"],
    },
    function (
      issuer,
      sub,
      profile,
      jwtClaims,
      accessToken,
      refreshToken,
      tokenResponse,
      done
    ) {
      //認証成功したらこの関数が実行される
      //ここでID tokenの検証を行う
      console.log("issuer: ", issuer);
      console.log("sub: ", sub);
      console.log("profile: ", profile);
      console.log("jwtClaims: ", jwtClaims);
      console.log("accessToken: ", accessToken);
      console.log("refreshToken: ", refreshToken);
      console.log("tokenResponse: ", tokenResponse);

      return done(null, {
        profile: profile,
        accessToken: {
          token: accessToken,
          scope: tokenResponse.scope,
          token_type: tokenResponse.token_type,
          expires_in: tokenResponse.expires_in,
        },
        idToken: {
          token: tokenResponse.id_token,
          claims: jwtClaims,
        },
      });
    }
  )
);

passport.serializeUser(function (user, done) {
  //userにはprofileが入る
  done(null, user);
});

passport.deserializeUser(function (obj, done) {
  done(null, obj);
});

app.get("/auth/openidconnect", passport.authenticate("openidconnect"));

app.get(
  "/oauth2callback",
  passport.authenticate("openidconnect", {
    failureRedirect: "/loginfail",
  }),
  function (req, res) {
    // Successful authentication, redirect home.
    console.log("認可コード:" + req.query.code);
    req.session.user = req.session.passport.user.displayName;
    res.redirect("/login");
  }
);
//ここまで

// catch 404 and forward to error handler
app.use(function (req, res, next) {
  next(createError(404));
});

// error handler
app.use(function (err, req, res, next) {
  // set locals, only providing error in development
  res.locals.message = err.message;
  res.locals.error = req.app.get("env") === "development" ? err : {};

  // render the error page
  res.status(err.status || 500);
  res.render("error");
});
module.exports = app;
login成功後は、/loginというページに遷移させる予定なので、
views/login.jade
routes/login.js
をそれぞれ追加します。
extends layout

block content
  h1= title
  p Welcome to #{title}
  p login成功!
var express = require("express");
var router = express.Router();

/* GET home page. */
router.get("/", function (req, res, next) {
  res.render("login", { title: "ログイン" });
});

module.exports = router;
login失敗時のページも作っておきます。
views/loginfail.jade
routes/loginfail.js
extends layout

block loginfail
  block content
  h1= title
  p Welcome to #{title}
  p Login失敗
var express = require('express');
var router = express.Router();

/* GET home page. */
router.get('/', function(req, res, next) {
  res.render('loginfail', { title: 'ログインできなかったよ' });
});

module.exports = router;
これでRPの作成は完了です。
最終的にはこんな感じのディレクトリ構成になりました。
$ ls
app.js                  node_modules            package.json            routes
bin                     package-lock.json       public                  views
$ ls views
error.jade      index.jade      layout.jade     login.jade      loginfail.jade
$ ls routes
index.js        login.js        loginfail.js
RPの登録
OpenAMにRPを登録します。
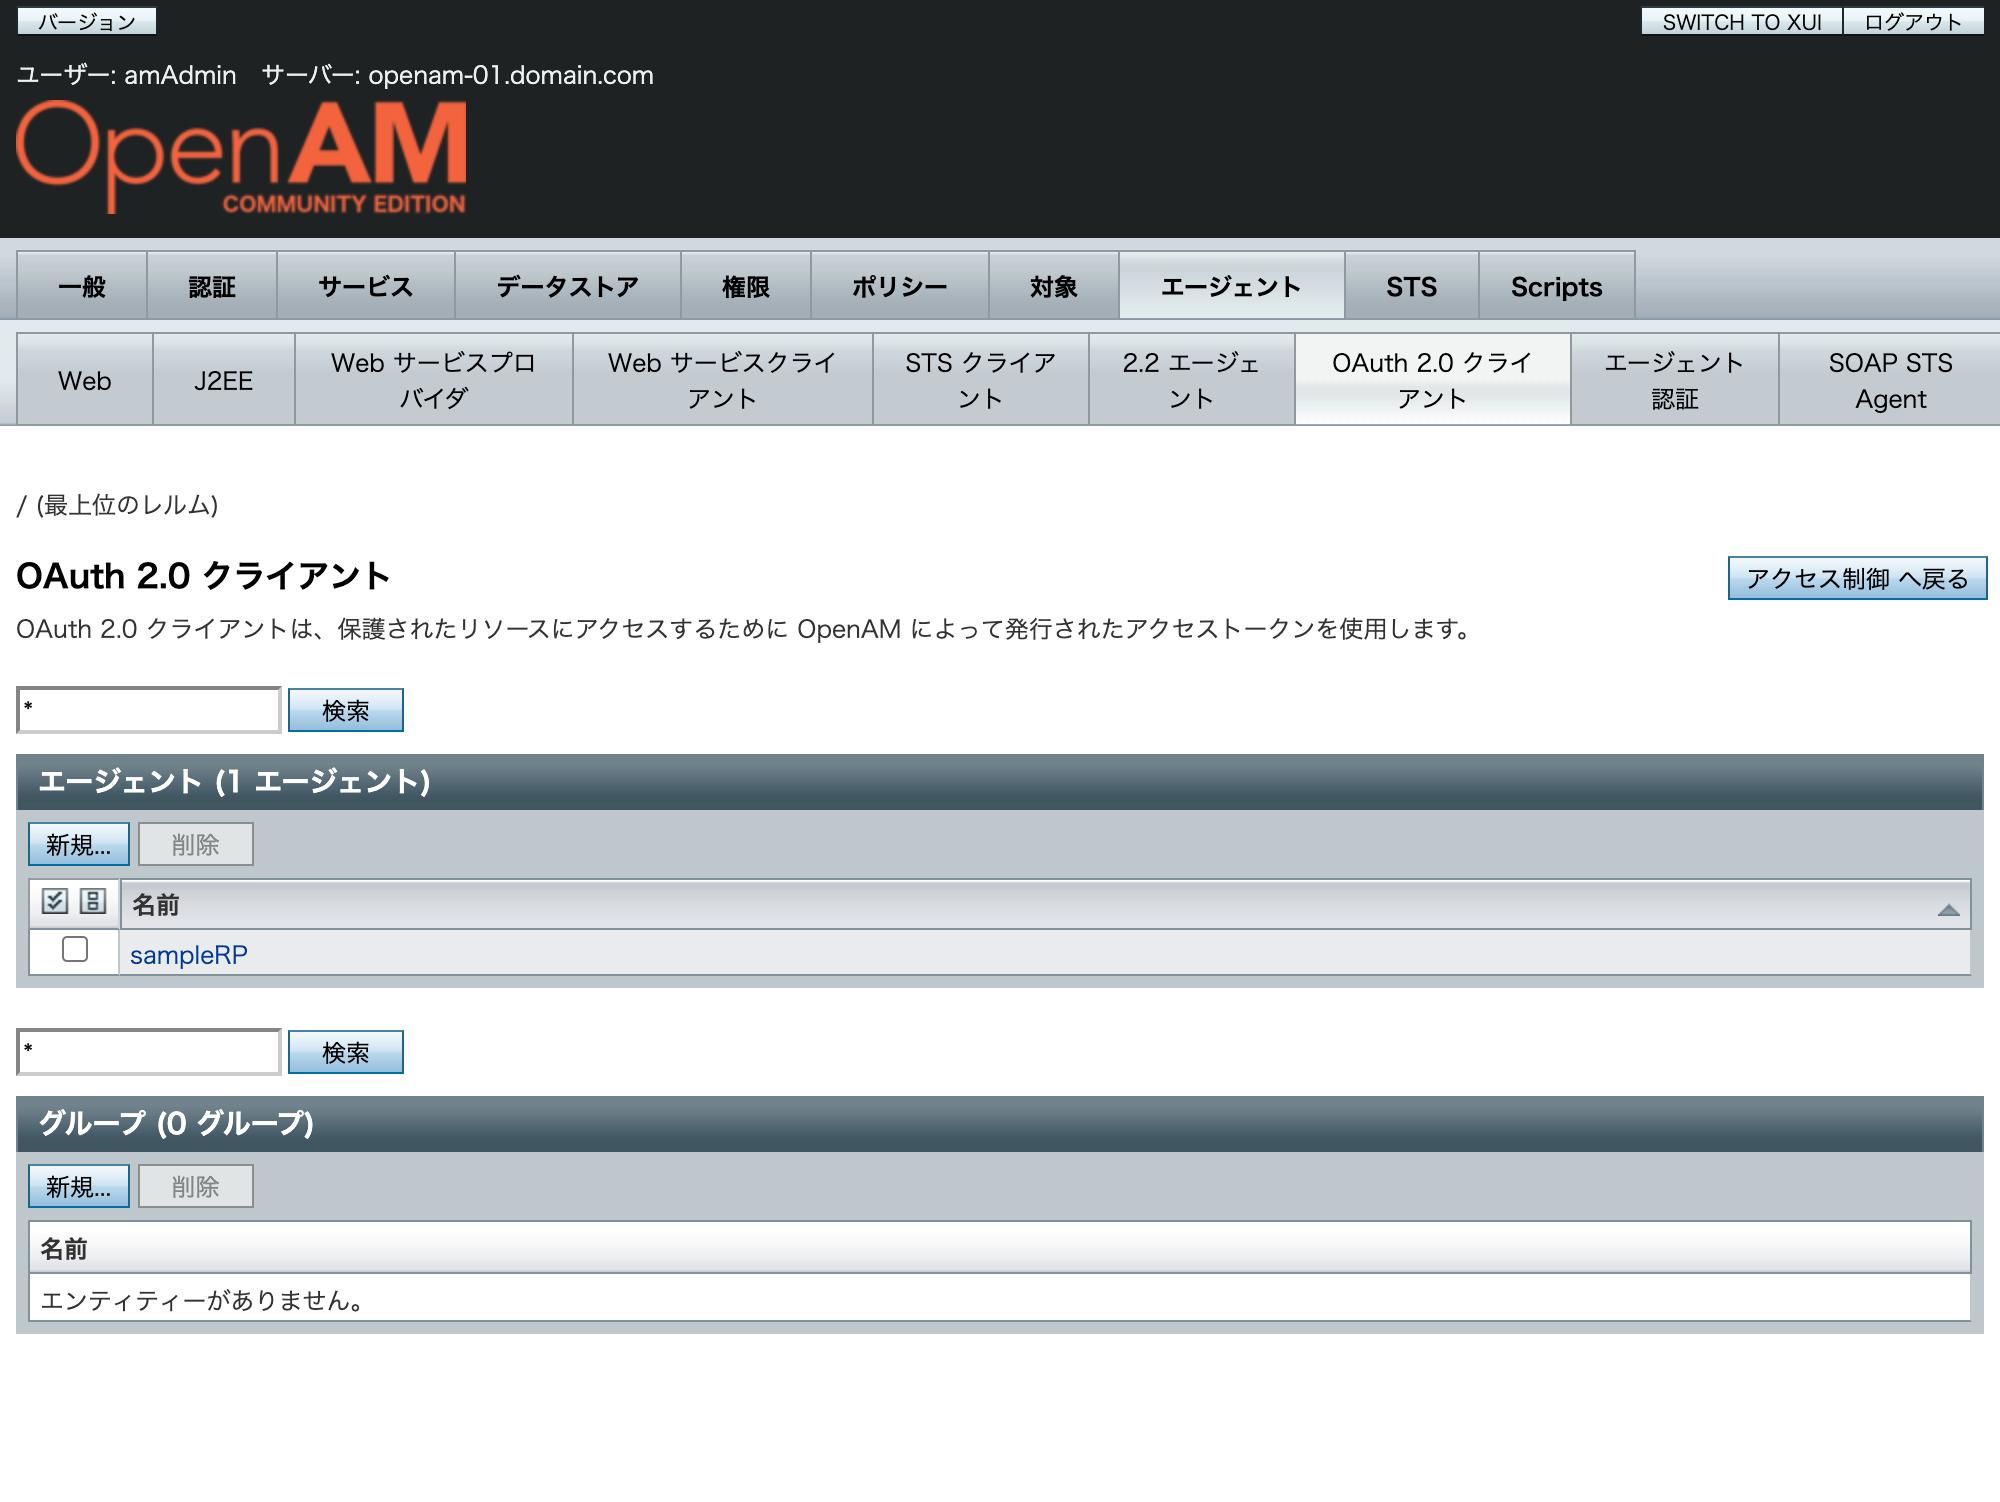
OpenAMにAdminでログイン後、Top Level Realm(トップレベルレルム)のApplications>OAuth2.0を選択します。
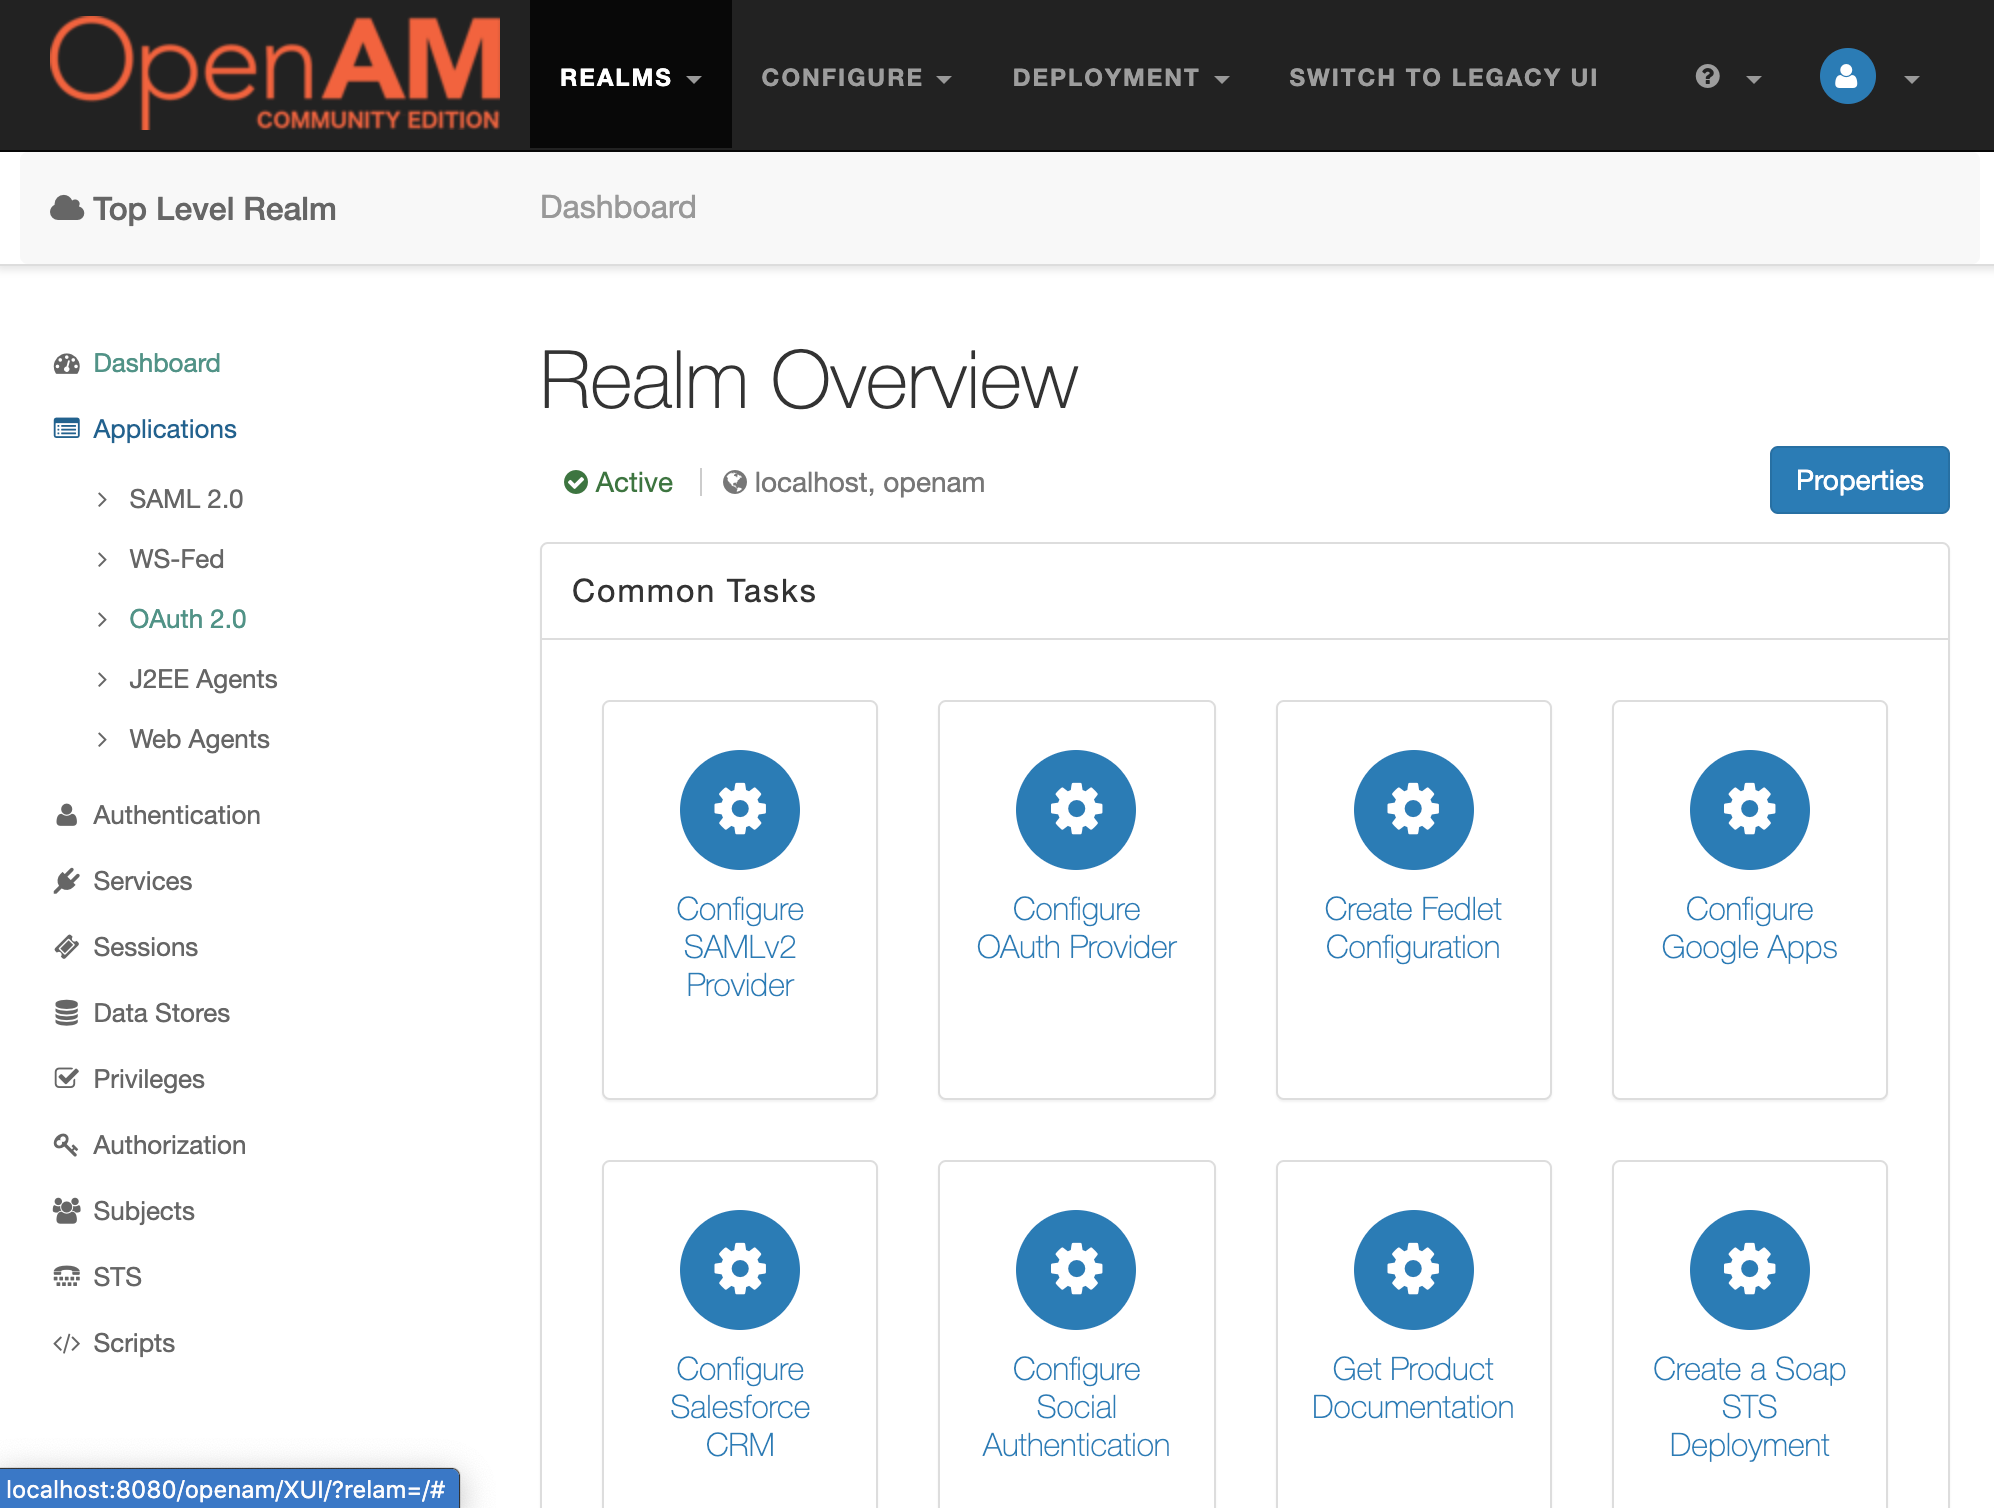
エージェントの名前とパスワードの入力を求められるので、
今回は下記のように入力し、作成を押します。
名前:sampleRP
パスワード:password
このパスワードは、先ほど作成したapp.js内のRP_PASSWORDにあたります。
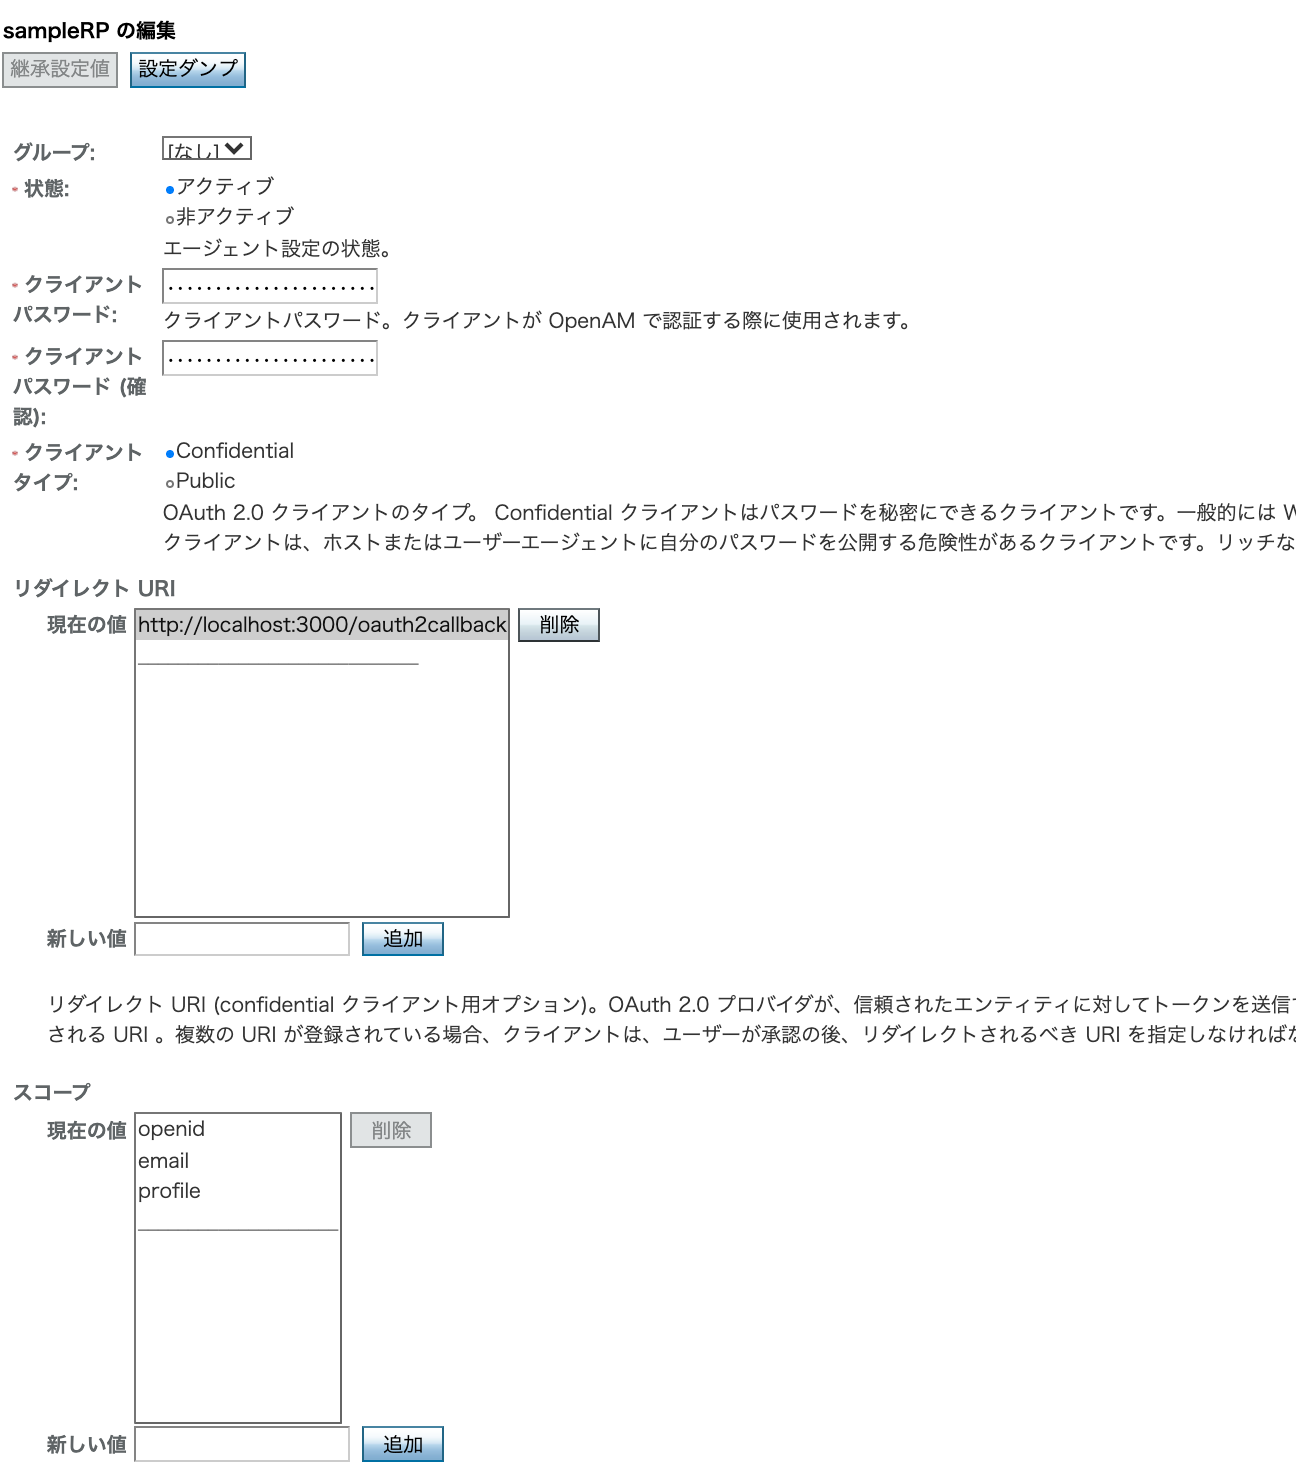
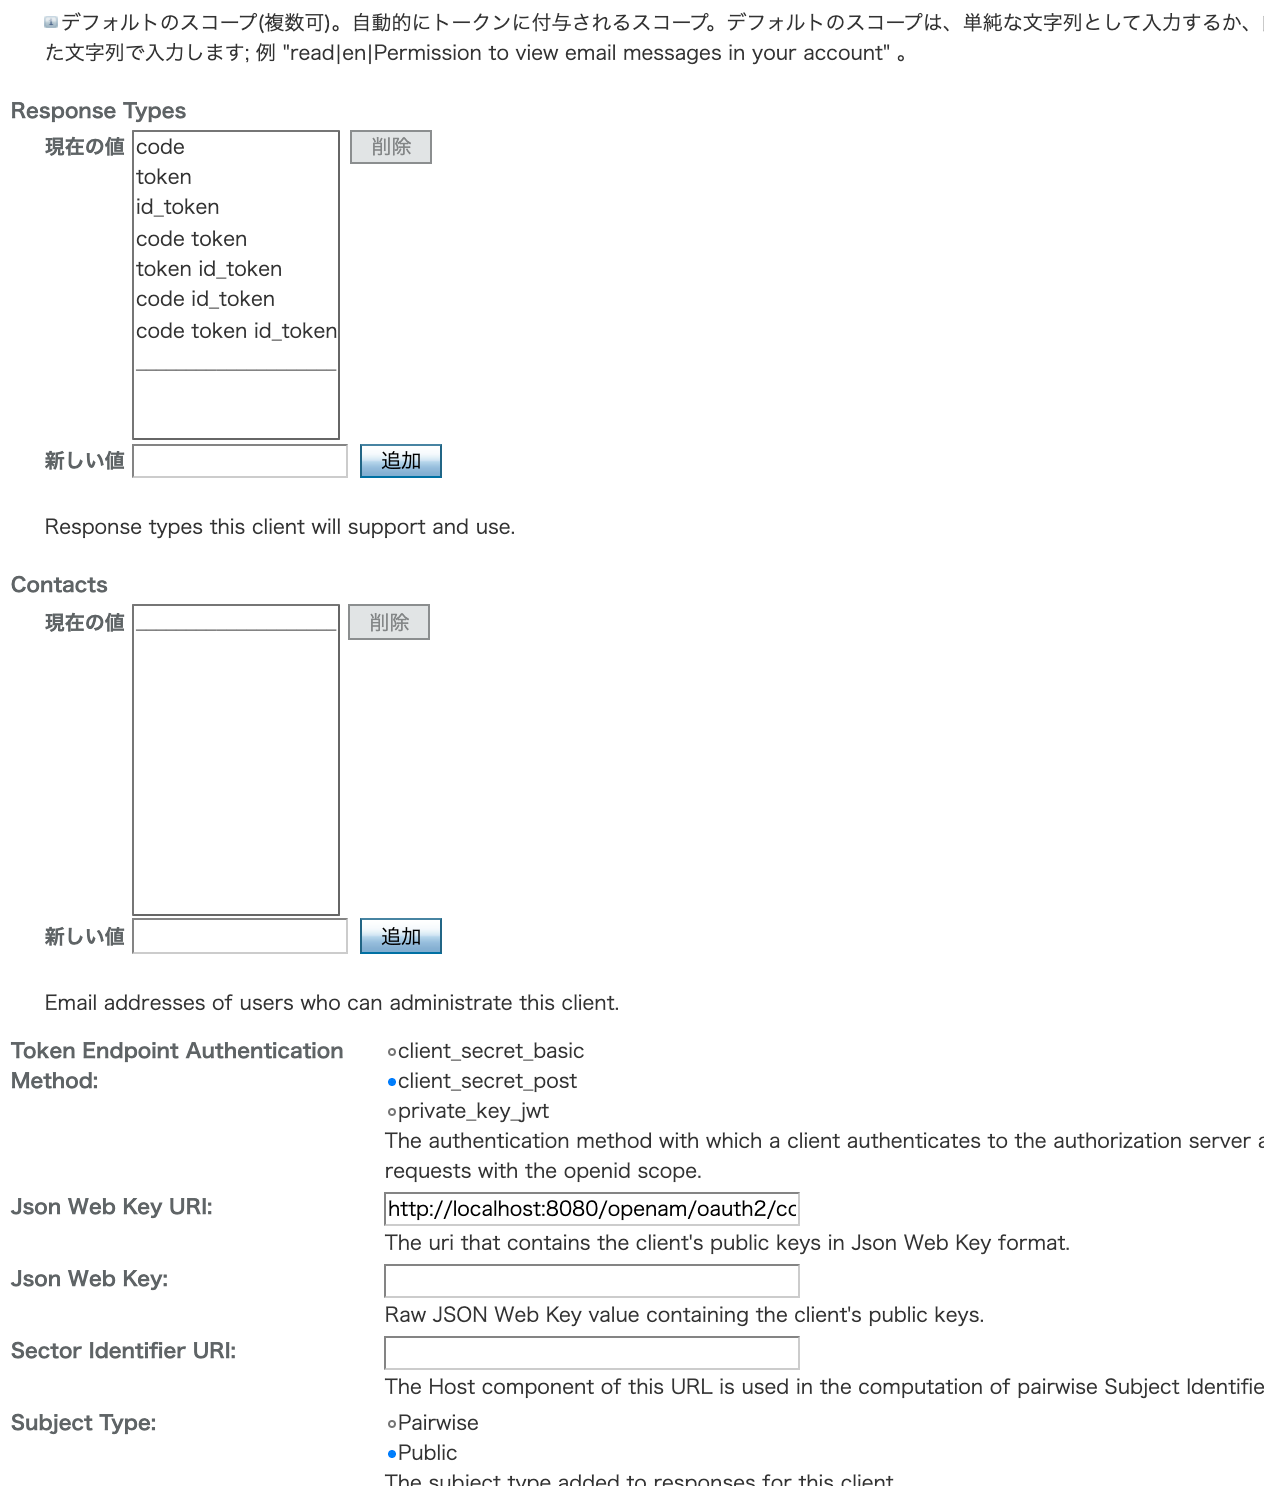
作成を押した後、メインページに戻るので、エージェントから、先ほど作成したエージェントを選択し、設定を追加していきます。
| 項目 | 設定内容 |
|---|---|
| リダイレクトURI | http://localhost:3000/oauth2callback |
| スコープ | openid, email, profole |
| Token Endpoint Authentication Method | client_secret_post |
| そのほかの設定は、デフォルトのまま。 |
設定追加後、保存を押して登録完了です。
動作確認
app.js内のRP_PASSWORDをpasswordに、YOUR_PASSWORDを好きな文字列に変更して、早速RPを動かしてみます。
$ npm start
RPにアクセス!
http://localhost:3000/
SSO連携のリンクを押してみるとOpenAMのログイン画面に遷移します。
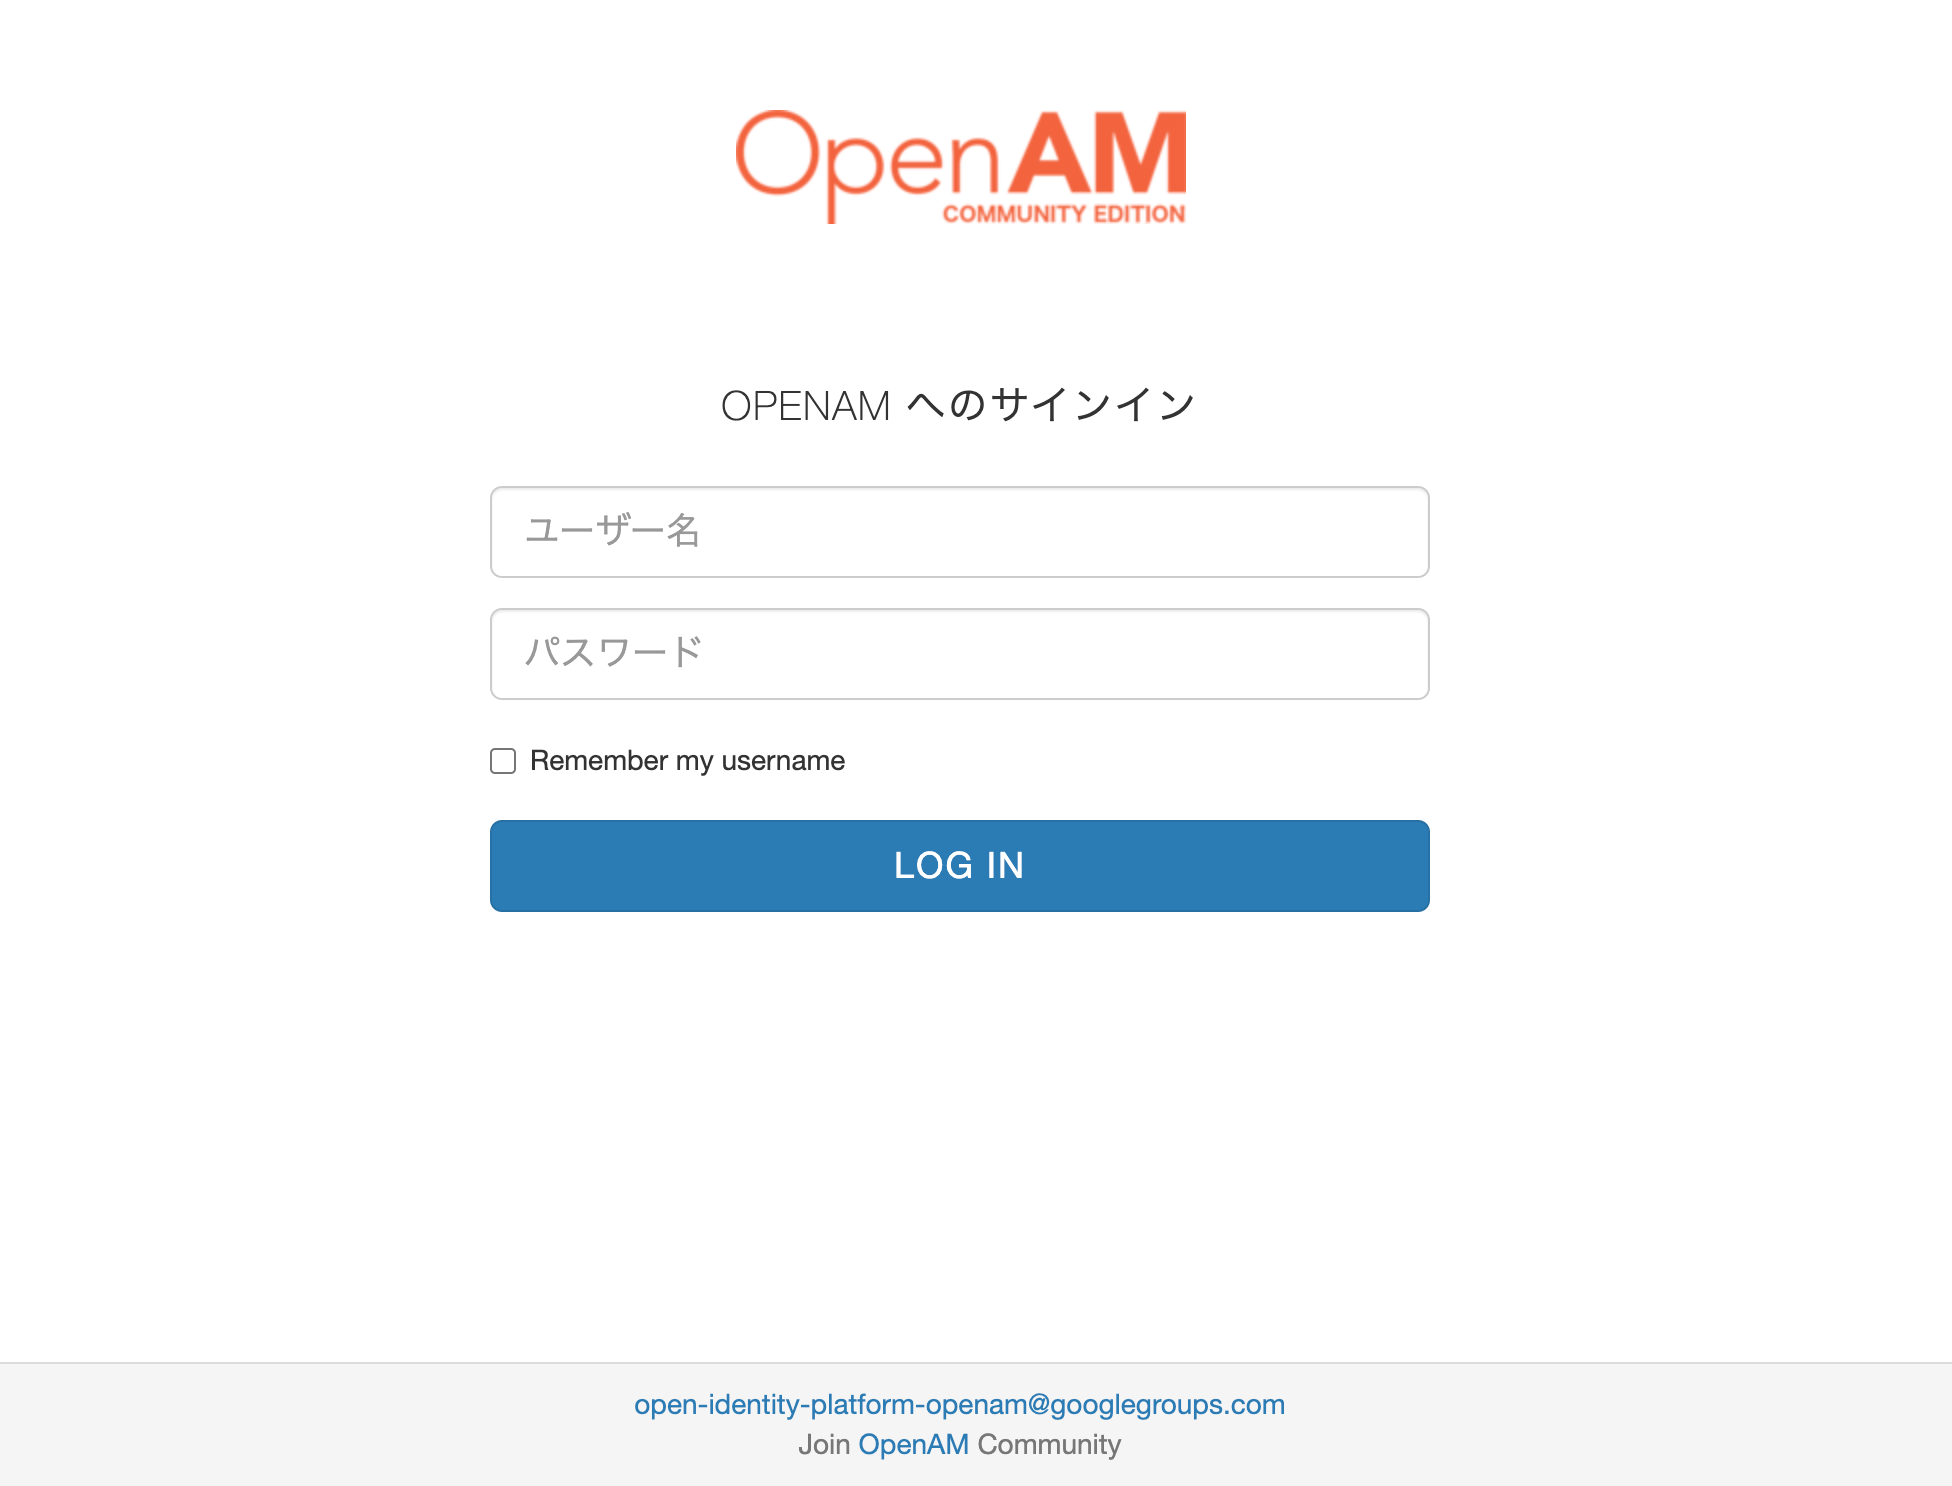
初期設定で作成したアカウントのID/PWを入れてログイン!
アカウントを作成した記憶がない方はデフォルトの下記アカウントでもログインできるはずです。
ID: demo
password: changeit
ログイン後、個人情報提供の同意画面に遷移するのでAllowを選択します。
ターミナルにこんな感じに出力されていれば認証成功です。

これでアクセストークン、IDトークンが取得できているはずなので、
この後、ユーザーの情報を取得したい場合は、OpenAMのユーザー情報エンドポイントにアクセストークンを GETで渡せば大丈夫なはずです。
参考:
https://backstage.forgerock.com/docs/am/5/oauth2-guide/#oauth2-byo-client
以上になります。
お疲れ様でした!
参考文献
[1] 株式会社オージス総研 テミストラクトソリューション部 氏縄 武尊."第三回 Relying Party の実装例 ~passport~".オブジェクトの広場.2016-03-10,(参照2020-08-24)
[2] Open Source Solution Technology Corporation.学認Shibboleth ShibbolethとOpenAMを連携させて学外と学内をシングルサインオン.2011
[3] ForgeRock."exampleOAuth2Clients/node-passport-openidconnect".Github.2020-3-25,(参照2020-08-24)
