Macbook ProにTeXStudioをインストールした時に色々つまづいたのでメモ.
環境
- Macbook Pro (15-inch, 2018)
- macOS Mojave
- MacTeX 2017
- TeXStudio
インストール
Homebrewがあるなら一発です.
brew cask install texstudio
TeXStudioの設定
ここを参考に環境設定をいじります.
ビルド
- ビルド & 表示:
DVI->PDFチェーン - 既定のコンパイラ:
LaTeX

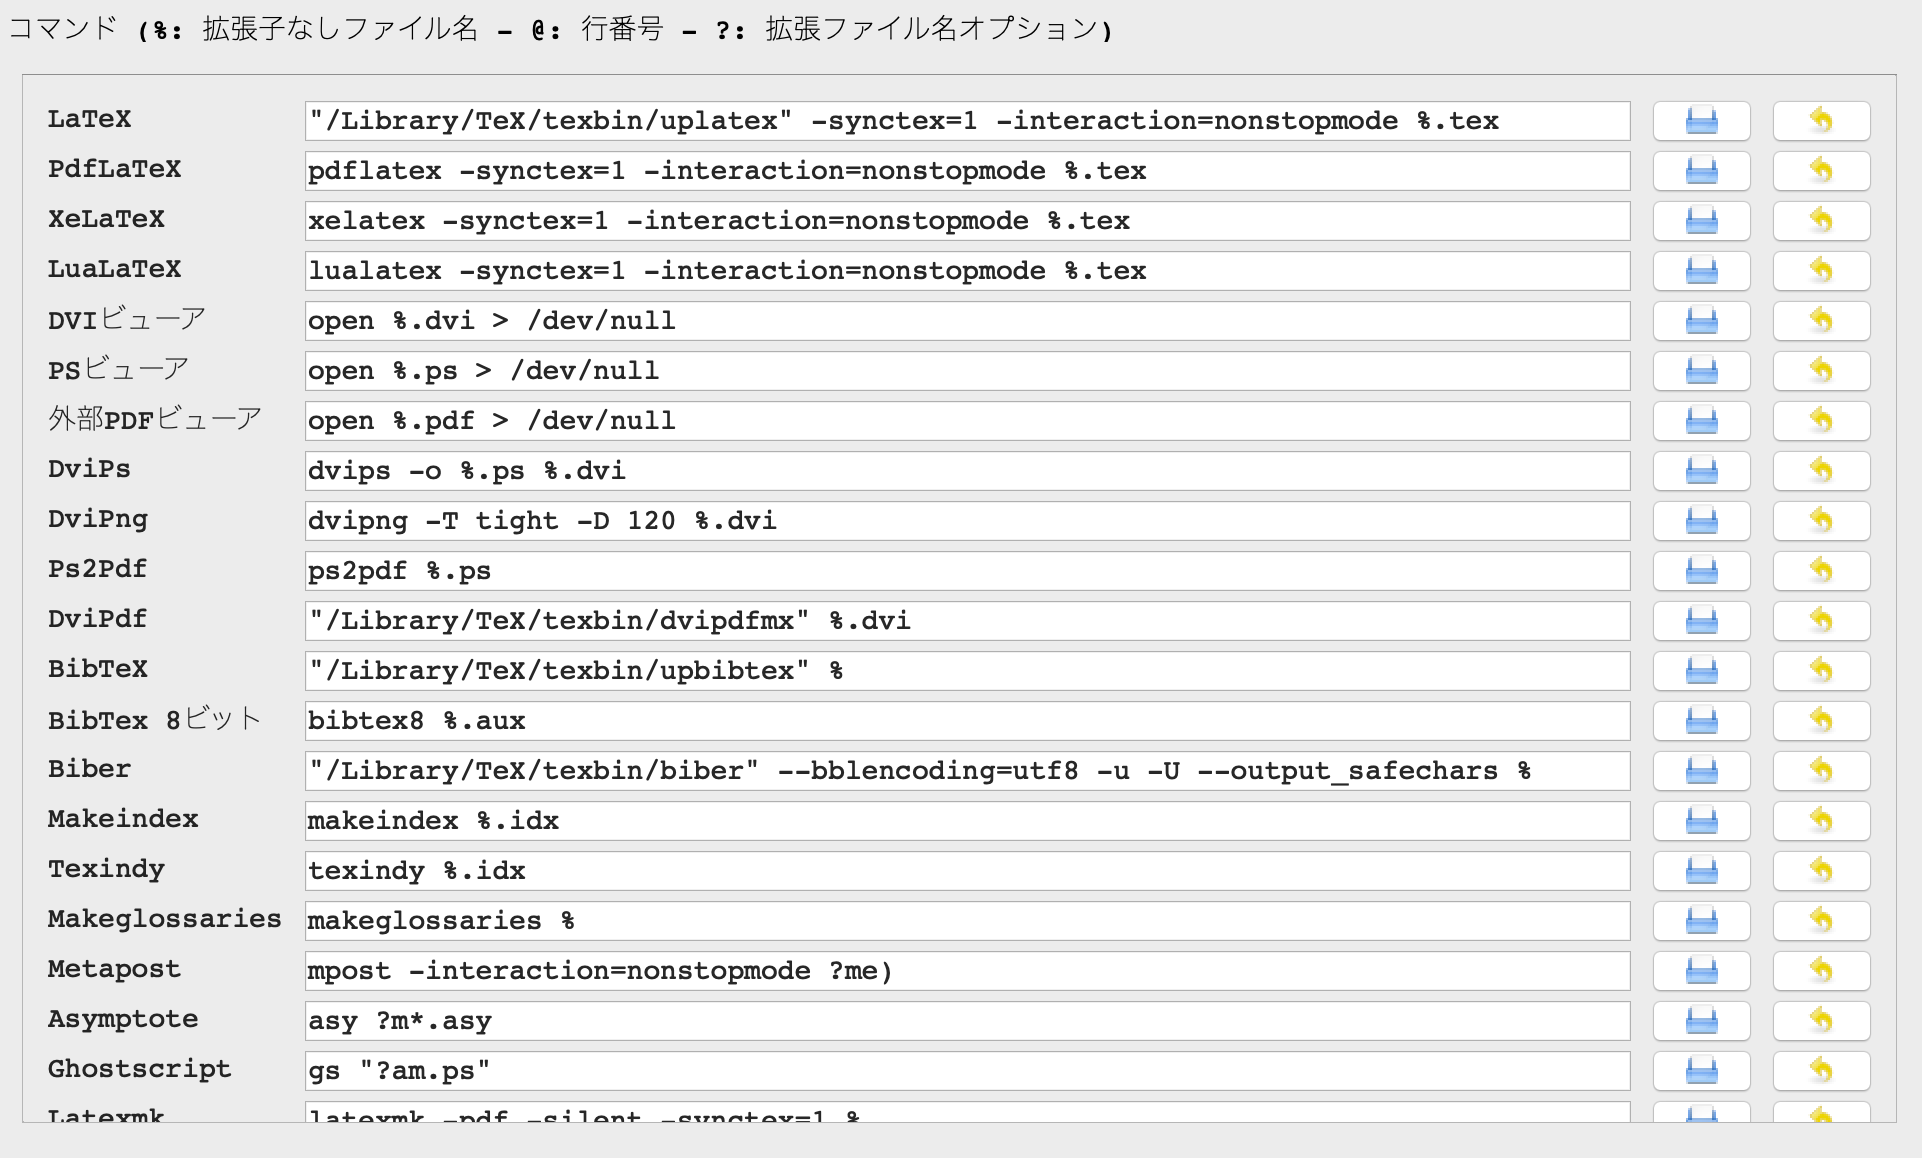
コマンド
変えるのは次の4つ
- LaTeX :
"/Library/TeX/texbin/uplatex" -synctex=1 -interaction=nonstopmode %.tex - DviPdf :
"/Library/TeX/texbin/dvipdfmx" %.dvi - BibTeX :
"/Library/TeX/texbin/upbibtex" % - Biber :
"/Library/TeX/texbin/biber" --bblencoding=utf8 -u -U --output_safechars %
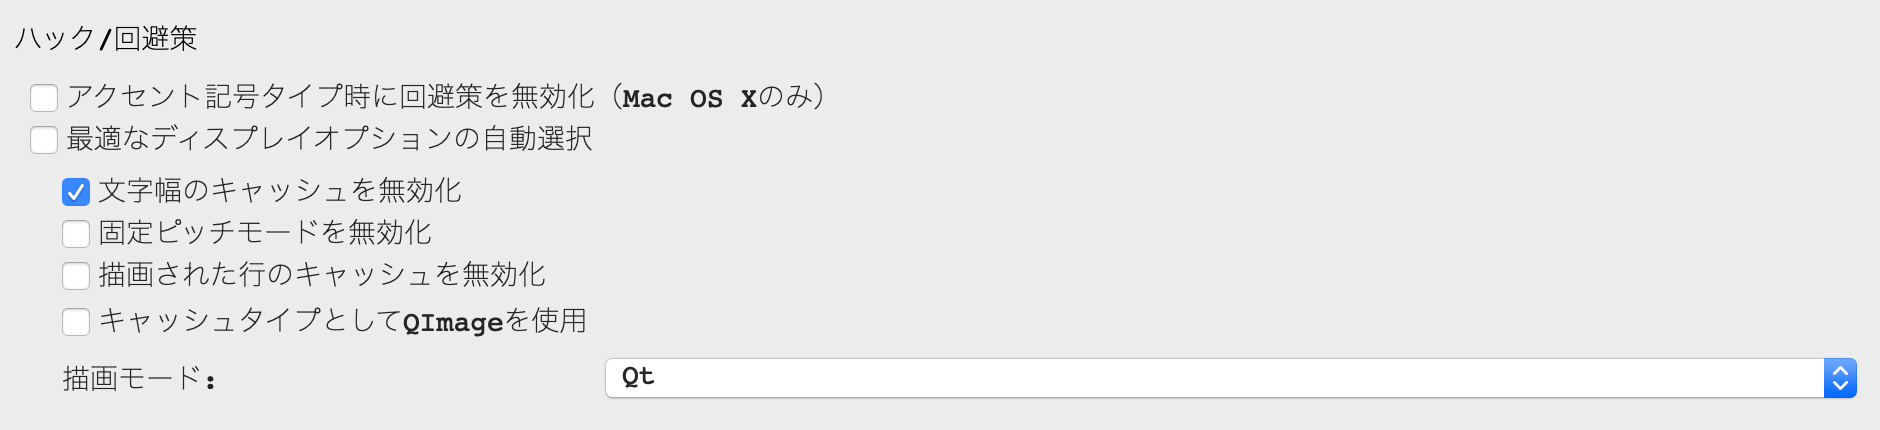
詳細なエディタ設定
ここからは高度なオプションをにチェックを入れてください.
ハック/回避策
- 最適なディスプレイオプションの自動選択 :
OFF - 描画モード :
Qt
外観
- 行番号を表示 :
すべての行番号

以上で設定は完了です.
ビルドでエラーが起こる
ヒラギノフォントが悪さをしているらしい.下記コマンドで解決.
sudo kanji-config-updmap-sys ipaex
sudo mktexlsr
TeXStudioのPDFビューワーに日本語が表示されない
TeXStudioに日本語のフォントがないよう.poppler-dataを配置する必要があるとのこと.
poppler-data を配置する場所は下記で調べることができます.
strings -a /Applications/texstudio.app/Contents/Frameworks/libpoppler.??.dylib | grep poppler
次のように返ってきました.
/usr/local/Cellar/poppler/0.61.0-texworks/share/poppler
%Produced by poppler pdftops version: {0:s} (http://poppler.freedesktop.org)
/usr/local/Cellar/poppler/0.61.0-texworks/share/popplerがpopplerを置くべき場所です(多分皆さん同じ).
ここにpopplerを配置します.次のコマンドを入力.
cd ~
curl -kO https://poppler.freedesktop.org/poppler-data-0.4.9.tar.gz
tar xvf poppler-data-0.4.9.tar.gz
sudo mkdir -p /usr/local/Cellar/poppler/0.61.0-texworks/share/poppler
sudo cp -pR ~/poppler-data-0.4.9/* /usr/local/Cellar/poppler/0.61.0-texworks/share/poppler
TeXStudioを再起動すると,日本語が表示されるようになりました.
(おまけ)TeXStudioのカラーテーマを変える
TeXStudioは白いので,暗めにカラーテーマを変えます.
ここのサイトに色々テーマが載ってます([formats]で始まる長いコードです).
- お好きなものをコピーしてきて,
*.txsprofile形式で保存します. - TeXstudioを起動して,
オプション→プロファイルの読み込みで先ほどのファイル(*.txsprofile)を選択 - TeXStudioを再起動.自分の好みのカラーテーマに変わっているはずです.
-
オプション→プロファイルを保存で正しい場所に*.txsprofileを保存し直します.
また,文字入力中の背景が見にくいため背景をなくしてアンダーラインに変更します.
環境設定の構文の強調表示のフォーマットで
- 事前編集の色を右クリックでなくす
- 真ん中の
u(underline)にチェックを入れる

以上で設定は全て完了です.