概要
ハッカソンでRaspberry PiとGrove Pi+スターターキット、kintoneを活用することになり、Pythonで問題なく利用できるか調べました。結果、GitHubに公開しているgrovepi.pyには不具合があり修正する必要がありますが、付属センサは概ね利用できました。
Grove Pi+ スターターキット 初心者向け Raspberry Pi A+,B,B+&2,3適用 CE認証(写真はGrove Pi本体)
https://shop.dexterindustries.com/grovepi-starter-kit-raspberry-pi/

Grove Pi+ の設定と試験環境
使用OS
Raspbian Buster with desktop
Version:September 2019
Release date:2019-09-26
Kernel version:4.19
使用ライブラリィ
library supports this fw versions: 1.3.0
以下の情報を参考に設定
https://www.dexterindustries.com/GrovePi/get-started-with-the-grovepi/setting-software/
(重要)ライブラリィ不具合の修正
以下の__「Raspberry PiでGrove Pi+スターターキットとカメラを使う初期設定」の”Grove Pi+のライブラリィ不具合”を参照__し、grovepi.py を修正。
https://qiita.com/yukataoka/items/9df2c74f7cd514e04b97#grove-pi%E3%81%AE%E3%83%A9%E3%82%A4%E3%83%96%E3%83%A9%E3%83%AA%E3%82%A3%E4%B8%8D%E5%85%B7%E5%90%88
試験環境
デフォルトのアカウント pi のルート(/home/pi)配下に、以下の手順で設定。
$ mkdir ~/pgm
$ cd ~/pgm
$ cp ~/Dexter/GrovePi/Software/Python/grovepi.py ~/pgm
$ cp ~/Dexter/GrovePi/Software/Python/grove_rgb_lcd/grove_rgb_lcd.py ~/pgm
$ python grovepi.py
library supports this fw versions: 1.3.0
Grove Pi+ スターターキット付属のセンサを試す
1.Example Project: LED Fade(LEDのフェード)
https://www.dexterindustries.com/GrovePi/projects-for-the-raspberry-pi/
http://www.dexterindustries.com/GrovePi/projects-for-the-raspberry-pi/led-fade/
https://github.com/DexterInd/GrovePi/blob/master/Projects/LED_Fade/led_fade.py
センサ
コード
import time
import grovepi

# Connect the Rotary Angle Sensor to analog port A2
potentiometer = 2

# Connect the LED to digital port D5
led = 5

grovepi.pinMode(led,"OUTPUT")
time.sleep(1)
i = 0

while True:
    try:
        # Read resistance from Potentiometer
        i = grovepi.analogRead(potentiometer)
        print(i)

        # Send PWM signal to LED
        grovepi.analogWrite(led,i//4)
        time.sleep(0.5)

    except KeyboardInterrupt:
        break

    except (IOError,TypeError) as e:
        print("Error")
        break
結果
$ python led_fade.py
0
0
12
546
1023
1023
1023
945
0
0
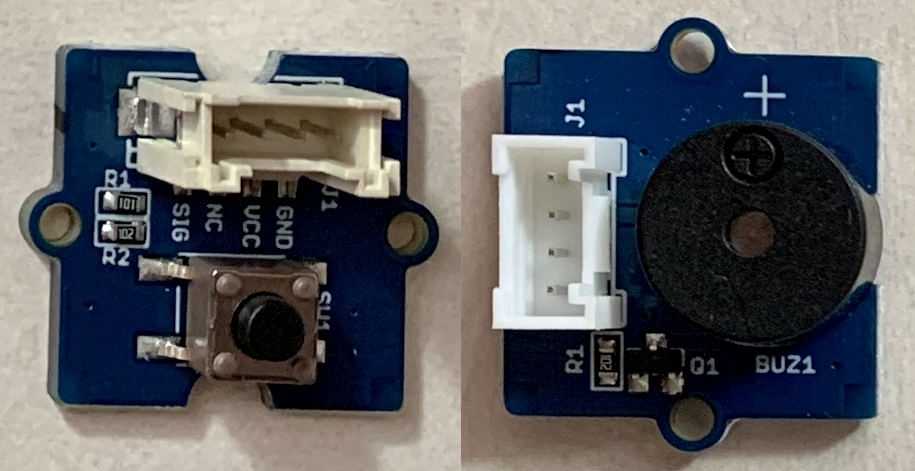
2.Example Project: Button And Buzzer(ボタンブザー)
https://www.dexterindustries.com/GrovePi/projects-for-the-raspberry-pi/
https://github.com/DexterInd/GrovePi/blob/master/Projects/Button_And_Buzzer/Button_And_Buzzer.py
センサ
コード
import time
from grovepi import *
import math

buzzer_pin = 2		#Port for buzzer
button = 4		#Port for Button

pinMode(buzzer_pin,"OUTPUT")	# Assign mode for buzzer as output
pinMode(button,"INPUT")		# Assign mode for Button as input
while True:
	try:
		button_status= digitalRead(button)	#Read the Button status
		if button_status:			#If the Button is in HIGH position, run the program
			digitalWrite(buzzer_pin,1)
			print "Buzzing"
		else:					#If Button is in Off position, print "Off" on the screen
			digitalWrite(buzzer_pin,0)
			print "Off"
                time.sleep(0.1)

	except KeyboardInterrupt:			# Stop the buzzer before stopping
		digitalWrite(buzzer_pin,0)
		break

	except (IOError,TypeError) as e:
		print("Error")
		break
結果
$ python Button_And_Buzzer.py
Off
Off
Off
Buzzing
Buzzing
Off
Buzzing
Off
Off
Buzzing
Off
Buzzing
Off
Off
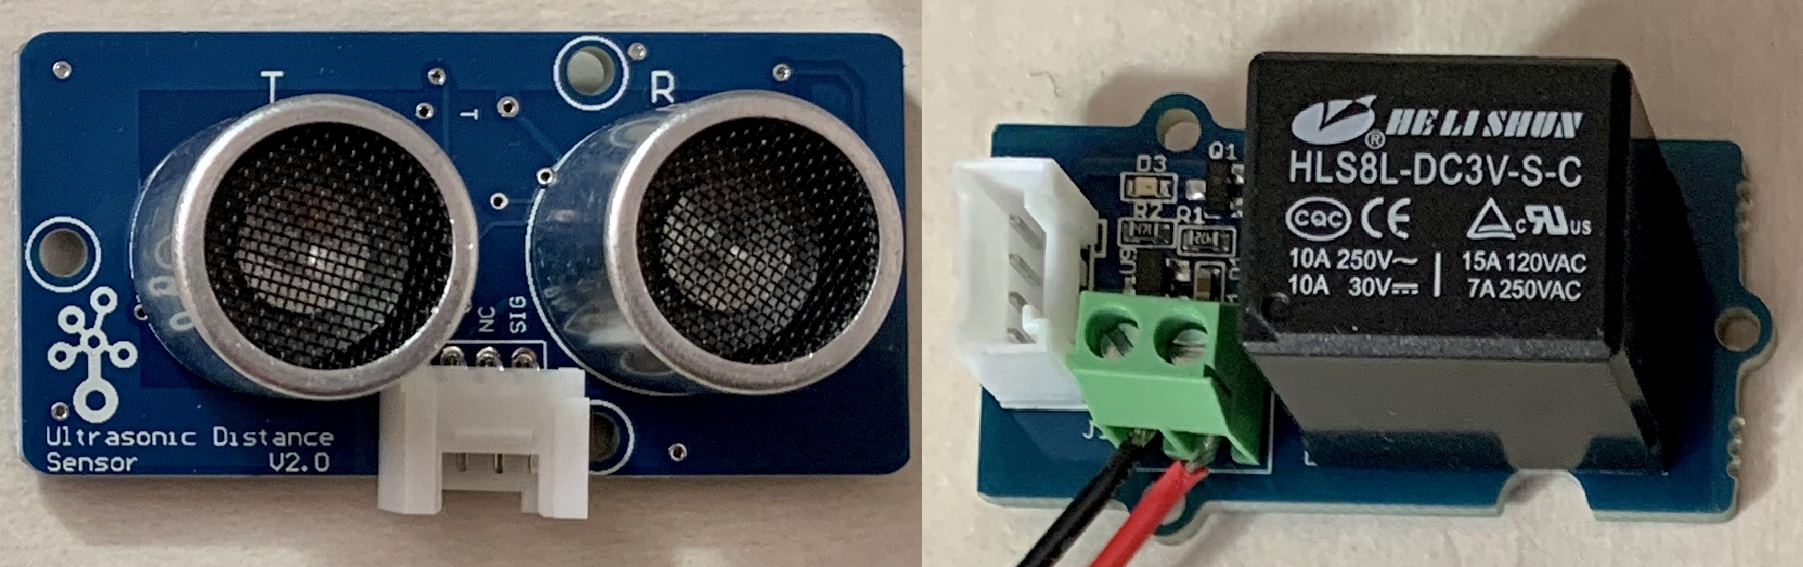
3.Example Project: Ultrasonic And Relay(距離センサとリレー)
https://www.dexterindustries.com/GrovePi/projects-for-the-raspberry-pi/
https://github.com/DexterInd/GrovePi/blob/master/Projects/Ultrasonic_And_Relay/Ultrasonic_And_Relay.py
センサ
コード
import time
from grovepi import *

# Connect the Grove Ultrasonic Ranger to digital port D4
# SIG,NC,VCC,GND

ultrasonic_ranger = 4
Relay_pin = 2

pinMode(Relay_pin,"OUTPUT")
digitalWrite(Relay_pin,0)

while True:
    try:
        # Read distance value from Ultrasonic
        distant = ultrasonicRead(ultrasonic_ranger)
        print(distant,'cm')
        if distant <= 10:
            digitalWrite(Relay_pin,1)
        else:
            digitalWrite(Relay_pin,0)
        time.sleep(0.2)

    except KeyboardInterrupt:
        digitalWrite(Relay_pin,0)
        break

    except (IOError,TypeError) as e:
        print("Error")
        break
結果
$ python Ultrasonic_And_Relay.py
(93, 'cm')
(92, 'cm')
(92, 'cm')
(9, 'cm')
(8, 'cm')
(9, 'cm')
(9, 'cm')
(93, 'cm')
(94, 'cm')
(93, 'cm')
4.Example Project: Home Weather Display(家の気温と湿度を表示)
https://www.dexterindustries.com/GrovePi/projects-for-the-raspberry-pi/
https://www.dexterindustries.com/GrovePi/projects-for-the-raspberry-pi/raspberry-pi-temperature-sensor/
https://github.com/DexterInd/GrovePi/blob/master/Projects/Home_Weather_Display/Home_Weather_Display.py
センサ

コード
from grovepi import *
from grove_rgb_lcd import *
from time import sleep
from math import isnan

dht_sensor_port = 7 # connect the DHt sensor to port 7
dht_sensor_type = 0 # use 0 for the blue-colored sensor and 1 for the white-colored sensor

# set green as backlight color
# we need to do it just once
# setting the backlight color once reduces the amount of data transfer over the I2C line
setRGB(0,255,0)
setText("")

while True:
	try:
        # get the temperature and Humidity from the DHT sensor
		[ temp,hum ] = dht(dht_sensor_port,dht_sensor_type)
		print("temp =", temp, "C\thumidity =", hum,"%")

		# check if we have nans
		# if so, then raise a type error exception
		if isnan(temp) is True or isnan(hum) is True:
			raise TypeError('nan error')

		t = str(temp)
		h = str(hum)

        # instead of inserting a bunch of whitespace, we can just insert a \n
        # we're ensuring that if we get some strange strings on one line, the 2nd one won't be affected
		setText_norefresh("Temp:" + t + "C\n" + "Humidity :" + h + "%")

		time.sleep(1)

	except (IOError, TypeError) as e:
		print(str(e))
		# and since we got a type error
		# then reset the LCD's text
		setText("")
		break

	except KeyboardInterrupt as e:
		print(str(e))
		# since we're exiting the program
		# it's better to leave the LCD with a blank text
		setText("")
		break

	# wait some time before re-updating the LCD
	sleep(0.05)
結果
$ python Home_Weather_Display.py
('temp =', 21.0, 'C\thumidity =', 57.0, '%')
('temp =', 21.0, 'C\thumidity =', 57.0, '%')
('temp =', 21.0, 'C\thumidity =', 56.0, '%')
('temp =', 21.0, 'C\thumidity =', 56.0, '%')
('temp =', 21.0, 'C\thumidity =', 56.0, '%')
5.Example Project: Sensor Twitter Feed(センサ値のツイート)
https://www.dexterindustries.com/GrovePi/projects-for-the-raspberry-pi/
http://www.dexterindustries.com/GrovePi/projects-for-the-raspberry-pi/raspberry-pi-twitter-sensor-feed/
https://github.com/DexterInd/GrovePi/tree/master/Projects/Sensor_Twitter_Feed
ツイートには対応していません。
センサ
コード
# import twitter
import time
import grovepi
import math

# Connections
sound_sensor = 0        # port A0
light_sensor = 1        # port A1
temperature_sensor = 2  # port D2
led = 3                 # port D3

intro_str = "DI Lab's"

# Connect to Twitter
"""
api = twitter.Api(
    consumer_key='YourKey',
    consumer_secret='YourKey',
    access_token_key='YourKey',
    access_token_secret='YourKey'
    )
"""

grovepi.pinMode(led,"OUTPUT")
grovepi.analogWrite(led,255)  #turn led to max to show readiness

while True:

    # Error handling in case of problems communicating with the GrovePi
    try:

        # Get value from light sensor
        light_intensity = grovepi.analogRead(light_sensor)

        # Give PWM output to LED
        #grovepi.analogWrite(led,light_intensity/4)
        grovepi.analogWrite(led,light_intensity*20)

        # Get sound level
        sound_level = grovepi.analogRead(sound_sensor)

        time.sleep(0.5)

        # Get value from temperature sensor
        [t,h]=[0,0]
        [t,h] = grovepi.dht(temperature_sensor,0)

        # Post a tweet
        out_str ="%s Temp: %d C, Humidity: %d, Light: %d, Sound: %d" %(intro_str,t,h,light_intensity/10,sound_level)
        print (out_str)
        #api.PostUpdate(out_str)

        #time.sleep(60)
        time.sleep(2)

    except IOError:
        print("Error")
        exit()

    except KeyboardInterrupt:
        exit()

    except Exception as e:
        print("Duplicate Tweet or Twitter Refusal: {}".format(e))
        exit()
結果
$ python wifi_twit.py
DI Lab's Temp: 24 C, Humidity: 50, Light: 76, Sound: 593
DI Lab's Temp: 24 C, Humidity: 51, Light: 76, Sound: 196
DI Lab's Temp: 24 C, Humidity: 51, Light: 76, Sound: 195
DI Lab's Temp: 24 C, Humidity: 51, Light: 76, Sound: 197
6.Grove - Buzzer(ブザー)
https://www.seeedstudio.com/Grove-Buzzer.html
http://wiki.seeedstudio.com/Grove-Buzzer/#play-with-raspberry-pi-with-grovepi_plus
センサ

コード
import time
import grovepi

# Connect the Grove Buzzer to digital port D8
# SIG,NC,VCC,GND
buzzer = 8

grovepi.pinMode(buzzer,"OUTPUT")

# Buzz for 1 second
grovepi.digitalWrite(buzzer,1)
print ('start')
time.sleep(1)

# Stop buzzing for 1 second and repeat
grovepi.digitalWrite(buzzer,0)
print ('stop')
結果
$ python grove_buzzer.py
start
stop
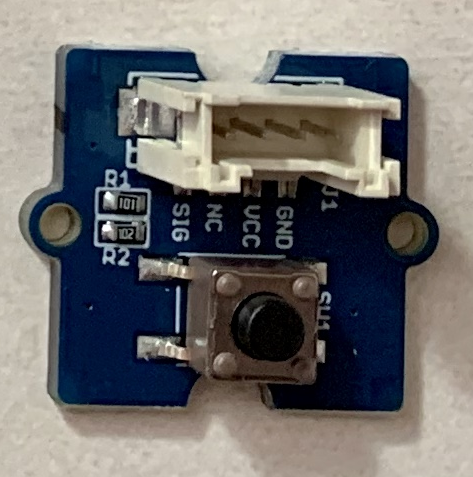
7.Grove - Button(ボタン)
https://www.seeedstudio.com/Grove-Button.html
http://wiki.seeedstudio.com/Grove-Button/#play-with-raspberry-piwith-grovepi_plus
センサ
コード
import time
import grovepi

# Connect the Grove Button to digital port D4
# SIG,NC,VCC,GND
button = 4

grovepi.pinMode(button,"INPUT")

while True:
    try:
        print(grovepi.digitalRead(button))
        time.sleep(0.5)

    except KeyboardInterrupt:	# Stop the buzzer before stopping
        break

    except (IOError,TypeError) as e:
        print("Error")
        break
結果
$ python grove_button.py
0
0
0
1
1
1
0
0
1
0
0
0
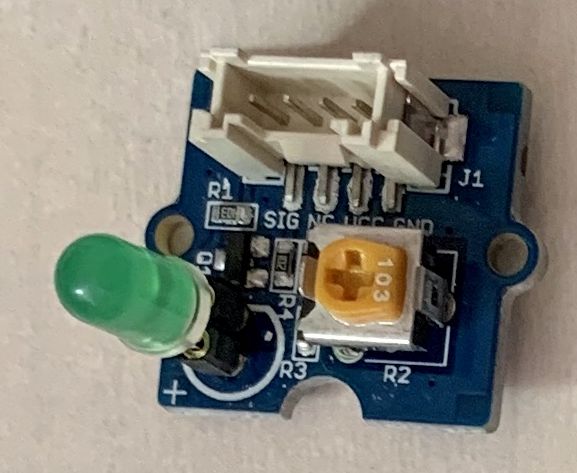
8.Grove - LED
https://www.seeedstudio.com/Grove-Green-LED.html
https://www.seeedstudio.com/Grove-Red-LED.html
https://www.seeedstudio.com/Grove-Blue-LED.html
http://wiki.seeedstudio.com/Grove-Red_LED/#play-with-raspberry-pi-with-grovepi_plus
センサ

コード
import time
from grovepi import *

# Connect the Grove LED to digital port D4
led = 4

pinMode(led,"OUTPUT")
time.sleep(1)

while True:
    try:
        #Blink the LED
        digitalWrite(led,1)	# Send HIGH to switch on LED
        print ("LED ON!")
        time.sleep(1)

        digitalWrite(led,0)	# Send LOW to switch off LED
        print ("LED OFF!")
        time.sleep(1)

    except KeyboardInterrupt:	# Turn LED off before stopping
        digitalWrite(led,0)
        break

    except IOError:		# Print "Error" if communication error encountered
        print ("Error")
結果
$ python grove_led_blink.py
LED ON!
LED OFF!
LED ON!
LED OFF!
LED ON!
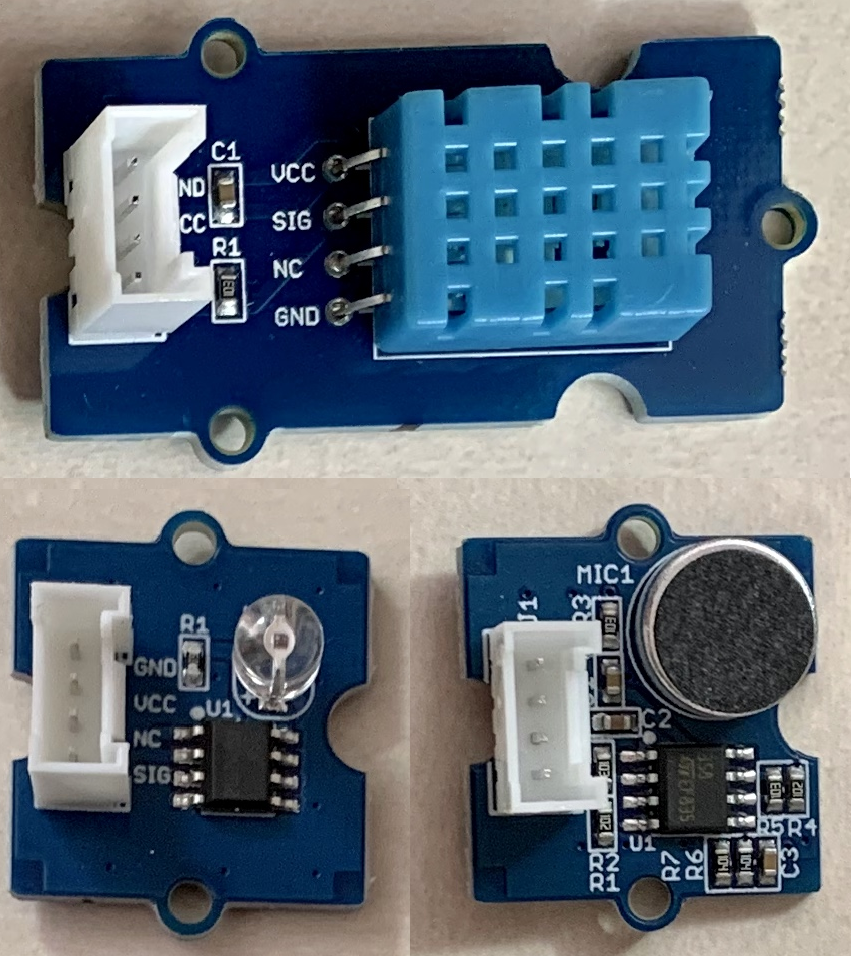
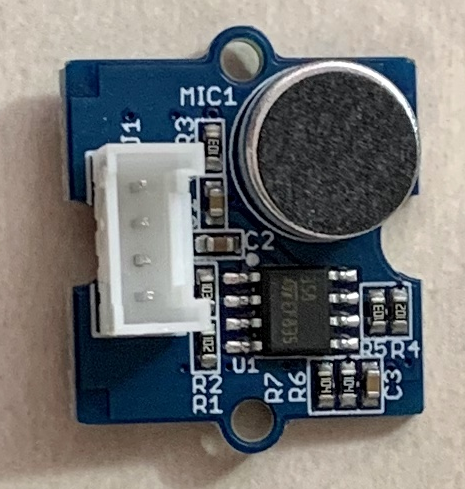
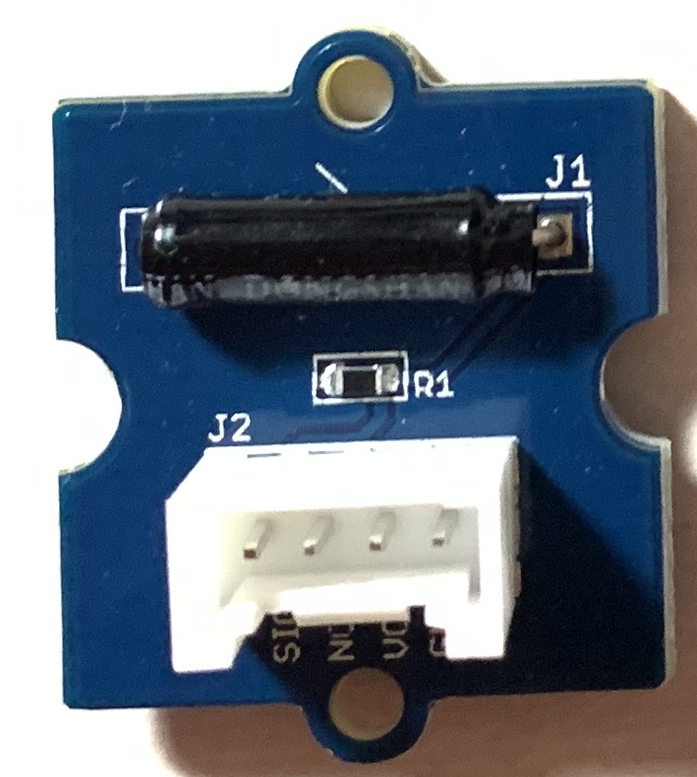
9.Grove - Sound Sensor(音センサ)
https://www.seeedstudio.com/Grove-Sound-Sensor.html
http://wiki.seeedstudio.com/Grove-Sound_Sensor/#play-with-raspberry-pi-with-grovepi_plus
センサ
コード
import time
import grovepi

# Connect the Grove Sound Sensor to analog port A0
# SIG,NC,VCC,GND
sound_sensor = 0

# Connect the Grove LED to digital port D5
# SIG,NC,VCC,GND
led = 5

grovepi.pinMode(sound_sensor,"INPUT")
grovepi.pinMode(led,"OUTPUT")

# The threshold to turn the led on 400.00 * 5 / 1024 = 1.95v
# threshold_value = 400
threshold_value = 40

while True:
    try:
        # Read the sound level
        sensor_value = grovepi.analogRead(sound_sensor)

        # If loud, illuminate LED, otherwise dim
        if sensor_value > threshold_value:
            grovepi.digitalWrite(led,1)
        else:
            grovepi.digitalWrite(led,0)

        print("sensor_value = %d" %sensor_value)
        time.sleep(0.5)

    except KeyboardInterrupt:
        break

    except (IOError,TypeError) as e:
        print("Error")
        break
結果
$ python grove_sound_sensor.py
sensor_value = 580
sensor_value = 221
sensor_value = 270
sensor_value = 976
sensor_value = 755
sensor_value = 222
sensor_value = 222
sensor_value = 222
sensor_value = 222
sensor_value = 221
sensor_value = 222
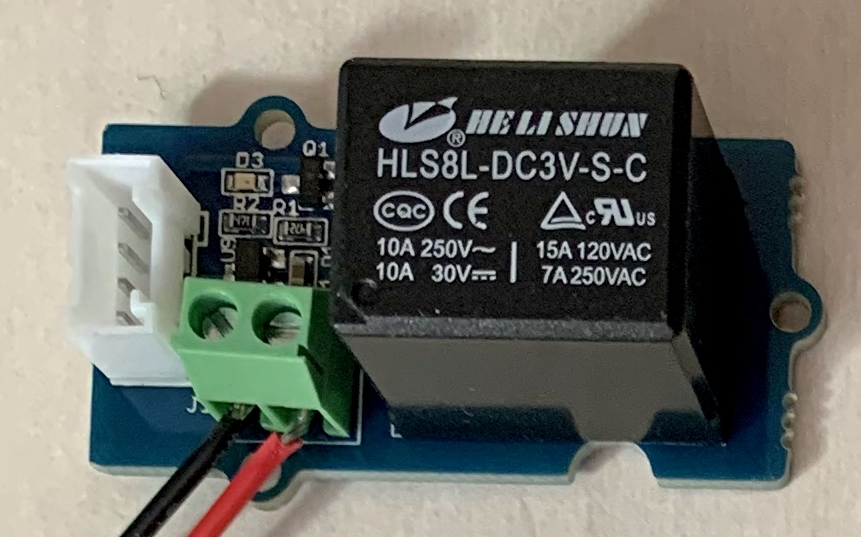
10.Grove - Relay(リレー)
https://www.seeedstudio.com/Grove-Relay.html
http://wiki.seeedstudio.com/Grove-Relay/#play-with-raspberry-pi-with-grovepi_plus
センサ
コード
import time
import grovepi
# Connect the Grove Switch to digital port D3
# SIG,NC,VCC,GND

switch = 3
# Connect the Grove Relay to digital port D4
# SIG,NC,VCC,GND

relay = 4
grovepi.pinMode(switch,"INPUT")
grovepi.pinMode(relay,"OUTPUT")
grovepi.digitalWrite(relay,0)

while True:
    try:
        if grovepi.digitalRead(switch):
            print("ON")
            grovepi.digitalWrite(relay,1)
        else:
            grovepi.digitalWrite(relay,0)
            print("OFF")
        time.sleep(0.5)

    except KeyboardInterrupt:
        grovepi.digitalWrite(relay,0)
        break

    except (IOError,TypeError) as e:
        print("Error")
        break
結果
$ python grove_switch_relay.py
OFF
OFF
OFF
ON
ON
ON
OFF
OFF
OFF
OFF
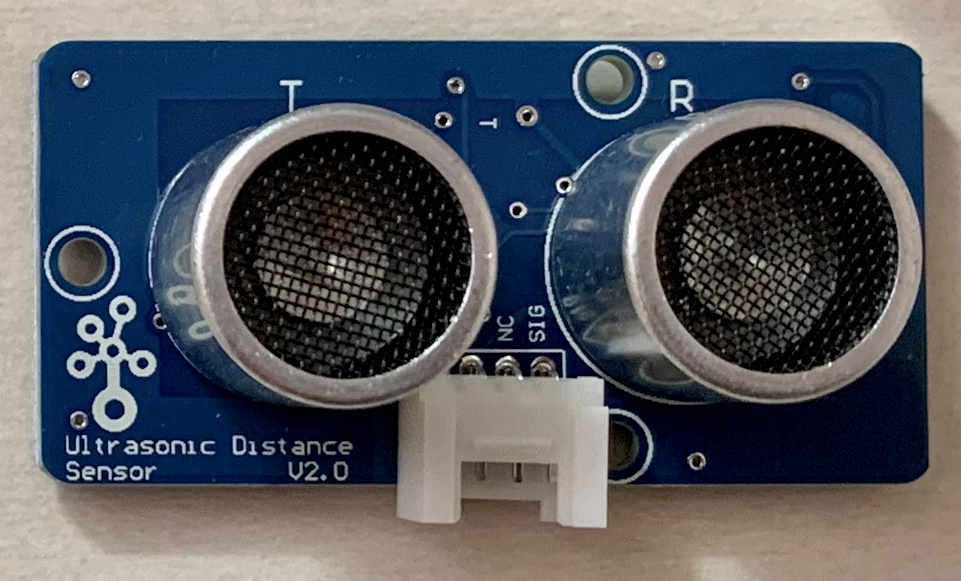
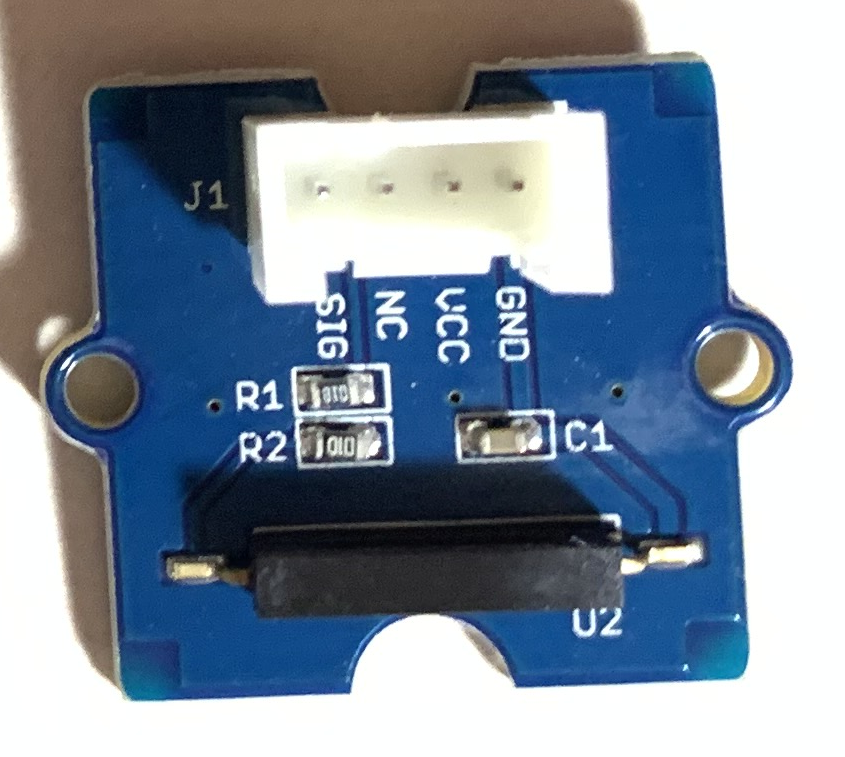
11.Grove - Ultrasonic Distance Sensor(距離センサ)
https://www.seeedstudio.com/Grove-Ultrasonic-Distance-Sensor.html
http://wiki.seeedstudio.com/Grove-Ultrasonic_Ranger/#play-with-raspberry-pi-with-grovepi_plus
センサ
コード
from grovepi import *

# Connect the Grove Ultrasonic Ranger to digital port D4
# SIG,NC,VCC,GND

ultrasonic_ranger = 4

while True:
    try:
        # Read distance value from Ultrasonic
        print ultrasonicRead(ultrasonic_ranger)
        time.sleep(0.2)

    except KeyboardInterrupt:
        break

    except (IOError,TypeError) as e:
        print("Error")
        break
結果
$ python grove_ultrasonic.py
166
166
166
36
32
31
31
31
30
30
38
166
166
4
2
2
166
166
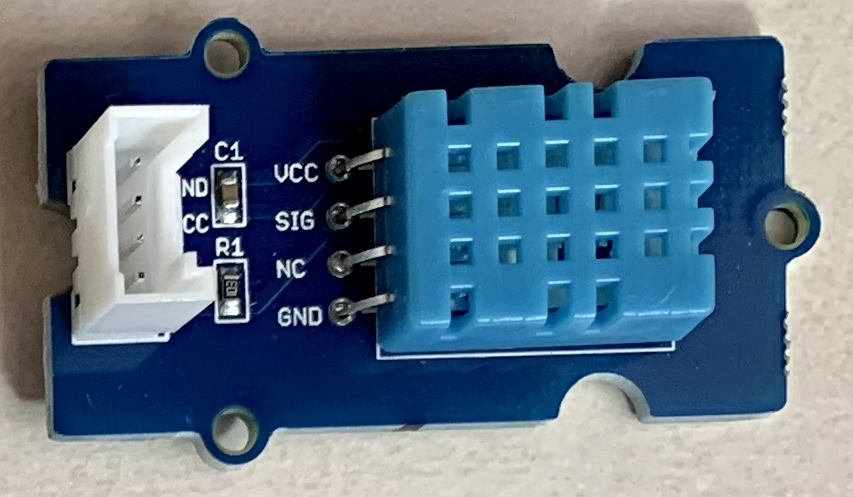
12.Grove - Temperature & Humidity Sensor (DHT11)(温湿度センサ)
https://www.seeedstudio.com/Grove-Temperature-Humidity-Sensor-DHT11.html
http://wiki.seeedstudio.com/Grove-TemperatureAndHumidity_Sensor/#play-with-raspberry-pi-with-grovepi_plus
センサ
コード
import grovepi
import math
import time
# Connect the Grove Temperature & Humidity Sensor Pro to digital port D4
# This example uses the blue colored sensor.
# SIG,NC,VCC,GND
sensor = 4  # The Sensor goes on digital port 4.

# temp_humidity_sensor_type
# Grove Base Kit comes with the blue sensor.
blue = 0    # The Blue colored sensor.
white = 1   # The White colored sensor.

while True:
    try:
        # This example uses the blue colored sensor.
        # The first parameter is the port, the second parameter is the type of sensor.
        [temp,humidity] = grovepi.dht(sensor,blue)
        if math.isnan(temp) == False and math.isnan(humidity) == False:
            print("temp = %.02f C humidity =%.02f%%"%(temp, humidity))
        time.sleep(0.5)

    except KeyboardInterrupt:
        break

    except (IOError,TypeError) as e:
        print("Error")
        break
結果
$ python grove_dht_pro.py
temp = 19.00 C humidity =63.00%
temp = 19.00 C humidity =63.00%
temp = 19.00 C humidity =63.00%
temp = 19.00 C humidity =62.00%
13.Grove - Rotary Angle Sensor(回転角度センサ)
https://www.seeedstudio.com/Grove-Rotary-Angle-Sensor.html
http://wiki.seeedstudio.com/Grove-Rotary_Angle_Sensor/#play-with-raspberry-pi-with-grovepi_plus
センサ
コード
import time
import grovepi

# Connect the Grove Rotary Angle Sensor to analog port A0
# SIG,NC,VCC,GND
potentiometer = 0

# Connect the LED to digital port D5
# SIG,NC,VCC,GND
led = 5

grovepi.pinMode(potentiometer,"INPUT")
grovepi.pinMode(led,"OUTPUT")
time.sleep(1)

# Reference voltage of ADC is 5v
adc_ref = 5

# Vcc of the grove interface is normally 5v
grove_vcc = 5

# Full value of the rotary angle is 300 degrees, as per it's specs (0 to 300)
full_angle = 300

while True:
    try:
        # Read sensor value from potentiometer
        sensor_value = grovepi.analogRead(potentiometer)

        # Calculate voltage
        voltage = round((float)(sensor_value) * adc_ref / 1023, 2)

        # Calculate rotation in degrees (0 to 300)
        degrees = round((voltage * full_angle) / grove_vcc, 2)

        # Calculate LED brightess (0 to 255) from degrees (0 to 300)
        brightness = int(degrees / full_angle * 255)

        # Give PWM output to LED
        grovepi.analogWrite(led,brightness)

        print("sensor_value = %d voltage = %.2f degrees = %.1f brightness = %d" %(sensor_value, voltage, degrees, brightness))
        time.sleep(0.2)

    except KeyboardInterrupt:
        break

    except (IOError,TypeError) as e:
        print("Error")
        break
結果
$ python grove_rotary_angle_sensor.py
sensor_value = 0 voltage = 0.00 degrees = 0.0 brightness = 0
sensor_value = 0 voltage = 0.00 degrees = 0.0 brightness = 0
sensor_value = 0 voltage = 0.00 degrees = 0.0 brightness = 0
sensor_value = 222 voltage = 1.09 degrees = 65.4 brightness = 55
sensor_value = 392 voltage = 1.92 degrees = 115.2 brightness = 97
sensor_value = 485 voltage = 2.37 degrees = 142.2 brightness = 120
sensor_value = 511 voltage = 2.50 degrees = 150.0 brightness = 127
sensor_value = 530 voltage = 2.59 degrees = 155.4 brightness = 132
sensor_value = 562 voltage = 2.75 degrees = 165.0 brightness = 140
sensor_value = 617 voltage = 3.02 degrees = 181.2 brightness = 154
sensor_value = 706 voltage = 3.45 degrees = 207.0 brightness = 175
sensor_value = 826 voltage = 4.04 degrees = 242.4 brightness = 206
sensor_value = 950 voltage = 4.64 degrees = 278.4 brightness = 236
sensor_value = 1021 voltage = 4.99 degrees = 299.4 brightness = 254
sensor_value = 1023 voltage = 5.00 degrees = 300.0 brightness = 255
sensor_value = 1023 voltage = 5.00 degrees = 300.0 brightness = 255
sensor_value = 1023 voltage = 5.00 degrees = 300.0 brightness = 255
sensor_value = 1022 voltage = 5.00 degrees = 300.0 brightness = 255
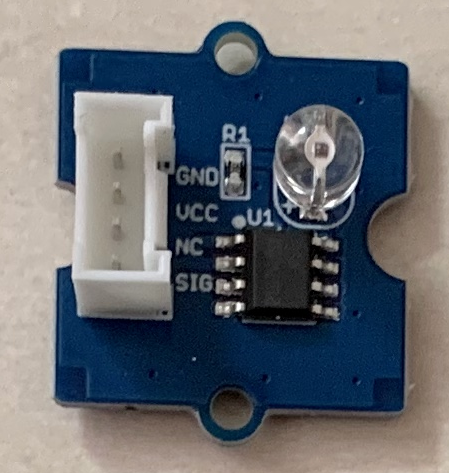
14.Grove - Light Sensor v1.2(光センサ)
https://www.seeedstudio.com/Grove-Light-Sensor-v1-2.html
http://wiki.seeedstudio.com/Grove-Light_Sensor/#play-with-raspberry-pi-with-grovepi_plus
センサ
コード
import time
import grovepi

# Connect the Grove Light Sensor to analog port A0
# SIG,NC,VCC,GND
light_sensor = 0

# Connect the LED to digital port D4
# SIG,NC,VCC,GND
led = 4

# Turn on LED once sensor exceeds threshold resistance
threshold = 10

grovepi.pinMode(light_sensor,"INPUT")
grovepi.pinMode(led,"OUTPUT")

while True:
    try:
        # Get sensor value
        sensor_value = grovepi.analogRead(light_sensor)

        # Calculate resistance of sensor in K
        resistance = (float)(1023 - sensor_value) * 10 / sensor_value

        if resistance > threshold:
            # Send HIGH to switch on LED
            grovepi.digitalWrite(led,1)
        else:
            # Send LOW to switch off LED
            grovepi.digitalWrite(led,0)

        print("sensor_value = %d resistance = %.2f" %(sensor_value,  resistance))
        time.sleep(0.5)

    except KeyboardInterrupt:	# Turn LED off before stopping
        grovepi.digitalWrite(led,0)
        break
    except IOError:				# Print "Error" if communication error encountered
        print ("Error")
結果
$ python grove_light_sensor.py
sensor_value = 64 resistance = 149.84
sensor_value = 68 resistance = 140.44
sensor_value = 72 resistance = 132.08
sensor_value = 75 resistance = 126.40
sensor_value = 76 resistance = 124.61
sensor_value = 91 resistance = 102.42
sensor_value = 404 resistance = 15.32
sensor_value = 511 resistance = 10.02
sensor_value = 512 resistance = 9.98
sensor_value = 496 resistance = 10.62
sensor_value = 771 resistance = 3.27
sensor_value = 771 resistance = 3.27
sensor_value = 772 resistance = 3.25
sensor_value = 772 resistance = 3.25
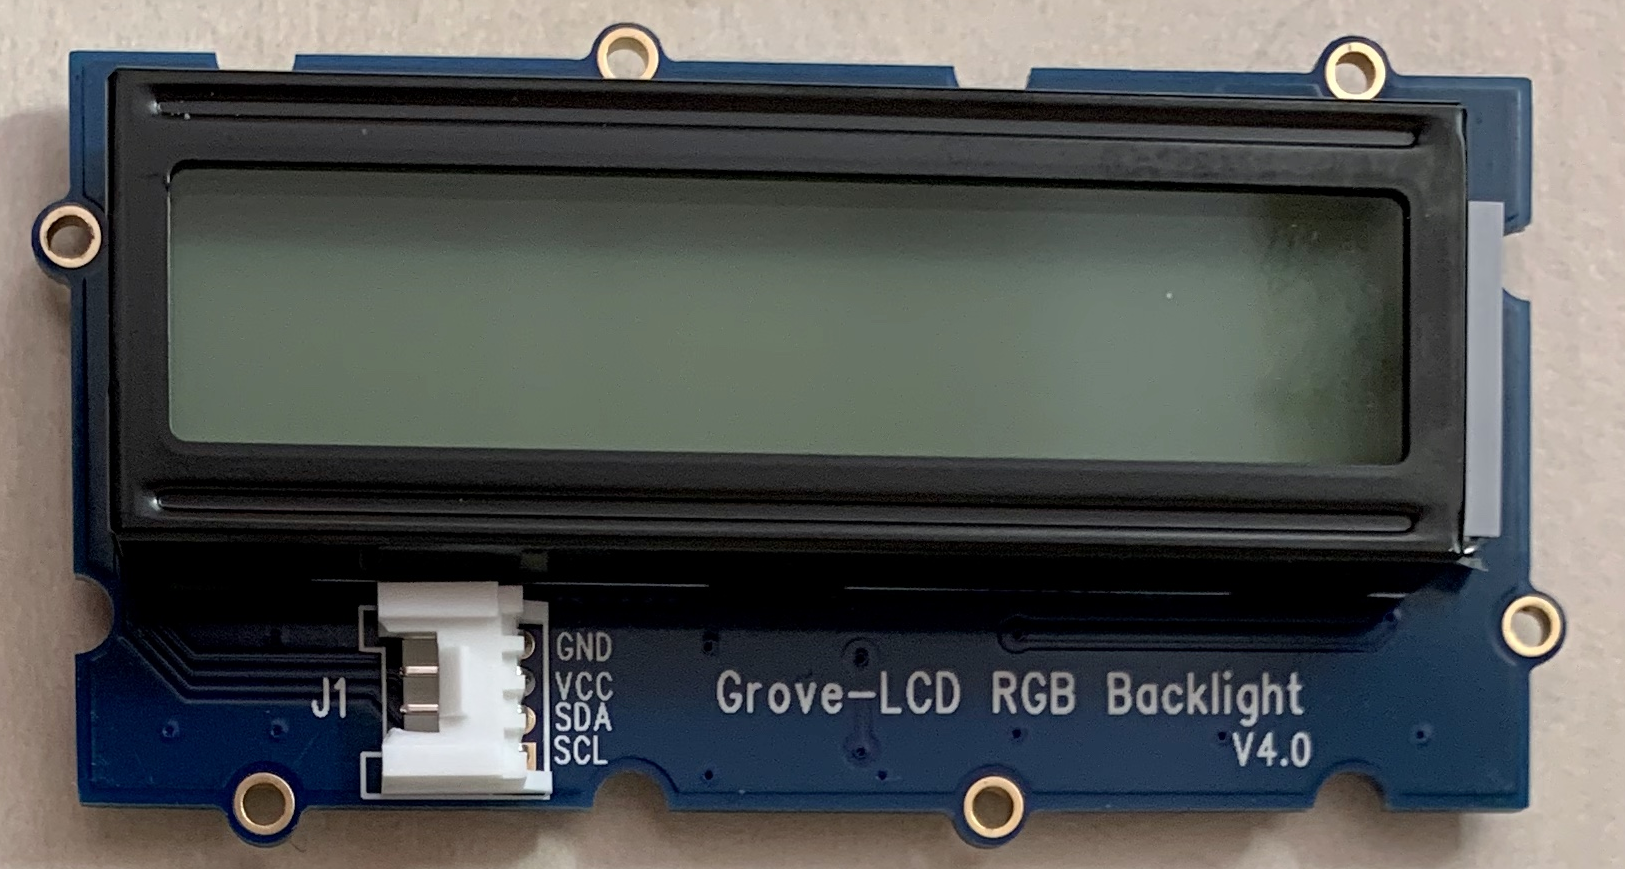
15.Grove - LCD RGB Backlight
https://www.seeedstudio.com/Grove-LCD-RGB-Backlight.html
http://wiki.seeedstudio.com/Grove-LCD_RGB_Backlight/#play-with-raspberry-pi
センサ
コード
import time
import sys
if sys.platform == 'uwp':
import winrt_smbus as smbus
bus = smbus.SMBus(1)
else:
import smbus
import RPi.GPIO as GPIO
rev = GPIO.RPI_REVISION
if rev == 2 or rev == 3:
bus = smbus.SMBus(1)
else:
bus = smbus.SMBus(0)
# this device has two I2C addresses
DISPLAY_RGB_ADDR = 0x62
DISPLAY_TEXT_ADDR = 0x3e
# set backlight to (R,G,B) (values from 0..255 for each)
def setRGB(r,g,b):
bus.write_byte_data(DISPLAY_RGB_ADDR,0,0)
bus.write_byte_data(DISPLAY_RGB_ADDR,1,0)
bus.write_byte_data(DISPLAY_RGB_ADDR,0x08,0xaa)
bus.write_byte_data(DISPLAY_RGB_ADDR,4,r)
bus.write_byte_data(DISPLAY_RGB_ADDR,3,g)
bus.write_byte_data(DISPLAY_RGB_ADDR,2,b)
# send command to display (no need for external use)
def textCommand(cmd):
bus.write_byte_data(DISPLAY_TEXT_ADDR,0x80,cmd)
# set display text \n for second line(or auto wrap)
def setText(text):
textCommand(0x01) # clear display
time.sleep(.05)
textCommand(0x08 | 0x04) # display on, no cursor
textCommand(0x28) # 2 lines
time.sleep(.05)
count = 0
row = 0
for c in text:
if c == '\n' or count == 16:
count = 0
row += 1
if row == 2:
break
textCommand(0xc0)
if c == '\n':
continue
count += 1
bus.write_byte_data(DISPLAY_TEXT_ADDR,0x40,ord(c))
# Update the display without erasing the display
def setText_norefresh(text):
textCommand(0x02) # return home
time.sleep(.05)
textCommand(0x08 | 0x04) # display on, no cursor
textCommand(0x28) # 2 lines
time.sleep(.05)
count = 0
row = 0
while len(text) < 32: #clears the rest of the screen
text += ' '
for c in text:
if c == '\n' or count == 16:
count = 0
row += 1
if row == 2:
break
textCommand(0xc0)
if c == '\n':
continue
count += 1
bus.write_byte_data(DISPLAY_TEXT_ADDR,0x40,ord(c))
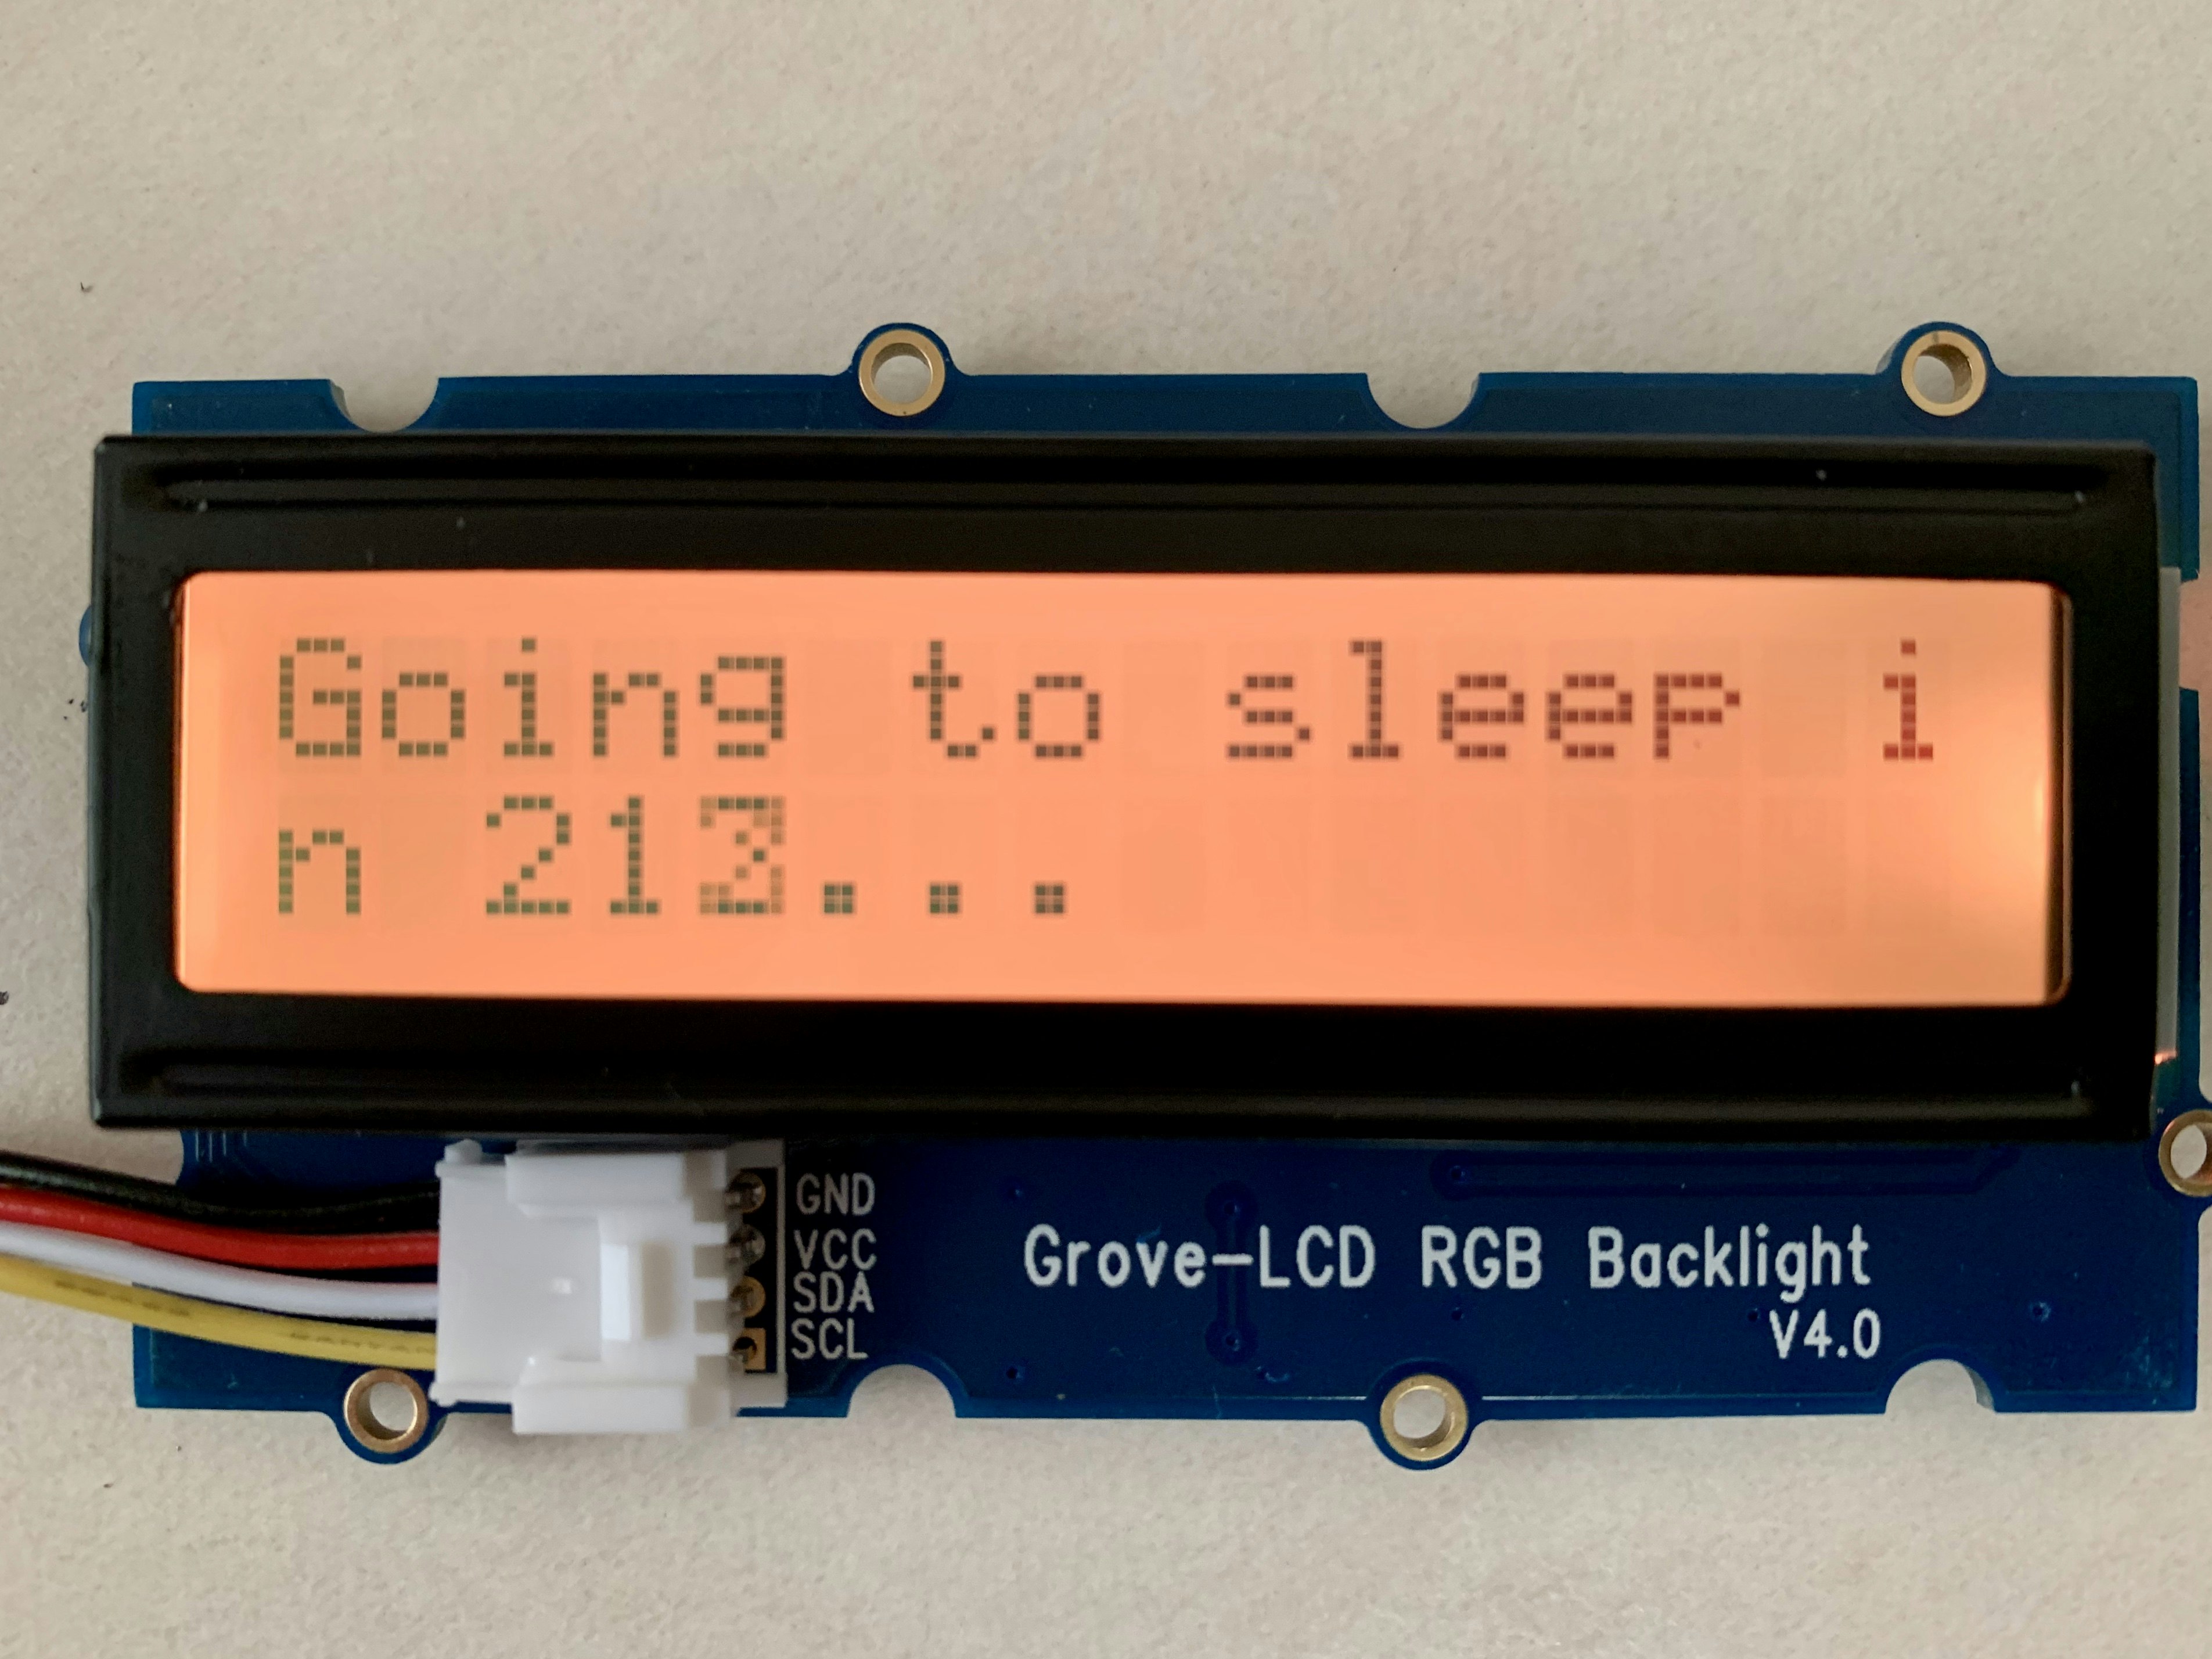
# example code
if __name__=="__main__":
setText("Hello world\nThis is an LCD test")
setRGB(0,128,64)
time.sleep(2)
for c in range(0,255):
setText_norefresh("Going to sleep in {}...".format(str(c)))
setRGB(c,255-c,0)
time.sleep(0.1)
setRGB(0,255,0)
setText("Bye bye, this should wrap onto next line")
結果
他のセンサを試してみた
16.Grove - Touch Sensor(タッチセンサ)
https://www.seeedstudio.com/Grove-Touch-Sensor.html
http://wiki.seeedstudio.com/Grove-Touch_Sensor/#play-with-raspberry-pi-with-grovepi_plus
センサ

コード
import time
import grovepi

# Connect the Grove Button to digital port D4
# SIG,NC,VCC,GND
button = 4

grovepi.pinMode(button,"INPUT")

while True:
    try:
        print(grovepi.digitalRead(button))
        time.sleep(0.5)

    except KeyboardInterrupt:	# Stop the buzzer before stopping
        break

    except (IOError,TypeError) as e:
        print("Error")
        break
結果
$ python grove_button.py
0
0
0
1
1
1
0
0
1
1
0
0
0
17.Grove - Magnetic Switch(磁気スイッチ)
https://www.seeedstudio.com/Grove-Magnetic-Switch-p-744.html
http://wiki.seeedstudio.com/Grove-Magnetic_Switch/#play-with-raspberry-pi
センサ
コード
import time
import grovepi

# Connect the Grove Tilt Switch to digital port D2
# SIG,NC,VCC,GND
tilt_switch = 2

grovepi.pinMode(tilt_switch,"INPUT")

while True:
    try:
        print grovepi.digitalRead(tilt_switch)
        time.sleep(0.5)
    except KeyboardInterrupt:
        break
    except IOError:
        print ("Error")
結果
$ python grovepi_tilt_switch.py
0
0
0
1
0
0
1
1
1
1
1
0
0
0
0
18.Grove - Tilt Switch(傾きセンサ)
https://www.seeedstudio.com/Grove-Tilt-Switch.html
http://wiki.seeedstudio.com/Grove-Tilt_Switch/
センサ
コードと結果
「17.Grove - Magnetic Switch(磁気スイッチ)」と同じ。
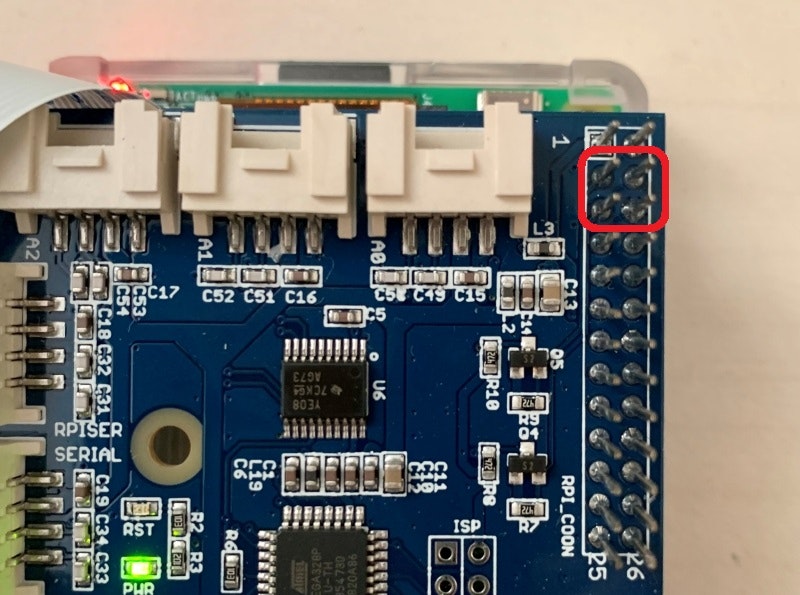
19.Grove - 3 Axis Digital Accelerometer(±16g)(加速度計)
センサ
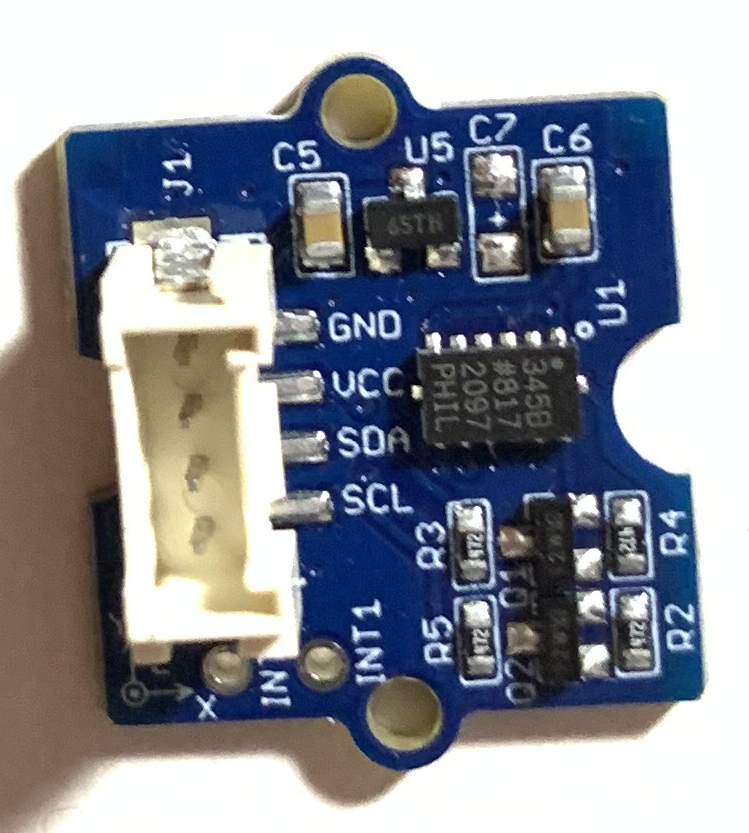
Grove Pi+ 経由のサンプルが無く、以下の赤囲みのI2Cと5V電源を直接使う。
コード
import smbus
from time import sleep

# select the correct i2c bus for this revision of Raspberry Pi
revision = ([l[12:-1] for l in open('/proc/cpuinfo','r').readlines() if l[:8]=="Revision"]+['0000'])[0]
bus = smbus.SMBus(1 if int(revision, 16) >= 4 else 0)

# ADXL345 constants
EARTH_GRAVITY_MS2   = 9.80665
SCALE_MULTIPLIER    = 0.004

DATA_FORMAT         = 0x31
BW_RATE             = 0x2C
POWER_CTL           = 0x2D

BW_RATE_1600HZ      = 0x0F
BW_RATE_800HZ       = 0x0E
BW_RATE_400HZ       = 0x0D
BW_RATE_200HZ       = 0x0C
BW_RATE_100HZ       = 0x0B
BW_RATE_50HZ        = 0x0A
BW_RATE_25HZ        = 0x09

RANGE_2G            = 0x00
RANGE_4G            = 0x01
RANGE_8G            = 0x02
RANGE_16G           = 0x03

MEASURE             = 0x08
AXES_DATA           = 0x32

class ADXL345:

    address = None

    def __init__(self, address = 0x53):
        self.address = address
        self.setBandwidthRate(BW_RATE_100HZ)
        self.setRange(RANGE_2G)
        self.enableMeasurement()

    def enableMeasurement(self):
        bus.write_byte_data(self.address, POWER_CTL, MEASURE)

    def setBandwidthRate(self, rate_flag):
        bus.write_byte_data(self.address, BW_RATE, rate_flag)

    # set the measurement range for 10-bit readings
    def setRange(self, range_flag):
        value = bus.read_byte_data(self.address, DATA_FORMAT)

        value &= ~0x0F;
        value |= range_flag;
        value |= 0x08;

        bus.write_byte_data(self.address, DATA_FORMAT, value)

    # returns the current reading from the sensor for each axis
    #
    # parameter gforce:
    #    False (default): result is returned in m/s^2
    #    True           : result is returned in gs
    def getAxes(self, gforce = False):
        bytes = bus.read_i2c_block_data(self.address, AXES_DATA, 6)

        x = bytes[0] | (bytes[1] << 8)
        if(x & (1 << 16 - 1)):
            x = x - (1<<16)

        y = bytes[2] | (bytes[3] << 8)
        if(y & (1 << 16 - 1)):
            y = y - (1<<16)

        z = bytes[4] | (bytes[5] << 8)
        if(z & (1 << 16 - 1)):
            z = z - (1<<16)

        x = x * SCALE_MULTIPLIER
        y = y * SCALE_MULTIPLIER
        z = z * SCALE_MULTIPLIER

        if gforce == False:
            x = x * EARTH_GRAVITY_MS2
            y = y * EARTH_GRAVITY_MS2
            z = z * EARTH_GRAVITY_MS2

        x = round(x, 4)
        y = round(y, 4)
        z = round(z, 4)

        return {"x": x, "y": y, "z": z}

if __name__ == "__main__":
    # if run directly we'll just create an instance of the class and output
    # the current readings
    adxl345 = ADXL345()

    while True:
        try:
            axes = adxl345.getAxes(True)
            print("ADXL345 on address 0x%x:" % (adxl345.address))
            print("   x = %.3fG" % ( axes['x'] ))
            print("   y = %.3fG" % ( axes['y'] ))
            print("   z = %.3fG" % ( axes['z'] ))
            sleep(2)

        except KeyboardInterrupt:
            break

        except (IOError,TypeError) as e:
            print("Error")
            break
結果
$ python grovepi_accelerometer.py
ADXL345 on address 0x53:
   x = -0.072G
   y = -0.136G
   z = 0.908G
ADXL345 on address 0x53:
   x = 0.252G
   y = 0.752G
   z = 0.024G
ADXL345 on address 0x53:
   x = -0.204G
   y = -0.200G
   z = -1.012G
ADXL345 on address 0x53:
   x = 0.088G
   y = -0.356G
   z = 0.828G
その他
今回試験していませんが、保有している以下のセンサも今後試してみるつもりです。
絶対圧センサ評価モジュール
https://www.switch-science.com/catalog/5329/
https://camp.isaax.io/ja/examples/2smpb-02e-raspberry-pi
https://github.com/isaaxug/2smpb02e-with-isaax
Grove - Temperature Sensor(温度センサ)
https://www.seeedstudio.com/Grove-Temperature-Sensor.html
http://wiki.seeedstudio.com/Grove-Temperature_Sensor_V1.2/#play-with-raspberry-pi-with-grovepi_plus
Grove - GPS Module
https://www.seeedstudio.com/Grove-GPS-Module.html
http://wiki.seeedstudio.com/Grove-GPS/#play-with-raspberry-pi
Grove - Water Sensor(水センサ)
https://www.seeedstudio.com/Grove-Water-Sensor-p-748.html
http://wiki.seeedstudio.com/Grove-Water_Sensor/#play-with-raspberry-piwith-grovepi_plus
Grove - Moisture Sensor(水分センサ)
https://www.seeedstudio.com/Grove-Moisture-Sensor.html
http://wiki.seeedstudio.com/Grove-Moisture_Sensor/#play-with-raspberry-piwith-grovepi_plus