はじめに
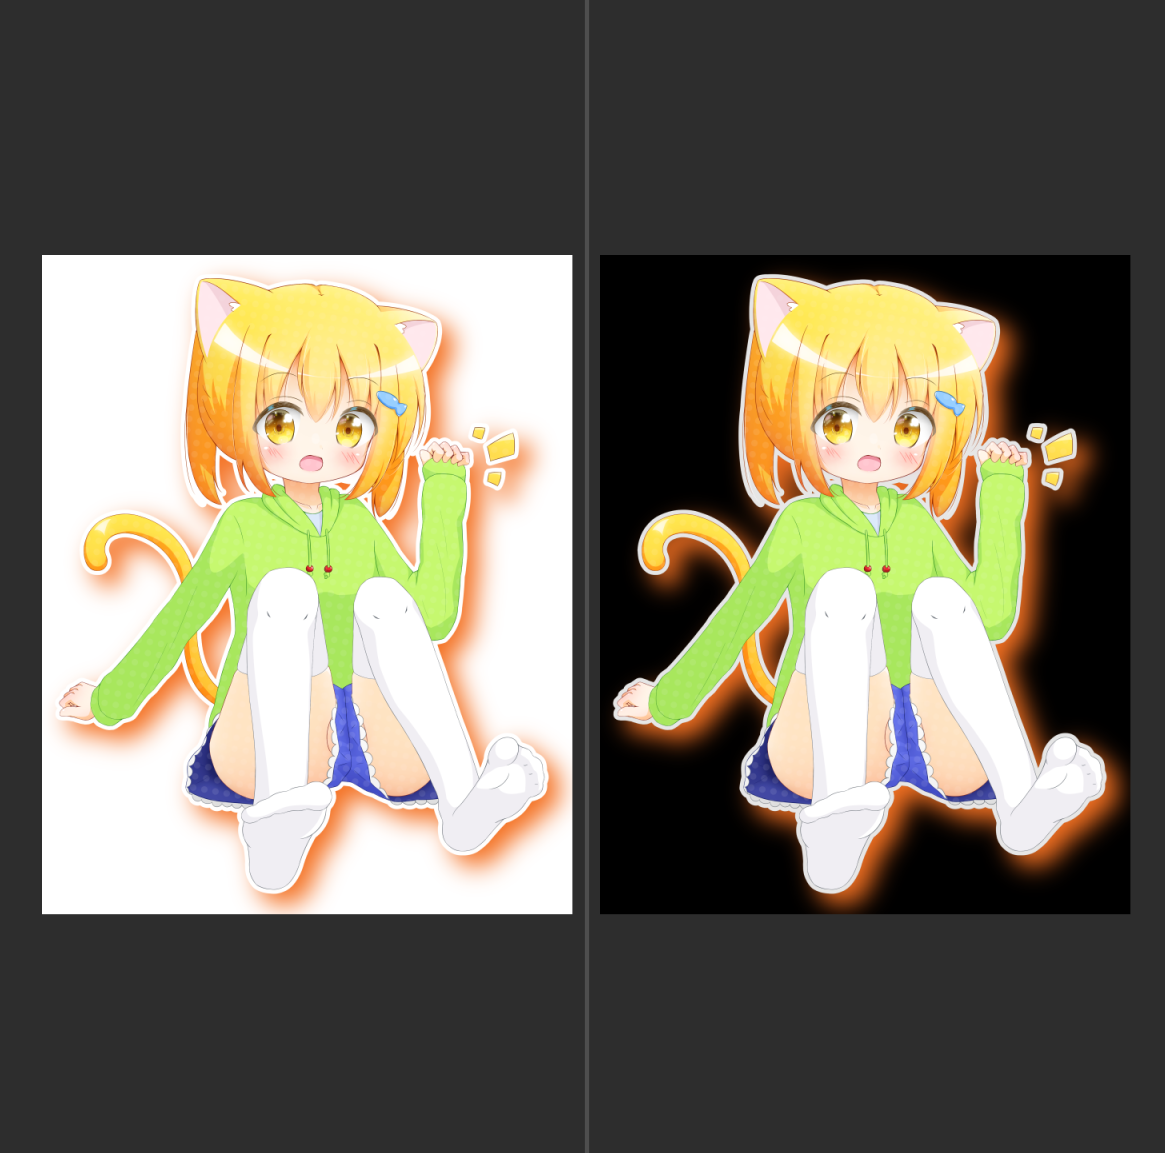
アルファチャンネルの存在しない画像、例えばグリーンバック画像から完全なオリジナルの透過画像を生成するような問題は、条件式が不足していて明らかに解が一意に定まりません。ですが、画像が2枚あれば話は別です。以下のような2枚の画像のが与えられた場合に、透過画像をPythonで生成する問題について説明します。
- 黒背景画像とアルファチャンネル画像の2枚
- 白背景画像とアルファチャンネル画像の2枚
- 黒背景画像と白背景画像
問題設定
アルファ付きの元画像の各ピクセルを $\vec{x}$ とし、以下のように表すとします。
\vec{x} =
  \left( \begin{array}{c} x_r \\ x_g \\ x_b \\ x_a \end{array} \right)
このとき、黒背景画像 $\vec{y}$、白背景画像 $\vec{z}$ は以下のようになります。
y_a = z_a = 1 \\

\quad \\

\begin{eqnarray}

\left( \begin{array}{c} y_r \\ y_g \\ y_b \end{array} \right)
  &=& x_a
    \left( \begin{array}{c} x_r \\ x_g \\ x_b \end{array} \right)
    +
    (1-x_a)
    \left( \begin{array}{c} 0 \\ 0 \\ 0 \end{array} \right) \\
\quad \\

  &=&
    \left( \begin{array}{c} x_a x_r \\ x_a x_g \\ x_a x_b \end{array} \right) \\

\quad \\

\left( \begin{array}{c} z_r \\ z_g \\ z_b \end{array} \right)
  &=& x_a
    \left( \begin{array}{c} x_r \\ x_g \\ x_b \end{array} \right)
    +
    (1-x_a)
    \left( \begin{array}{c} 1 \\ 1 \\ 1 \end{array} \right) \\
\quad \\

  &=&
    \left( \begin{array}{c} x_a x_r-x_a+1 \\ x_a x_g-x_a+1 \\ x_a x_b-x_a+1 \end{array} \right) \\
\end{eqnarray}
アルファブレンド - Wikipedia
https://ja.wikipedia.org/wiki/アルファブレンド
1. 黒背景画像とアルファチャンネルから透過画像を生成
まずは、黒背景画像 $y_r, y_g, y_b$ とアルファチャンネル $x_a$ が与えられた場合について考えてみます。このケースでは $x_r, x_g, x_b$ が未知なので、これらについて解くと以下のようになります。その結果、以下のような RGB 画像が得られます。
\left( \begin{array}{c} x_r \\ x_g \\ x_b \end{array} \right)
  = \frac{1}{x_a}
    \left( \begin{array}{c} y_r \\ y_g \\ y_b \end{array} \right)

このような RGB の表し方を「ストレートRGB」と、また、このような処理を「アンプリマルチプライ処理」と言うそうです。
参考:
コンポジターに必要なアルファチャンネルの知識(後編)
http://compojigoku.blog.fc2.com/blog-entry-5.html
あとは、この RGB 画素値をアルファ値と組み合わせて出力すれば OK です。
Python プログラム
black_background.py
from PIL import Image
import numpy as np

# Read PNG
img_black = np.array(Image.open('background_white.png')).astype(np.float32)
img_alpha = np.array(Image.open('alpha_channel.png')).astype(np.float32)

# Use red channel as alpha
img_alpha = img_alpha[:, :, 0]

# Divide
img_rgb_straight = np.dstack((
    img_black[:, :, 0] * 255.0 / img_alpha,
    img_black[:, :, 1] * 255.0 / img_alpha,
    img_black[:, :, 2] * 255.0 / img_alpha,
  ))
img_rgb_straight = np.clip(img_rgb_straight, 0.0, 255.0)

# RGBA = RGB + A
img_rgba = np.dstack((
  img_rgb_straight,
  img_alpha))

# Write Result
Image.fromarray(img_rgba.astype(np.uint8)).save("argb_generated.png")
2. 白背景画像とアルファチャンネルから透過画像を生成
同様に解くと以下のようになります。
\left( \begin{array}{c} x_r \\ x_g \\ x_b \end{array} \right)
  = \left( \begin{array}{c} 1 \\ 1 \\ 1 \end{array} \right)
    -
    \frac{1}{x_a}
    \left( \begin{array}{c} 1-z_r \\ 1-z_g \\ 1-z_b \end{array} \right)
3. 黒背景画像と白背景画像から透過画像を生成
この場合は $x_a$ も未知変数なのでこれについて解かなければなりません。ですがこれは簡単です。
x_a = 1 - (z_r - y_r) \\
あとは (1) の場合と同様になります。
Python プログラム
black_and_white_background.py
from PIL import Image
import numpy as np

# Read PNG
img_white = np.array(Image.open('background_black.png')).astype(np.float32)
img_black = np.array(Image.open('background_white.png')).astype(np.float32)

# Alpha Matte (from Red channel)
img_alpha = 255.0 - np.absolute(img_white[:, :, 0] - img_black[:, :, 0])

img_darker = np.minimum(img_white, img_black)
img_darker = img_darker[:, :, 0:3]

# Divide "img_darker" by "img_alpha"
img_rgb_straight = np.dstack((
    img_darker[:, :, 0] * 255.0 / img_alpha,
    img_darker[:, :, 1] * 255.0 / img_alpha,
    img_darker[:, :, 2] * 255.0 / img_alpha,
  ))
img_rgb_straight = np.clip(img_rgb_straight, 0.0, 255.0)

# RGBA = RGB + A
img_rgba = np.dstack((
  img_rgb_straight,
  img_alpha))

# Write Result
Image.fromarray(img_rgba.astype(np.uint8)).save("argb_generated.png")
完成した CLIP STUDIO PAINT 用オートアクション
完成したものがこちらになります。