概要
本書ではUbuntu上に作成したminikubeにNginxをデプロイします。その後、「Hello World」のHTMLファイルをデプロイしたNginx上で表示できるようにConfigMapの設定をします。
前提条件
Ubuntu上にminikubeを立ち上げてください。minikubeのインストール方法につきましては著者が執筆しました下記の記事をご参考ください。
Ubuntu20.04.1 LTSにminikubeをインストールする
1. NginxのYAMLファイルを作成する
NginxのYAMLファイルを作成します。vi nginx.yamlでViエディターを立ち上げ、下記のYAMLファイルを作成します。
apiVersion: v1 # 使用するKubernetes APIバージョンを定義
kind: Service # PodのネットワークであるServiceリソースを定義
metadata: # 名前やラベルを指定
  labels:
    app: nginx-app
    name: nginx
  name: nginx-service
spec: # spec内にリソースの仕様を記述する
  selector: # 同一のラベルを定義しているリソースを参照
    app: nginx-app
    name: nginx
  type: NodePort # Kubenetes外からアクセスできるようにNodePortを指定(ホストOSからNginxの画面が確認できるようにする)
  ports:
  - name: nginx-port #ポート番号を指定
    port: 80
    protocol: TCP
    targetPort: nginx-port
---
apiVersion: apps/v1
kind: Deployment # Podの自己修復機能を持つDeploymentリソースを定義
metadata:
  labels:
    app: nginx-app
    name: nginx
  name: nginx
spec:
  replicas: 1 # 作成するPod数を定義
  selector:
    matchLabels:
      app: nginx-app
      name: nginx
  template:
    metadata:
      labels:
        app: nginx-app
        name: nginx
    spec:
      containers:
      - name: nginx
        image: nginx:latest # NginxのDockerHubに記載されているDockerImageの名称とバージョンを指定
        ports:
        - containerPort: 80 # Podから解放するポート番号を定義
          name: nginx-port
          protocol: TCP
2.Nginxをデプロイ
-
下記のコマンドを実行し、作成したYAMLファイルをデプロイします。
$ kubectl apply -f nginx.yaml -
下記のコマンドを実行し、NginxのPodとServiceが作成されたことを確認します。
$ kubectl get pod | grep nginx nginx-669bffdf57-hnmph 1/1 Running 1 25m $ kubectl get service | grep nginx nginx-service NodePort 10.108.1.208 <none> 80:30348/TCP 25m -
下記のコマンドを実行し、ホストOS(Ubuntu)からNginxの画面が表示できるIPアドレスを払い出します。
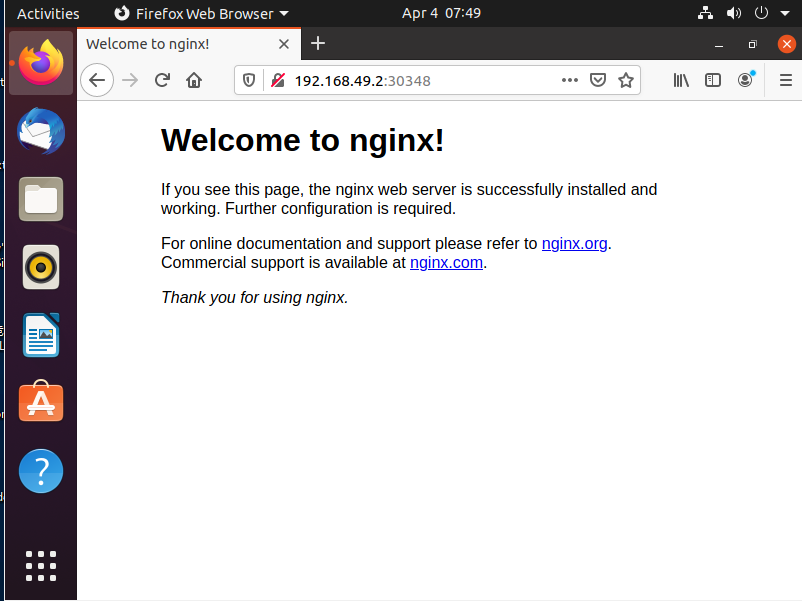
$ minikube service nginx-service |-----------|---------------|---------------|---------------------------| | NAMESPACE | NAME | TARGET PORT | URL | |-----------|---------------|---------------|---------------------------| | default | nginx-service | nginx-port/80 | http://192.168.49.2:30348 | |-----------|---------------|---------------|---------------------------| * Opening service default/nginx-service in default browser... -
ブラウザにて払い出されたIPアドレスに移動し、Nginxのデフォルト画面が表示できることを確認します。
3.index.htmlをConfigmapリソースに保存
ConfigMapとは設定ファイルをリソース内に保存し、保存した設定ファイルをPodにマウントする際に使用されます。
Kubernetes公式のConfigMap概要
vi nginx-configmap.yamlにてViエディターを立ち上げConfigMapのYAMLファイルを作成します。
apiVersion: v1
kind: ConfigMap # Podに設定ファイルを渡すことができるリソース
metadata:
  labels:
    app: nginx-app
    name: nginx
  name: nginx-html
data: # 下記にPodに渡したい設定ファイルを定義
  index.html: | # ファイル名を定義
    <html> # 設定ファイルの中身を記載
      <head>
        <title>
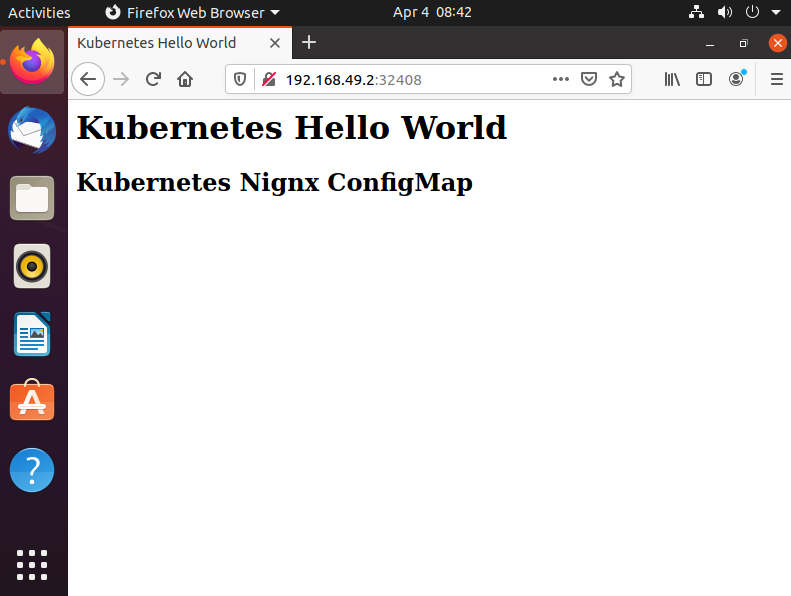
        Kubernetes Hello World
        </title>
      <body>
        <h1>
        Kubernetes Hello World
        </h1>
        <h2>
        Kubernetes Nignx ConfigMap
        </h2>
      </body>
    </html>
YAMLファイルの作成後、kubectl apply -f nginx-configmap.yamlを実行しConfigMapリソースを作成します。ConfigMapリソースが作成されたか確認する際はkubectl get configmapを実行します。
$ kubectl get configmap | grep nginx
nginx-html         1      9m26s
4.NginxのPod上からindex.htmlが見えるようにする
先程作成したConfigMapリソースをPod上にマウントするため、1章で作成したnginx.yamlを修正します。
apiVersion: v1
kind: Service
metadata:
  labels:
    app: nginx-app
    name: nginx
  name: nginx-service
spec:
  selector:
    app: nginx-app
    name: nginx
  type: NodePort
  ports:
  - name: nginx-port
    port: 80
    protocol: TCP
    targetPort: nginx-port
---
apiVersion: apps/v1
kind: Deployment
metadata:
  labels:
    app: nginx-app
    name: nginx
  name: nginx
spec:
  replicas: 1
  selector:
    matchLabels:
      app: nginx-app
      name: nginx
  template:
    metadata:
      labels:
        app: nginx-app
        name: nginx
    spec:
      containers:
      - name: nginx
        image: nginx:latest
        ports:
        - containerPort: 80
          name: nginx-port
          protocol: TCP
        volumeMounts: # Pod上にマウントするファイルを定義
        - name: nginx-html-file # マウントしたいvolumeを指定
          mountPath: /usr/share/nginx/html/index.html # 配置するパスを指定(Nginxのデフォルトの公開ディレクトリは/usr/share/nginx/html)
          subPath: index.html # マウントするファイル名を指定
          readOnly: true
      volumes: # マウントしたいリソースを定義
        - name: nginx-html-file # Podにマウントするvolumeを定義
          configMap:
            name: nginx-html # 使用するConfigMapリソースを指定
            items: # ConfigMapリソースで定義した、どのファイルを使用するか指定する
            - key: "index.html"
              path: "index.html"
YAMLファイル修正後、kubectl apply -f nginx.yamlを実行し修正した内容を適用します。その後、ブラウザを確認しindex.htmlの中身が表示されたことを確認します。
最後に
本書ではConfigMapを使用してNginxにindex.htmlを表示することができました。Kubernetes(minikube)内のConfigMapとNginxを組み合わせることでHTMLの勉強や動作確認などに使用できます。

