今回の記事では、AggregateによるEntityの結合についてまとめたいと思います。
(前回の記事はこちら)
AggregateによるEntityの結合
AggregateにはSourceを複数設定できます。
例として下記のようなAggregateを作成します。
SourcesにCustomerとCustomerProfileを追加しました。
※CustomerEntityとCustomerProfileは1対多の関係です。
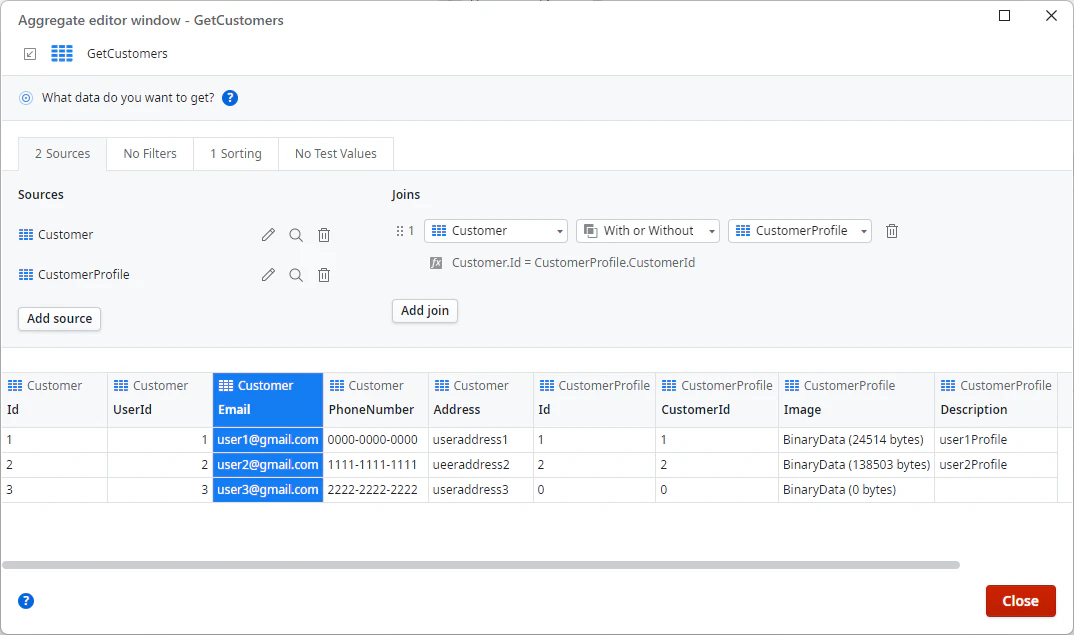
これでEntityの結合ができました。
(Joinsには「With or Without」が設定されていますが、自動で付与されました。)
結合の種類
Joinsの部分にEntity及び結合種類、結合条件を設定することができます。
アイコンがとても分かりやすいので、直観的に使いやすいです。
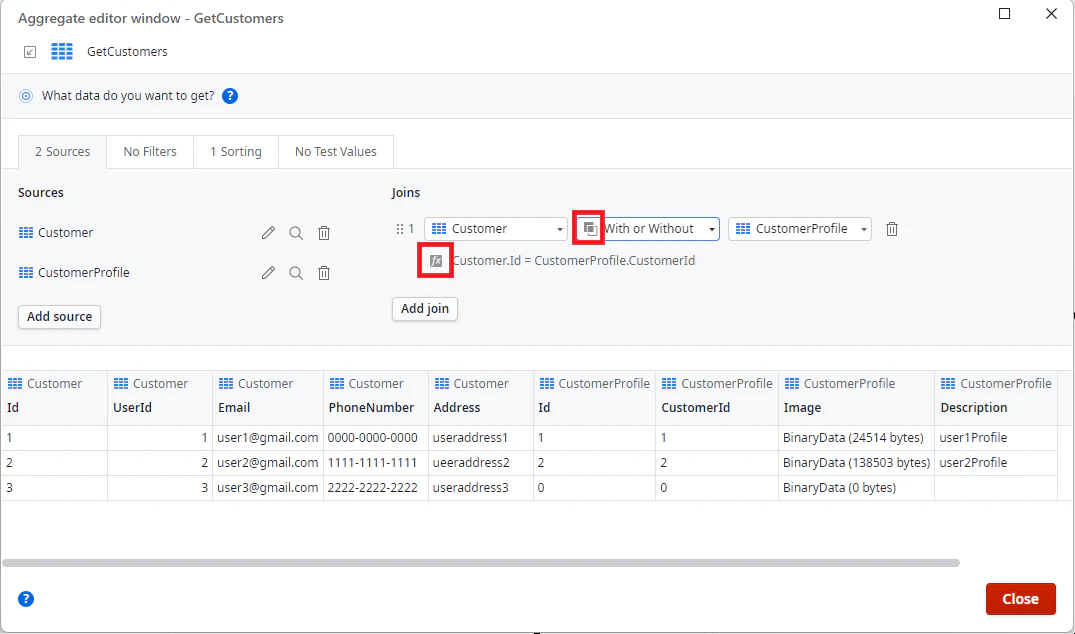
OutSystemsには3種類の結合が用意されています。
・With or Without
テーブルの左側結合(left join)
右側のEntityが条件一致しなくても、左側のEntityのレコードをすべて返します。
・Only With
テーブルの内部結合(inner join)
エンティティ間で条件一致するレコードのみを返します。
・With
テーブルの外部結合(outer join)
両方のEntityのレコードをすべて返します。
SQLクエリに直すと下記のとおりです。(公式から抜粋)

以上となります。
次はAggregateの実際の使用方法や集計(合計、平均、最小、最大など)の使用方法などをまとめる予定です。