Twilio Advent Calendar 4日目の記事です。
今年 (2022年) の6月に「Introducing Grafana OnCall OSS, on-call management for the open source community」という記事で Grafana OnCall のオープンソース化が発表されました。PagerDuty みたいなやつです。
(画像はドキュメントサイトより)
セルフホストの Grafana OnCall が電話を掛けるのに Twilio を使うらしいので試してみます。(Grafana Cloud なら無料ですぐ使えます ![]() )
)
現在の Grafana OnCall は通知の受け口として次のインテグレーションを持っています。PagerDuty と比べてしまうと少ないですね。でも Webhook があるからなんとかなるかな。
- Grafana Alertging
- Alertmanager
- Zabbix
- Webhook
Chat の通知先としては次の3つをサポートしています。
- Slack
- Telegram
- Microsoft Teams
Twilio の設定については ここ に次のように書かれています。
Twilio Setup
Grafana OnCall supports Twilio SMS and phone call notifications delivery. If you prefer to configure SMS and phone call notifications using Twilio, complete the following steps:
- Set
GRAFANA_CLOUD_NOTIFICATIONS_ENABLEDas False to ensure the Grafana OSS ↔︎ Cloud connector is disabled.- From your OnCall environment, select Env Variables and configure all variables starting with
TWILIO_.
Docker Compose で起動
お試し実行なので手元の mac で Docker Compose を使って実行します。
README の Getting Started に手順があります。
GitHub にある docker-compose.yml を取得します。
curl -LO https://raw.githubusercontent.com/grafana/oncall/v1.1.5/docker-compose.yml
Grafana のコンテナイメージが grafana/grafana:9.0.0-beta3 だったので最新の 9.3.0 に、oncall は v1.1.5 を明示しておきます。 (macOS の sed じゃなくて GNU の sed を使うため sed ではなく gsed としています)
gsed -i \
  -e 's,grafana:9.0.0-beta3,grafana:9.3.0,' \
  -e 's,image: grafana/oncall$,image: grafana/oncall:v1.1.5,' docker-compose.yml
必要な環境変数を .env ファイルに設定
echo "DOMAIN=http://localhost:8080
COMPOSE_PROFILES=with_grafana  # Remove this line if you want to use existing grafana
SECRET_KEY=$(pwgen 64 1)" > .env
(これで docker compose の profiles 機能を知りました。便利)
いざ実行
docker-compose pull && docker-compose up -d
Grafana 上で操作
Grafana OnCall は Grafana から操作することになります。OnCall サーバーは Grafana サーバーから HTTP(S) でアクセスできる場所にあればどこでも大丈夫です。今回はどちらも Docker Compose の中で実行されています。
ブラウザで http://localhost:3000/ を開くと Grafana にアクセスできます。
デフォルトでは Username: admin / Password: admin です。
ログインしたら画面左下の歯車アイコンから Configuration → Plugins を開きます。
Search grafana plugins と書かれている入力欄に oncall と入れれば Grafana OnCall が見つかります。
Grafana OnCall パネルをクリックして開きます。ここで青い Enable ボタンをクリックして有効化し、下の OnCall backend URL に http://engine:8080 を入力して Connect ボタンをクリックします。
接続されました。
Plugin を有効化したことにより、左のバーに OnCall のアイコンが追加されました。
しかし、 Plugin has not been initialized と表示され、Retry しても Configure Plugin で backend URL を再設定しても解消されませんでしたが、ブラウザでページを reload したら initialize されました。
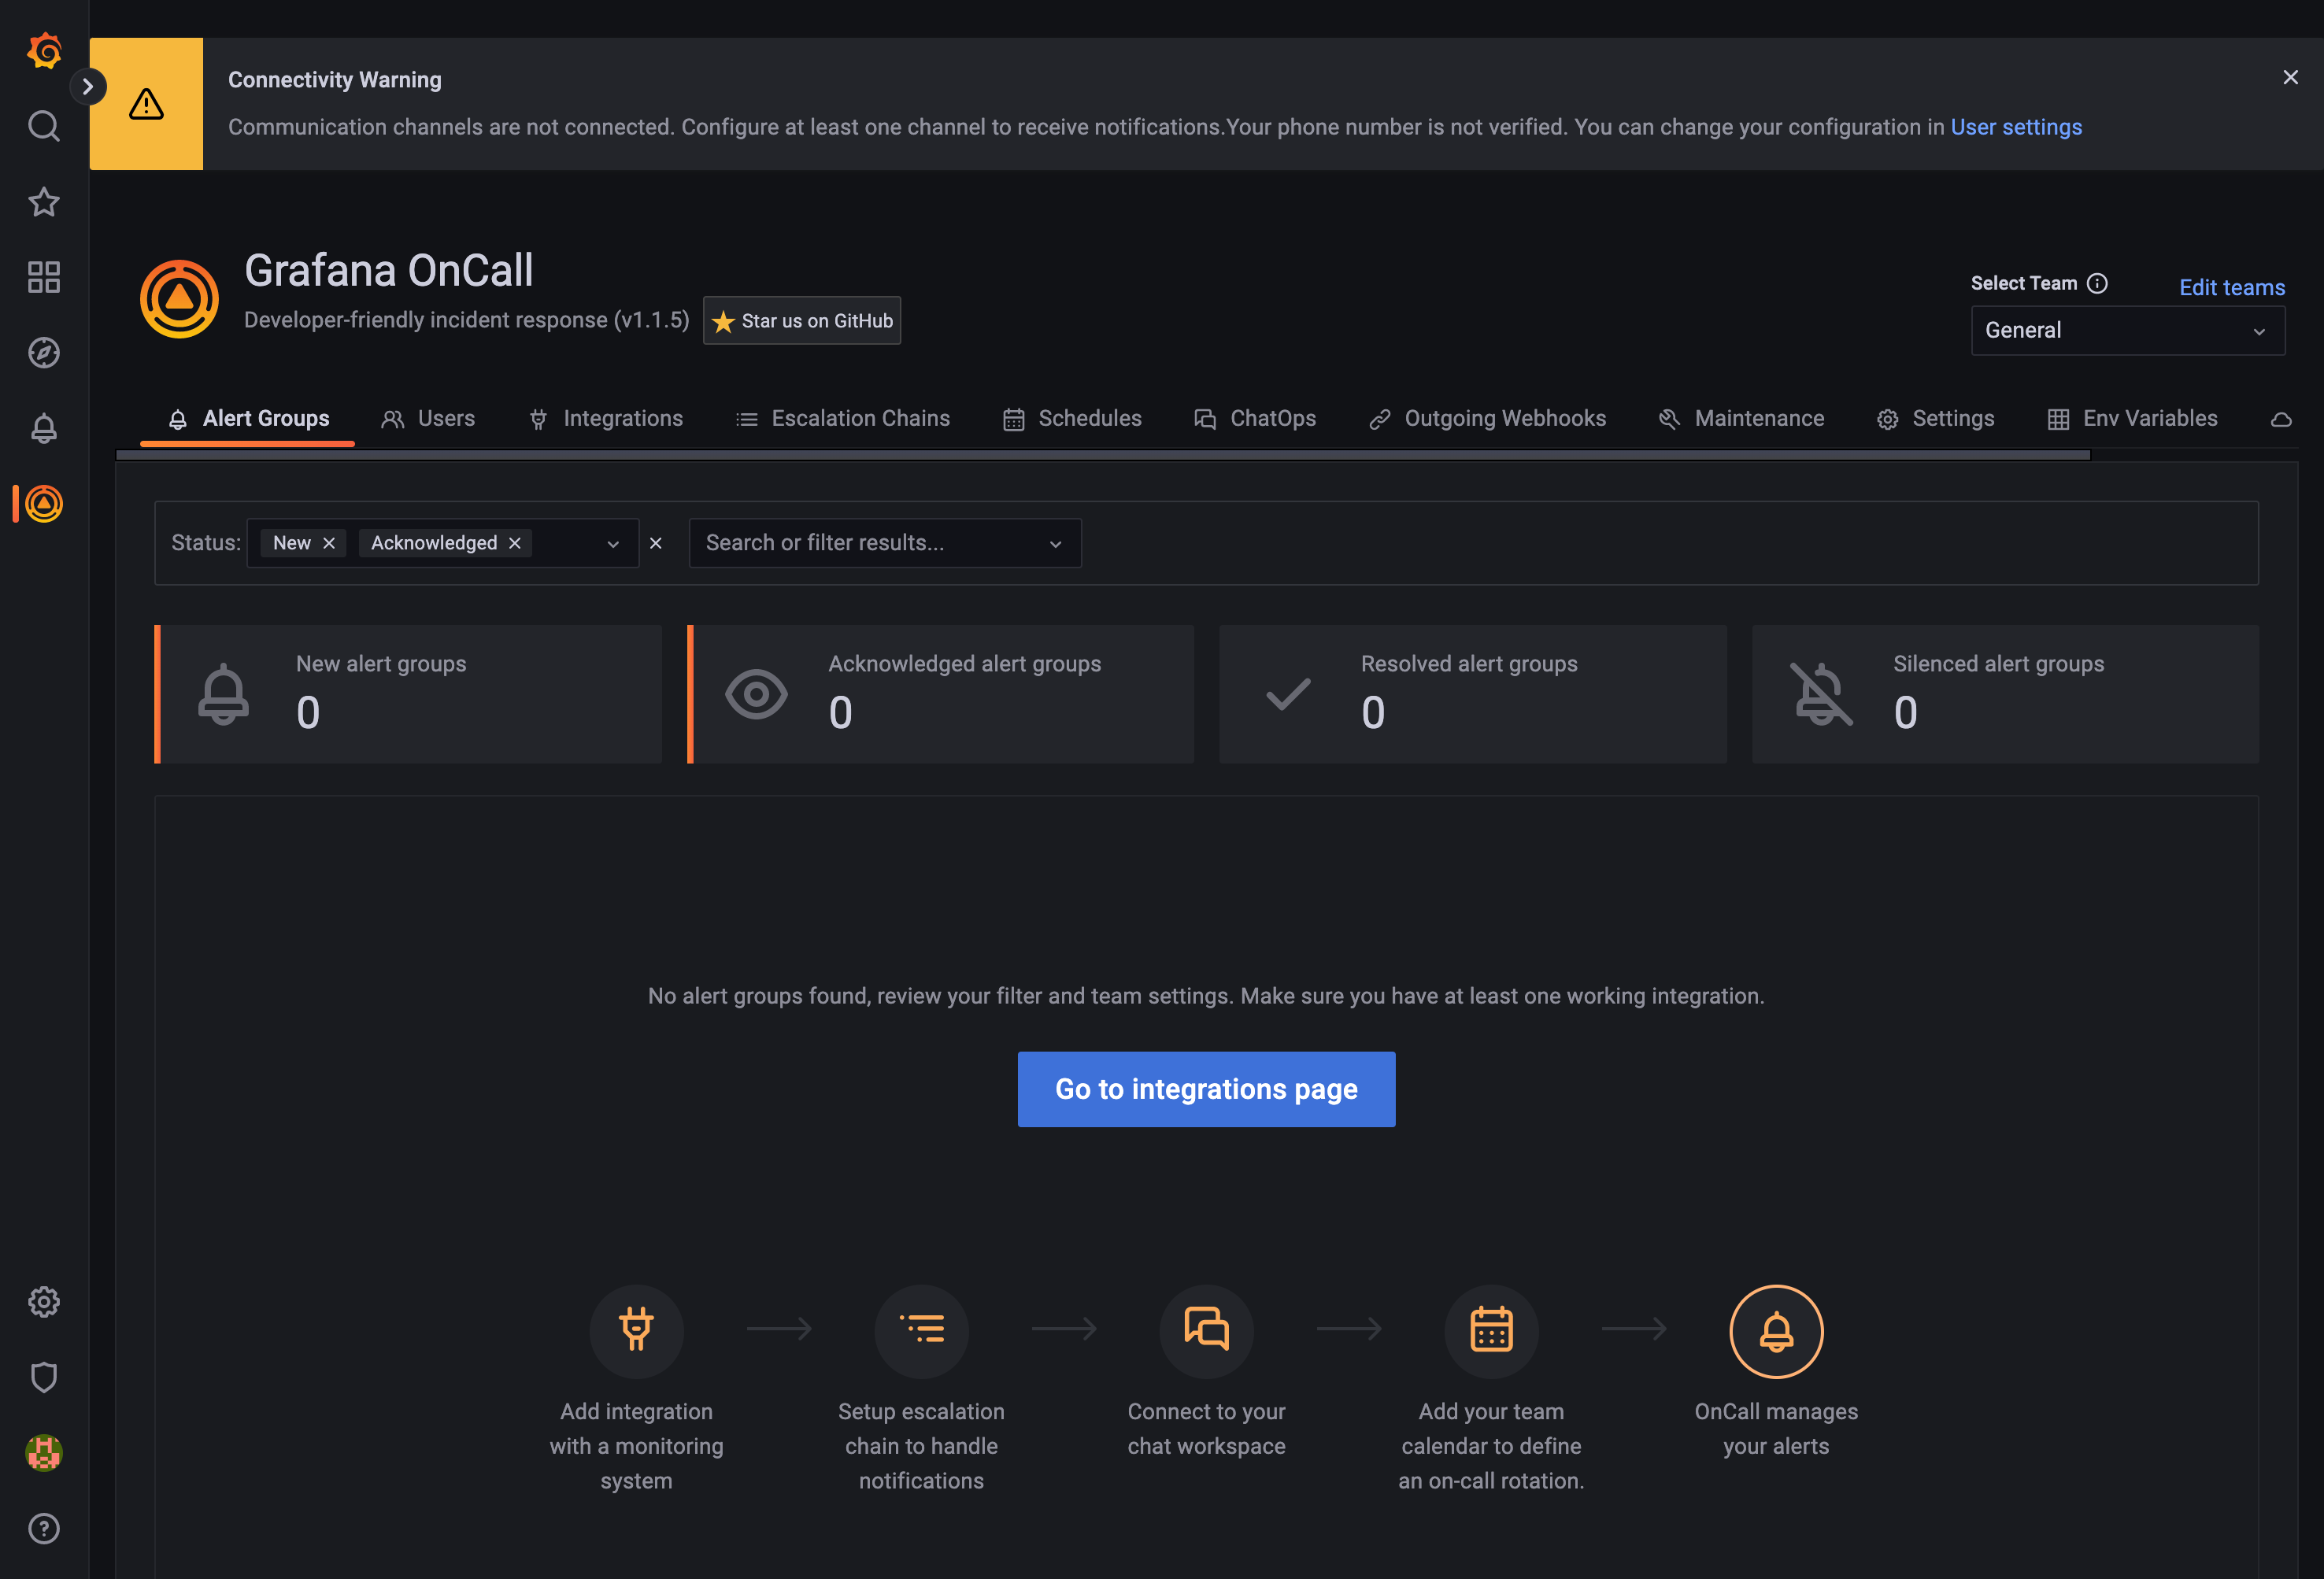
そして、次のような画面に遷移しました。
ここで Env Variables タブに移動します。ここがドキュメントの Twilio Setup に書かれていたやつですね。
-
GRAFANA_CLOUD_NOTIFICATIONS_ENABLEDをFalseにする -
TWILIO_で始まる項目を全部設定する
| Name | Description |
|---|---|
| TWILIO_ACCOUNT_SID | Twilio account SID/username to allow OnCall to send SMSes and make phone calls, see here for more info. Required. |
| TWILIO_API_KEY_SECRET | Twilio API key secret/password to allow OnCall to send SMSes and make phone calls, see here for more info. Either (TWILIO_API_KEY_SID + TWILIO_API_KEY_SECRET) or TWILIO_AUTH_TOKEN is required. |
| TWILIO_API_KEY_SID | Twilio API key SID/username to allow OnCall to send SMSes and make phone calls, see here for more info. Either (TWILIO_API_KEY_SID + TWILIO_API_KEY_SECRET) or TWILIO_AUTH_TOKEN is required. |
| TWILIO_AUTH_TOKEN | Twilio password to allow OnCall to send SMSes and make calls, see here for more info. Either (TWILIO_API_KEY_SID + TWILIO_API_KEY_SECRET) or TWILIO_AUTH_TOKEN is required. |
| TWILIO_NUMBER | Number from which you will receive calls and SMSes, more info. |
| TWILIO_VERIFY_SERVICE_SID | SID of Twilio service for number verification. You can create a service in Twilio web interface. twilio.com -> verify -> create new service. |
Twilio の設定
サインアップしたら Account SID と Auth Token は確認できます。
次に電話番号を取得する必要があるようです。青い Get a Twilio phone number ボタンをクリックすると You've got a phone number! と表示されてすぐにアメリカの電話番号が取得できました。
次に進むと API 呼び出しの curl コマンドが表示されるのでこれをコピペして実際に電話がかかってくるか確認することができます。To に指定されているのが私の電話番号で From に指定されているのが先ほど発行されたアメリカの電話番号です。
Twilio Console の右上にある Account メニューから API keys & tokens にアクセスして Create API key に進めば、無効化の可能な API key を発行することが可能で、こちらを使うのがよりセキュアなようです。 TWILIO_AUTH_TOKEN ではなくて TWILIO_API_KEY_SID と TWILIO_API_KEY_SECRET を設定することにします。
Grafana OnCall という名前の Key を作成します。SID と Secret が作成されます。
残すは TWILIO_VERIFY_SERVICE_SID なのだけれども、はて?
SID of Twilio service for number verification. You can create a service in Twilio web interface. twilio.com -> verify -> create new service.
Twilio Console の左のメニューに Verify というのがない場合は Explore Products から Account security → Verify でたどり着けました。
ピン留めアイコンをクリックしておけば左のメニューにも表示されるようになります。
Grafana OnCall という名前で Service を作成しました。
やっと必要な情報が揃いました。
| Name | Description |
|---|---|
| TWILIO_ACCOUNT_SID | Twilio に singup すると発行される Account の ID |
| TWILIO_API_KEY_SECRET | Grafana OnCall 用として作成した API Key の Secret |
| TWILIO_API_KEY_SID | Grafana OnCall 用として作成した API Key の ID |
| TWILIO_AUTH_TOKEN | API Key を使うのでこれは設定しない |
| TWILIO_NUMBER | 発行した発信用電話番号 (トライアルアカウントなのでアメリカの番号) |
| TWILIO_VERIFY_SERVICE_SID | Verify Service の SID |
Grafana の UI からポチポチ設定すれば restart などは不要で使えるようになります。
Grafana の user に電話番号を設定する
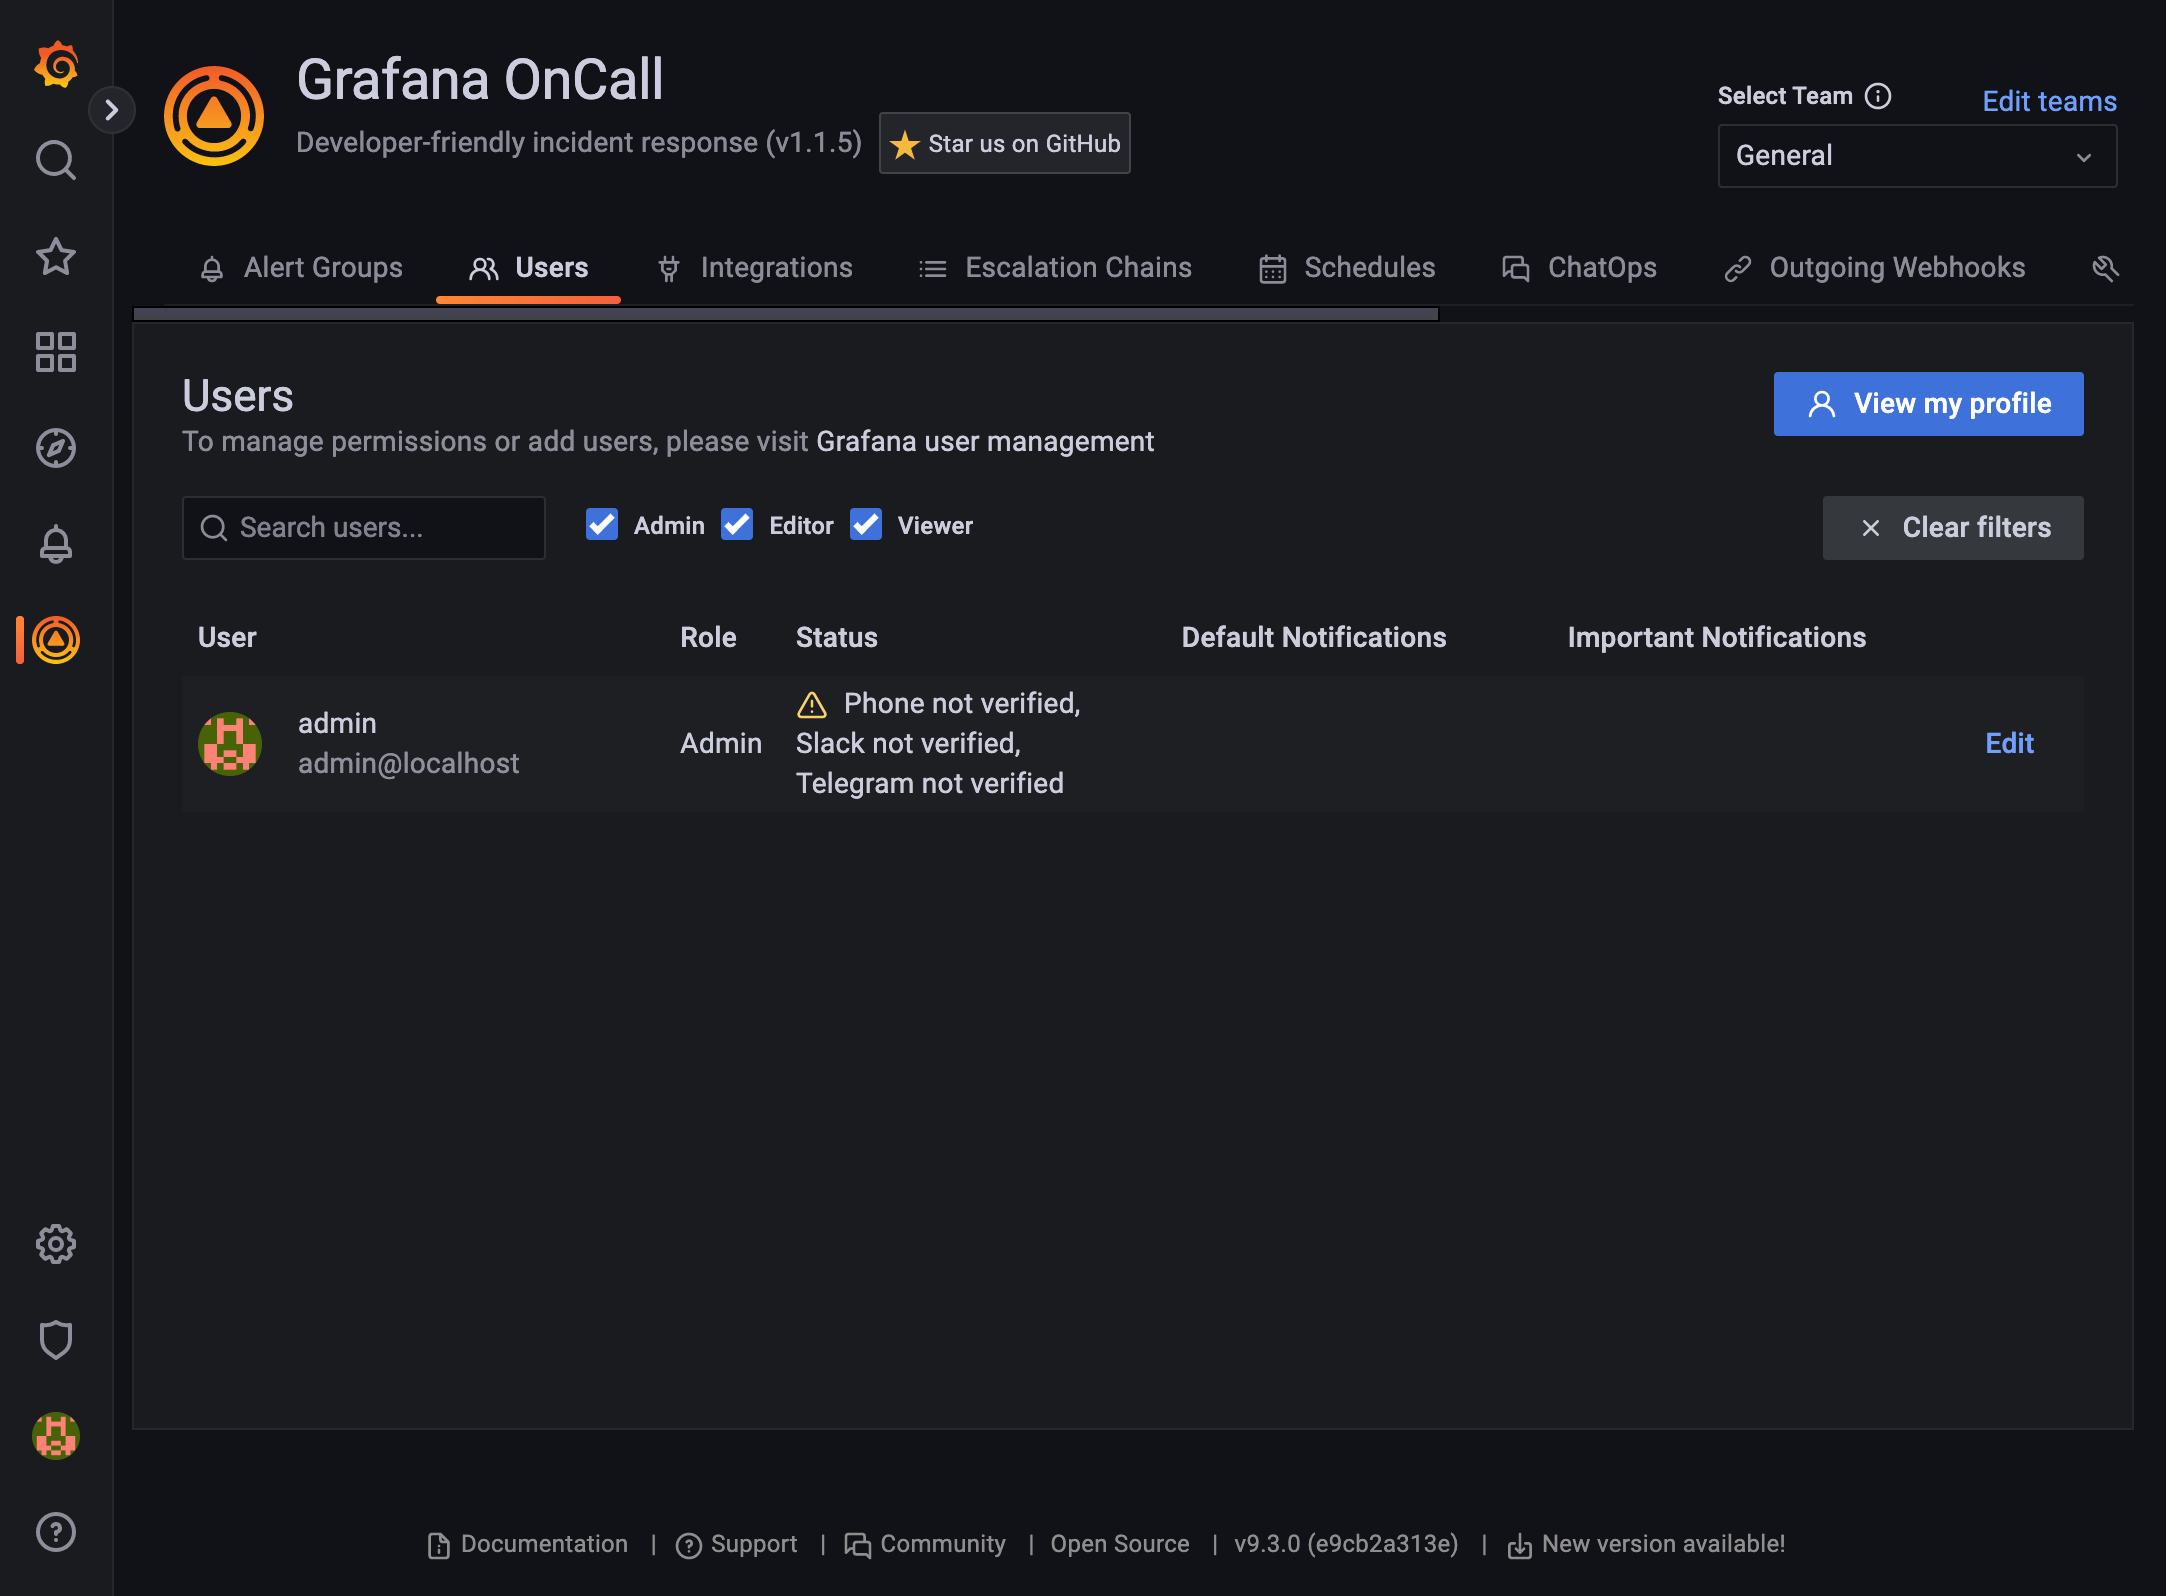
Grafana OnCall の Users タブを確認すると admin ユーザーの Status 列に Phone not verified と表示されています。
ここで Edit をクリックして Phone Verification タブで電話番号を入力し、 Send Code ボタンをクリックすると SMS で6桁のコードが送られてきます。
受け取ったコードを入力して Verify ボタンを押せば登録完了です。
これで Make Test Call ボタンをクリックすると電話がかかってきてテストメッセージが読み上げられます。
Alert 通知をしてみる
User 設定
Users タブで admin ユーザーの Default Notifications を Notify by SMS に、 Important Notifications を Notify by Phone call にします。
Escalation Chain 設定
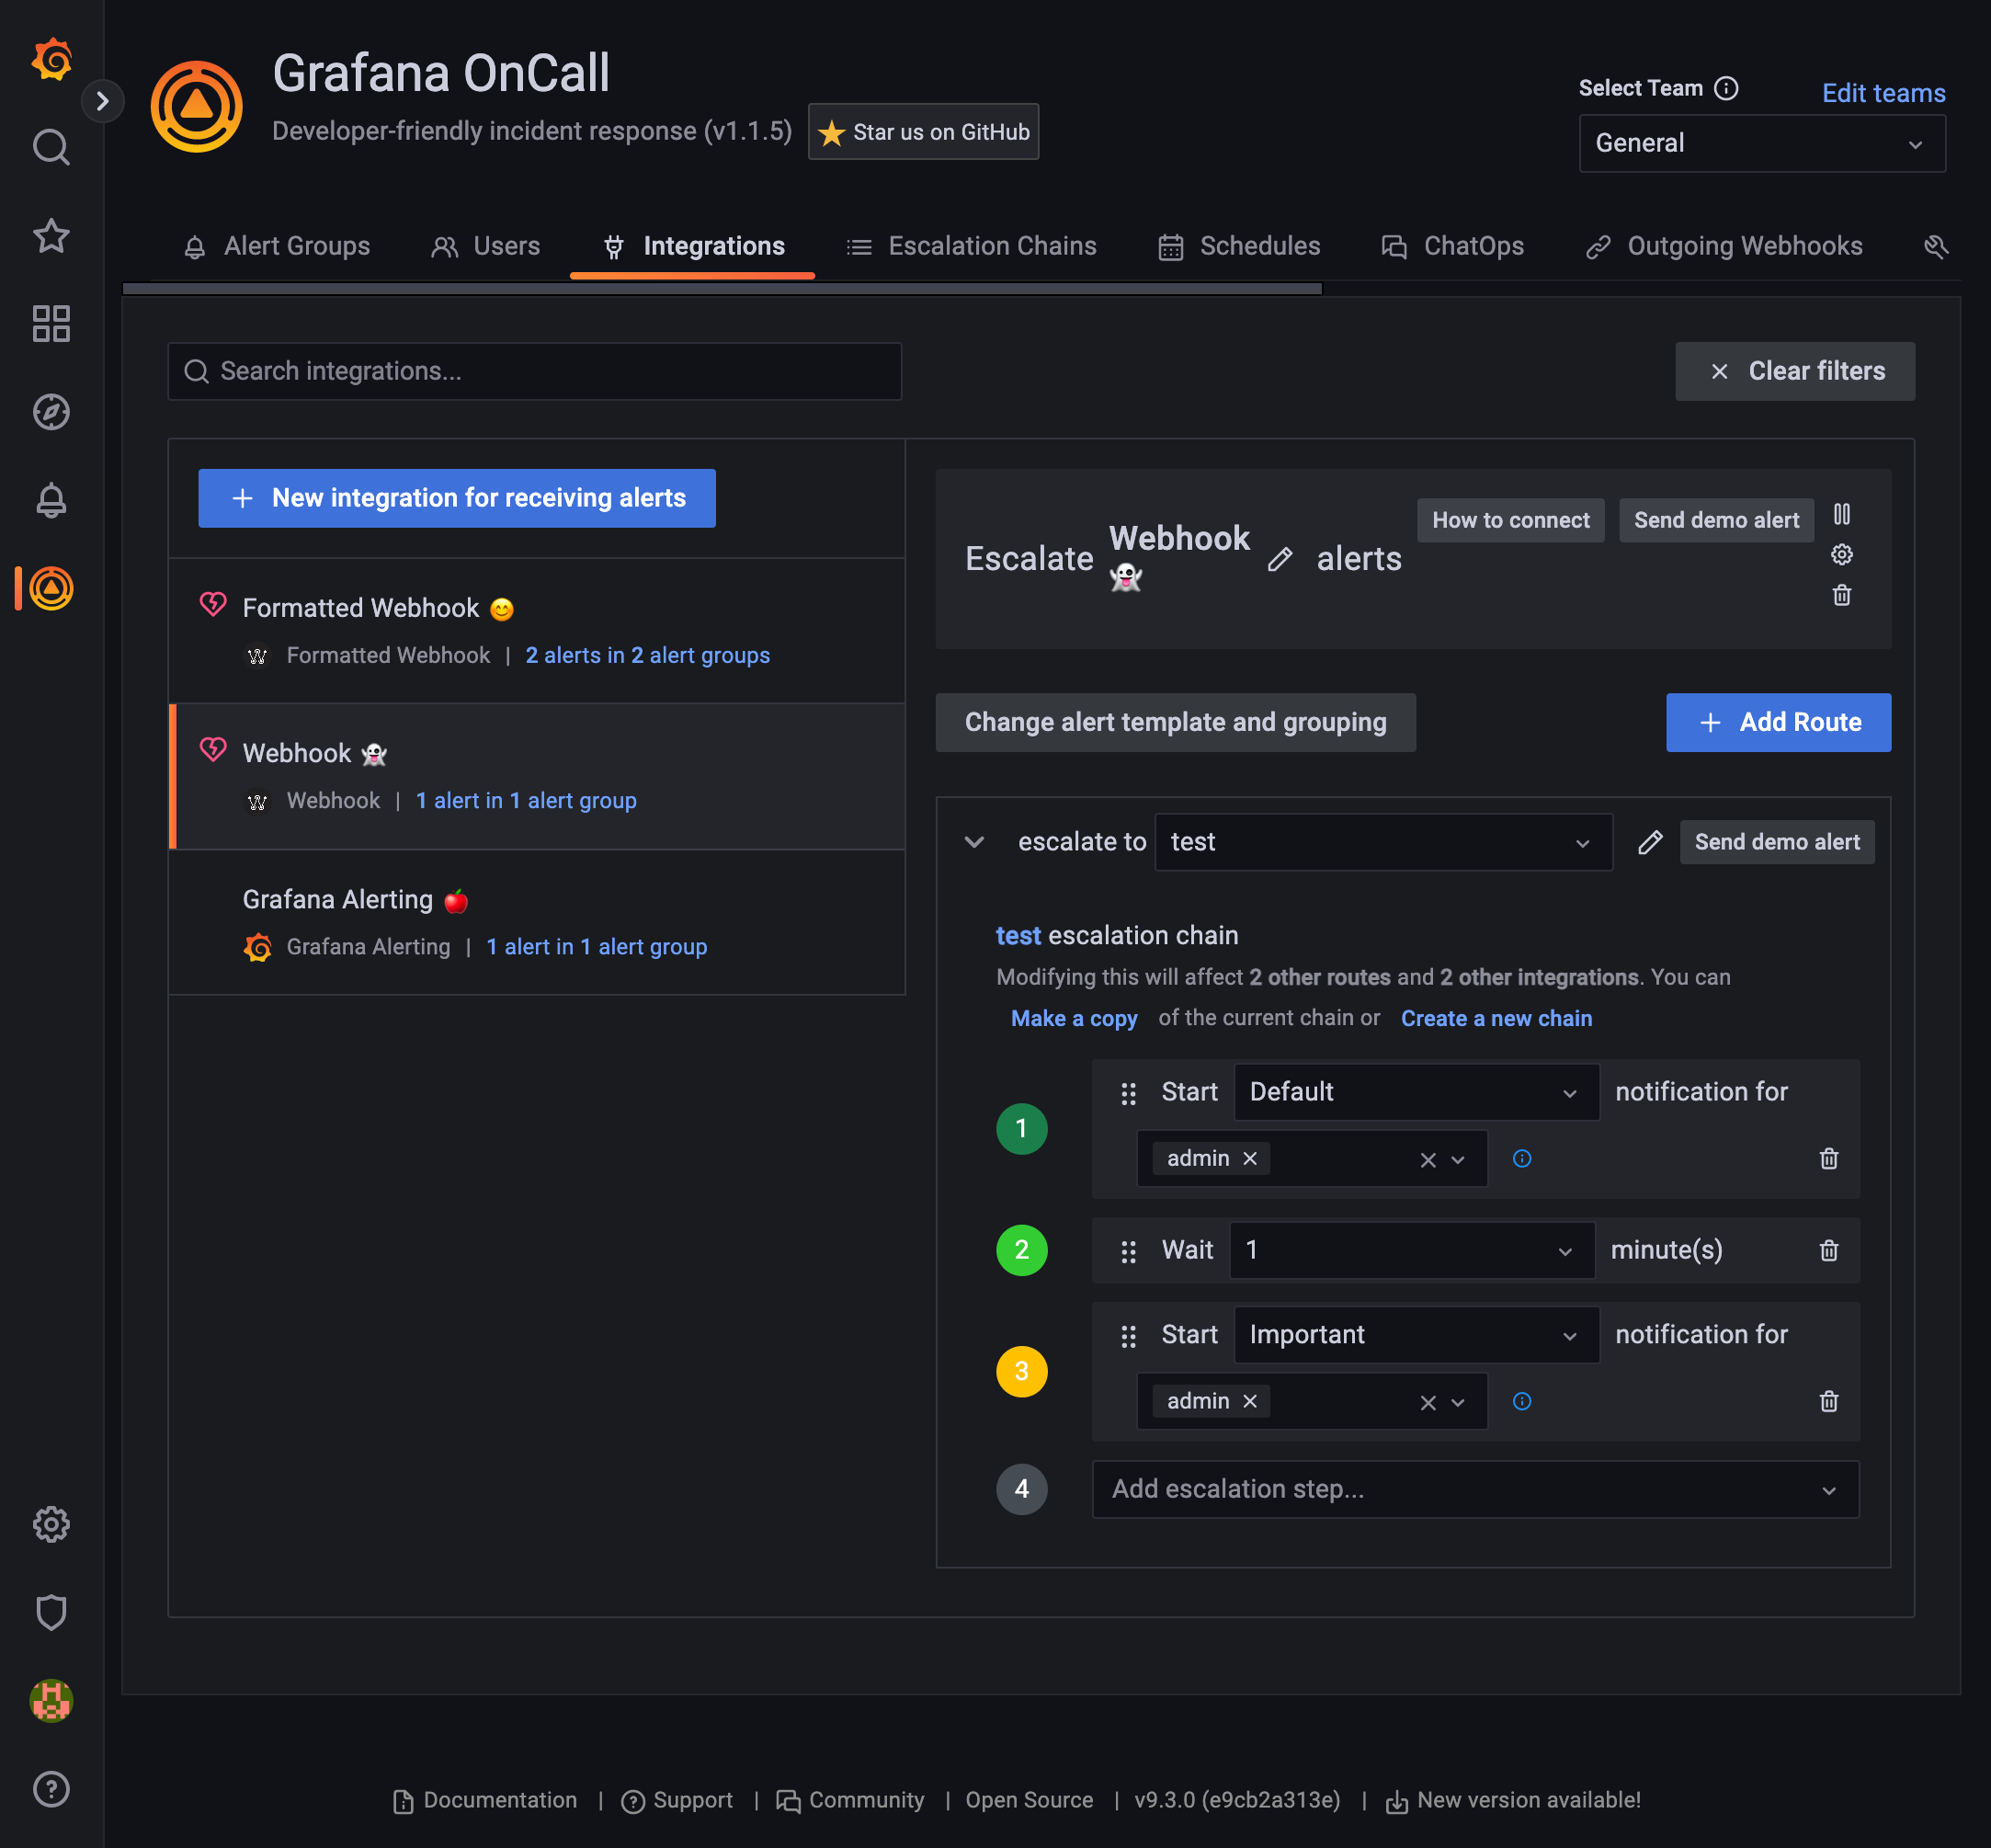
Escalation Chains タブで New Escalation Chain ボタンから test という Escalation Chain を作ってみました。
まず admin ユーザーに Default notification で通知し、1分待った後、今度は admin ユーザーに Inportant notification で通知します。
次に Integrations タブで New Integration for receiving alerts ボタンから Grafana Alerting でも Webhook でも Formated Webhook でも何でも良いので選択して
Escalation 先に先ほど作成した test を選択します。 Send demo alert というボタンがあるのでこれをクリックすると SMS での通知が届き、放っておくと1分後に電話がかかってくるのが確認できます。
Twilio の Monitoring 機能
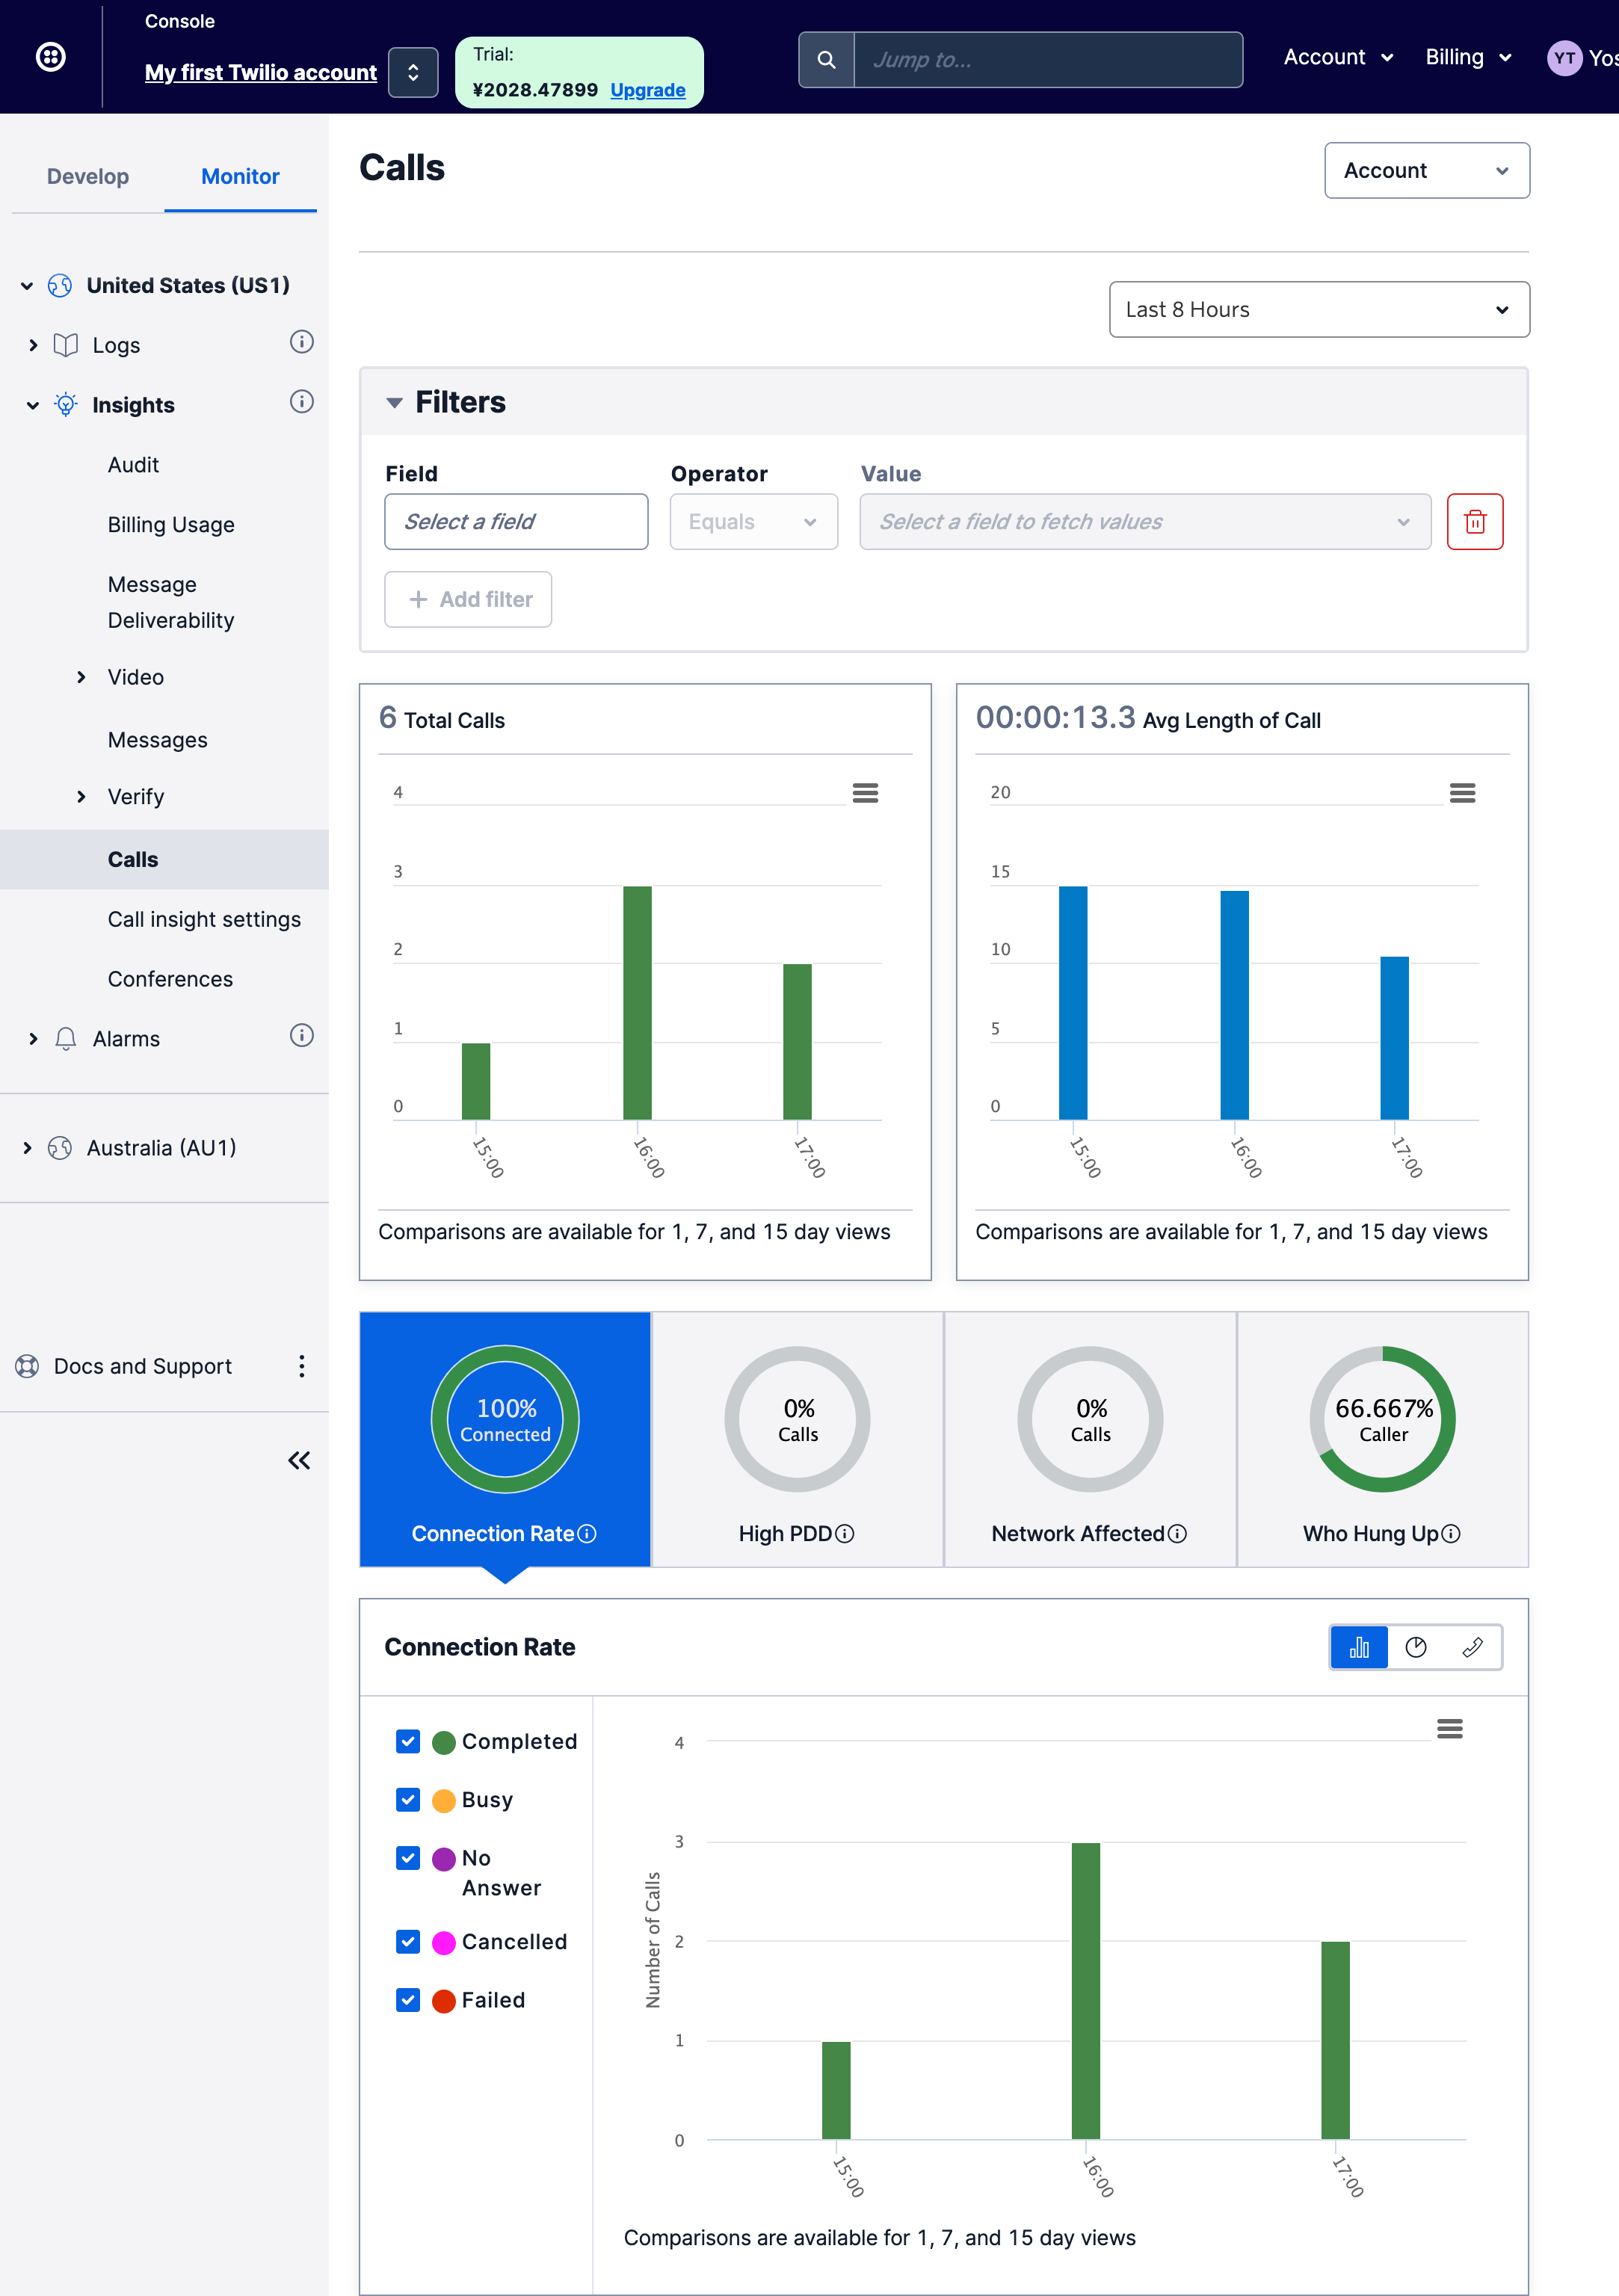
費用や電話、SMS の回数などは Monitoring 画面で確認できます。
Billing Usage
費用は重要ですね
Calls
Messages
まとめ
今回はひとまず Twilio を使って SMS と電話で通知ができるというところまでを確認しました。
Grafana OnCall には通知先のスケジュールやローテーション設定もできます。
Alert の内容によって通知先を切り替えたりするルーティング設定もできます。
興味を持たれたら試してみてはいかがでしょうか。


