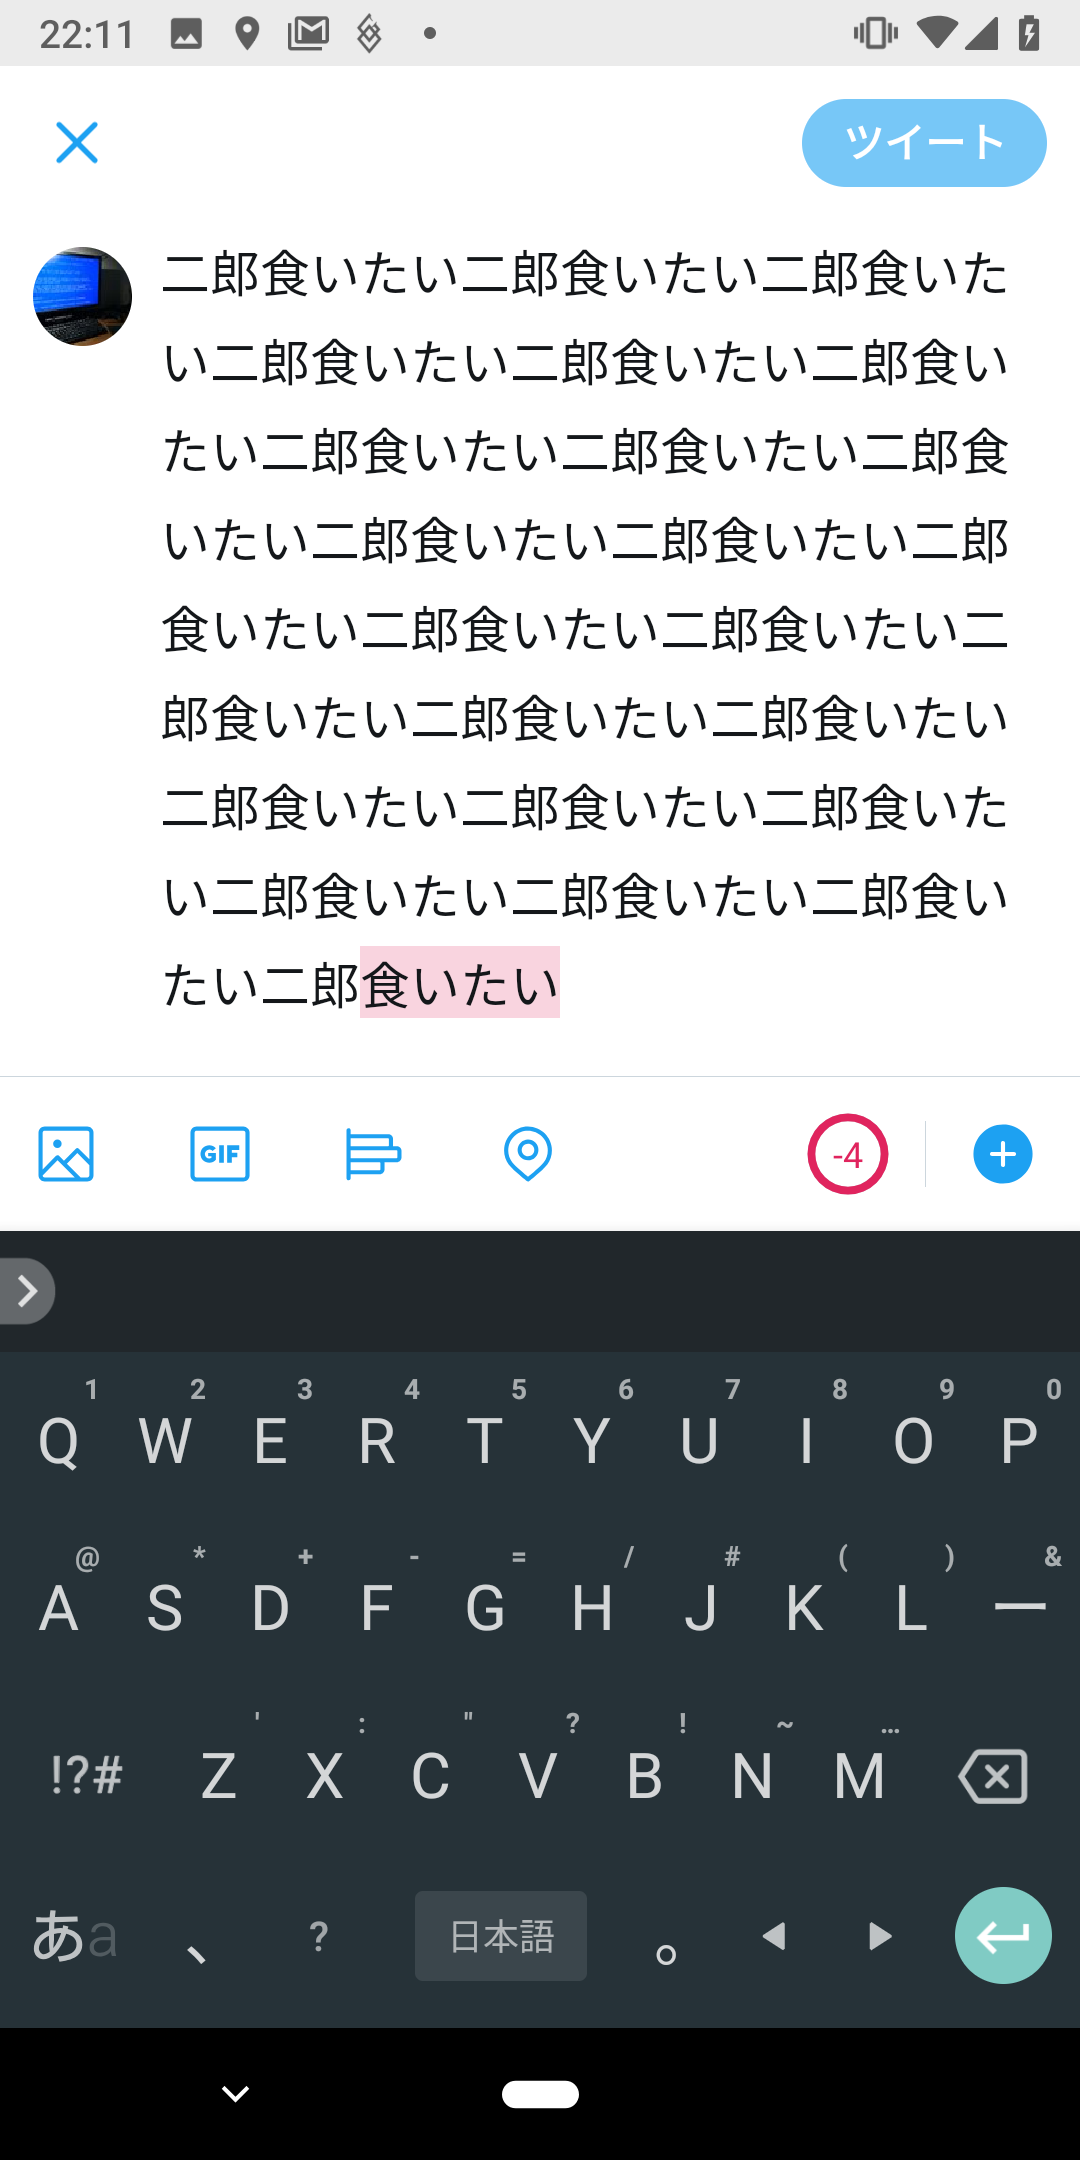
Twitterのように文字数制限のありオーバーした分は背景の色が変わる入力欄を作ったときに若干苦戦したのでメモ兼ねて記事を書きます。
もっといい方法あればコメント等でご指摘ください。
仕様
xmlから最大文字数を設定できる
オーバーした分のテキストのハイライトにする色をxmlから設定できる
未確定文字列(変換前など)はハイライトを設定しない
実装
今回はEditTextを継承した独自クラスを作る形で実装します。
<?xml version="1.0" encoding="utf-8"?>
<resources>
    <!--以下を追加-->
    <declare-styleable name="LimitableEditText">
        <attr format="color" name="backgroundColorExceeded"/>
        <attr format="integer" name="limitLength"/>
    </declare-styleable>
</resources>
class LimitableEditText @JvmOverloads constructor(
    context: Context,
    attrs: AttributeSet? = null,
    defStyleAttr: Int = android.R.attr.editTextStyle
) : EditText(context, attrs, defStyleAttr), TextWatcher {

    var backgroundColorSpan: BackgroundColorSpan
    var limitTextLength: Int

    init {
        context.obtainStyledAttributes(attrs, R.styleable.LimitableEditText)
            .also {
                val exceededLimitColor =
                    it.getColor(
                        R.styleable.LimitableEditText_backgroundColorExceeded,
                        Color.argb(20, Color.red(Color.RED), Color.green(Color.RED), Color.blue(Color.RED))
                    )
                backgroundColorSpan = BackgroundColorSpan(exceededLimitColor) // デフォルトでハイライトを赤に設定
                limitTextLength = // xmlで設定されている場合に最大文字数の制限をかける
                    it.getInteger(R.styleable.LimitableEditText_limitLength, DEFAULT_LENGTH)
            }
            .recycle()
        addTextChangedListener(this)
    }

    override fun afterTextChanged(s: Editable?) {
        if (s == null) return

        // 未確定文字列がある場合はハイライトの処理をしない
        if (limitTextLength != DEFAULT_LENGTH && !hasComposingTextSpan(s)) {
            highlightExceedingSpan(s)
        }
    }

    override fun beforeTextChanged(s: CharSequence?, start: Int, count: Int, after: Int) {}

    override fun onTextChanged(s: CharSequence?, start: Int, before: Int, count: Int) {}

    fun getExceededTextLength() = limitTextLength - text.length

    private fun highlightExceedingSpan(editable: Editable) {
        if (editable.length > limitTextLength) {
            editable.setSpan(
                backgroundColorSpan, limitTextLength, editable.length, Spanned.SPAN_EXCLUSIVE_EXCLUSIVE
            )
        }
    }

    // 未確定文字列の判断をComposingTextが含まれているかどうかでしているが、
    // ComposingTextは非公開クラスのためクラス名を取得して判断している
    private fun hasComposingTextSpan(editable: Editable) =
        editable.getSpans(0, editable.length, Any::class.java)
            ?.map { it::class.java.name }
            ?.contains(COMPOSING_TEXT_CLASS_NAME) == true

    companion object {
        const val DEFAULT_LENGTH = -1
        const val COMPOSING_TEXT_CLASS_NAME = "android.view.inputmethod.ComposingText"
    }
}
解説
attrs.xmlに独自Viewの要素の定義を書きます。declare-stylableのnameには独自Viewのクラス名(今回はLimitableEditText)を書きます。ここで定義した要素はActivityやFragmentのxmlから値を設定することができます。今回は入力できる文字数の上限limitLengthとオーバーした分にハイライトする色backgroundColorExceededを定義しています。
context.obtainStyledAttributesでその独自に定義した要素の値を取り出すことができます。
詳しくはAndroidで独自Viewを作るときの4つのTips +3などを参考にしてみてください。
今回は使う側で値が定義されていない場合はデフォルト値を入れる実装にしていますが、必要に応じて例外を投げるなどしてください。
文字数制限をオーバーしたらハイライトを適用するという処理をするために、入力を監視するTextWatcherを継承し、文字を入力した直後に呼ばれるafterTextChangedで文字数がオーバーしてるか、未確定文字列が含まれているかどうか判断してハイライトを適用する処理をさせます。
未確定文字列を含んでいるかどうかをhasComposingTextSpanで判断しています。未確定文字列を含んでいるかどうかの判別方法は調べたところいくつかあり、editable.getSpansで取得できるスパンの中にUnderlineSpanを含むかどうかという方法もあったのですが、IME依存がありそうな気がしたので今回はComposingTextというクラスのスパンが適用されているかどうかで判断しています。ComposingTextは非公開クラスなのでリフレクションを用いてクラス名を取得して判断しています。ここの処理はもう少し良い実装があれば教えていただきたいです。
文字数が制限をオーバーしているかつ未確定文字列が含まれていない場合、editable.setSpanでハイライトを適用させています。今回はBackgroundColorSpanを使用していますが、ForegroundColorSpanを使うことで背景ではなく文字色を変えることができます。
使用例
class MainActivity : AppCompatActivity() {

    override fun onCreate(savedInstanceState: Bundle?) {
        super.onCreate(savedInstanceState)
        setContentView(R.layout.activity_main)
        limitableEditText.addTextChangedListener {
            countTextView.text = limitableEditText.getExceededTextLength().toString()
        }
        countTextView.text = limitableEditText.getExceededTextLength().toString()
    }
}
<?xml version="1.0" encoding="utf-8"?>
<androidx.constraintlayout.widget.ConstraintLayout
        xmlns:android="http://schemas.android.com/apk/res/android"
        xmlns:tools="http://schemas.android.com/tools"
        xmlns:app="http://schemas.android.com/apk/res-auto"
        android:layout_width="match_parent"
        android:layout_height="match_parent"
        tools:context=".MainActivity">

    <com.yt8492.customedittextsample.LimitableEditText
            android:id="@+id/limitableEditText"
            android:layout_width="match_parent"
            android:layout_height="134dp"
            android:textSize="20sp"
            android:layout_marginStart="8dp"
            app:layout_constraintTop_toTopOf="parent"
            app:layout_constraintEnd_toEndOf="parent"
            app:layout_constraintStart_toStartOf="parent"
            app:limitLength="10"/>
    <TextView
            android:id="@+id/countTextView"
            android:layout_width="wrap_content"
            android:layout_height="23dp"
            android:layout_marginTop="8dp"
            app:layout_constraintTop_toBottomOf="@+id/limitableEditText"
            app:layout_constraintEnd_toEndOf="parent"
            android:layout_marginEnd="8dp"/>

</androidx.constraintlayout.widget.ConstraintLayout>
