(この記事は3.3万文字あります) (つまり、全体の記事 23.4万文字と合わせると 26.7万文字 = 文庫本や新書445ページ分) (この記事は 55ページ分)
-
今回の作品(2023.7.26作品)
-
画像生成AIの中間画像作画でゆいもっぷさんの夏アニメMV作りました! 手づかみラーメン! (原画指定で動画化) 制作手法製作記は後日 SmoothGraphic Copyright(C)2013-2017 チラ裏エリア
— あお (@ao_love_yuimop) July 25, 2023
Full(高画質):https://t.co/Mc5Smg6qV4 https://t.co/KWa5THQlAP #AIArt #AIイラスト #AIAnime #AIアニメ #AIMovie pic.twitter.com/Wk42ntFLNW -
今回の作品全体の記事は こちら (23.4万文字)
- Qiita での前回の記事は こちら
大目的
- 自動化率をかなり高めていき、ゆいもっぷ(2D)アニメMVが週刊状態にしたい
- (ゆいもっぷ(2D)アニメ作りには色々な工程がある。各工程ごとに自動化率を高める必要がある)
ある時点に対象フォルダの中にある 123.png を 123_honyaで出すバッチファイル
用途
- 多分、どこかで連番.png で出力されるところがあったのだと思う ( 1.png 2.png みたいな)
- それを ramen/ みたいなフォルダに入れてる
- 動画編集ソフトとかだと ramen_1.png みたいになってると管理しやすい
- → フォルダ名をファイル名につけるバッチファイルが欲しい
- バッチファイルは、放り込んでダブルクリックで処理をかけることができるからね
コード
@echo off
setlocal enabledelayedexpansion
dir /b *.png > tmp_file_list.txt
for /f %%f in (tmp_file_list.txt) do (
    call set DIRECTORY_PATH=%CD%
    for %%i in ("!DIRECTORY_PATH!") do (
        set THIS_DIRECTORY=%%~ni
    )
    echo "%%f" "%%~nf_!THIS_DIRECTORY!%%~xf"
    ren "%%f" "%%~nf_!THIS_DIRECTORY!%%~xf"
)
endlocal
解説
- @echo off は、バッチファイルのコマンドを表示しない
- setlocal enabledelayedexpansion
- 変数の評価をコード読み込み時ではなく、実行ときに行う (要らないかも)
- dir の /b
- ファイル名だけを列挙する
- for の /f
- トークン(テキストファイルからとってくる値)の取り方を指定するオプションを指定できる (要らない気がする)
- call set
- 多分、 %CD% を実行した状態で setができる
- %CD%
- setの機能一部で、カレントディレクトリ文字列に展開される
- %%~ni
- %%i のうち、ファイル名(というよりパスの一番最後の部分?)を示す
- (別に for %%i でなくて良さそうな気がする… (1ループしかしてなさそう))
- echo の "%%~nf_!THIS_DIRECTORY!%%~xf"
- %%f のファイル名_フォルダ名 に %%f の拡張子(.つき)をつけたもの
- ren
- RENAMEする
novelai-api をプログラミング的につかいこなす
目的
- 対象ディレクトリに、i2i元の画像が何枚か(64枚くらい)入っている
- (i2i元の画像は 手製(自作)重ね合わせシステム 又は SmoothGraphic で作られる ← いずれも内容が連続的に変化してる)
- そのディレクトリに入ってる画像を一括でi2iして出力画像を、どの元画像に対する出力かわかる名前で出力させる
- すると、i2i 作業の自動化率が高まる
使ったライブラリ
- 安全安心なライブラリかはご自分でお確かめください
このように環境構築するのだ
- Windows 10 で VSCode
- VSCode 上のターミナルがPower Shell なので、Windows用の Python と pipを入れてると思う
- Python 3.9.6
- コマンドプロンプトなりVSCodeを途中で(なにかをインストールするために?)管理者権限で立ち上げないといけなかったみたい
- 多分 Windows での Python は ↓ で構築してます
- 管理者権限の VSCode のターミナルで pip install novelai-api
- https://github.com/Aedial/novelai-api を git や zip で取得する
-
https://github.com/Aedial/novelai-api/tree/main に書いてあるように アクセスキーなどを取得、.env に設置する
- username はメアド (…と2023/4/20頃のメモに書かれてた)
このように実行するのだ
コード
- https://github.com/Aedial/novelai-api/blob/main/example/generate_image_with_img2img.py をコピーして加筆して my_all_in_dir_generate_image_with_img2img.py にした
- nox -s run -- .\example\my_all_in_dir_generate_image_with_img2img.py が実行コマンド
- …↑が実行コマンドなのは、 https://github.com/Aedial/novelai-api/releases/tag/v0.11.5 の 2023/4/14 版だからで、現在の最新版は poetry になってる https://github.com/Aedial/novelai-api/tree/main/example
- nox は多分 pip install nox してる
import asyncio
import base64
import datetime
from pathlib import Path

from boilerplate import API

from novelai_api.ImagePreset import ImageGenerationType, ImageModel, ImagePreset


async def main():
    dir_name = 'valo_184'
    prompt = "{{{{{door, scenery, smoke, gate, wall, perspective, take off, fly away, jumping up}}}}}, jumping,{{{{{from top}}}}},{{{{{outdoors}}}}},{{{{{ sliding, landing}}}}}, fire a gun, shooting,up to face, looking up,rising up,{{{{{{{{{{{{{{gun}}}}}}}}}}}}}},{{{{{rifle}}}}}, {{{{{close-up}}}}},{{{{{dust}}}}}, desert, from below, short_shorts,   {{{ultimate yellow sky}}}, {{{{{{{{{{{{{white bra_through_clothes}}}}}}}}}}}}},{{{{{{{{{{cleavage}}}}}}}}}}, {{{{{{{{{{breast_press}}}}}}}}}},wavy_hair,bikini_under_clothes,sleeveless, {{{{{{{{{{crop_top}}}}}}}}}}, {{{{{side_slit}}}}},{{{{{{{{{{collared_shirt}}}}}}}}}},{{{{{bra_strap}}}}},{{{{{{{{{{jacket}}}}}}}}}},{{{{{jacket_removed}}}}},{{{{{{{{ virtual youtuber}}}}}}}}, {{{{{{{{{{watercolor pencil (medium)}}}}}}}}}}, light_rays,  {{{{{{{{{{{{{{{{{The most shiny}}}}}}}}}}}}}}}}},    {{{{{{{{{1girl}}}}}}}}},{{{{{{{{{{dog ears}}}}}}}}}}, {{{{aqua hair}}}},{{{{{lightblue hair}}}}},blue strap,armpit_crease, white_dress, white sleeveless_dress,purple eyes, symbol-shaped_pupils,large filesize,   foreshortening, big eyes,  professional lighting, lights,  white tops,  smile, {{{{{perfect hair}}}}}, 8k,  see-through body, See-through,wet, The most Powerful white tanktop,    ahoge,  off shoulder,  {{{{{{{{yellow hairpin}}}}}}}}, {{{{{star hair pin}}}}}, {{{{{yellow star hair ornament}}}}}, {{{{{medium hair}}}}},   Undressing,{{{{{{{{{{{{rating:questionable}}}}}}}}}}}}, {see-through silhouette, transparent, see-through, see-through sleeves}, masterpiece,high quality, best, best quality,high resolution,award winning,highly detailed,ultra detailed,hyper extreme detailed"
    uc = "on stomach,{{{{{panty}}}}},{{{{{{ lying}}}}}},{{{{{spread_legs, wariza,straddling, squatting }}}}}, panties, grass,sitting, water,  roof,window, viewfinder,garden,mountain,{{{trees}}}, concert,{{{{{{{{{{{text,signature, watermark, username, logo, copyrights}}}}}}}}}}},Orange hair,stadium, stage, indoors, blonde hair, yellow hair,   {{{{stars}}}},yellow eyes,{{{animal}}}, {{{{{Dog}}}}}, robot,riding,red hair,{{{{{long hair}}}}},blunt bangs, chick, night,black bra,black hair, mascot,{{{{{simple background}}}}}, deformation, {{{{{{{{{multiple girls}}}}}}}}},{{{{{{{{{{{{{{{{{{{{2girls}}}}}}}}}}}}}}}}}}}},    {{{{yellow skirt,  yellow clothe,yellow tops}}}},  missing fingers, extra fingers,lowres,   sepia, {{Worst quality}},{{low quality}},{{normal quality}},head_out_of_frame,       Comic,Facepaint,Wavy mouth, {{{{Split screen}}}},   {{{{{{ multiple views}}}}}},  {{{Blur}}},  fat,3d, {{{{monochrome}}}},    Blurry,   depth_of_field,  chromatic_aberration, more than 2 thighs, extra calf, extra legs, bad knee, {{more than 2 legs}},{{{{{more than 2 arms, extra arms}}}}},bad Anatomy"

# 実行コマンド
# nox -s run -- .\example\my_all_in_dir_generate_image_with_img2img.py

    samples = 4 #1 #2 #3
    resolution = (1344, 896) #(896, 896) #448, 224, 112 # 180, 268, # 200, 248
    strength = 0.52 #0.7 #0.52
    noise = 0.13 #0.2 #0.13

    input_dir = Path("C://Users/ao_love_yuimop/Pictures/to_i2i")
    paths = input_dir.glob("*.png")
    now = datetime.datetime.now()
    #timestamp = now.strftime("%Y%m%d_%H%M%S")
    timestamp = now.strftime("%H%M%S")

    d = Path("results")
    d.mkdir(exist_ok=True)
    out_dir = Path("results/" + dir_name + "_out")
    out_dir.mkdir(exist_ok=True)

    # 出力用ディレクトリに既に出力がある入力ファイルは処理しない処理のために、
    # 出力用ディレクトリの全てのファイル名をとる
    output_files = []
    output_paths = out_dir.glob("*.png")
    for file in output_paths:
        prefix = str(file).split("\\")[2].split(".")[0]
        output_files.append(prefix)
        # print (prefix + "sonzai in out_dir")

    for path in paths:
        prefix = str(path).split("\\")[5].split(".")[0]
        if any(prefix in output_file for output_file in output_files):
            # print (prefix + " is exists in output_files")
            continue

        async with API() as api_handler:
            api = api_handler.api

            with open(path, "rb") as f:
                image = base64.b64encode(f.read()).decode()

            preset = ImagePreset()
            preset.steps = 50
            preset.strength = strength
            preset.noise = noise
            preset.resolution = resolution
            preset.n_samples = samples
            preset.image = image
            preset.uc = uc
            preset.sampler = preset.sampler.k_dpmpp_2m #"k_dpmpp_2m" # "k_euler_ancestral"

            model = ImageModel.Anime_Curated #ImageModel.Anime_Full
            #settings = preset.to_settings(model)

            print(str(path) + " begin")
            i = 0
            async for _, img in api.high_level.generate_image(
                prompt, model, preset, ImageGenerationType.IMG2IMG
            ):
                with open(out_dir.joinpath(str(path.name) + "_" + str(i) + "_" + timestamp + ".png"), "wb") as f:
                    f.write(img)
                    print(str(path) + " finished.") # 普通通り、10秒くらいかかってそう水曜22:38 2023/04/19 22:38
                    # 3枚で 18秒 2023/04/19 22:49
                    # これでも、1枚ずつ作ってくれる (過剰並列にならない)
                    i += 1

asyncio.run(main())
重ね合わせシステムの改修
「1枚につき2つの制御点を指定して回転についても合わせる」コードの改修について (ImageMagick)
背景・用途
- 重ね合わせるときに、回転させると、画像の境界が目立ちやすく (or 出来上がった画像の範囲内に入りやすく)、そこに blur (ぼかし)をかけないと、i2iした時に思いっきり線になりやすい
開発
- 参考: https://imagemagick.biz/archives/213
-
convert before.jpg -rotate +45 after.jpg
-
- ☆move の方で +repageつけることで、ちゃんとcutできた模様 2023/07/03 0:43
- +repage とは、「キャンバス範囲を現在見えている部分だけにする」ということ
- キャンバスがそのままだと、回転とかした時に、ベースとなるキャンバス範囲はそのままになって、move(平行移動)はともかく回転とかした時に基点がズレたりする
- 普通の.png でも、キャンバスというものがある
- 参考: https://qiita.com/yoya/items/62879e6e03d5a70eed09
-
-crop (切り取りサイズ)+(切り取り場所の左上)のように使います。
-
- ☆そもそもrotateの時点で背景色を塗らなあかん 2023/07/03 1:26
- convert -background 'rgba(0,0,0,0)' -rotate 45 a.png b.png
- identify /home/ao_love_yuimop/1.png -format (大きさとかが出る)
- -verbose info: とか -fx "u.p{w/2,h/0}" info: とか色々オプションがある (どれかのオプションで突破の手がかりが得られた記憶)
- これも正解ではない(?) convert /home/ao_love_yuimop/1.png -format "%[pixel:u.p{w/2,h/0}]" info:
- ◎これが正解 convert -background 'rgba(49,125,219,255)' /home/ao_love_yuimop/1.png -rotate -35 /home/ao_love_yuimop/1_b.png 2>&1 2023/07/03 2:03
- こっちも正解 convert /home/ao_love_yuimop/1.png -gravity Center -crop 1344x896+0+0 /home/ao_love_yuimop/1_c.png 2>&1
- ☆出せた!(多分指定した位置、上辺の真ん中の色を取れたということ) 2023/07/03 1:47
- convert /home/ao_love_yuimop/1.png -format "%[pixel:u.p{w/2,0}]" info:
srgb(49,125,219)
- convert /home/ao_love_yuimop/1.png -format "%[pixel:u.p{w/2,0}]" info:
- やること 水平に対する角度を出す
- ☆回転してるときは、目の中点→おへそ を指定してもいいかもね 2023/07/02 10:25
- しかし、実際にやってみたら、そういう、x座標的にどっちがひだりにくるかが不定な場合、回転する方向が逆になって、まったく重ならなくなる問題があった (ので、左右逆転しない位置を指定している)
角度出し
- Bingチャットって、前から「創造的にモードだけが回答の質めちゃいいな」と思っていたのですが、創造的にモードだけがGPT-4だったのですね (最近のアップデートで「GPT-4」表記を推すようになって、それが「創造的に」モードだった)
PHPで、水平に対する角度を出すコードを書いてください。例えば、点が2つ、
(391, 536) と (562, 301) があって、その2つを通る線がが水平に対して
何度傾いているかを出したいです。

--------

// 点の座標
$x1 = 391;
$y1 = 536;
$x2 = 562;
$y2 = 301;

// 線の傾き
$slope = ($y2 - $y1) / ($x2 - $x1);

// 角度をラジアンで計算
$angle = atan2($slope, 1);

// 角度を度数法で表示
echo rad2deg($angle); // -26.565051177078
- ↑最後の計算だけは間違ってるが、コードは正しい
- 確かに、これに 90を足せば、水平になりそう
水平にするのがやりたいことではなく、
となりのやつと揃えたい

(253, 358) と (481, 394)


750は -60
650は +10 なので、
差分が 70

小さい方を +35動かし、大きい方を -35動かせば
揃う

水平に対する角度を出す関数を作りたいね2023/07/02 10:34
画像の大きさが1344x896のときに、(253, 358) の点を、
画像の中心にたいして、35度回転させたときの点の位置を算出する
PHPのコードを書いてください。

----
PHPで画像の中心に対して点を回転させるには、
**atan2()**関数と**cos()**関数、**sin()**関数を使います。
atan2()関数は、y座標とx座標を引数にとって、原点から見た点の角度をラジアンで返します。
cos()関数とsin()関数は、角度を引数にとって、余弦と正弦の値を返します。
例えば、以下のように書くと、画像の大きさが1344x896のときに、(253, 358) の点を、
画像の中心にたいして、35度回転させたときの点の位置を算出することができます。

```php
// 画像の大きさ
$width = 1344;
$height = 896;

// 画像の中心
$cx = $width / 2;
$cy = $height / 2;

// 点の座標
$x = 253;
$y = 358;

// 回転角度(ラジアン)
$angle = deg2rad(35);

// 中心からの距離
$distance = sqrt(pow($x - $cx, 2) + pow($y - $cy, 2));

// 中心から見た点の角度
$theta = atan2($y - $cy, $x - $cx);

// 回転後の角度
$new_theta = $theta + $angle;

// 回転後の座標
$new_x = $cx + $distance * cos($new_theta);
$new_y = $cy + $distance * sin($new_theta);

// 座標を表示
echo "($new_x, $new_y)"; // (284.0430913148, 462.5328059809)


このようにして、回転後の点の位置が(284.0430913148, 462.5328059809)ということがわかります。

ソース: Bing との会話 2023/7/2
(1) [PHP]中心から角度を指定して線を引く(座標の回転) - PHP .... https://php-archive.net/php/point-rotate/.
(2) Coordinate Rotation in PHP - Stack Overflow. https://stackoverflow.com/questions/8742237/coordinate-rotation-in-php.
(3) PHP: str_rot13 - Manual. https://www.php.net/manual/ja/function.str-rot13.php.
- ↑これも計算結果だけが間違ってそう (コードは正しそう)
PHPで水平に対する角度を出すには、**atan2()**関数を使います。
atan2()関数は、y座標とx座標を引数にとって、原点から見た点の角度を
ラジアンで返します。例えば、以下のように書くと、点(391, 536)と
点(562, 301)を通る線が水平に対して何度傾いているかを出すことができます。

php
// 点の座標
$x1 = 391;
$y1 = 536;
$x2 = 562;
$y2 = 301;

// 線の傾き
$slope = ($y2 - $y1) / ($x2 - $x1);

// 角度をラジアンで計算
$angle = atan2($slope, 1);

// 角度を度数法で表示
echo rad2deg($angle); // -26.565051177078


atan2()関数やrad2deg()関数の詳しい使い方や注意点については、
以下のサイトを参考にしてみてください。


// 点の座標
$x1 = 253;
$y1 = 358;
$x2 = 481;
$y2 = 394;

// 線の傾き
$slope = ($y2 - $y1) / ($x2 - $x1);

// 角度をラジアンで計算
$angle = atan2($slope, 1);

// 角度を度数法で表示
echo rad2deg($angle); // 7.1250163489018


- [atan2 - PHPマニュアル](https://www.php.net/manual/ja/function.atan2.php):
- PHPの公式ドキュメントです。atan2()関数の構文や引数、返り値、例などを説明しています。
- [rad2deg - PHPマニュアル](https://www.php.net/manual/ja/function.rad2deg.php):
- PHPの公式ドキュメントです。rad2deg()関数の構文や引数、返り値、例などを説明しています。
- [how to calculate angle between two vectors code in php](https://stackoverflow.com/questions/14108393/how-to-calculate-angle-between-two-vectors-code-in-php):
- Stack Overflowの質問ページです。ベクトルの角度を計算する方法について回答があります。
- [Calculate angle between two Latitude/Longitude points](https://stackoverflow.com/questions/3932502/calculate-angle-between-two-latitude-longitude-points):
- Stack Overflowの質問ページです。緯度経度の角度を計算する方法について回答があります。
- [Measuring the distance between two coordinates in PHP](https://stackoverflow.com/questions/10053358/measuring-the-distance-between-two-coordinates-in-php):
- Stack Overflowの質問ページです。座標間の距離を計算する方法について回答があります。

これらのサイトを読んで、PHPで水平に対する角度を出す方法がわかったでしょうか?
もし分からないことがあれば、また聞いてくださいね。

ソース: Bing との会話 2023/7/2
(1) how to calculate angle between two vectors code in php. https://stackoverflow.com/questions/14108393/how-to-calculate-angle-between-two-vectors-code-in-php.
(2) Measuring the distance between two coordinates in PHP. https://stackoverflow.com/questions/10053358/measuring-the-distance-between-two-coordinates-in-php.
(3) Calculate angle between two Latitude/Longitude points. https://stackoverflow.com/questions/3932502/calculate-angle-between-two-latitude-longitude-points.
透明度をなくす
なんか透明度が150はほぼなくて 250は透明度が高い
 これがclean できなかった原因かな。 透明度をなくしたい

https://qiita.com/iwiwi/items/fdec3466c4dea5818b3a

convert HOGE.PNG  \( +clone -alpha opaque -fill white -colorize 100% \)\
+swap -geometry +0+0 -compose Over -composite -alpha off PIYO.png

(改行はバックスラッシュだったはず…)
回転させた境界にblur(ぼかし)をかける
-
http://kyle-in-jp.blogspot.com/2007/03/imagemagick_04.html
- %im%\convert.exe sample7.jpg -edge 1 sample93b.gif
- https://imagemagick.biz/archives/432
- convert /home/ao_love_yuimop/250.png -selective-blur 20x20+30% /home/ao_love_yuimop/250blr.png
imagemagickで直線に沿って blur をかける方法

----

imagemagickで直線に沿ってblurをかける方法をお探しですね。

その場合は、**-region**というオプションでblurをかけたい範囲を指定することができます1。

-regionは、幅x高さ+X座標+Y座標という形式で矩形領域を指定します1。

例えば、以下のコマンドは、幅150px、高さ150pxの領域をX座標599px、
Y座標261pxの位置に移動させて、そこにblurをかけます1。

convert a.png -region 150x150+599+261 -blur 0x100 +region b.png

-regionの後に+regionを付けることで、元の画像に戻すことができます1。

この方法であれば、imagemagickで直線に沿ってblurをかけることができます。
試してみてください??

ソース: Bing との会話 2023/7/9
(1) Bluring and Sharpening -- ImageMagick Examples. https://imagemagick.org/Usage/blur/.
(2) Blur part of image in Imagemagick - Stack Overflow. https://stackoverflow.com/questions/47064408/blur-part-of-image-in-imagemagick.
(3) ImageMagick の Convolve (畳み込み) 処理 - Qiita. https://qiita.com/yoya/items/0ea9721419879a78eb8c.
- convert a.png -region 150x150+599+261 -blur 0x100 +region b.png
☆→(↓)にズレた画像の←↑の点から→と↓に
←↑にズレた画像の右下の点から↑と←にブラーを伸ばせばいいか
2023/07/09 15:32
→結局は4点全部にかけることになった 4辺全部入ることもあったので 2023/07/16 11:10

convert /home/ao_love_yuimop/250.png   -region 40x250+579+261 -blur 0x3 +region   /home/ao_love_yuimop/250r
くらいかなあ
0x3 の3 は 2-5 で帰れる感じ 2023/07/09 15:36
☆まぁ、↓をするのがいいかな

region を斜めにすることはできますか?

----

-regionオプションは、矩形領域を指定するものなので、斜めにすることはできません1。

しかし、別の方法として、**-mask**というオプションで任意の形状のマスク画像を作成し、
それをblurの範囲として指定することができます2。

-maskオプションは、白黒の画像を読み込んで、白い部分だけを処理対象とします2。

例えば、以下のコマンドは、斜めに切り取った四角形のマスク画像を作成し、
それを元の画像に適用してblurをかけます2。

convert logo.jpg \\
\\ ( -clone 0 -fill white -colorize 100 -fill black \\
-draw \"polygon 332,180 427,105 481,238 399,279\" \\
-alpha off -write mpr:mask +delete \\) \\
-mask mpr:mask -blur 0x5 +mask logo_blur.jpg

この方法であれば、imagemagickで直線に沿ってblurをかけることができます。試してみてください??

ソース: Bing との会話 2023/7/9
(1) 画像を回転する | ImageMagick コマンドリファレンス. http://image-magick.com/2014/10/05/rotate/.
(2) 画像の回転/反転 | | Imagemagickの使い方日本語マニュアル. https://imagemagick.biz/archives/213.
(3) ImageMagick ? Command-line Options. https://imagemagick.org/script/command-line-options.php.
[重ね合わせた座標をだすぞ] 2023/07/09 15:38
[こんなぼかすimagemagickのコマンドを書きたい]2023/07/09 20:08
convert logo.jpg \\
\\ ( -clone 0 -fill white -colorize 100 -fill black \\
-draw \"polygon 332,180 427,105 481,238 399,279\" \\
-alpha off -write mpr:mask +delete \\) \\
-mask mpr:mask -blur 0x5 +mask logo_blur.jpg

↓で、ポリゴンを…
left up に移動している場合、
右下の点から伸びる2辺をぼかす
つまり、ne-se(たてのせん) sw-se の2辺
そこで幅を+-20px でやる

つまり ポリゴンの点は
ne_x -20, ne

  縦の線なら、横幅を +-widthで、
  横の線なら、縦幅を +-widthで返す
これを4つについてつければいいね 2023/07/09 20:14
- cut をやると、 100の方が灰色が雑になる
- → 移動距離が -0.4 とかだった intにして解決 2023/07/16 11:13
どこが制御点になってるか表示する
JavaScript で img の上に座標指定で点を描きたいです
canvas を使わないと描けませんか?

--------
JavaScriptでimgの上に座標指定で点を描きたいということですね。??
その場合、以下のようなコードを試してみてください。

html
<!-- imgタグとcanvasタグを作成 -->
<img id="image" src="image.jpg">
<canvas id="canvas"></canvas>

<script>
  // imgタグとcanvasタグを取得
  var image = document.getElementById("image")
  var canvas = document.getElementById("canvas")

  // canvasのサイズをimgと同じにする
  canvas.width = image.width
  canvas.height = image.height

  // canvasのコンテキストを取得
  var ctx = canvas.getContext("2d")

  // imgの上にcanvasを重ねる
  canvas.style.position = "absolute"
  canvas.style.left = image.offsetLeft + "px"
  canvas.style.top = image.offsetTop + "px"

  // 点を描く関数を定義
  function drawPoint(x, y, color, size) {
    // 点の色とサイズを設定
    ctx.fillStyle = color
    ctx.lineWidth = size
    // 点を描く
    ctx.beginPath()
    ctx.arc(x, y, size / 2, 0, Math.PI * 2)
    ctx.fill()
    ctx.closePath()
  }

  // 座標指定で点を描く(例:(100, 200)に赤色の10pxの点)
  drawPoint(100, 200, "red", 10)
</script>

canvasを使わないと描けませんかということですね。
canvasを使わない方法もありますが、canvasを使う方法が一般的で簡単です。
canvasを使わない方法としては、例えば、imgの上にdivタグを重ねて、
divタグの背景色やサイズや位置を調整して点のように見せるという方法がありますが、これはあまりおすすめしません。
canvasを使う方法は、imgのピクセルデータに直接アクセスして点を描くことができるので、
より柔軟で高速です。
→ 結局canvas を重ねて描画した
webページ上でEnterキーを押したら、 form の submit が押されたことにしたいです
webページ上でEnterキーを押したら、formのsubmitが押されたことにしたいということですね。??
その場合、以下のようなコードを試してみてください。

html
<!-- formタグとsubmitボタンを作成 -->
<form id="form">
  <input type="submit" id="submit" value="Submit">
</form>

<script>
  // formタグとsubmitボタンを取得
  var form = document.getElementById("form")
  var submit = document.getElementById("submit")

  // webページにキーダウンイベントのリスナーを登録
  document.onkeydown = function(event) {
    // キーコードが13(Enterキー)ならば
    if (event.keyCode == 13) {
      // submitボタンをクリックする
      submit.click()
    }
  }

  // formにサブミットイベントのリスナーを登録
  form.onsubmit = function() {
    // サブミットされたときに実行したい処理を書く
    // 例:アラートを表示する
    alert("form is submitted")
  }
</script>
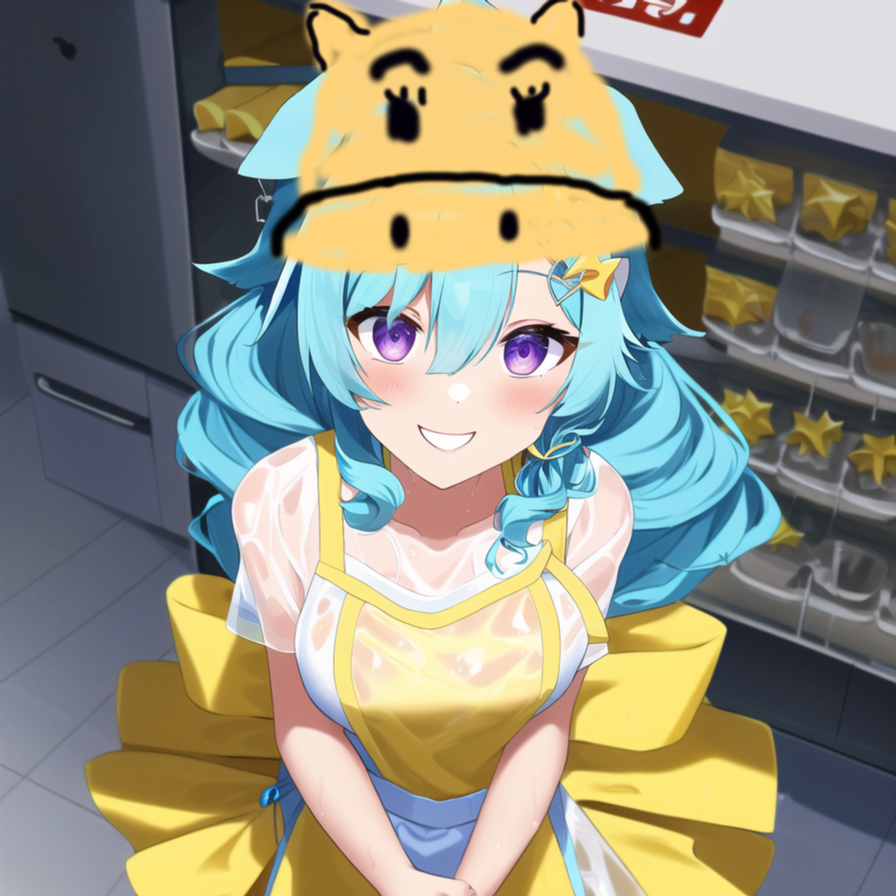
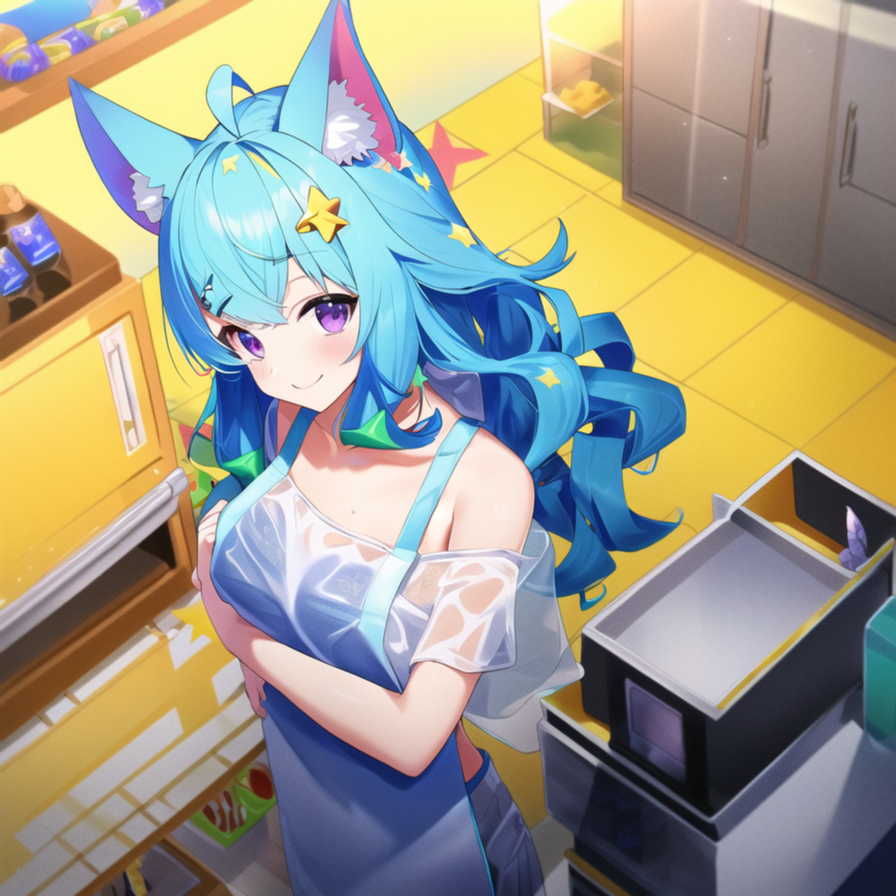
静止画部分について(続き)
- はてなブログの画像アップロード上限(300MB/月)が1動画分の記事を描き切る直前くらいで埋まりそうになったのでこちらに続きを描きます。
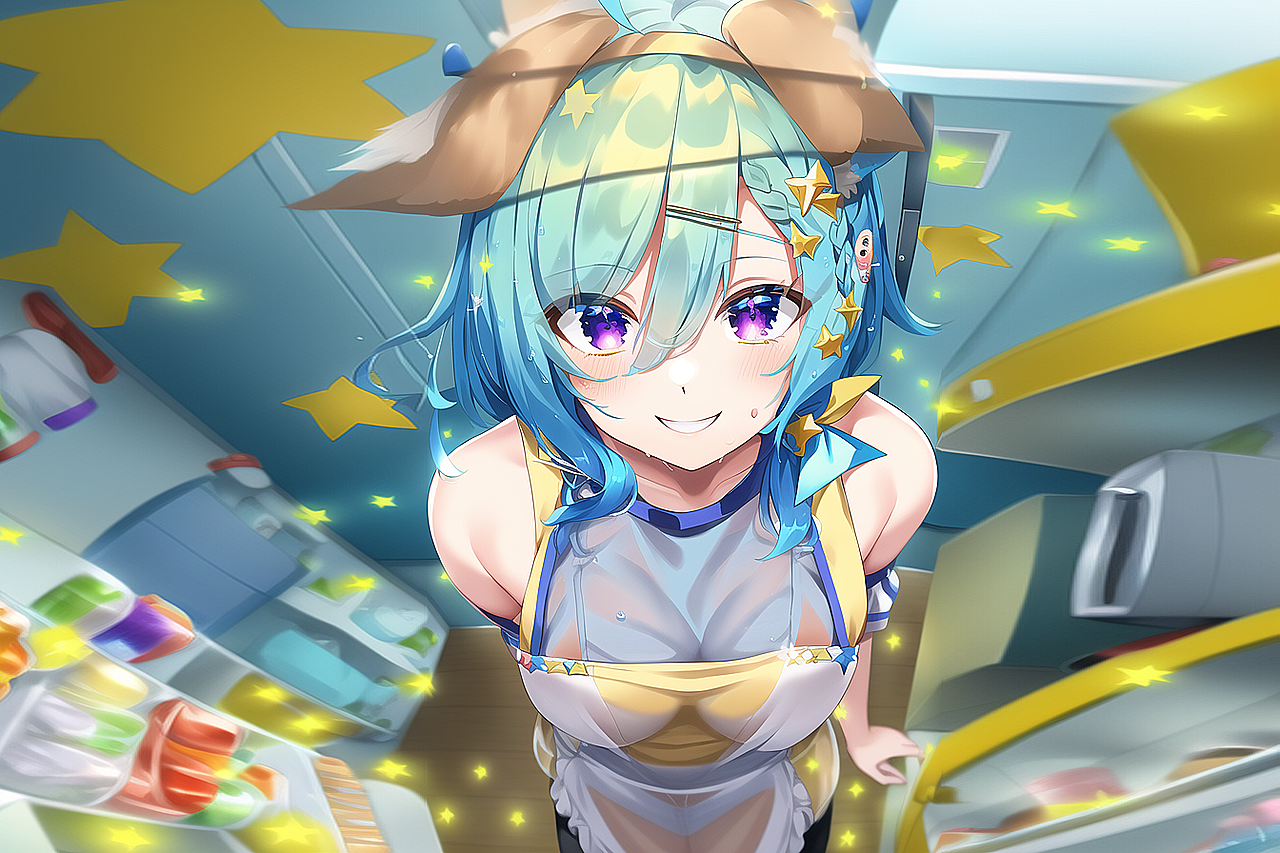
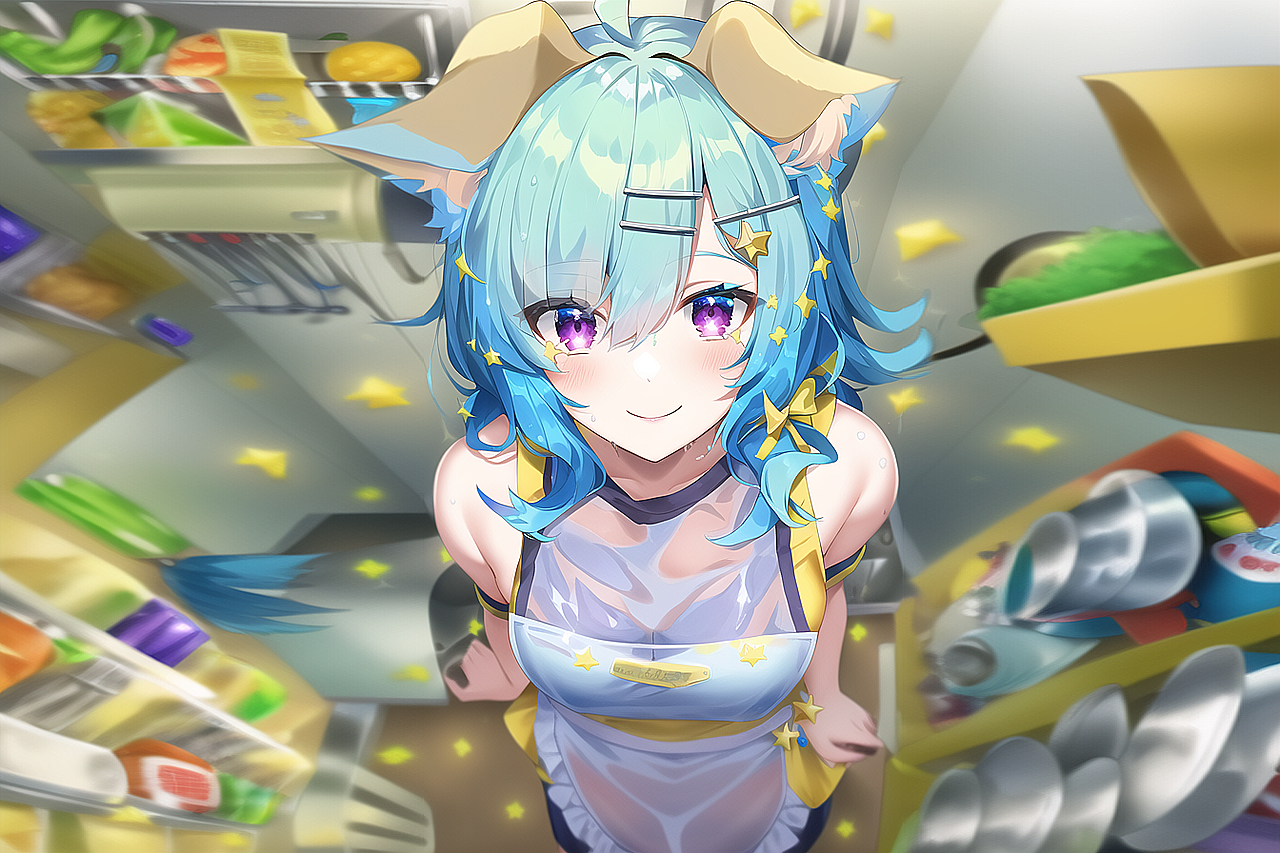
キッチンシーン (「投票行って」)
A
- これも正方形の方が綺麗なのでは、ということで正方形で作って、左右はSAIで引き伸ばしですね。
- SG i2i f8 シャープ2
- 引き伸ばし元 (↑の採用画像ではシャープがかかって引き締まってますね)
- ☆(次回:) 髪の色が重ね合わせる前と後ろで違う、というかキャップみたいなのがあると、きれいな髪色になるので再度やりたい (キッチンシーン「投票行って」)
- この画像の肝は「髪の色」ですね (まわりのsparkle もきれいだけど)
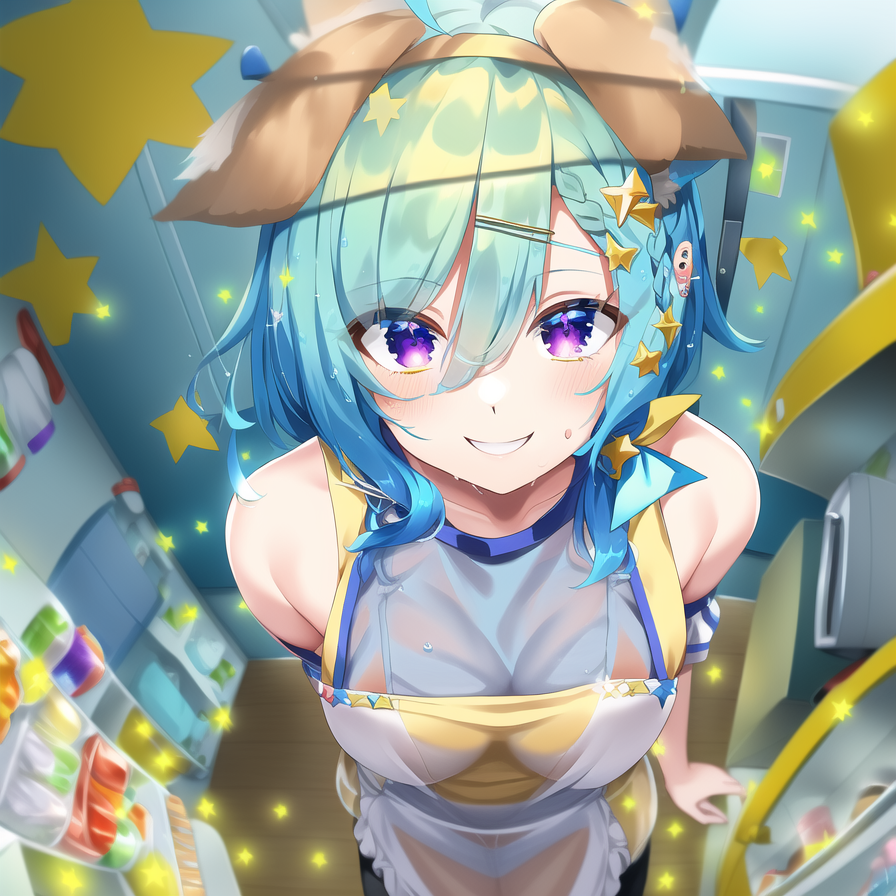
第一原画
- この2枚から↑になるので、プロンプトの apronの効果が強いですね。
-
- SGの重ね合わせ結果 (f8)

プロンプト
- 通常通り strength 0.52 0.13
cap, cartoon-character costume, arms over head,yellow background,name badge,convenience store, from above ,lights, upper body, refrigerator, close-up, upper body, shelf, looking at viewer,white tops, carrying, apron, bright background, in room,smile,wink, smile, {{{kitchen}}},1girl, 8k, RAW photo, best quality, masterpiece, ultra high res, {{{{{ see-through hair}}}}},, see-through body, See-through,wet, The most Powerful white tanktop, {{insane}}, {{{{wavy hair}}}},{{{{{{{{{{{lightblue hair}}}}}}}}}}}, {{{{{{{{{{dog ears }}}}}}}}}}, ahoge, white skirt with blue lines, off shoulder, pannier skirt, {{{{{{{{yellow hairpin}}}}}}}}, {{{{{star hair pin}}}}}, {{{{{yellow star hair ornament}}}}}, {{{{{medium hair}}}}}, short skirt, college student, chiba girl,purple eyes, Undressing,{{{{{{{{{{{{rating:questionable}}}}}}}}}}}}, see-through silhouette, transparent, see-through, see-through sleeves,see-through silhouette, transparent, see-through, masterpiece,high quality,best,high resolution,best quality,award winning,highly detailed,hyper extreme detailed
2girls, {multiple girls}, 3d, sepia, sketch ,{{Worst quality}},{{low quality}},{{normal quality}},head_out_of_frame, Multiple Girls, Comic,Facepaint,Wavy mouth, {{{{Split screen}}}}, {{{{{{ multiple views}}}}}}, {{{Blur}}}, {{{{monochrome}}}}, Blurry, depth_of_field, \u3000chromatic_aberration,\u3000\u3000\u3000\u3000\u3000{{{{{Dog}}}}}, more than 2 thighs, extra calf, extra legs, bad knee, {{more than 2 legs}},{{{{{more than 2 arms, extra arms}}}}},bad Anatomy
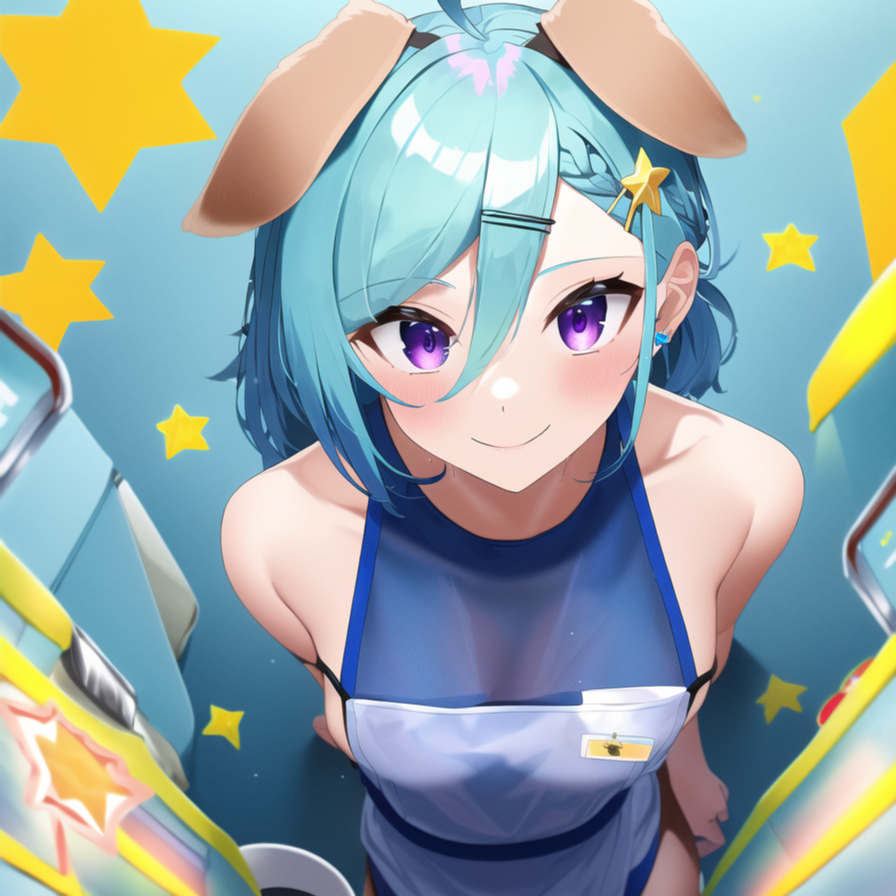
B
- 同じく SG i2i f6 シャープ2
- 背景引き伸ばし& シャープ前。シャープがめちゃ大事ですね

- プロンプトはAと同じ(多分)
第一原画
- ☆(次回) 一つ前のカットの採用画像を第一原画にしてもよい
-

外食シーン
- 鉄板焼
- シャープがうまく決まらなかった
第一原画
- 似たものがたくさんあって分からないが以下あたり 多分1枚めと2枚めから三枚目を作って1枚めと3枚めで採用画像を得てる
-
プロンプト
- 地味に tokyo がついてる tokyo scenery
Hamburg steak, closeup to viewer, happy laughing, cityscape, tokyo scenery,beautiful starry sky, sky full of stars,{{Add layer}}, dynamic angle, waist-up, idle, actress,very cute, big eyes, extremely detailed eyes and face, eyes with beautiful details, professional lighting, physically-based rendering, yellow background,name badge,lights, refrigerator, upper body, shelf, looking at viewer,white tops, bright background, in room,smile,wink, smile, 1girl, 8k, RAW photo, best quality, masterpiece, ultra high res, {{{{{ see-through hair}}}}}, see-through body, See-through,wet, The most Powerful white tanktop, {{insane}}, {{{{wavy hair}}}},{{{{{{{{{{{lightblue hair}}}}}}}}}}}, {{{{{{{{{{dog ears }}}}}}}}}}, ahoge, white skirt with blue lines, off shoulder, pannier skirt, {{{{{{{{yellow hairpin}}}}}}}}, {{{{{star hair pin}}}}}, {{{{{yellow star hair ornament}}}}}, {{{{{medium hair}}}}}, short skirt, college student, purple eyes, Undressing,{{{{{{{{{{{{rating:questionable}}}}}}}}}}}}, {see-through silhouette, transparent, see-through, see-through sleeves}, masterpiece,high quality,best,high resolution,best quality,award winning,highly detailed,ultra detailed,hyper extreme detailed
grayscale, skin spots, acnes, skin blemishes, age spot, ugly face,fat, missing fingers, extra fingers,lowers normal quality, 2girls, {multiple girls}, 3d, sepia, sketch ,{{Worst quality}},{{low quality}},{{normal quality}},head_out_of_frame, Multiple Girls, Comic,Facepaint,Wavy mouth, {{{{Split screen}}}}, {{{{{{ multiple views}}}}}}, {{{Blur}}}, {{{{monochrome}}}}, Blurry, depth_of_field, \u3000chromatic_aberration,\u3000\u3000\u3000\u3000\u3000{{{{{Dog}}}}}, more than 2 thighs, extra calf, extra legs, bad knee, {{more than 2 legs}},{{{{{more than 2 arms, extra arms}}}}},bad Anatomy
キルログシーン
- ある程度はペイントで書いたけど、もっと雑でも書き込みを増やして i2iすればよかった
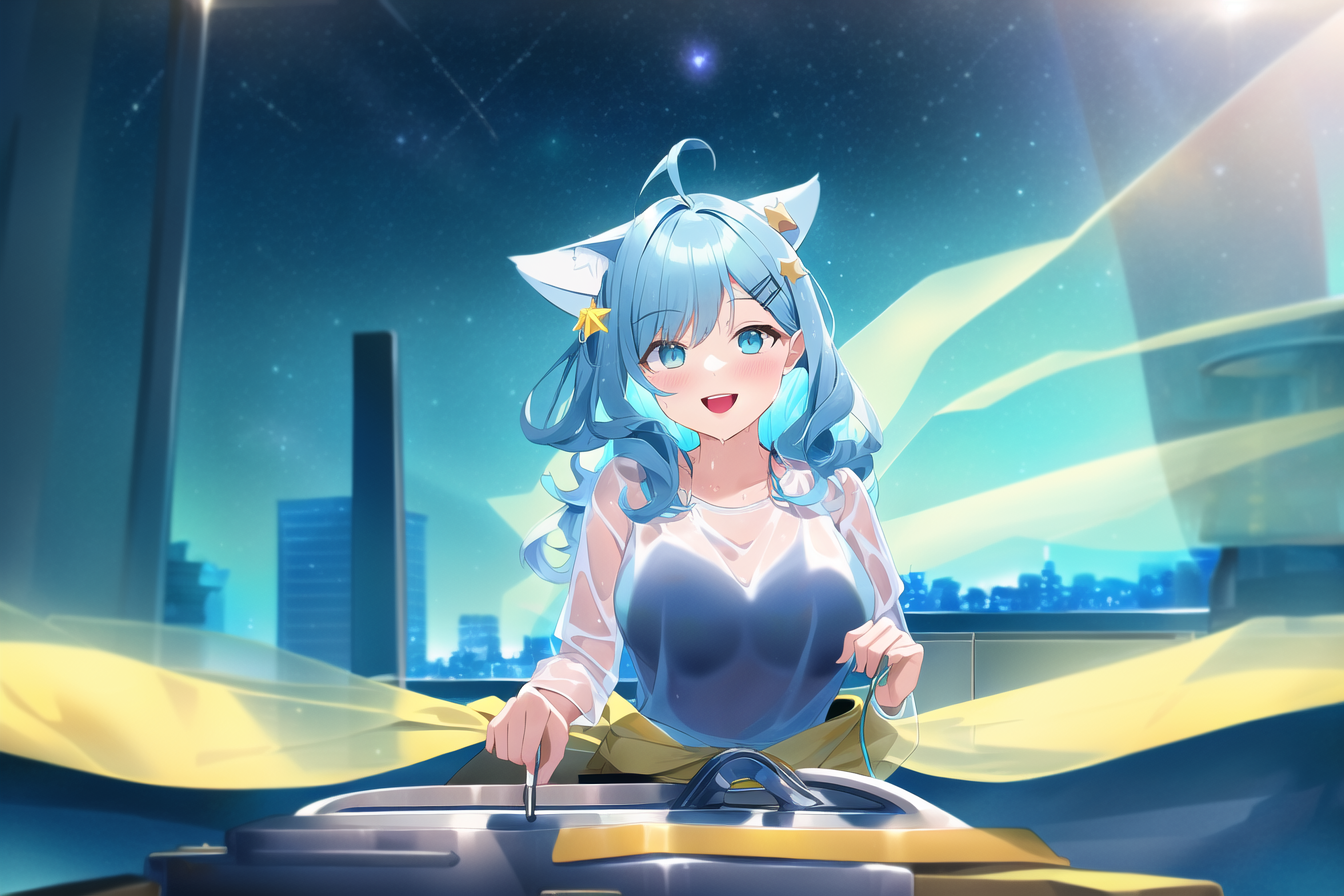
目がきらきらのシーン
- 地味に シャープなし→シャープ2→シャープ3→シャープ4 と4段階分出る
- 0.16秒、0.27秒、0.4秒、0.94秒
- SG i2i
- シャープなし

- シャープ3

第一原画
-
多分 A と B から C を得て Cと Bから採用画像を得ている AとBだけかも?
-
A
-
-
B
-
-
C
-
プロンプト
- Bは Aから先頭の death box を抜いただけ(多分)
- A
- やっぱり満点の星空系はきれいですね
- Aは極限系っぽい溶けかけの顔してる
- 目関係が充実してますね。 big eyes, extremely detailed eyes and face, eyes with beautiful details, purple eyes
- stars in eyes みたいなのがないのが意外 (BャCにもなさそう)
- ☆(次次回): 目がめちゃきれいなのは、第一原画の両方で目の色が違うから。静止画だったらそれできれいな目が得られるのでまたやりたい (動画だと目の色が交互に明滅する)
- ☆☆(次次回): というか、第二原画をそうやって同じ色のグラでで作れば、動画でも破綻しないので、きれいな目の動画を作りたい (きれいな目の静止画シーン)
death box, camouflaged clothes, outdoors,sunny, desert, champion, gun, closeup to viewer, happy laughing, cityscape, tokyo scenery,beautiful starry sky, sky full of stars,{{Add layer}}, dynamic angle, waist-up, idle, actress,very cute, big eyes, extremely detailed eyes and face, eyes with beautiful details, professional lighting, physically-based rendering, yellow background,name badge,lights, refrigerator, upper body, shelf, looking at viewer,white tops, bright background, in room,smile,wink, smile, 1girl, 8k, RAW photo, best quality, masterpiece, ultra high res, {{{{{ see-through hair}}}}}, see-through body, See-through,wet, The most Powerful white tanktop, {{insane}}, {{{{wavy hair}}}},{{{{{{{{{{{lightblue hair}}}}}}}}}}}, {{{{{{{{{{dog ears }}}}}}}}}}, ahoge, white skirt with blue lines, off shoulder, pannier skirt, {{{{{{{{yellow hairpin}}}}}}}}, {{{{{star hair pin}}}}}, {{{{{yellow star hair ornament}}}}}, {{{{{medium hair}}}}}, short skirt, college student, purple eyes, Undressing,{{{{{{{{{{{{rating:questionable}}}}}}}}}}}}, {see-through silhouette, transparent, see-through, see-through sleeves}, masterpiece,high quality,best,high resolution,best quality,award winning,highly detailed,ultra detailed,hyper extreme detailed
grayscale, skin spots, acnes, skin blemishes, age spot, ugly face,fat, missing fingers, extra fingers,lowers normal quality, 2girls, {multiple girls}, 3d, sepia, sketch ,{{Worst quality}},{{low quality}},{{normal quality}},head_out_of_frame, Multiple Girls, Comic,Facepaint,Wavy mouth, {{{{Split screen}}}}, {{{{{{ multiple views}}}}}}, {{{Blur}}}, {{{{monochrome}}}}, Blurry, depth_of_field, \u3000chromatic_aberration,\u3000\u3000\u3000\u3000\u3000{{{{{Dog}}}}}, more than 2 thighs, extra calf, extra legs, bad knee, {{more than 2 legs}},{{{{{more than 2 arms, extra arms}}}}},bad Anatomy
プラントシーン
- 出したい構図はもっと雑書き込みをi2iでやって出すべきだと思った (プラントシーン)
- 投票やスカートは上手く書き込めた
プラントした後のシーン
- SG i2i f6, f7 (f0-f16をi2iしてる)
- s2, s3, s2, s3


第一原画
-
 (←A)
(←A) 
プロンプト
- A (Bも同じ)
explode, huge explosion, from sky, from above, outdoors,sunny, large filesize, desert, champion, {{{{{gun}}}}}, {{{shooting}}}, dynamic angle, waist-up, idle, actress,very cute, big eyes, professional lighting, physically-based rendering, yellow background,name badge,lights, refrigerator, upper body, shelf, looking at viewer,white tops, bright background, in room,smile,wink, smile, 1girl, 8k, RAW photo, best quality, masterpiece, ultra high res, {{{{{ see-through hair}}}}}, see-through body, See-through,wet, The most Powerful white tanktop, {{insane}}, {{{{wavy hair}}}},{{{{{{{{{{{lightblue hair}}}}}}}}}}}, {{{{{{{{{{dog ears }}}}}}}}}}, ahoge, white skirt with blue lines, off shoulder, pannier skirt, {{{{{{{{yellow hairpin}}}}}}}}, {{{{{star hair pin}}}}}, {{{{{yellow star hair ornament}}}}}, {{{{{medium hair}}}}}, short skirt, college student, purple eyes, Undressing,{{{{{{{{{{{{rating:questionable}}}}}}}}}}}}, {see-through silhouette, transparent, see-through, see-through sleeves}, masterpiece,high quality,best,high resolution,best quality,award winning,highly detailed,ultra detailed,hyper extreme detailedgrayscale, skin spots, acnes, skin blemishes, age spot, ugly face,fat, missing fingers, extra fingers,lowers normal quality, 3d, sepia, sketch ,{{Worst quality}},{{low quality}},{{normal quality}},head_out_of_frame, Multiple Girls, Comic,Facepaint,Wavy mouth, {{{{Split screen}}}}, {{{{{{ multiple views}}}}}}, {{{Blur}}}, {{{{monochrome}}}}, Blurry, depth_of_field, \u3000chromatic_aberration,\u3000\u3000\u3000\u3000\u3000{{{{{Dog}}}}}, more than 2 thighs, extra calf, extra legs, bad knee, {{more than 2 legs}},{{{{{more than 2 arms, extra arms}}}}},bad Anatomy
使わなかった画像
- 普通に使えそうな構図がAだけだから、前半(f8まで)に寄ってますね
- 背景の オレンジ色が desertを呼び出してますね
- f4
- f4
- f5
- f8
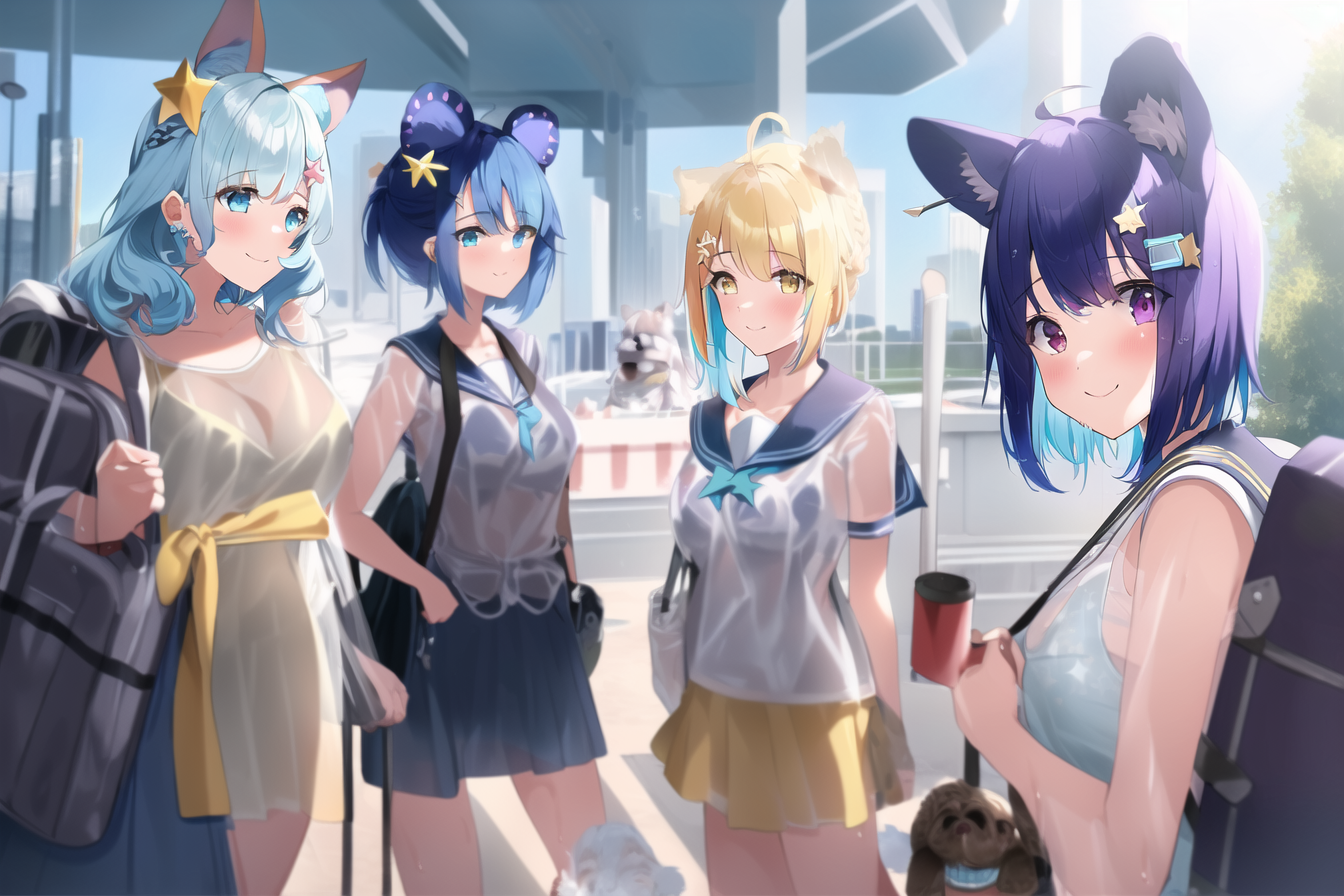
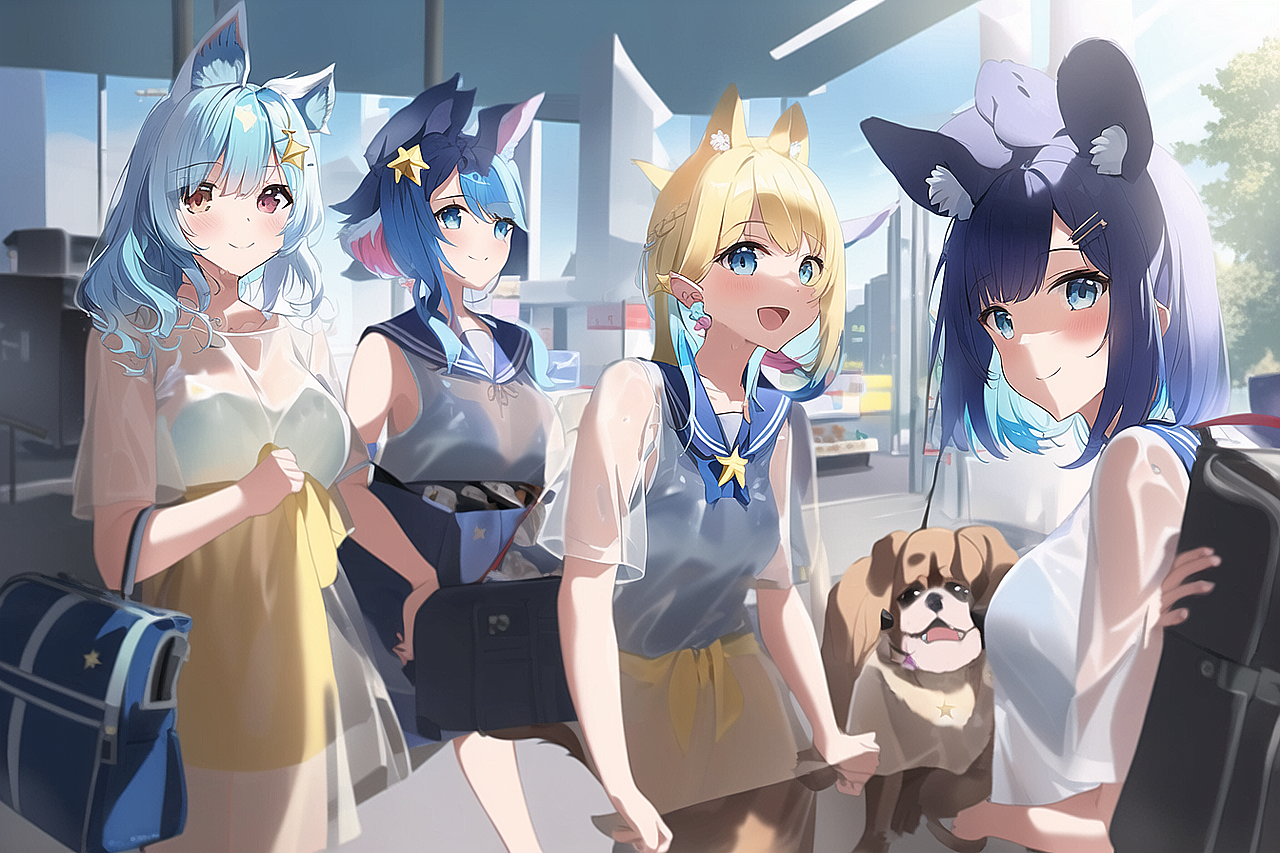
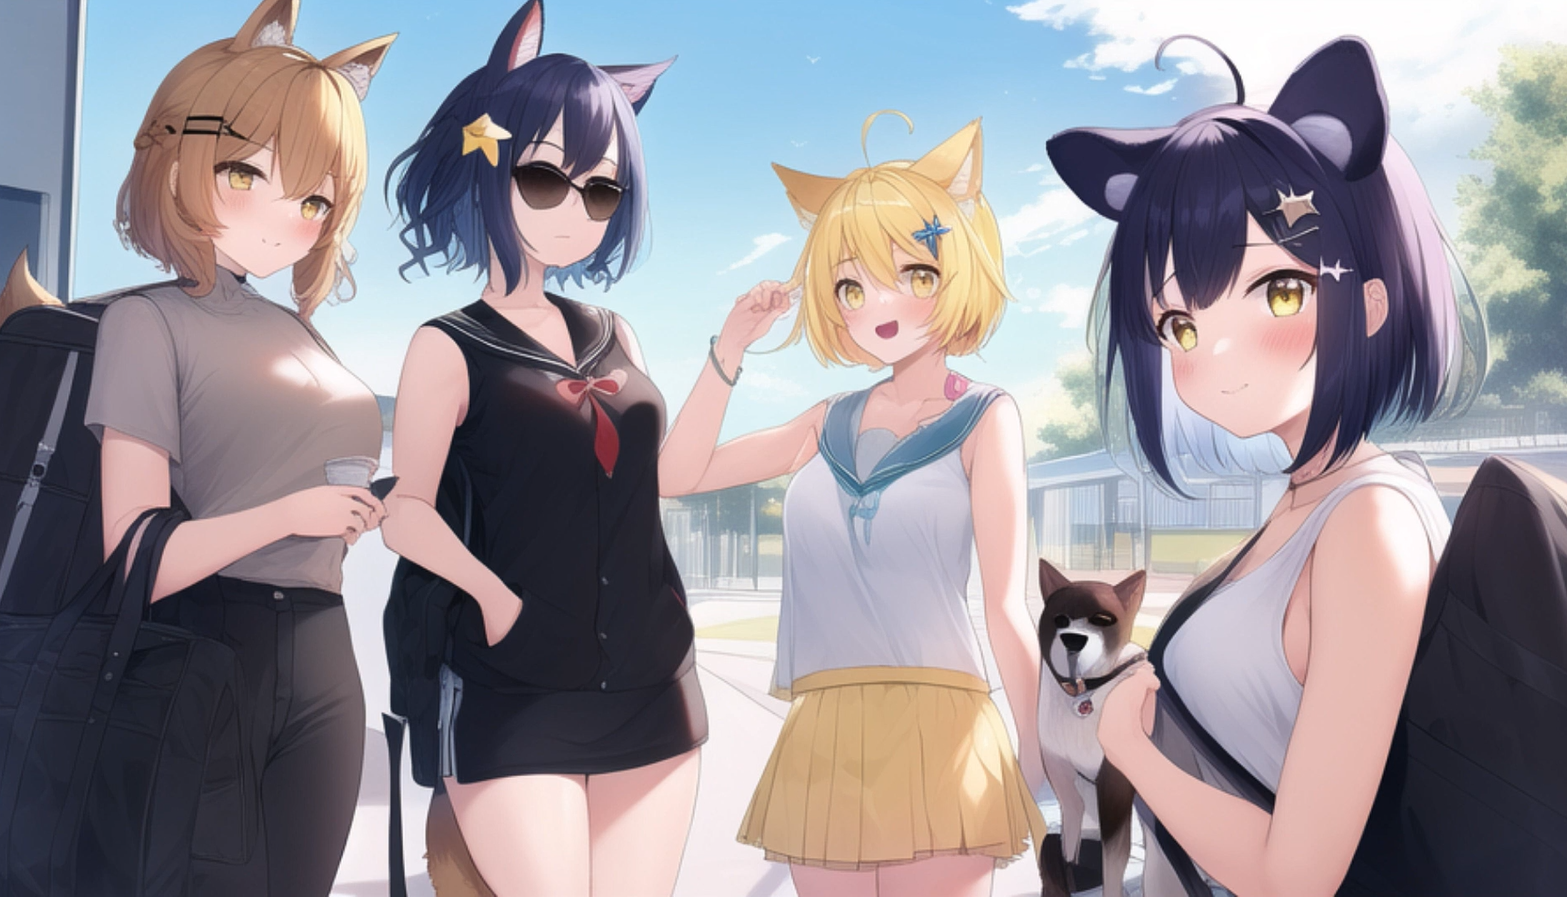
旅行シーン
- SG i2i f6 s2 s3, f7 s2 s3
- やっぱり、静止画であっても、複数人いるシーンがあるとにぎやかでいいですね
- strength 0.62 (0.15くらい?) やはり、 0.52 0.13 よりは強かった
-
 (f6 シャープなし)
 -
 (f6 シャープ2。 strength 0.62くらいでも、左の人は髪色が思いっきりlightblue になってますね。(プロンプトで指定されている以上、1人はlightblue hair の人を入れないといけない))
 -
 (f7 シャープなし)
 -
 (f7 シャープ2。f6よりちょっと中央に寄ってますね)
第一原画
-
 (←あおちゃんかわいい)
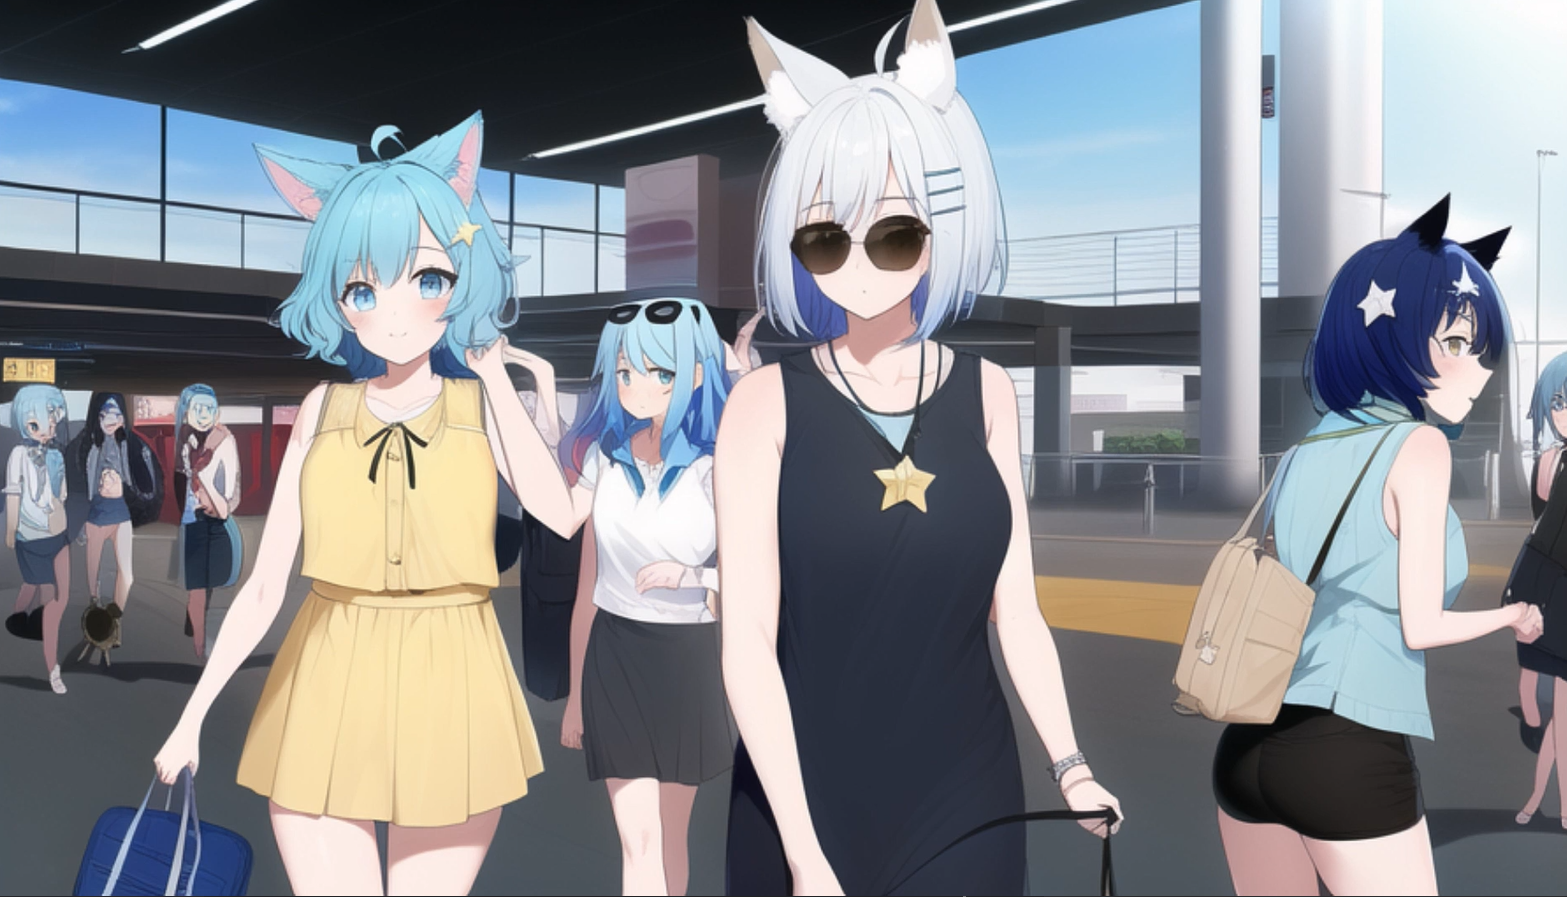
-
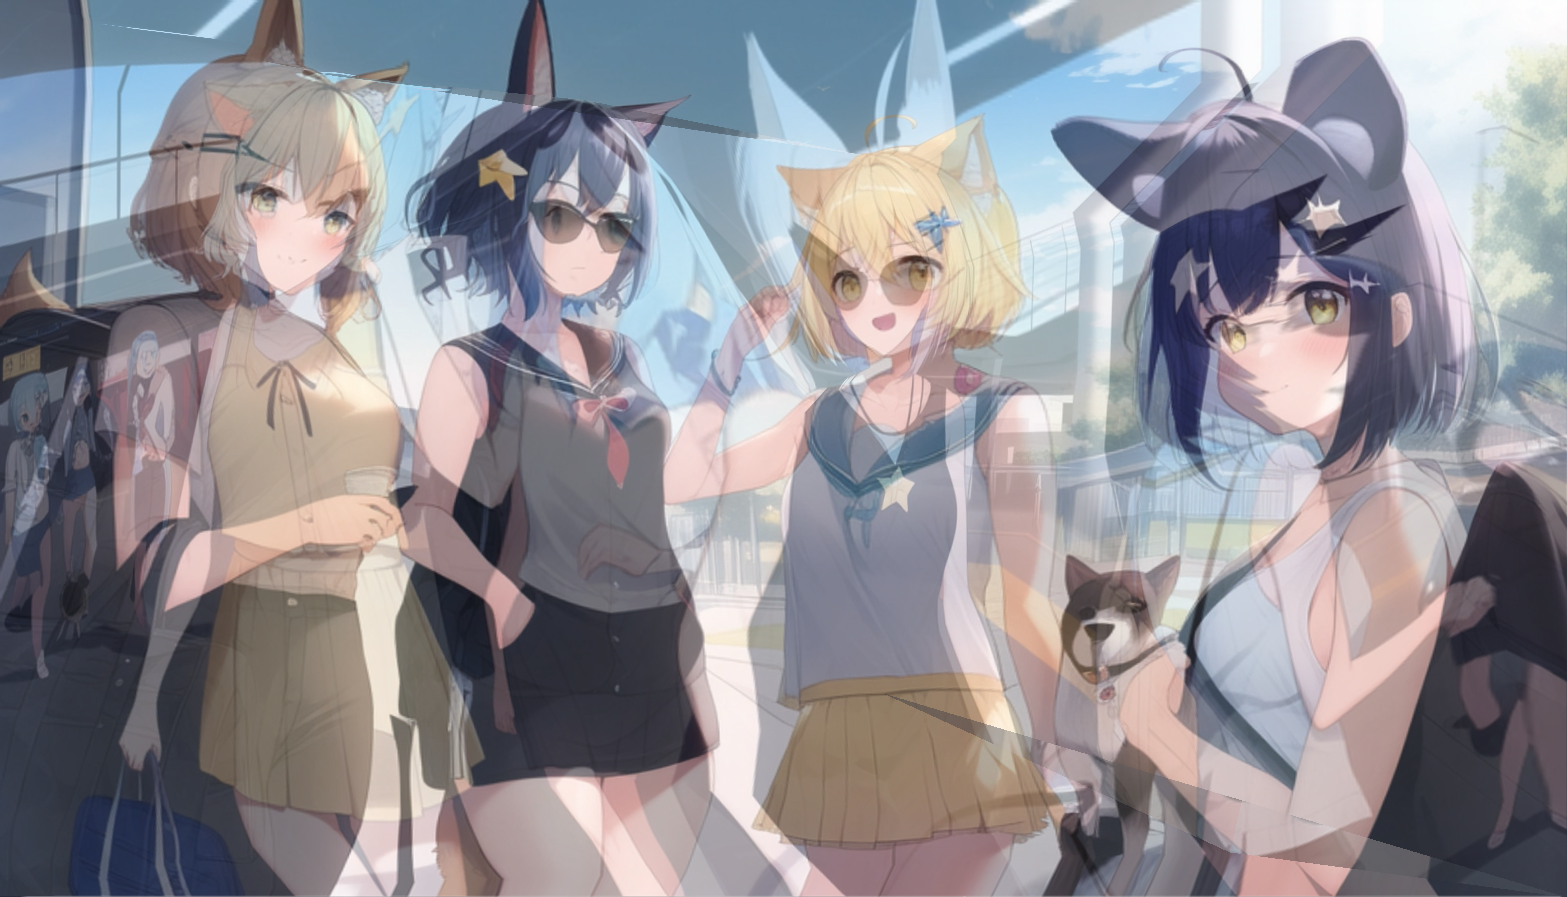 (←f6)
(←f6) -
 (←f7)
(←f7) - こういう重ね合わせでも、 strength を上げればいいものになりますね
プロンプト
sailor dress,4girls, travel, carrying bag, airport, station, from sky, from above, outdoors,sunny, large filesize, desert, champion, dynamic angle, waist-up, idle, actress,very cute, big eyes, professional lighting, physically-based rendering, yellow background,lights, refrigerator, upper body, shelf, looking at viewer,white tops, bright background, in room,smile,wink, smile, 1girl, 8k, RAW photo, best quality, masterpiece, ultra high res, {{{{{ see-through hair}}}}}, see-through body, See-through,wet, The most Powerful white tanktop, {{insane}}, {{{{wavy hair}}}},{{{{{{{{{{{lightblue hair}}}}}}}}}}}, {{{{{{{{{{dog ears }}}}}}}}}}, ahoge, white skirt with blue lines, off shoulder, pannier skirt, {{{{{{{{yellow hairpin}}}}}}}}, {{{{{star hair pin}}}}}, {{{{{yellow star hair ornament}}}}}, {{{{{medium hair}}}}}, short skirt, college student, purple eyes, Undressing,{{{{{{{{{{{{rating:questionable}}}}}}}}}}}}, {see-through silhouette, transparent, see-through, see-through sleeves}, masterpiece,high quality,best,high resolution,best quality,award winning,highly detailed,ultra detailed,hyper extreme detailed
grayscale, skin spots, acnes, skin blemishes, age spot, ugly face,fat, missing fingers, extra fingers,lowers normal quality, 3d, sepia, sketch ,{{Worst quality}},{{low quality}},{{normal quality}},head_out_of_frame, Comic,Facepaint,Wavy mouth, {{{{Split screen}}}}, {{{{{{ multiple views}}}}}}, {{{Blur}}}, {{{{monochrome}}}}, Blurry, depth_of_field, \u3000chromatic_aberration,\u3000\u3000\u3000\u3000\u3000{{{{{Dog}}}}}, more than 2 thighs, extra calf, extra legs, bad knee, {{more than 2 legs}},{{{{{more than 2 arms, extra arms}}}}},bad Anatomy
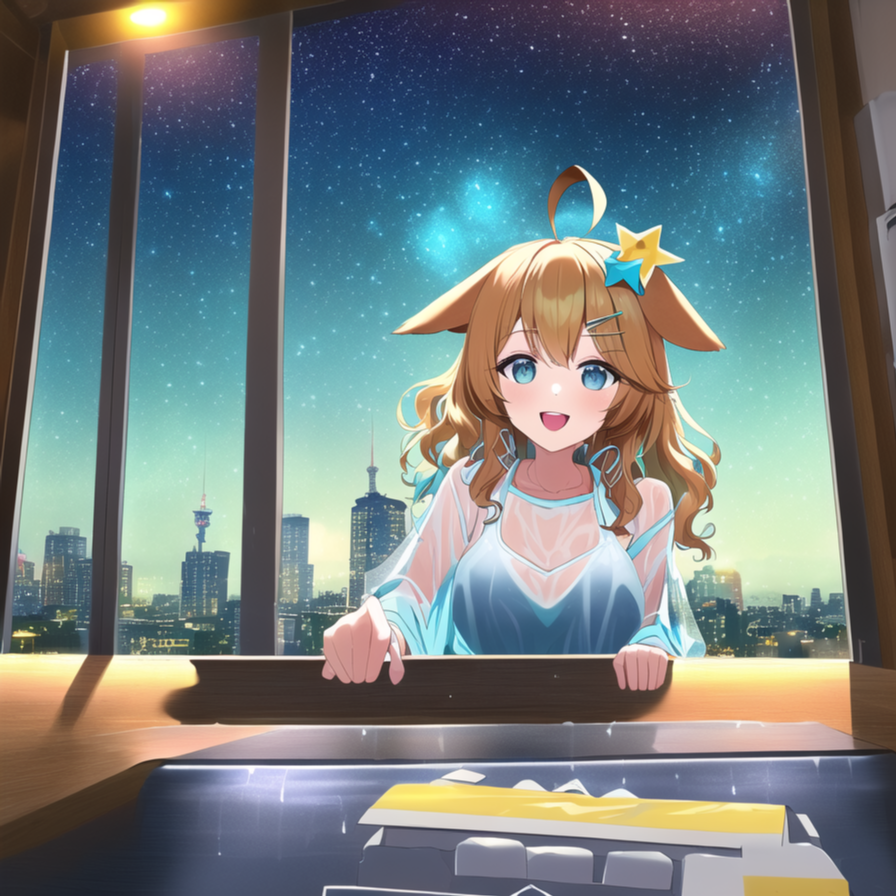
搭乗シーン
- 構図を出すためにt2i出力をSAIで合成してi2iしたような覚えがあります f02, s3, s4
- …と思いきや、構図はほぼ完成品が t2i で出てました
- s3

- s4
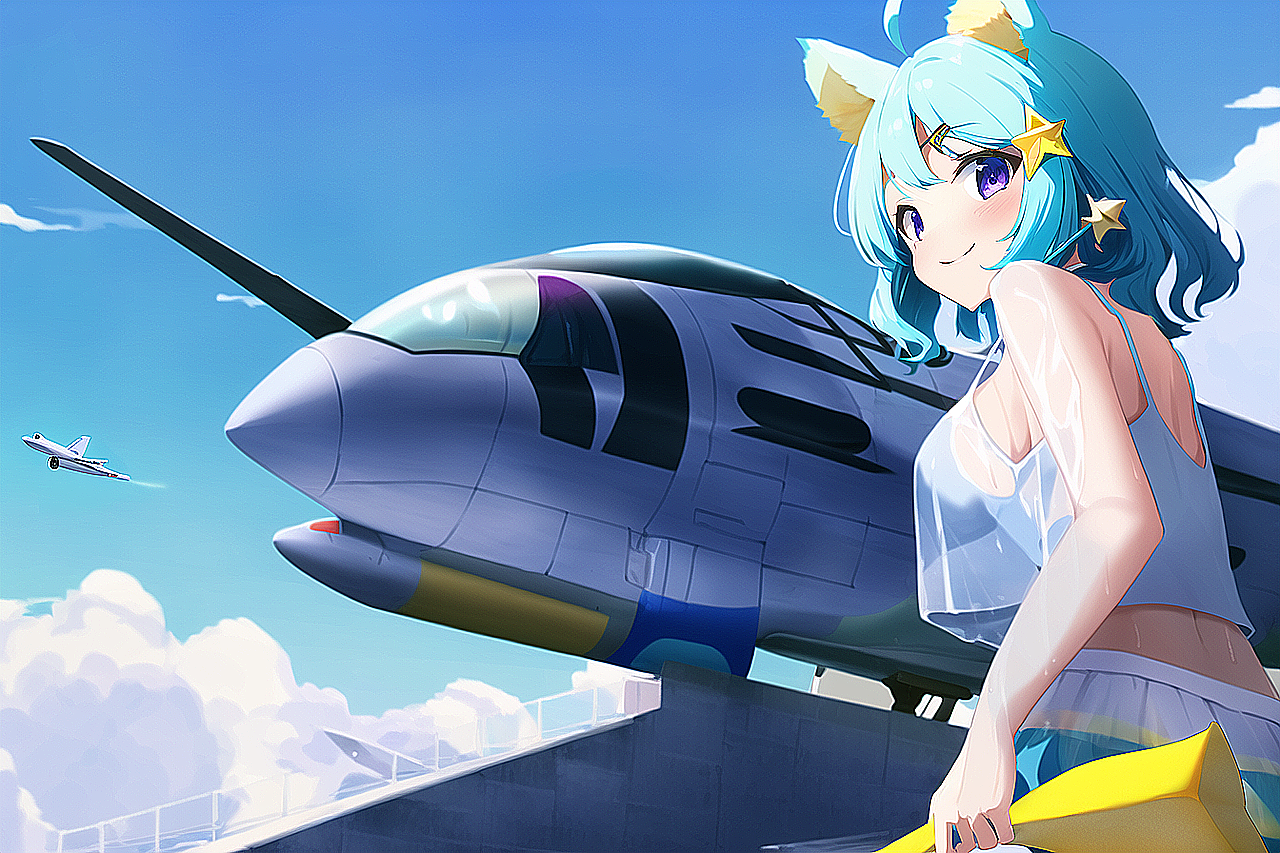
- 晴れて日差しが強くておかしくないシーンだから s4でも合ってるかも。
- s4だとシースルー感が強まりますね。
第一原画
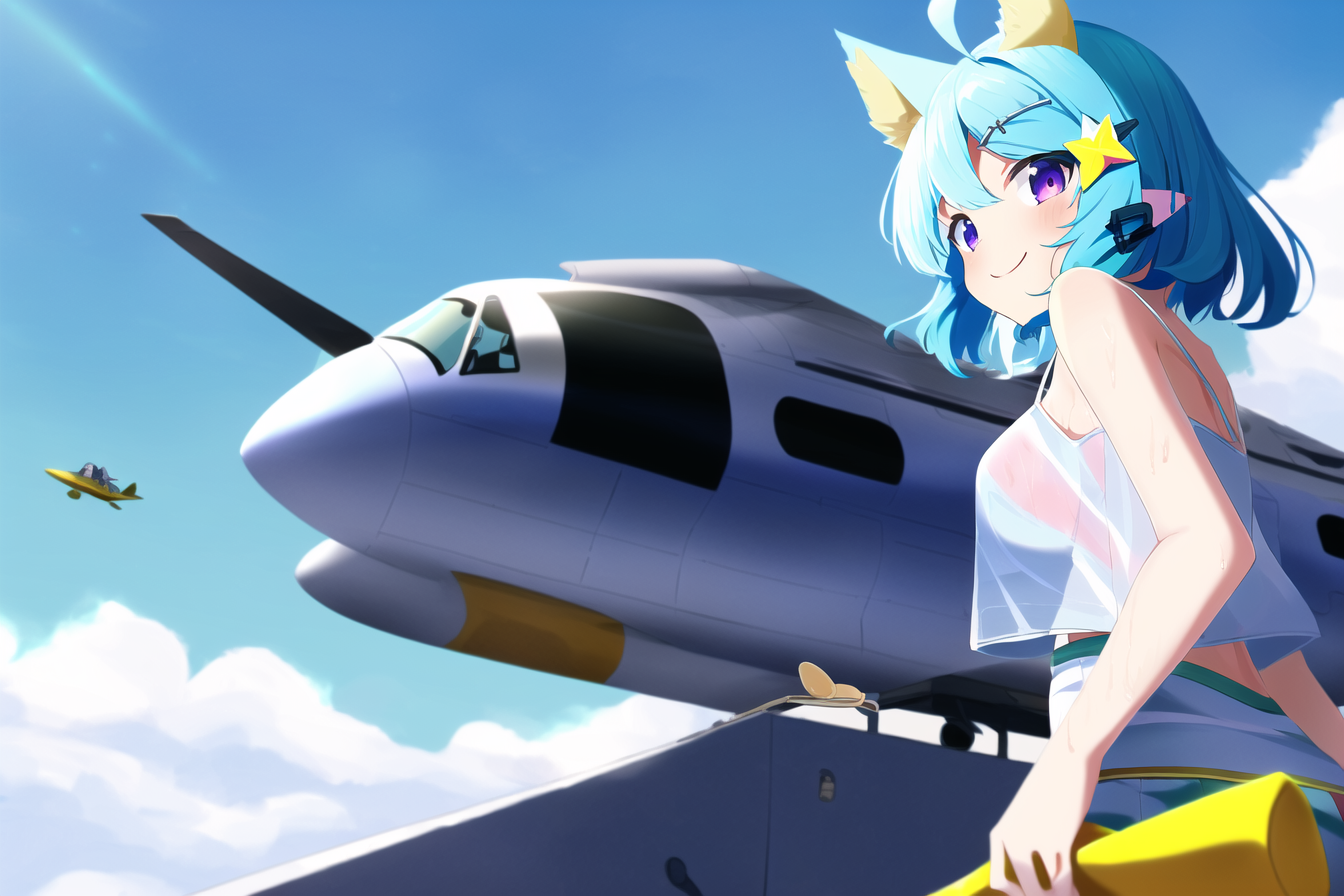
プロンプト
- …t2iかと思いきや、↓は str 0.7 の i2i でした (でも構図は t2iで出てそう?)
{jet fighter},boarding bridge,from behind,boarding, {jumbo-jet}, {airplane}, stairs, blue sky, sunny, cloud, hand on cheek, lightblue camisole, {{white shirt}},lightblue strap,large filesize, waist-up, idle, actress,very cute, big eyes, professional lighting, physically-based rendering, lights, upper body, looking at viewer,white tops, smile,wink, 1girl, 8k, RAW photo, best quality, masterpiece, ultra high res, {{{{{ see-through hair}}}}}, see-through body, See-through,wet, The most Powerful white tanktop, {{insane}}, {{{{wavy hair}}}},{{{{{{{{{{{lightblue hair}}}}}}}}}}}, {{{{{{{{{{dog ears }}}}}}}}}}, ahoge, white skirt with blue lines, off shoulder, pannier skirt, {{{{{{{{yellow hairpin}}}}}}}}, {{{{{star hair pin}}}}}, {{{{{yellow star hair ornament}}}}}, {{{{{medium hair}}}}}, short skirt, college student, purple eyes, Undressing,{{{{{{{{{{{{rating:questionable}}}}}}}}}}}}, {see-through silhouette, transparent, see-through, see-through sleeves}, masterpiece,high quality,best,high resolution,best quality,award winning,highly detailed,ultra detailed,hyper extreme detailed
grayscale, skin spots, acnes, skin blemishes, age spot, ugly face,fat, missing fingers, extra fingers,lowers normal quality, 3d, sepia, sketch ,{{Worst quality}},{{low quality}},{{normal quality}},head_out_of_frame, Comic,Facepaint,Wavy mouth, {{{{Split screen}}}}, {{{{{{ multiple views}}}}}}, {{{Blur}}}, {{{{monochrome}}}}, Blurry, depth_of_field, \u3000chromatic_aberration,\u3000\u3000\u3000\u3000\u3000{{{{{Dog}}}}}, more than 2 thighs, extra calf, extra legs, bad knee, {{more than 2 legs}},{{{{{more than 2 arms, extra arms}}}}},bad Anatomy
今後の目標
- 今回の自動化率UP開発の結果、下記2工程の自動化率の低さがボトルネックなので、このあたりの自動化率UPを試みていきたい (方法案がある) (次回)
- 制御点(キーポイント)設定
- 選別
- 選別は前後フレーム情報を参照する方法が既に世の中にあるけれど、それとは別の方式案があるので先にそっちを試してみたい (次回)