ImageMagick の画像抜き出しについてのうんちくです。
画像の特定領域の抜き出しは、主に -crop と -trim が使われます。条件によって -shave も便利です。
-crop
画像を抜き出す素直なオプションは -crop です。
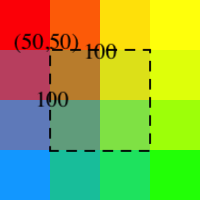
-crop (切り取りサイズ)+(切り取り場所の左上)のように使います。
(width)x(height)+(x)+(y)
% identify -format "%wx%h" 4x4.png
200x200
% convert 4x4.png -crop 100x100+50+50  out.png
| 4x4.png | -crop 100x100+50+50 | out.png |
|---|---|---|
 |
 |
 |
-gravity
どの角から crop するかは -gravity 指定を使います。
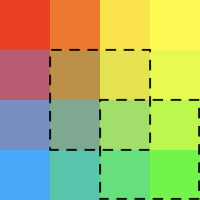
真ん中(center)と、右下(southeast) を抜き出す例です。
% convert 4x4.png -gravity center -crop 100x100+0+0  center.png
% convert 4x4.png -gravity southeast -crop 100x100+0+0 southeast.png
| 4x4.png | 4x4crop.png | center.png | southeast.png |
|---|---|---|---|
|
 |
 |
 |
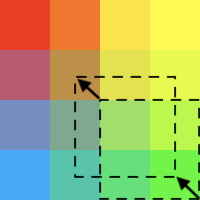
gravity と +x+y を併せると、gravity の場所を基準にして、そこからどれだけズラすかを制御できます。
例えば、右下隅の25x25だけ間をあけて抜き出すのはこれです。 -25 でなく +25 である事に注意です。
% convert 4x4.png -gravity southeast -crop 100x100+25+25 southeast.png
| 4x4.png | -gravity southeast -crop 100x100+25+25 | out.png |
|---|---|---|
|
 |
 |
少し厄介ですが、gravity で east や south に寄せた場合は。ずらすx,y方向に対して +- が逆になります。
端っこをどの位空けるかの指示だと思うと合理的です。
Gravityの詳細はこちらをご参照ください。
- ImageMagick Gravity 指定
+0+0 なし
開始位置無しでサイズだけ指定すると、タイル上に分解されます。
% convert 4x4.png -crop 50%x50% out.png
| -crop 50%x50% | out-0.png | out-1.png | - out-2.png | out-3.png |
|---|---|---|---|---|
 |
 |
 |
 |
 |
out-%d.gif を指定すれば、out-0.gif, out-1.gif, out-2.gif, out-3.gif が生成されます。
実はこのままだと少しまずい問題が残っています。
crop 使用上の注意
例えば、タイル状に分解されたPNGファイルを元に GIF アニメーションを作るとおそらく意図した結果にならないでしょう。
% convert -delay 100 out-[0123].png out.gif
| out.gif |
|---|
 |
先ほど生成した PNG ファイルの中身を identify で確認してみましょう。
% identify out-[0123].png
out-0.png PNG 100x100 200x200+0+0 8-bit sRGB 5c 354B 0.000u 0:00.000
out-1.png PNG 100x100 200x200+100+0 8-bit sRGB 5c 354B 0.000u 0:00.000
out-2.png PNG 100x100 200x200+0+100 8-bit sRGB 5c 354B 0.000u 0:00.000
out-3.png PNG 100x100 200x200+100+100 8-bit sRGB 5c 354B 0.000u 0:00.000
PNG や GIF は画像のサイズと別に、キャンバス(もしくはスクリーン)と呼ばれる表示領域としてのサイズ情報を持ちます。
上記 identify の例だと 200x200 のスクリーンの +{x:0or100}+{y:0or100} に 100x100 画像が配置される事を示します。
| out-0.png | out-1.png | out-2.png | out-3.png |
|---|---|---|---|
 |
 |
 |
 |
ImageMagick ではレイヤー機能として存在していて、GIF アニメーションのコマを処理する時に便利です。
それ以外だと面倒なだけなので、とりあえずレイヤーを潰すと良いでしょう。
+repage の勧め
既に crop した画像のキャンバスと画像のサイズを一致させるには、+repage を使って下さい。
% mogrify +repage out-[0123].png
% identify out-?.png
out-0.png PNG 100x100 100x100+0+0 8-bit sRGB 5c 326B 0.000u 0:00.000
out-1.png PNG 100x100 100x100+0+0 8-bit sRGB 5c 326B 0.000u 0:00.000
out-2.png PNG 100x100 100x100+0+0 8-bit sRGB 5c 326B 0.000u 0:00.000
out-3.png PNG 100x100 100x100+0+0 8-bit sRGB 5c 326B 0.000u 0:00.000
% convert -delay 100 out-?.png out.gif
こうするとおそらく意図通りの PNG 画像と GIF アニメーションになるはずです。
なお、JPEG のようにキャンバスの概念を持たない画像フォーマットだと、勝手に +repage 相当の処理がなされます。
| out.gif |
|---|
 |
殆どのケースでは、-crop の後はセットで +repage を実行した方が安全です。
公式にもこう書かれています。
Always use "+repage" after any 'crop' like operation.Unless you actually need to preserve that info.
(訳) "crop" などの操作の後には、常に "+repage" を使用してください。実際にその情報を保存する必要がある場合を除きます。
+0+0!
実は +repage を使わない方法もありまして。+0+0! のように ! を後ろにつけると、-crop では +repage 相当の動作をします。
% convert 4x4.png -gravity center -crop 100x100+0+0  center.png
% identify center.png
center.png PNG 100x100 200x200+50+50 8-bit sRGB 5c 354B 0.000u 0:00.000
% convert 4x4.png -gravity center -crop 100x100+0+0!  center.png
% identify center.png
center.png PNG 100x100 100x100+0+0 8-bit sRGB 5c 326B 0.000u 0:00.000
ただし、例えば、-resize の ! はアスペクト比固定をやめる目印で全然違う意味で、この手の多義的な指定記号を使うのはあまりお勧めできません。文字数の節約を迫られた場合とかにどうぞ。
-flatten
あと、キャンバス内の位置も大事で残して表示に反映させたい。という場合は -flatten が使えます。
% convert 4x4.png -gravity center -crop 100x100+0+0  center.png
% convert center.png -background transparent -flatten center2.png
% convert center.png -background blue -flatten center3.png
| center.png | center2.png | center3.png |
|---|---|---|
|
 |
 |
-extent
名前から画像を広げる印象の強いオプションですが、画像を狭める、つまり一部を切り取る事もできます。
こちらは crop 位置の page 情報を維持せず、0,0 原点にフィットします。
% magick 4x4.png -extent 100x100+50+50 extent.png
% identify extent.png
extent.png PNG 100x100 100x100+0+0 8-bit sRGB 5c 362B 0.000u 0:00.000
| extent.png |
|---|
 |
むしろ、crop より使い勝手が楽かもしれません。
-shave
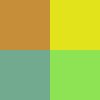
-gravity center 指定の -crop と処理的にほぼ同じで、-shave を使うと周囲から何ピクセル削りたい。という指定ができます。-border や -frame の逆の機能です。
% convert 4x4.png -shave 50x50 out.png
| 4x4.png | out.png |
|---|---|
|
 |
こっちはキャンバスも作り直してくれるので、+repage 無しで大丈夫です。
% identify out.png
out.png PNG 100x100 100x100+0+0 8-bit sRGB 5c 326B 0.000u 0:00.009
-trim
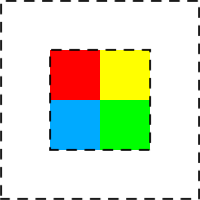
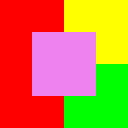
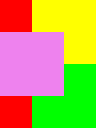
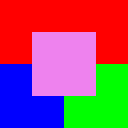
いい感じに抜き出す auto crop operator として -trim があります。
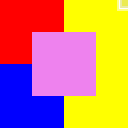
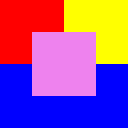
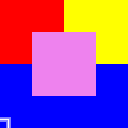
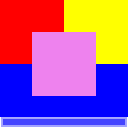
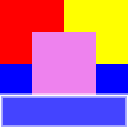
画像の上下左右の4辺から変化のない領域を削ります。文字通りのトリミングです。
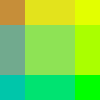
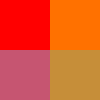
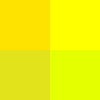
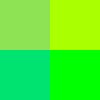
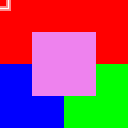
% convert -size 64x64 xc:red \
-size 32x32 xc:violet -gravity center -composite test1.png
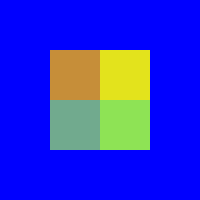
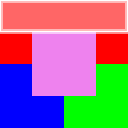
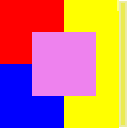
% convert -size 32x64 xc:red xc:yellow +append \
-size 32x32 xc:violet -gravity center -composite test2.png
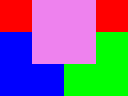
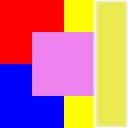
% convert -size 32x32 xc:red xc:yellow +append -size 64x32 xc:blue -append \
-size 32x32 xc:violet -gravity center -composite test3.png
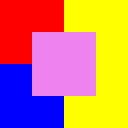
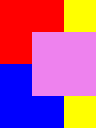
% convert -size 32x32 xc:red xc:yellow +append \
\( xc:blue xc:green1 +append \) -append \
xc:violet -gravity center -composite test4.png
% mogrify -trim test[1234].png
| test1.png | test2.png | test3.png | test4.png | |
|---|---|---|---|---|
| trim前 |  |
 |
 |
 |
| trim後 |  |
 |
 |
 |
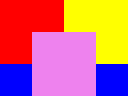
% convert -trim 4x4m.png out.png
| 4x4m.png | out.png |
|---|---|
 |
 |
これも元のキャンバスが残っていて、問題があります。
% identify out.png
out.png PNG 100x100 200x200+50+50 8-bit sRGB 5c 354B 0.000u 0:00.000
| out.png |
|---|
 |
こちらも +repage を使うと混乱しなくて良いかもしれません。
% identify out.png
out.png PNG 100x100 200x200+50+50 8-bit sRGB 5c 354B 0.000u 0:00.000
% mogrify +repage out.png
% identify out.png
out.png PNG 100x100 100x100+0+0 8-bit sRGB 5c 326B 0.000u 0:00.000
このキャンバス上のレイヤー機能は、GIF アニメーションのコマを処理する時に便利ですが、それは別のエントリで解説します。
trim アルゴリズム
いい感じ、だと説明になっていないので、具体的な処理についてです。
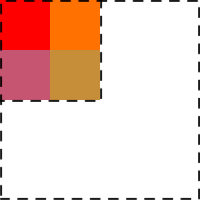
- 一番左上のピクセルの色を基準にして
- 画像の左の列から色が一致したら狭める
- 画像の上の行から色が一致したら狭める
 |
 |
 |
 |
 |
|---|---|---|---|---|
 |
 |
 |
 |
 |
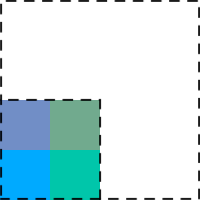
- 一番右上のピクセルを基準にして
- 画像の右の列から色が一致したら狭める
 |
 |
 |
 |
 |
|---|
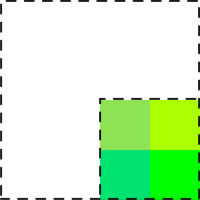
- 一番左下のピクセルを基準にして
- 画像の下の行から色が一致したら狭める
 |
 |
 |
 |
 |
|---|
ImageMagick の実際のコード
-trim は TrimImage 関数が対応します。
どこまでトリミングするかは GetImageBoundingBox 、その情報を元に画像を切り出すのが CropImage です。
-
magick/transform.c: TrimImage
-
トリミングの基準とする色を3隅から取り出す。
SetMagickPixelPacket(image,p,GetCacheViewVirtualIndexQueue(image_view),
    &target[0]);
  GetMagickPixelPacket(image,&target[1]);
  p=GetCacheViewVirtualPixels(image_view,(ssize_t) image->columns-1,0,1,1,
    exception);
  if (p != (const PixelPacket *) NULL)
    SetMagickPixelPacket(image,p,GetCacheViewVirtualIndexQueue(image_view),
      &target[1]);
  GetMagickPixelPacket(image,&target[2]);
  p=GetCacheViewVirtualPixels(image_view,0,(ssize_t) image->rows-1,1,1,
    exception);
  if (p != (const PixelPacket *) NULL)
    SetMagickPixelPacket(image,p,GetCacheViewVirtualIndexQueue(image_view),
      &target[2]);
  status=MagickTrue;
  GetMagickPixelPacket(image,&zero);
- 色が違うところまで境界を狭める。
    pixel=zero;
    for (x=0; x < (ssize_t) image->columns; x++)
    {
      SetMagickPixelPacket(image,p,indexes+x,&pixel);
      if ((x < bounding_box.x) &&
          (IsMagickColorSimilar(&pixel,&target[0]) == MagickFalse))
        bounding_box.x=x;
      if ((x > (ssize_t) bounding_box.width) &&
          (IsMagickColorSimilar(&pixel,&target[1]) == MagickFalse))
        bounding_box.width=(size_t) x;
      if ((y < bounding_box.y) &&
          (IsMagickColorSimilar(&pixel,&target[0]) == MagickFalse))
        bounding_box.y=y;
      if ((y > (ssize_t) bounding_box.height) &&
          (IsMagickColorSimilar(&pixel,&target[2]) == MagickFalse))
        bounding_box.height=(size_t) y;
      p++;
    }
RGB 値が多少ずれても一致とみなせるよう -fuzz 指定したパラメータで Similar 関数で色を比較します。
- magick/color.c IsMagickColorSimilar
  if ((p->matte != MagickFalse) || (q->matte != MagickFalse))
    {
      /*
        Transparencies are involved - set alpha distance.
      */
      pixel=(p->matte != MagickFalse ? GetPixelOpacity(p) : OpaqueOpacity)-
        (q->matte != MagickFalse ? q->opacity : OpaqueOpacity);
      distance=pixel*pixel;
      if (distance > fuzz)
        return(MagickFalse);
      /*
        Generate a alpha scaling factor to generate a 4D cone on colorspace.
        Note that if one color is transparent, distance has no color component
      */
      if (p->matte != MagickFalse)
        scale=(QuantumScale*GetPixelAlpha(p));
      if (q->matte != MagickFalse)
        scale*=(QuantumScale*GetPixelAlpha(q));
      if (scale <= MagickEpsilon)
        return(MagickTrue);
    }