前回はDjangoでロケットを飛ばすところまで見ていきました。
前回記事:【Django】001. (Djangoでの) Webページの基本
今回はDjangoのテンプレート (htmlファイル) について見ていきます。
今回も以下の本を参考にしています。
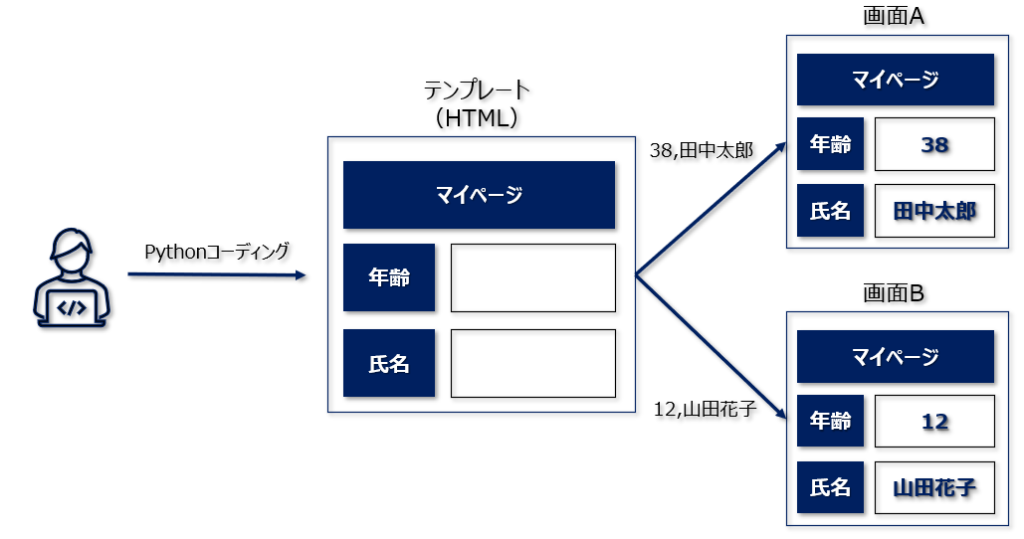
テンプレートとは?
表示する内容を操作できるHTMLファイル (枠 / 素みたいなもの)
ビューからデータを渡してそれを追加で処理して表示すしたりことができる。
【準備】アプリケーションの登録
※以下のコマンドでhelloというアプリケーションを作成したとする。
python manage.py startapp hello
settings.pyのINSTALLED_APPSにhelloを追加する。
INSTALLED_APPS = [
    "django.contrib.admin",
    ...(略)...
    "django.contrib.staticfiles",
    "hello", # 追加
]
INSTALLED_APPSに追加しておくことで、Djangoのテンプレート機能がhelloを検索できるようになるようです。
テンプレートの作成
テンプレートの作成場所
helloアプリケーションのテンプレートは
「django_app(プロジェクト)/hello/templates/hello」
に作成します。
つまり、helloアプリケーションフォルダの中にtemplatesフォルダを作成し、その中にさらにhelloフォルダを作成します。
※helloの中にhelloがある奇妙な構成ですが、これが基本的な構成らしいです。
index.htmlの作成
django_app(プロジェクト)/hello/templates/helloフォルダにindex.htmlというファイルを作成します。
<!DOCTYPE html>
<html lang="ja">
<head>
    <meta charset="UTF-8">
    <title>{{ title }}</title>
</head>
<body>
    <h1>{{ title }}</h1>
    <p>{{ msg }}</p>
</body>
</html>
titleとmsgは枠として生成しておき、後でDjangoから値を渡して表示します。
urlspatternの修正
helloアプリケーションのurls.pyを以下に修正する (ない場合は作成し、プロジェクトのurls.pyからルーティングするようにしておく)
from django.urls import path
from . import views

urlpatterns = [
    path("", views.index, name="index"),
]
index関数の修正
helloアプリケーションのviews.pyを修正する。
from django.shortcuts import render
from django.http import HttpResponse

def index(request):
    params = {
        "title": "Hello/Index",
        "msg": "this is sample page.",
    }
    return render(request, "hello/index.html", params)
先ほど作成したテンプレートに対してrequestとテンプレートで枠と設定しておいた変数の値を渡しています。
ページにアクセスする
python manege.py runserver
でサーバーを起動し、http://127.0.0.1:8000/hello/へアクセスします。
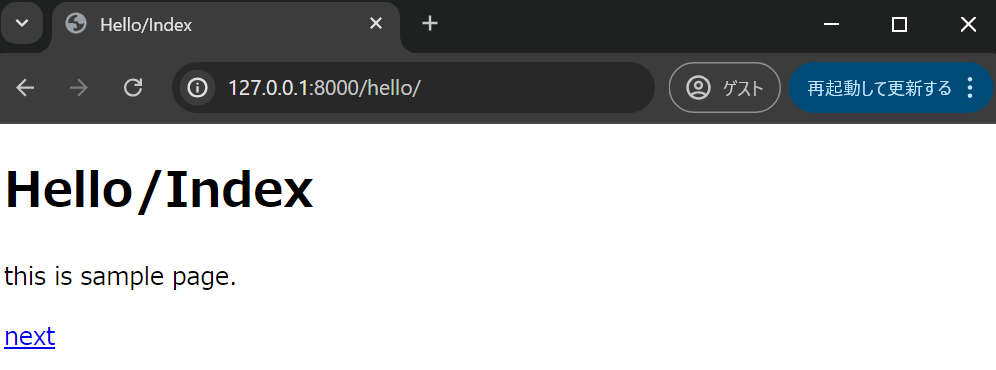
すると以下のようにちゃんと表示されるかと思います。
テンプレートに渡したtitleとmsgも無事に表示されていることがわかります。
複数ページの移動
今回はindex.htmlを使いまわして2つのページを表示させてみます。
index.htmlの変更
django_app(プロジェクト)/hello/templates/helloフォルダのindex.htmlを変更します。
<!DOCTYPE html>
<html lang="ja">
<head>
    <meta charset="UTF-8">
    <title>{{ title }}</title>
</head>
<body>
    <h1>{{ title }}</h1>
    <p>{{ msg }}</p>
    <p><a href="{% url goto %}">{{ goto }}</a></p>
</body>
</html>
ページを移動できるようにリンクを追加しています。
views.pyへの追記
hello/views.pyを以下のように変更する。
from django.shortcuts import render
from django.http import HttpResponse

def index(request):
    params = {
        "title": "Hello/Index",
        "msg": "this is sample page.",
        "goto": "next",
    }
    return render(request, "hello/index.html", params)


def next(request):
    params = {
        "title": "Hello/Next",
        "msg": "This is another page.",
        "goto": "index",
    }
    return render(request, "hello/index.html", params)
goto変数の値でお互いを行き来できるようにしています。
urlspatternを修正する
helloアプリケーションのurls.pyを以下に修正する
from django.urls import path
from . import views

urlpatterns = [
    path("", views.index, name="index"),
    path("next", views.next, name="next"),
]
ページにアクセスする
python manege.py runserver
でサーバーを起動し、http://127.0.0.1:8000/hello/へアクセスします。
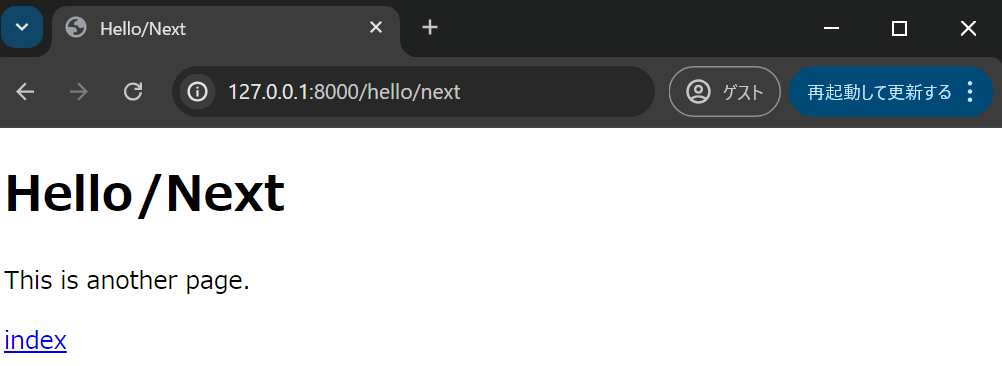
すると以下のようにちゃんと表示されるかと思います。
リンクをクリックするとお互いを行き来できていることがわかります。
{{ }}と{% %}って何?
{{ }}はテンプレート変数
{{ }}は変数を括弧内に入れることで、変数をレンダリングできる。
例:
<h1>Hello {{ firstname }}, how are you?</h1>
変数は先ほど使用した例のようにrender時に渡すことが可能。
また以下のテンプレートタグ内で作成した変数も利用可能。
例:
{% with firstname="Tobias" %}
   <h1>Hello {{ firstname }}, how are you?</h1>
{% endwith %}
{% %}はテンプレートタグ
{% %}はDjangoのテンプレートに用意されている特別な動きをするタグ。
今回の「url」は
{% url 名前%}
の形で記述することで指定した名前のURLが書きだされます。
ここでの名前とはurlspatternで指定したnameのことです。
urlpatterns = [
    path("", views.index, name="index"),
    path("next", views.next, name="next"),
]
他にも
{% if ... %}
{% else %}
{% endif %}
{% for ... in ... %}
{% endfor %}
等、様々なものが用意されています。
静的ファイルの利用
HTMLからロードするスタイルシートファイル、JavaScriptファイル、イメージファイル等をあらかじめ準備するのはどこに配置すればよいか?という話です。
静的ファイルは各アプリケーションの「static」フォルダ (なければ作成) に配置します。
style.cssというスタイルシートファイルを作成する場合は、
「django_app(プロジェクト)/hello/static/hello/css」
に作成します。
※これも冗長な構成な気もしますが、このような構成が一般的?なようです。
style.cssを記述する
では実際にstyle.cssを記述します。
body {
    color: gray;
    font-size: 16pt;
}

h1 {
    color: blue;
    opacity: 0.2;
    font-size: 36pt;
    margin-top: -20px;
    margin-bottom: 0px;
    text-align: right;
}

p {
    margin: 10px;
}

a {
    color: blue;
    text-decoration: none;
}
index.htmlを修正する
index.htmlから先ほど作成したstyle.cssを読み込むようにします。
{% load static %}
<!DOCTYPE html>
<html lang="ja">
<head>
    <meta charset="UTF-8">
    <title>{{ title }}</title>
    <link rel="stylesheet" type="text/css" href="{% static 'hello/css/style.css' %}">
</head>
<body>
    <h1>{{ title }}</h1>
    <p>{{ msg }}</p>
    <p><a href="{% url goto %}">{{ goto }}</a></p>
</body>
</html>
以下で性的ファイルを利用できる準備をし、
{% load static %}
以下のように記述します。
href="{% static 'hello/css/style.css' %}"
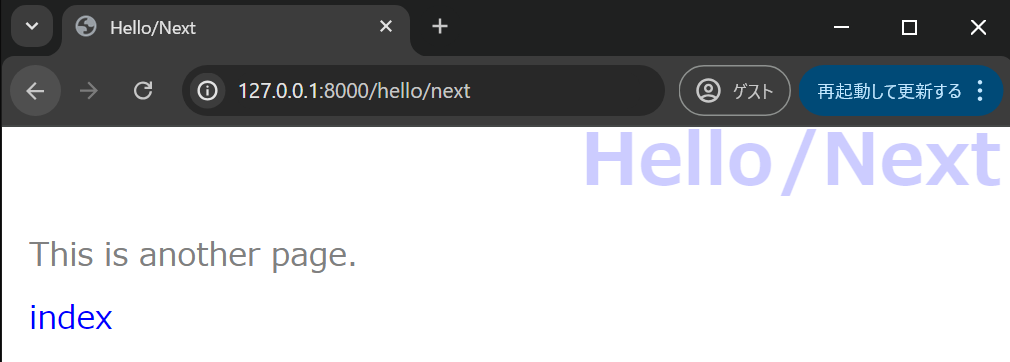
ページにアクセスすると以下のようにcssが反映されていることがわかります。
Bootstrapの使用
Bootstrapというスタイルシートフレームワークを使用すると (デザイン初心者でも) 簡単にそれなりにいい感じのページを作成できます。(私はそれでもまだまだです…泣)
index.htmlの修正
hello/index.htmlを以下に修正する。
{% load static %}
<!DOCTYPE html>
<html lang="ja">
<head>
    <meta charset="UTF-8">
    <title>{{ title }}</title>
    <link href="https://cdn.jsdelivr.net/npm/bootstrap@5.3.0/dist/css/bootstrap.min.css" rel="stylesheet" integrity="sha384-9ndCyUaIbzAi2FUVXJi0CjmCapSmO7SnpJef0486qhLnuZ2cdeRhO02iuK6FUUVM" crossorigin="anonymous">

</head>
<body class="container">
    <h1 class="display-4 text-primary mb-4">{{ title }}</h1>
    <p class="h5">{{ msg }}</p>
    <p class="h6"><a href="{% url goto %}">{{ goto }}</a></p>
</body>
</html>
ページにアクセスすると以下のようになっています。
cdn.jsdelivr.netはCDN (Content Deliber Network) と呼ばれるサービスを提供するサイトです。
CDNを使用することでローカルに準備しなくてもネット経由でサービスを使えるということです。
リンクが長いですが、以下のサイトの「CDN経由でインクルードする」からコピーでOKです。
Bootstrapのクラス
先ほどの使用例からBootstrapのクラスが使用されている箇所を抽出すると以下になります。
<body class="container">
    <h1 class="display-4 text-primary mb-4">
    <p class="h5">
    <p class="h6">
様々なクラスが準備されていますが例としては以下の表のような感じです。
| クラス | 概要 |
|---|---|
| h数字 | テキストの大きさと太さの設定 h1~h6までで<h1>~<h6>タグに相当 |
| display-数字 | タイトル等のフォントとサイズの設定 display1~display-6まであり、数字が大きくなると文字が小さくなる。 |
| text-数字 | text-primaryなどで、テキストカラーの設定 |
| m場所-数字 | マージンの設定。 場所はt, b, l, r, x, yで上下左右と水平垂直方向を表す。 数字は1~5とautoがあり、数字が大きいほどスペースが広くなる。 |
| p場所-数字 | パディングを設定するもの。 マージンと同様に使用可能。 |
大きさや場所を持つパターンは「クラス名 + 場所 + 数字」が基本で、色は追加で指定のように複数のクラスも組み合わせて使えそうです。多分便利!
クラス数多すぎる問題なので、欲しい機能が出てきたときに適宜探していきたいと思います。


