はじめに
公式ドキュメントの、以下のページでベータ版機能として掲載されている「LM Studio REST API」の話です。
●LM Studio REST API (beta) | LM Studio Docs
https://lmstudio.ai/docs/app/api/endpoints/rest
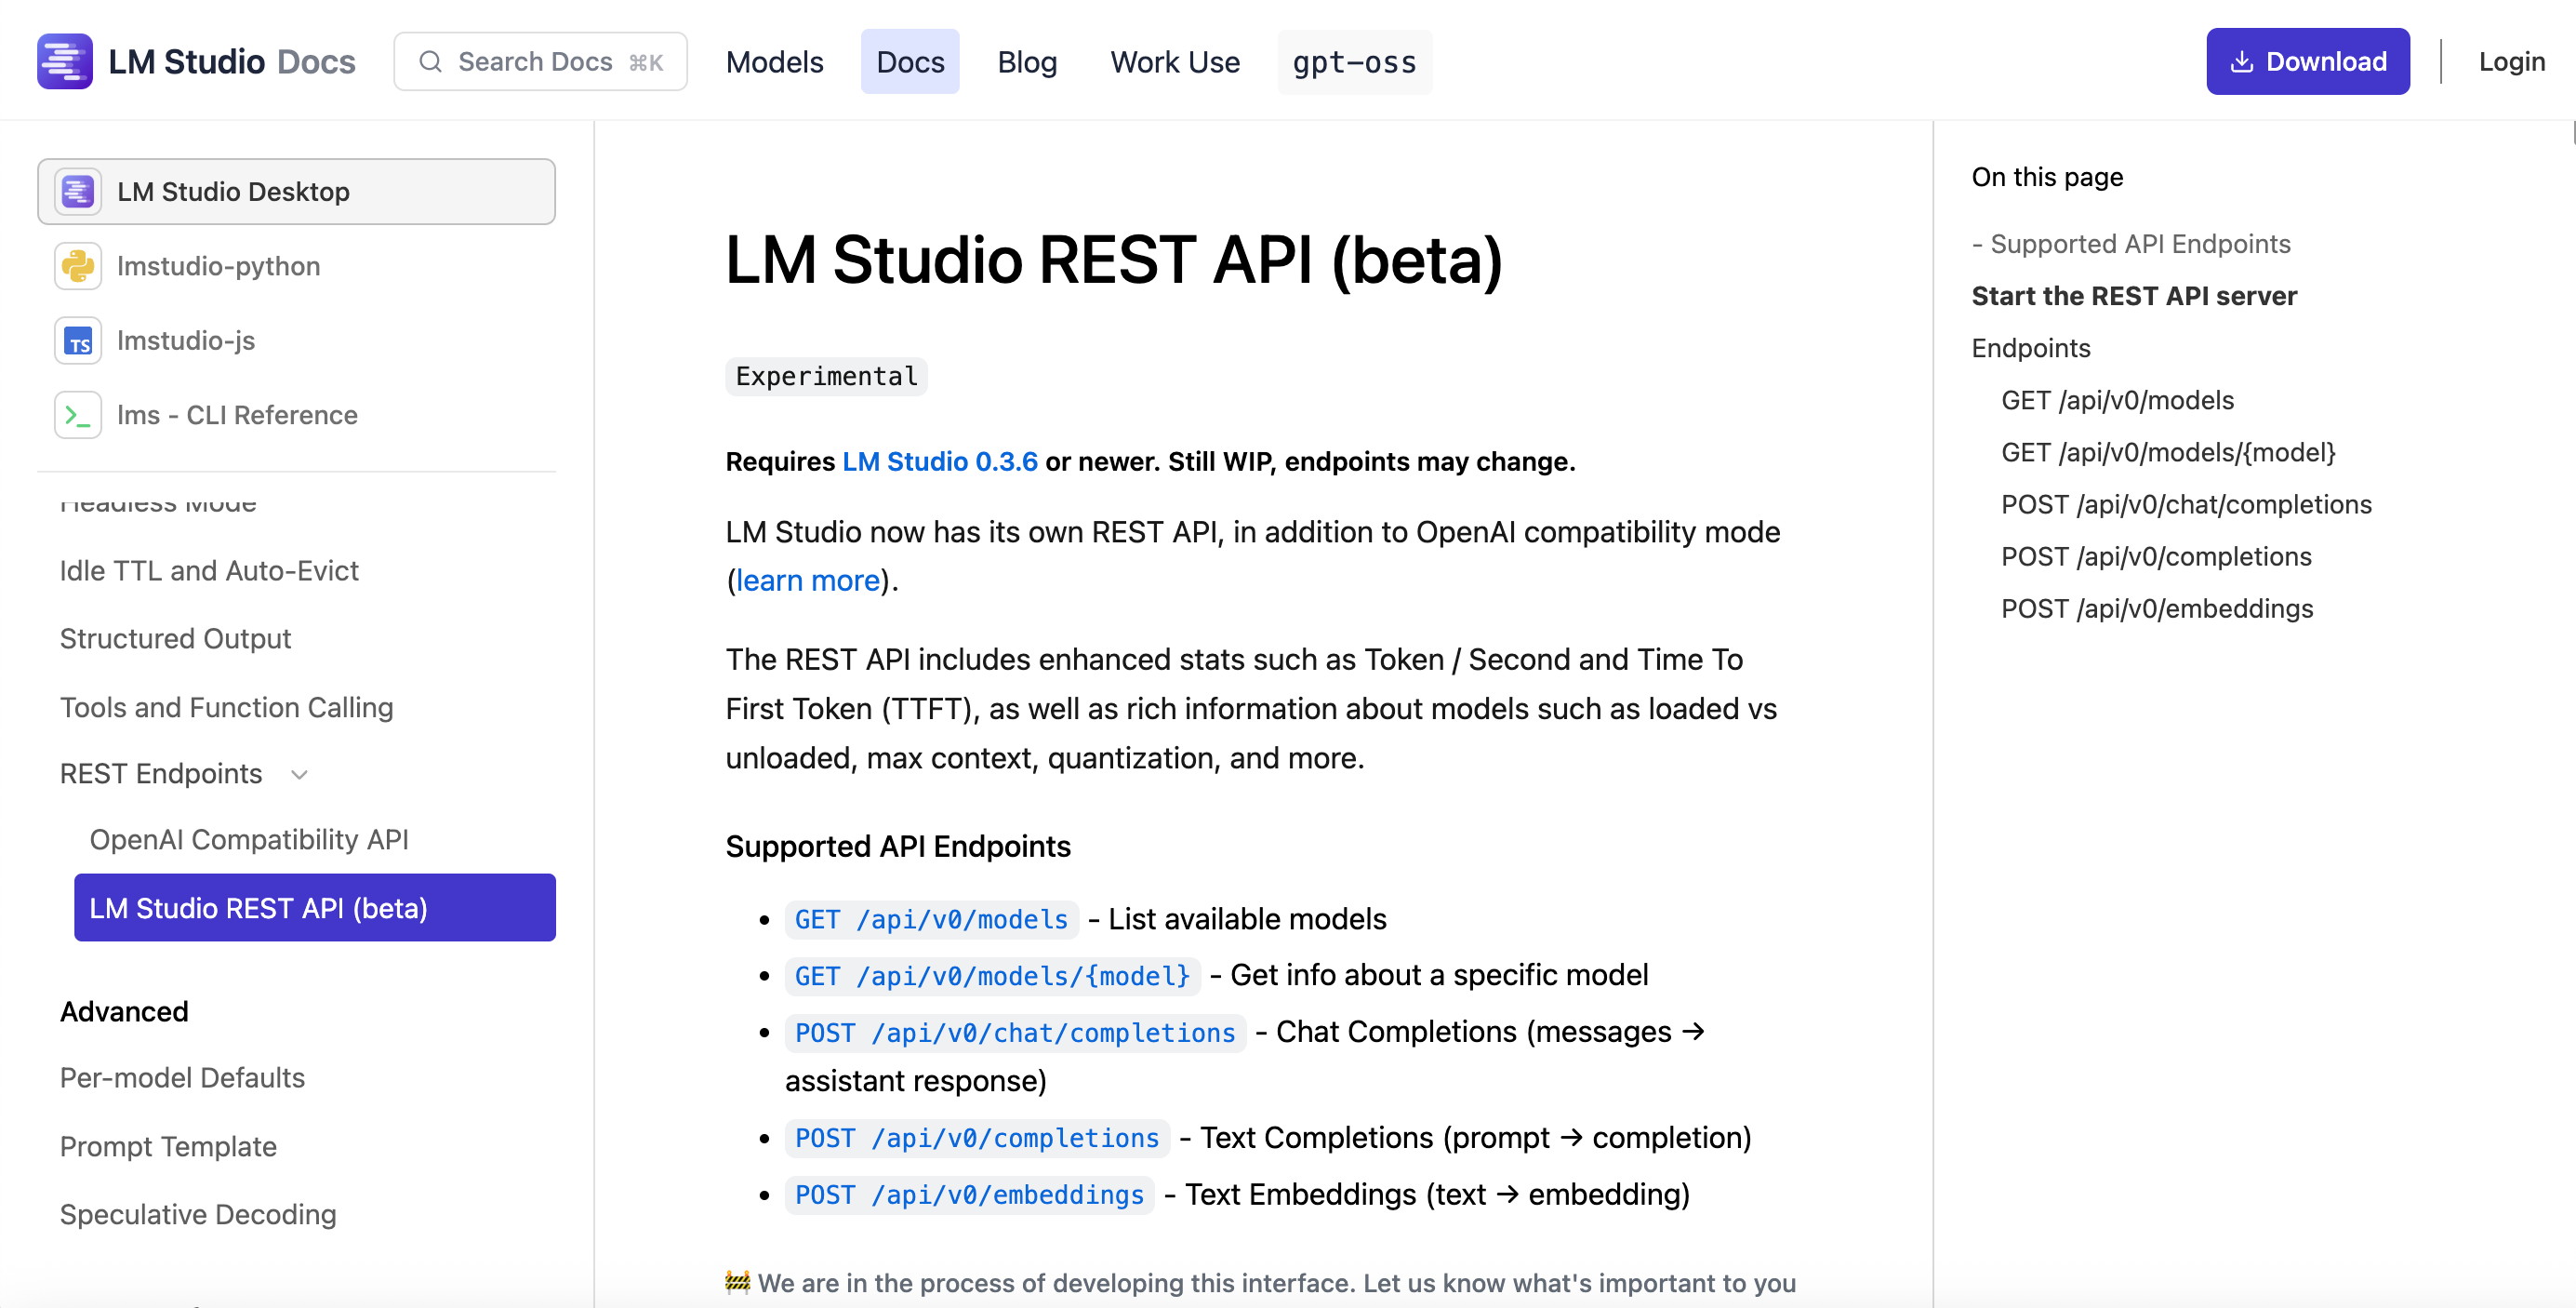
記事執筆時点でも、公式ドキュメントで以下の記載があるので要注意です。
Requires LM Studio 0.3.6 or newer. Still WIP, endpoints may change.
OpenAI互換の API
上記の公式ドキュメントには、以下の記載やページもあります。
LM Studio now has its own REST API, in addition to OpenAI compatibility mode.
ベータ版の「LM Studio REST API」とは別に OpenAI互換の API がある、という話です。
●OpenAI Compatibility API | LM Studio Docs
https://lmstudio.ai/docs/app/api/endpoints/openai
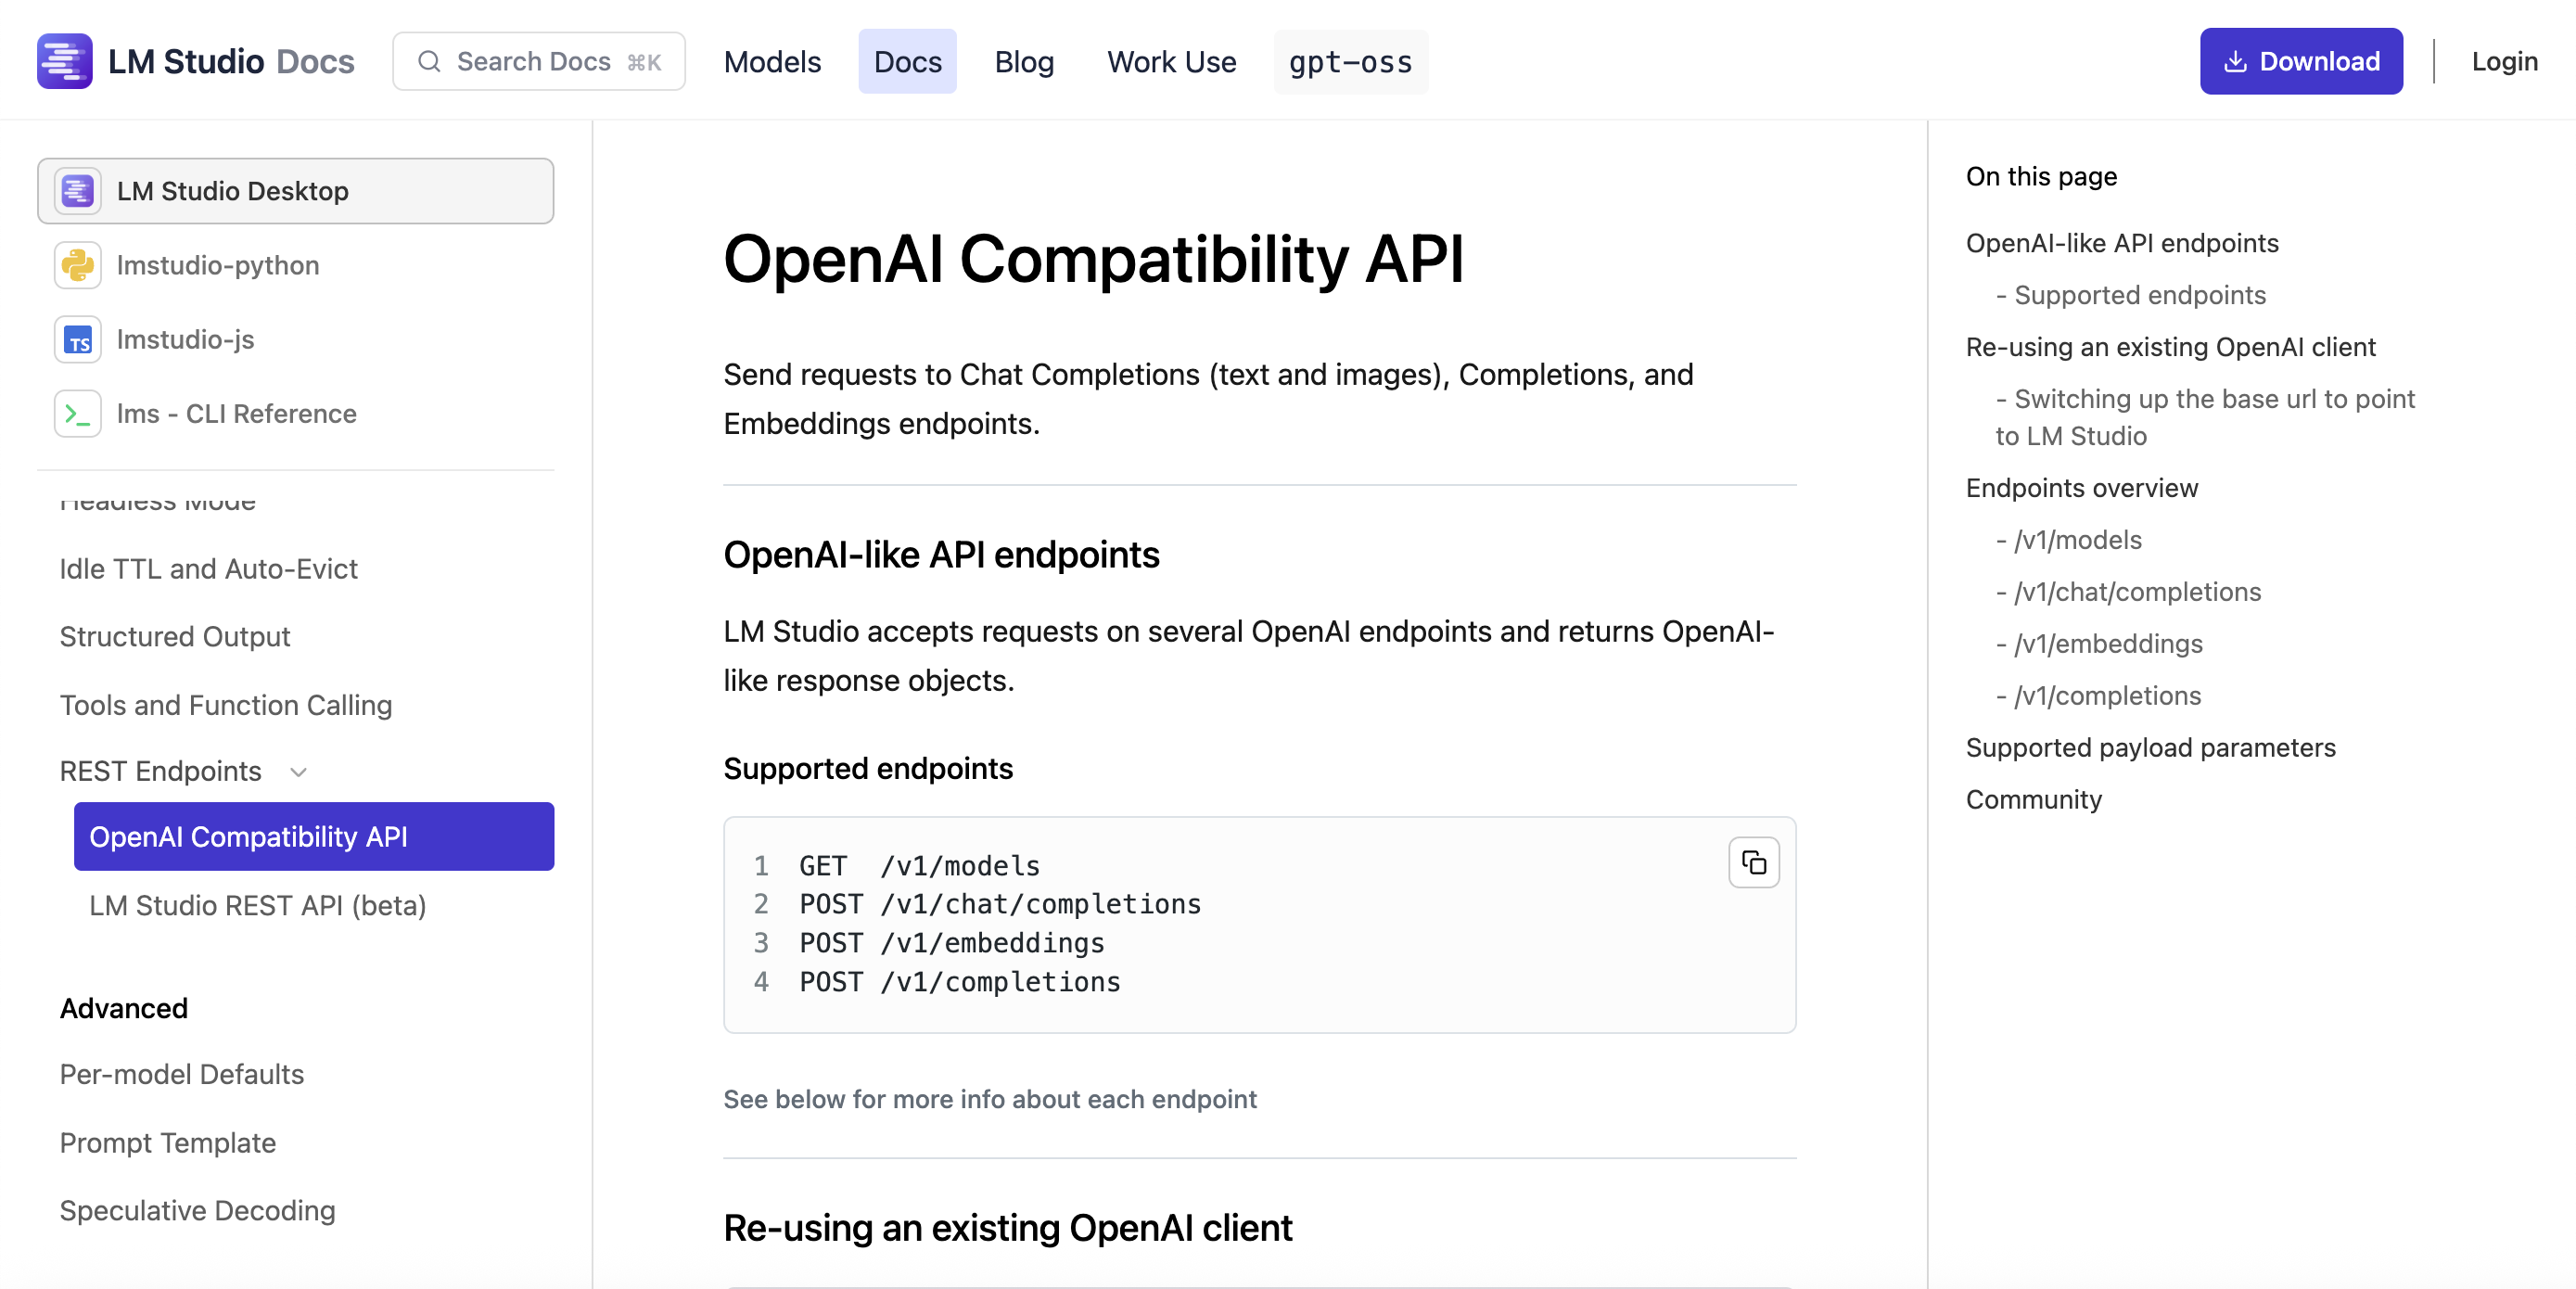
Ollama にもあるような(※ 以下)、OpenAI互換のモードの API です。。
●OpenAI compatibility · Ollama Blog
https://ollama.com/blog/openai-compatibility
LM Studio を使ったローカルサーバーについて
LM Studio を使ったローカルサーバーの説明は、公式ドキュメント内に別のページにも書いてあるようです。
●LM Studio as a Local LLM API Server | LM Studio Docs
https://lmstudio.ai/docs/app/api

そこには、ベータ版の LM Studio REST API 以外に、以下のオプションも書かれていました。
- API options
- TypeScript SDK - lmstudio-js
- Python SDK - lmstudio-python
- OpenAI Compatibility endpoints
2種類の SDK
個人的には、3つあるうちの以下の SDK も気になるところです。
●lmstudio-js (TypeScript SDK) | LM Studio Docs
https://lmstudio.ai/docs/typescript

●lmstudio-python (Python SDK) | LM Studio Docs
https://lmstudio.ai/docs/python

さっそく試してみる
それでは試していきます。PC は「M4 の MacBook Air」を使います。
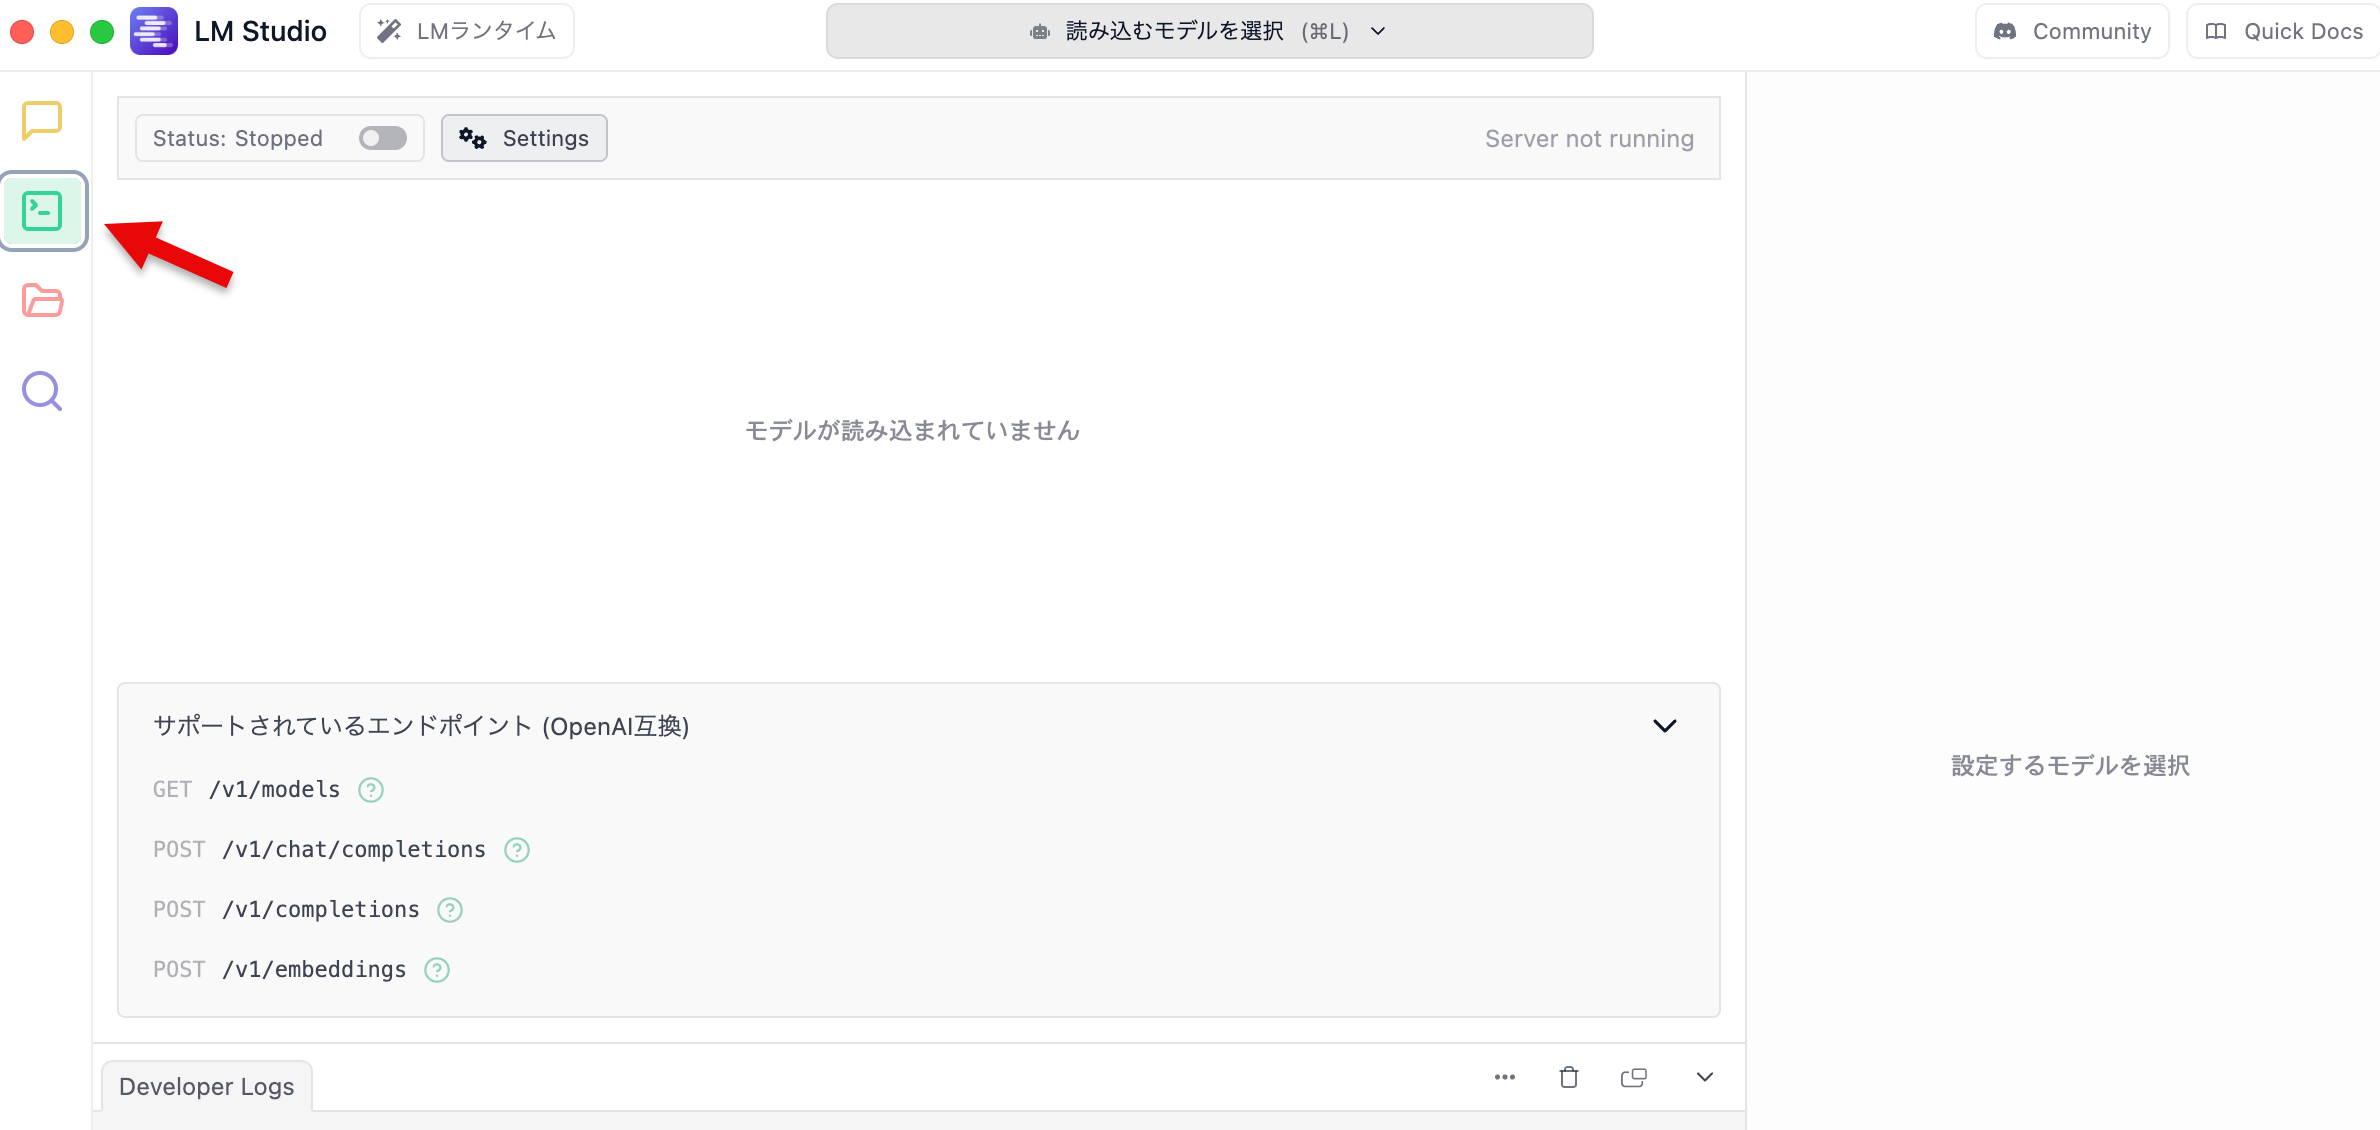
ローカルサーバーを準備する
ローカルサーバーをたてる部分は、以下のやり方で進めます。
●Run LM Studio as a service (headless) | LM Studio Docs
https://lmstudio.ai/docs/app/api/headless
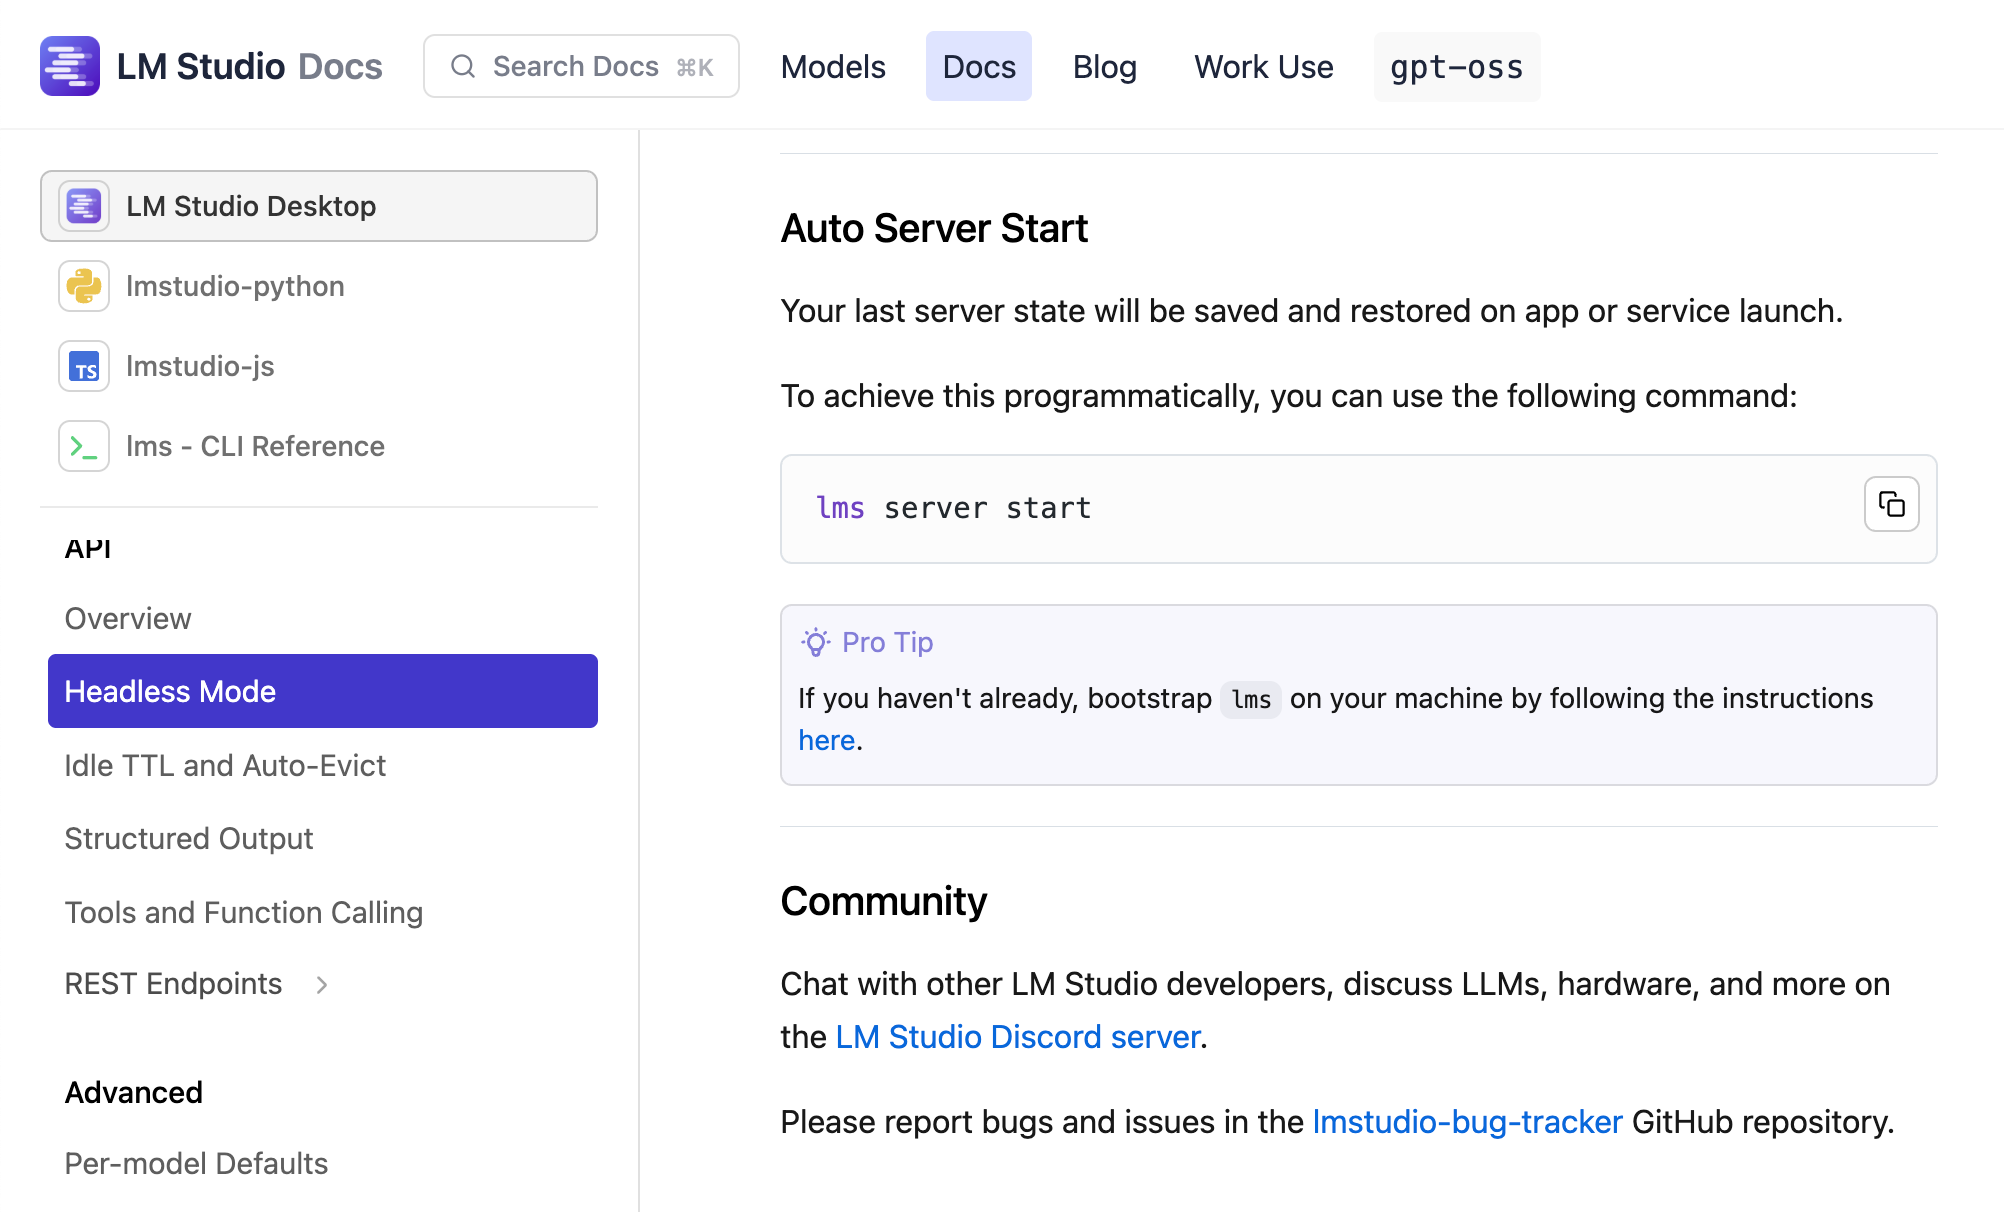
以下のコマンドを使うことになるようです。
lms server start
lmsコマンドとヘルプ
ちなみに、lmsコマンドは LM Studio をインストールした環境で、既に使えるようになっているようでした(LM Studio をインストール後、1度でも LM Studio を実行していれば使えるようになるっぽい?)。
●lms — LM Studio's CLI | LM Studio Docs
https://lmstudio.ai/docs/cli

以下は、lmsコマンドを使ってヘルプを表示させてみた時の様子です。
lms --help

上記の出力をテキストにしたものを、以下に掲載します。
% lms --help
lms < subcommand >where < subcommand > can be one of:
- chat - Open an interactive chat with the currently loaded model.
- status - Prints the status of LM Studio
- server - Commands for managing the local server
- ls - List all downloaded models
- ps - List all loaded models
- get - Searching and downloading a model from online.
- load - Load a model
- unload - Unload a model
- create - Create a new project with scaffolding
- log - Log operations. Currently only supports streaming logs from LM Studio via
lms log stream- dev - Starts the development server for the plugin in the current folder.
- push - Uploads the plugin in the current folder to LM Studio Hub.
- clone - Clone an artifact from LM Studio Hub to a local folder.
- login - Authenticate with LM Studio
- import - Import a model file into LM Studio
- flags - Set or get experiment flags
- bootstrap - Bootstrap the CLI
- version - Prints the version of the CLI
For more help, try running
lms <subcommand> --help
見てみたついでに「ダウンロード済みモデル一覧の表示」を試したので、その一部を以下に掲載してみます。

ローカルサーバーの起動(設定ファイルの作成)
lms server start というコマンドを実行してみました。
そうすると、最初は以下のエラーが出ました。
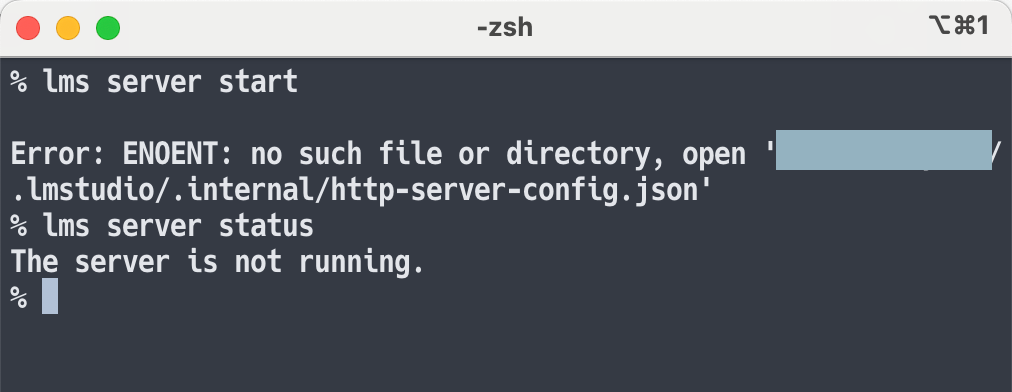
「アプリで自動で作られないのかな?」と思って、試しに一度、アプリのほうで見かけていた、以下の GUIベースのサーバー起動を試してみました。

そうすると、先ほどは作成などされていなかった ~/.lmstudio/.internal/http-server-config.json というパスのファイルが、以下の中身で作られたようでした。
{
  "autoStartOnLaunch": true,
  "port": 1234,
  "cors": false,
  "logSensitiveData": true,
  "logIncomingTokens": false,
  "verbose": false,
  "logLinesLimit": 500,
  "networkInterface": "127.0.0.1",
  "justInTimeModelLoading": true,
  "fileLoggingMode": "succinct"
}
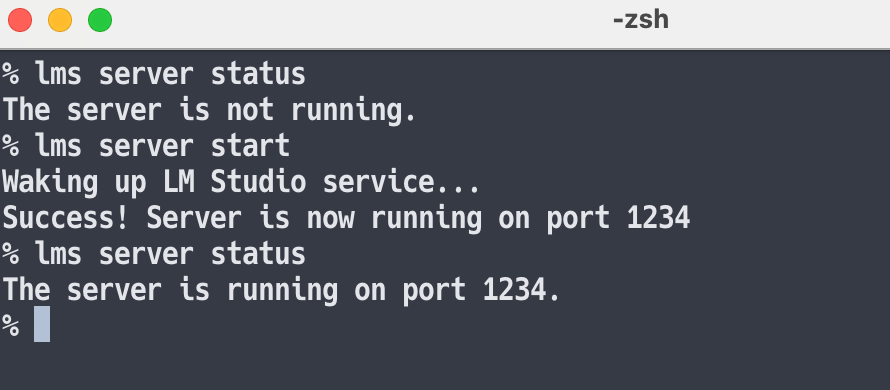
これで lms server start のコマンドを使って、サーバーを起動できるようになりました。
ローカルサーバーの起動
再度、lmsコマンドでの操作を試してみたところ、無事にコマンドを使ったサーバーの起動ができるのを確認できました。
以下は、 lms server status を実行してサーバーの起動状態を確認しつつ、 lms server start でサーバーを起動した流れです。
あとサーバーで使うモデルのロードについて、アプリから行うだけでなく、以下のような lmsコマンドでも行えるようです。
lms load gemma-3-270m-it --context-length 2048
API を試す
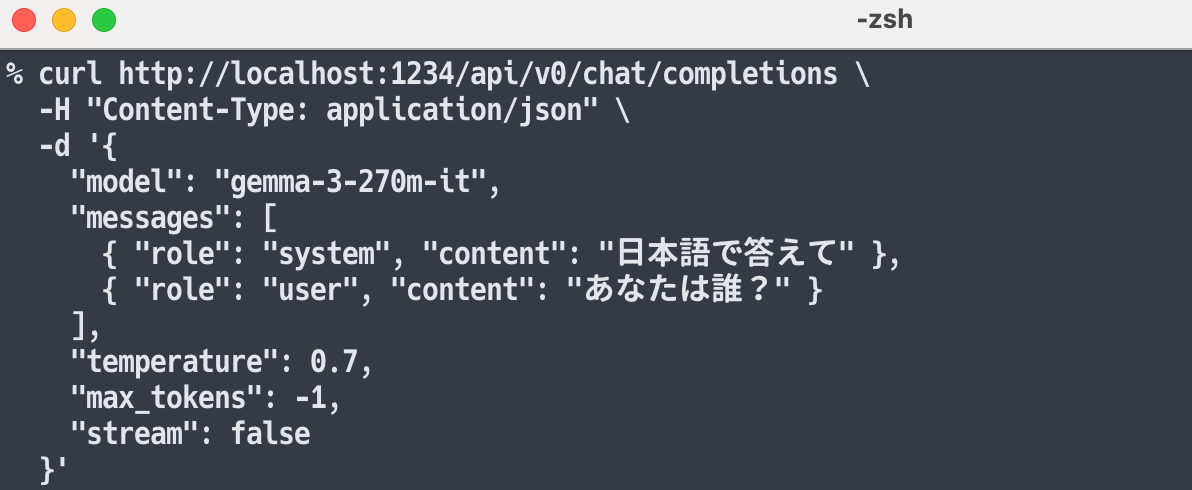
ローカルサーバーを立ち上げた状態で、curlコマンドを使って API でのやりとりを試してみます。
具体的には、以下の /api/v0/chat/completions を使ったものです。

上記サンプルの内容の、モデル・メッセージの部分だけ変更してお試しに使いました。具体的には以下の内容です。
curl http://localhost:1234/api/v0/chat/completions \
  -H "Content-Type: application/json" \
  -d '{
    "model": "gemma-3-270m-it",
    "messages": [
      { "role": "system", "content": "日本語で答えて" },
      { "role": "user", "content": "あなたは誰?" }
    ],
    "temperature": 0.7,
    "max_tokens": -1,
    "stream": false
  }'
上記の実行結果を以下に示します。

上記のように、モデルからのレスポンスや応答速度・生成速度などの情報が得られるのを確認できました。