はじめに
この記事は、ずいぶん前に以下の記事で見かけていた PptxGenJS に関する話を書いています。
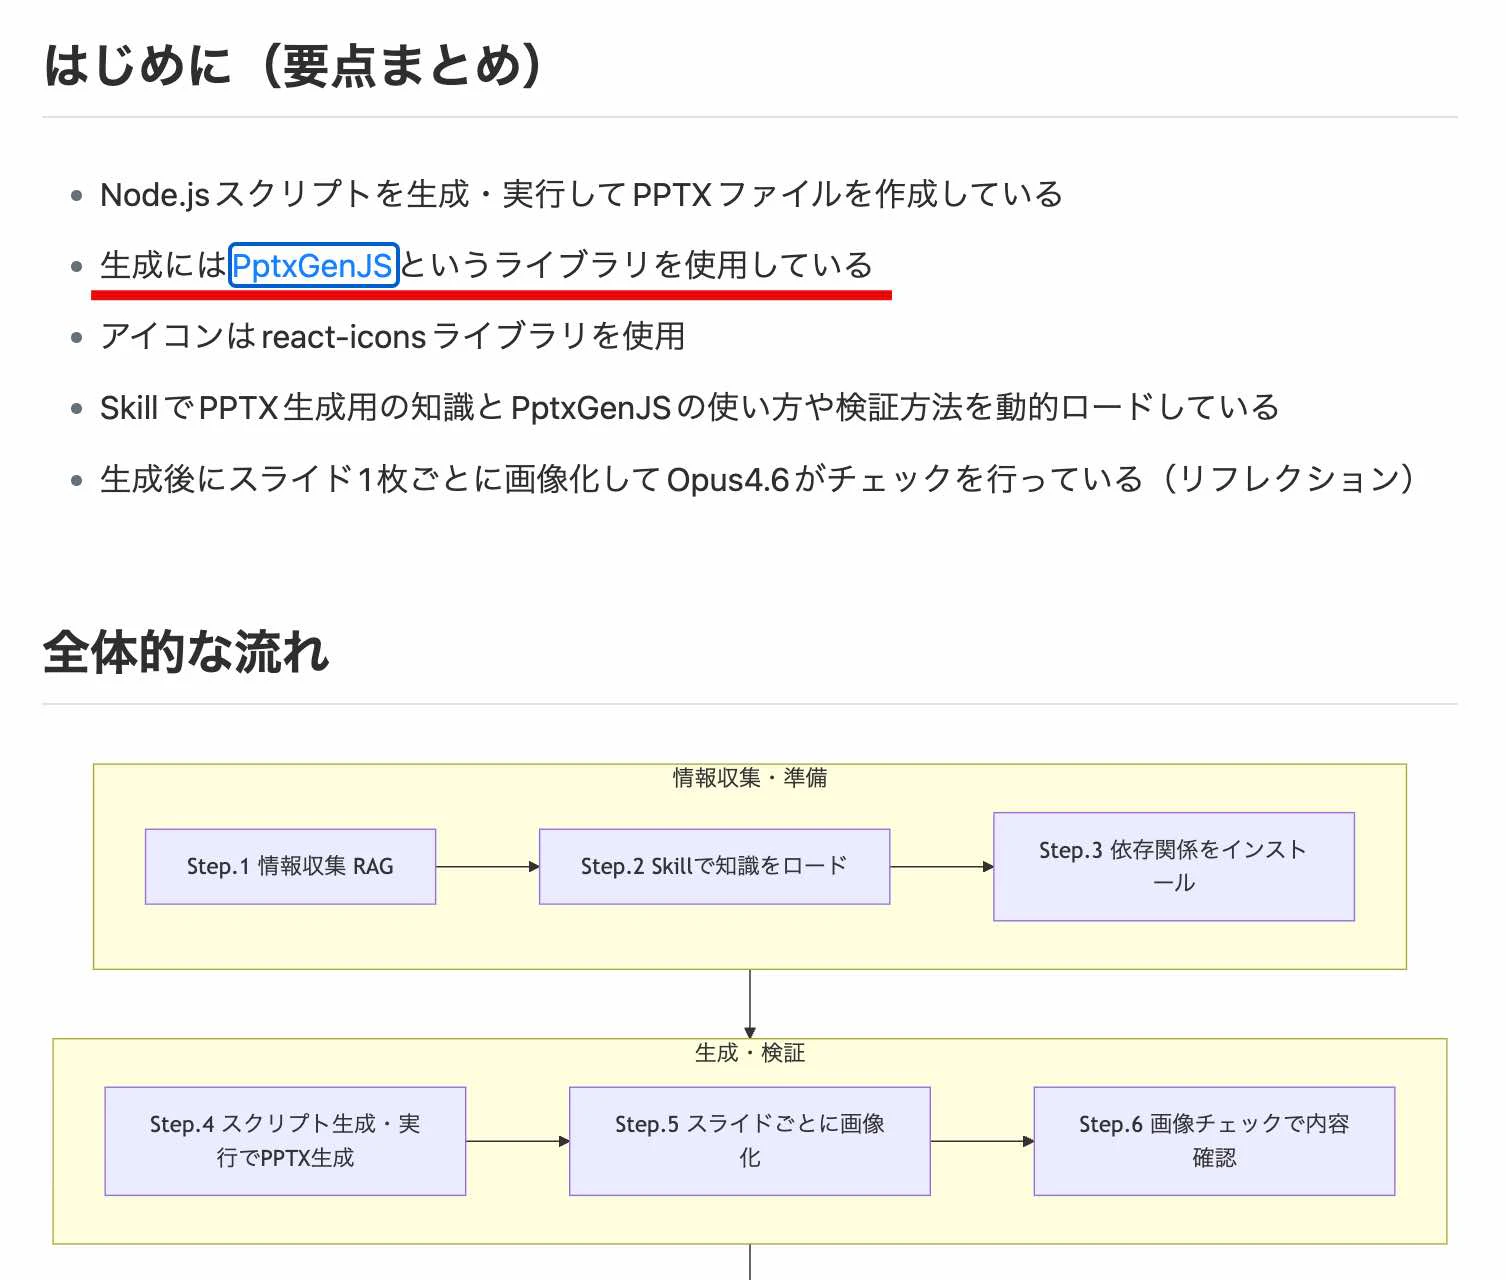
●Claude Opus4.6はどのようにPPTXを生成しているか
https://zenn.dev/microsoft/articles/how-the-claude-opus46-generate-pptx
以下が、公式ページや GitHubリポジトリなどです。
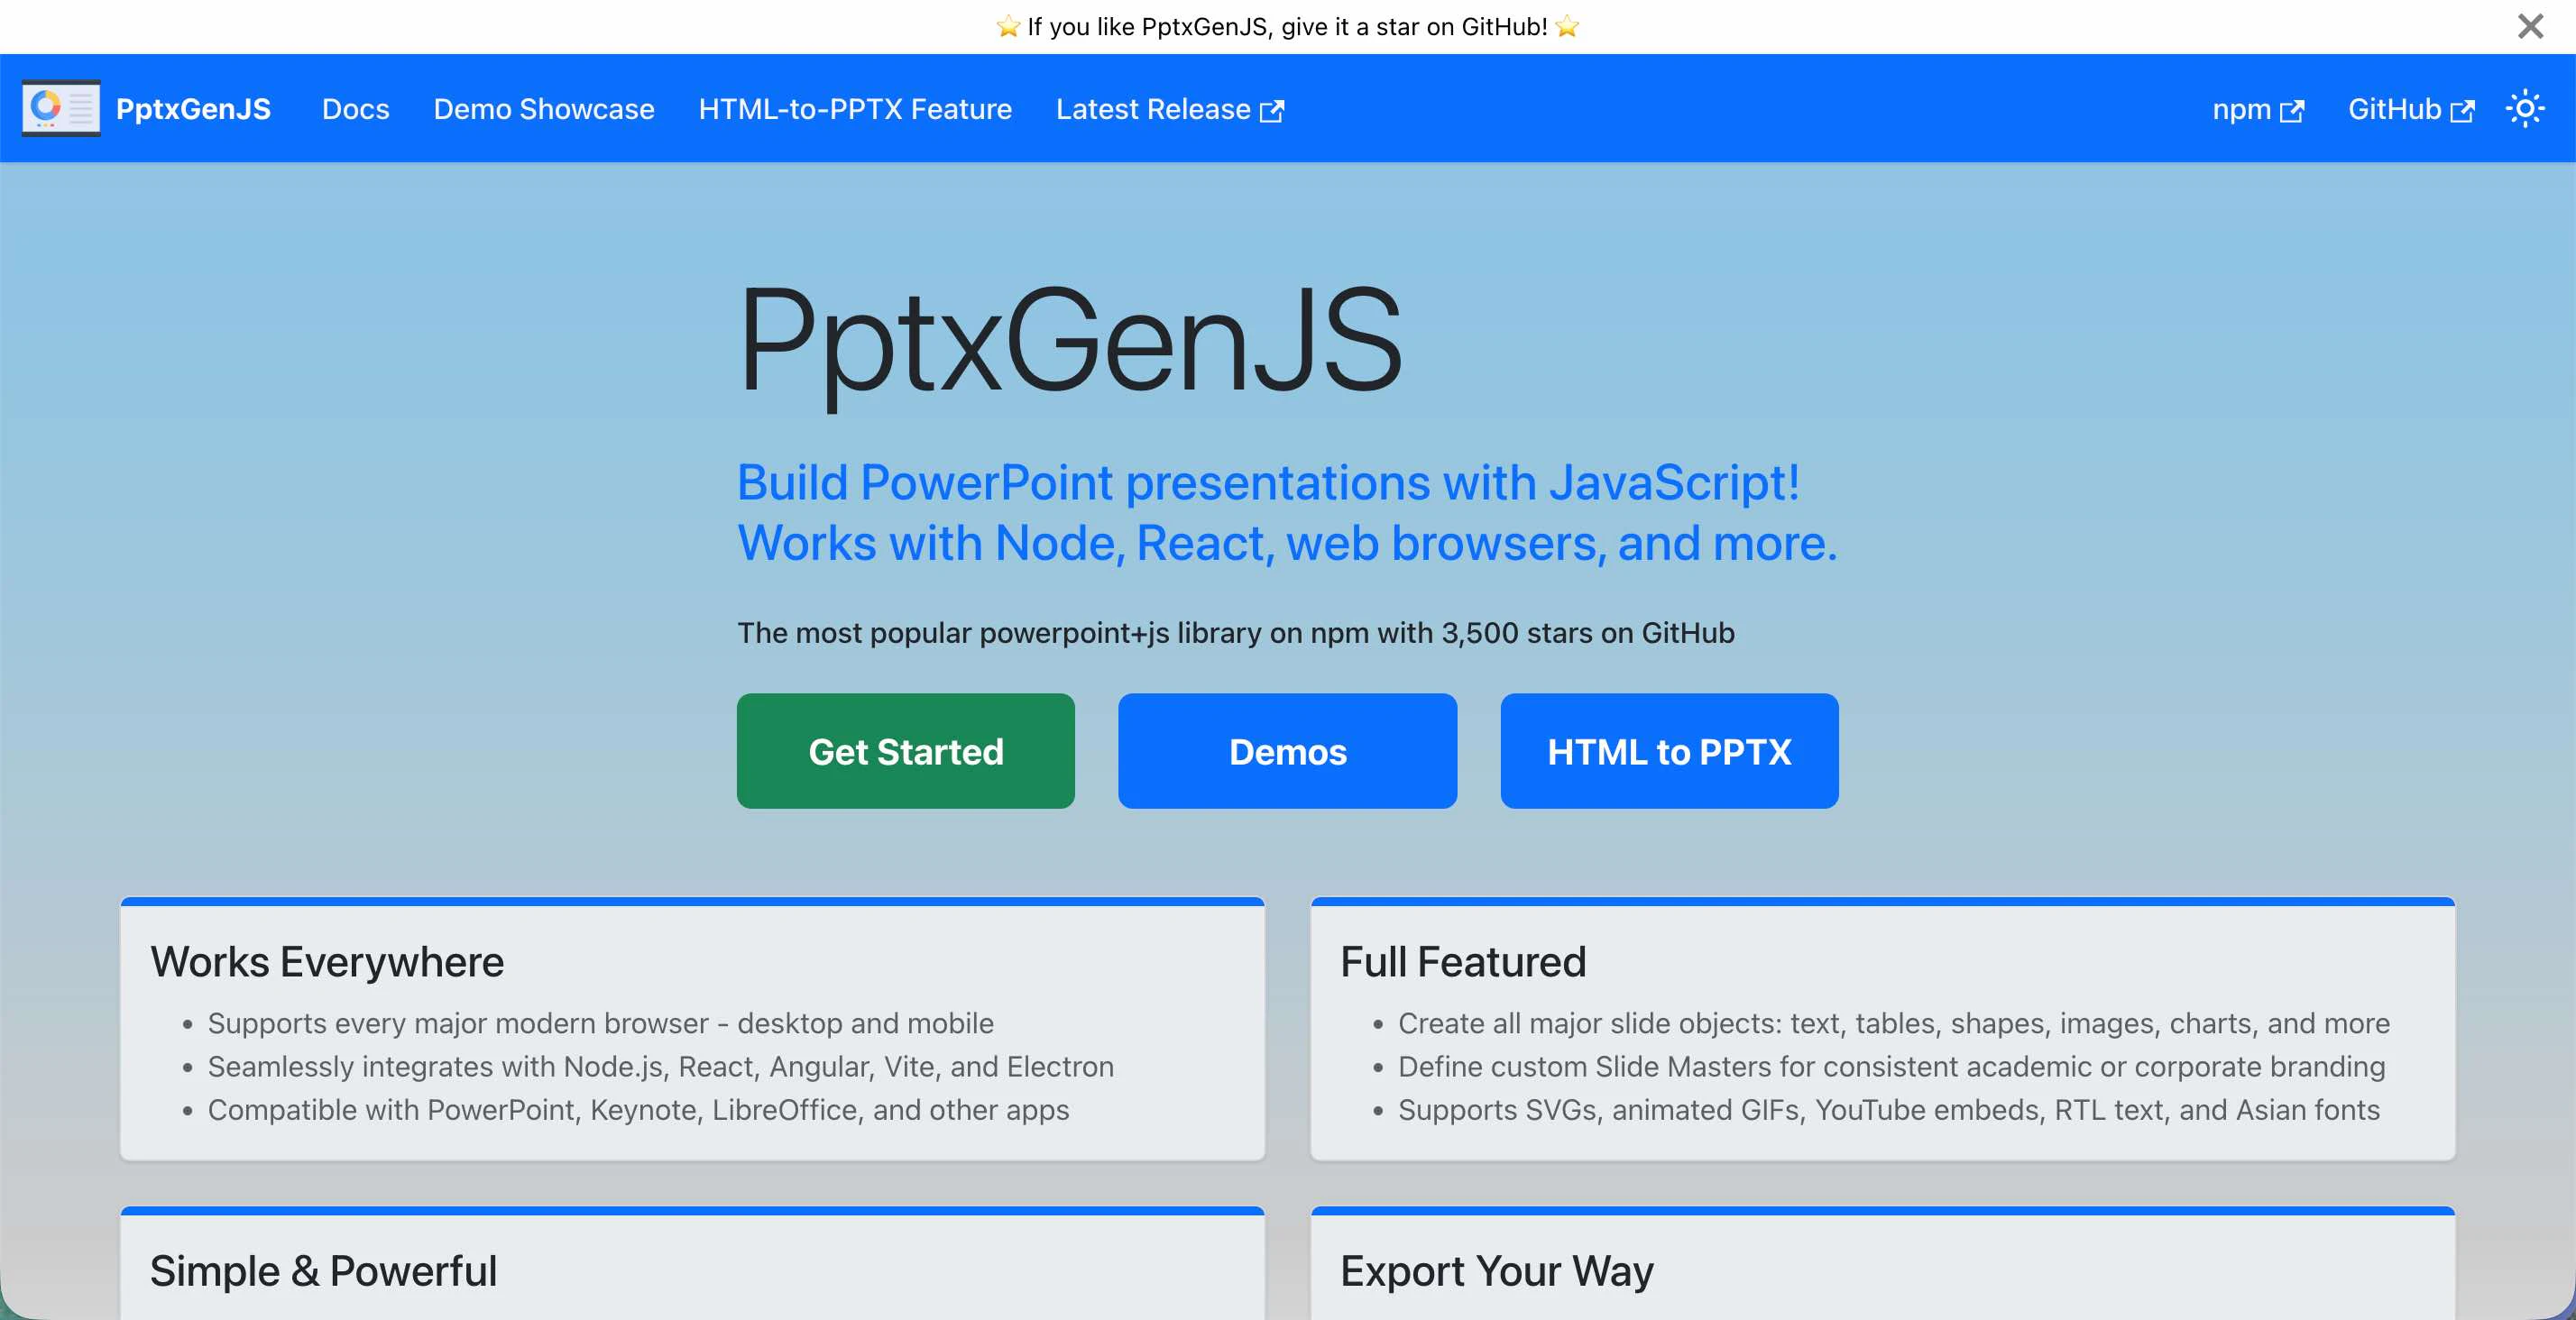
●Home | PptxGenJS
https://gitbrent.github.io/PptxGenJS/
●gitbrent/PptxGenJS: Build PowerPoint presentations with JavaScript. Works with Node, React, web browsers, and more.
https://github.com/gitbrent/PptxGenJS/
●pptxgenjs - npm
https://www.npmjs.com/package/pptxgenjs
PptxGenJS はブラウザでも動作させることができ、以下にブラウザで動かせる公式のデモもあったりします。
●Demos | PptxGenJS
https://gitbrent.github.io/PptxGenJS/demos/
試した内容
それでは、Node.js を使った PptxGenJS でのパワポファイルの生成を試します。
この後の内容を進めるために、以下のコマンドでパッケージのインストールを行ってください。
npm i pptxgenjs
Claude を使ったコード生成
Claude を使って、PptxGenJS でスライドを作成するコードを生成してみました。
プロンプトは、「PptxGenJS https://gitbrent.github.io/PptxGenJS/ を使った、Claude に関する説明をまとめた、1枚のスライドを生成するコードを作成して」という内容にしました。
生成されたコード
生成されたコードは以下のとおりです。
// Claude 紹介スライド — 1 枚モノを PptxGenJS で生成
// 実行: node claude-overview.js  (事前に npm install pptxgenjs)

const pptxgen = require("pptxgenjs");

const pres = new pptxgen();
pres.layout = "LAYOUT_16x9"; // 10" x 5.625"
pres.title  = "Claude とは";
pres.author = "Anthropic";

/* ─── カラーパレット (warm minimal) ───────────────────────── */
const BG       = "F5F1EB"; // 背景: warm cream
const INK      = "1A1A1A"; // 主要テキスト
const MUTED    = "6B6B6B"; // 補助テキスト
const CORAL    = "CC785C"; // Anthropic 系コーラル (アクセント)
const CARD_BG  = "FFFFFF"; // カード背景
const DIVIDER  = "E5DDD0"; // 区切り線

const slide = pres.addSlide();
slide.background = { color: BG };

/* ─── 1. ヘッダー: ブランド表記 ──────────────────────────── */
slide.addText("by ANTHROPIC", {
  x: 7.5, y: 0.35, w: 2.0, h: 0.3,
  fontSize: 9, fontFace: "Calibri", color: MUTED,
  charSpacing: 4, align: "right", margin: 0,
});

/* 左肩のコーラル印 (ビジュアルモチーフ) */
slide.addShape(pres.shapes.RECTANGLE, {
  x: 0.5, y: 0.62, w: 0.18, h: 0.18,
  fill: { color: CORAL },
  line: { color: CORAL, width: 0 },
});

/* ─── 2. タイトル ────────────────────────────────────── */
slide.addText("Claude", {
  x: 0.5, y: 0.78, w: 6, h: 1.0,
  fontSize: 60, fontFace: "Georgia", bold: true,
  color: INK, margin: 0,
});

slide.addText(
  "Anthropic が開発した、安全で誠実な対話を重視する AI アシスタント",
  {
    x: 0.5, y: 1.70, w: 9, h: 0.4,
    fontSize: 14, fontFace: "Calibri", color: MUTED, margin: 0,
  }
);

/* ─── 3. 特徴カード (3 列) ──────────────────────────── */
const features = [
  {
    title: "高度な対話・推論",
    body : "長い文脈を保持しながら、複雑な質問にも段階的に思考して回答します。",
  },
  {
    title: "コード生成・分析",
    body : "多言語に対応したコード生成・デバッグ・リファクタリングを支援します。",
  },
  {
    title: "安全性への配慮",
    body : "Constitutional AI に基づく設計で、誠実で有用な応答を志向します。",
  },
];

const CARD_Y = 2.40;
const CARD_H = 1.65;
const CARD_W = 2.90;
const GAP    = 0.15;
const START_X = 0.5;

features.forEach((f, i) => {
  const x = START_X + i * (CARD_W + GAP);

  // カード本体
  slide.addShape(pres.shapes.RECTANGLE, {
    x, y: CARD_Y, w: CARD_W, h: CARD_H,
    fill: { color: CARD_BG },
    line: { color: CARD_BG, width: 0 },
    shadow: {
      type: "outer", blur: 8, offset: 2, angle: 90,
      color: "000000", opacity: 0.06,
    },
  });

  // 左サイドのアクセントバー
  slide.addShape(pres.shapes.RECTANGLE, {
    x, y: CARD_Y, w: 0.06, h: CARD_H,
    fill: { color: CORAL },
    line: { color: CORAL, width: 0 },
  });

  // カードタイトル
  slide.addText(f.title, {
    x: x + 0.28, y: CARD_Y + 0.22, w: CARD_W - 0.40, h: 0.45,
    fontSize: 16, fontFace: "Georgia", bold: true,
    color: INK, margin: 0,
  });

  // カード本文
  slide.addText(f.body, {
    x: x + 0.28, y: CARD_Y + 0.72, w: CARD_W - 0.40, h: 0.85,
    fontSize: 11, fontFace: "Calibri",
    color: MUTED, margin: 0,
  });
});

/* ─── 4. モデルファミリー (下段) ────────────────────── */
const LINE_Y = 4.40;

slide.addShape(pres.shapes.LINE, {
  x: 0.5, y: LINE_Y, w: 9.0, h: 0,
  line: { color: DIVIDER, width: 1 },
});

slide.addText("MODEL FAMILY", {
  x: 0.5, y: LINE_Y + 0.12, w: 3, h: 0.3,
  fontSize: 9, fontFace: "Calibri",
  color: MUTED, charSpacing: 4, bold: true, margin: 0,
});

const models = [
  { name: "Opus",   desc: "最高性能・複雑なタスク向け" },
  { name: "Sonnet", desc: "性能とコストのバランス" },
  { name: "Haiku",  desc: "高速・軽量レスポンス"      },
];

models.forEach((m, i) => {
  const x = 0.5 + i * 3.05;
  slide.addText(
    [
      { text: m.name, options: { bold: true, color: INK,   fontSize: 18, fontFace: "Georgia" } },
      { text: "   " + m.desc,
                       options: { color: MUTED, fontSize: 10, fontFace: "Calibri" } },
    ],
    { x, y: LINE_Y + 0.50, w: 3.0, h: 0.45, margin: 0, valign: "middle" }
  );
});

/* ─── 出力 ─────────────────────────────────────────── */
pres.writeFile({ fileName: "claude-overview.pptx" })
    .then(name => console.log("Created:", name));
特に問題はないコードができたようなので、処理を実行してみます。
処理結果
上記を実行した結果は、以下のとおりです。
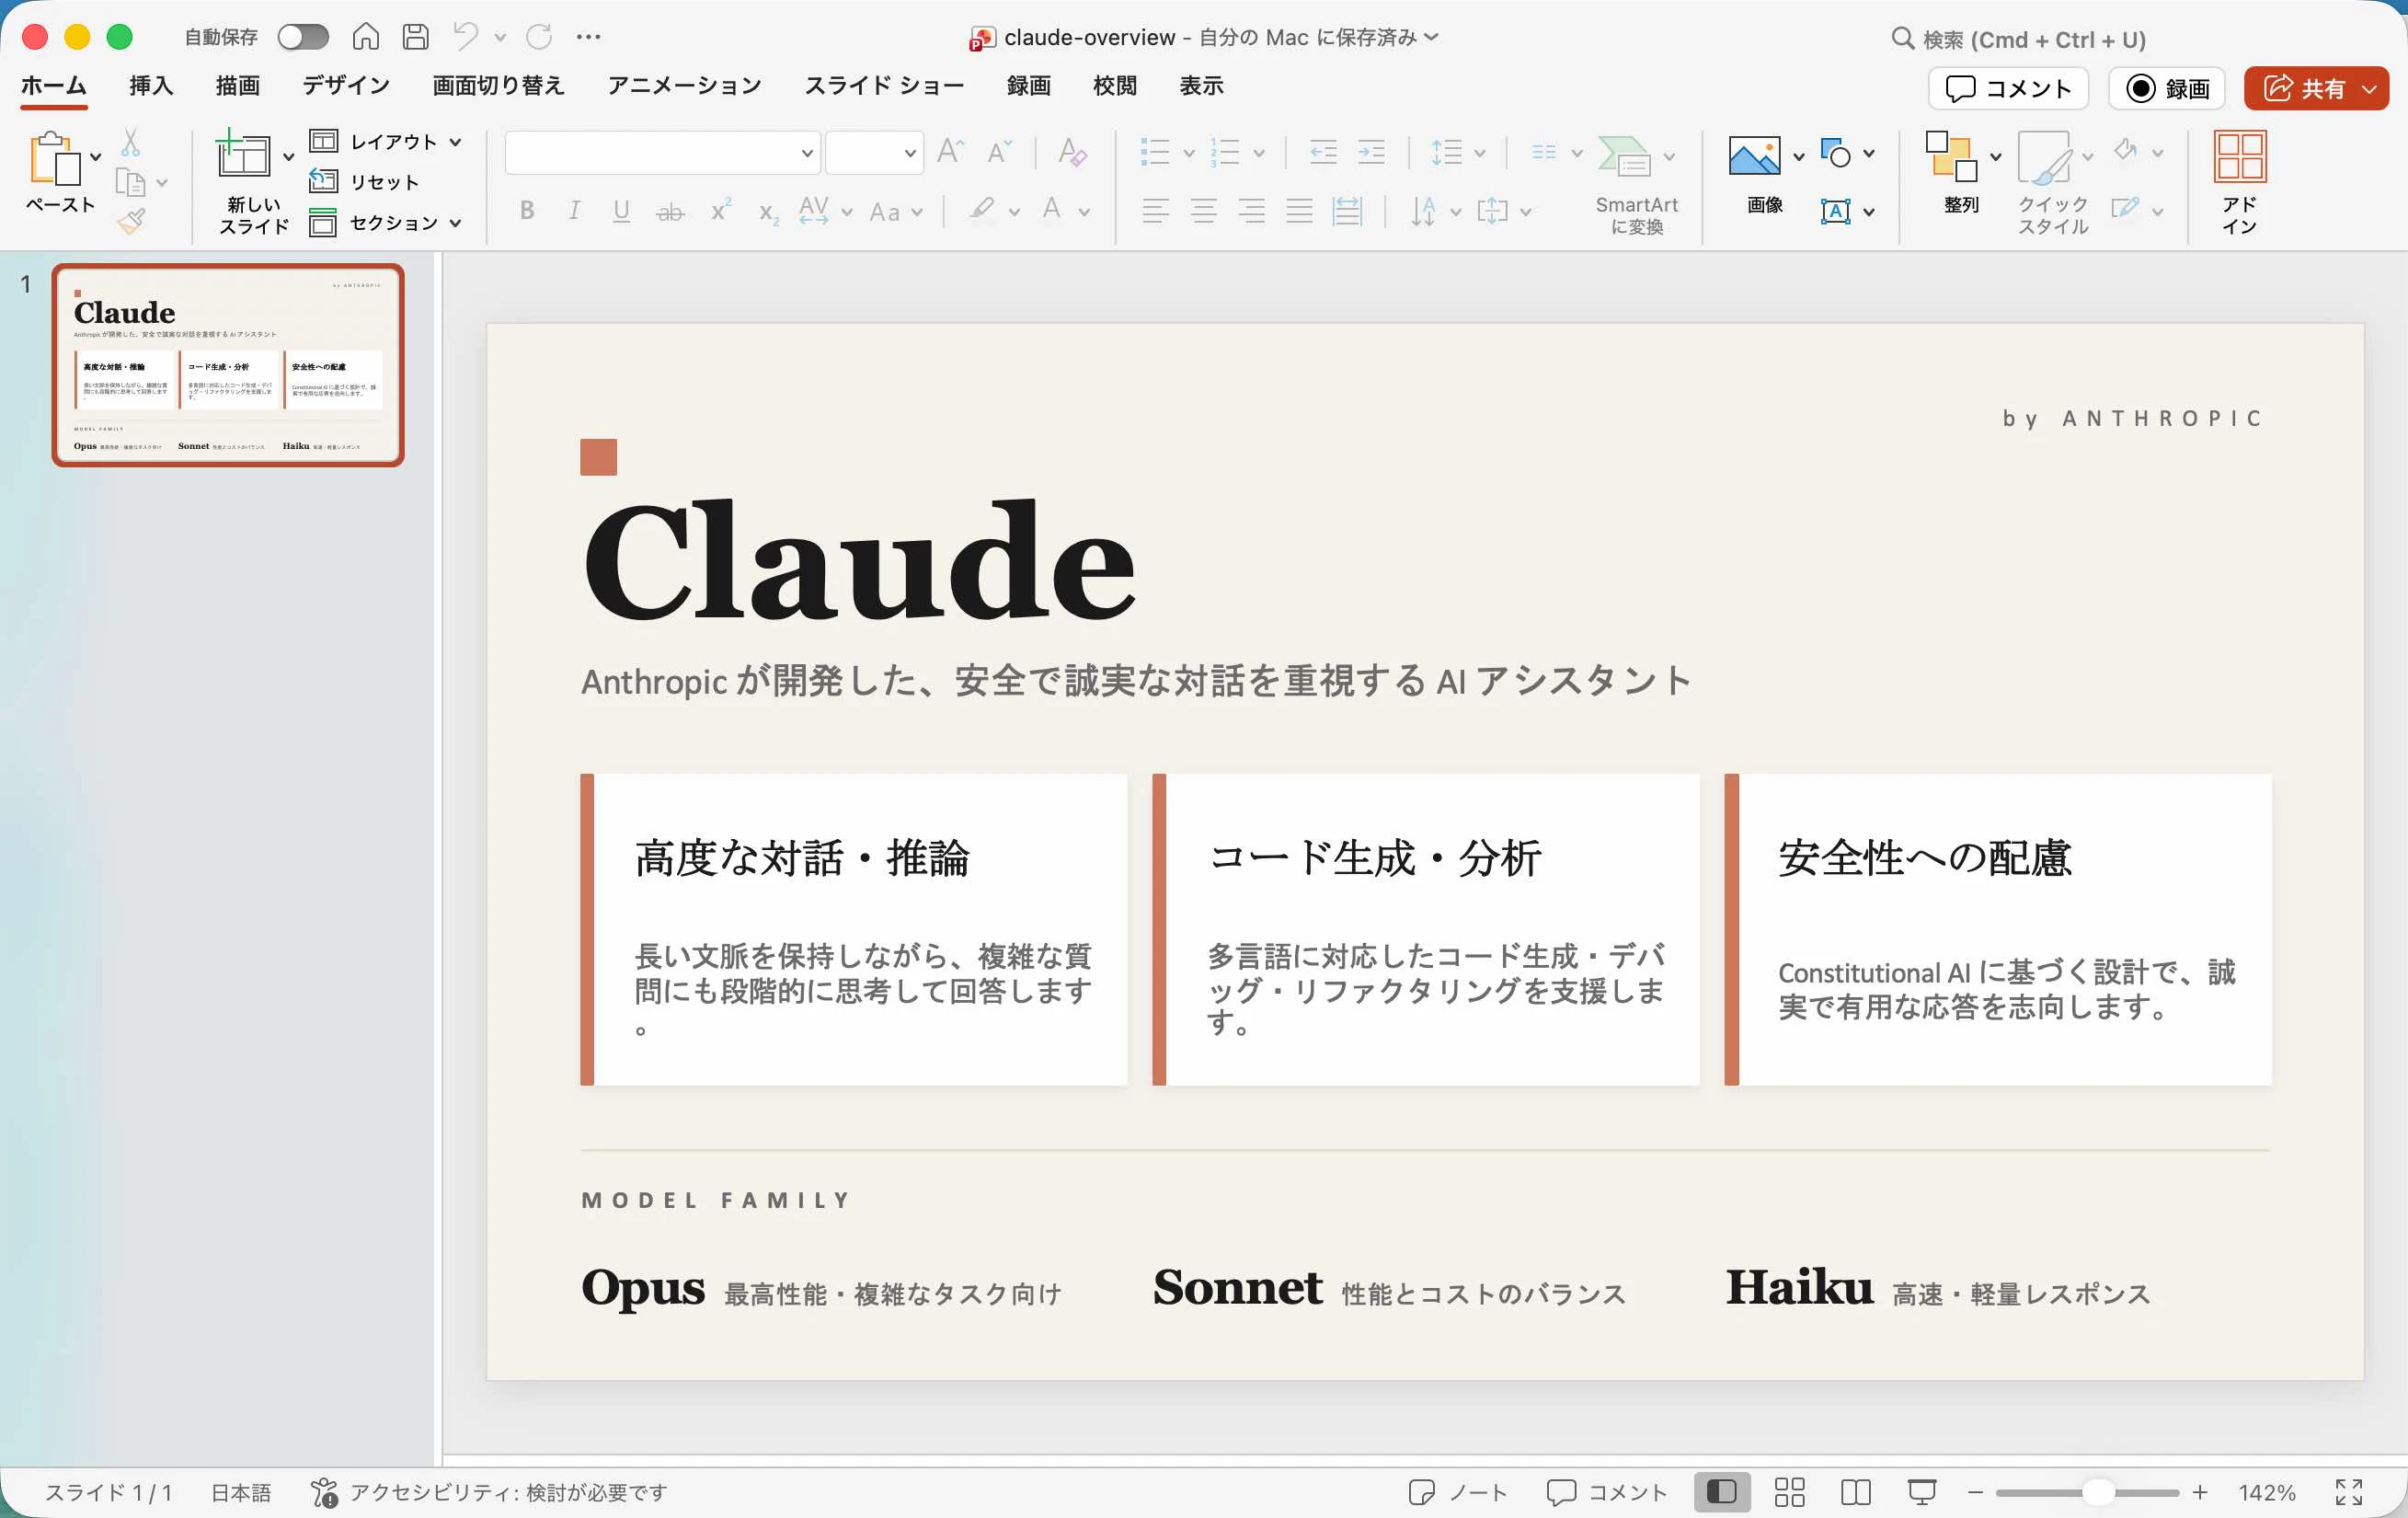
処理を実行してから、すぐに .pptx のファイルが生成されました。
ChatGPT を使ったコード生成
ChatGPT を使ったコード生成も試してみます。
コードを作成するためのプロンプトは「PptxGenJS https://gitbrent.github.io/PptxGenJS/ を使った、OpenAI Codex に関する説明をまとめた、1枚のスライドを生成するコードを作成して」という内容にしました。
生成されたコード
生成されたコードは、以下のとおりです。
// make-codex-slide.mjs
import pptxgen from "pptxgenjs";

const pptx = new pptxgen();
pptx.layout = "LAYOUT_WIDE";
pptx.author = "OpenAI Codex overview";

const slide = pptx.addSlide();

// Colors
const navy = "0B1020";
const blue = "2563EB";
const cyan = "22D3EE";
const white = "FFFFFF";
const gray = "CBD5E1";
const darkGray = "334155";
const light = "F8FAFC";

// Background
slide.background = { color: navy };

// Title
slide.addText("OpenAI Codex", {
  x: 0.6,
  y: 0.45,
  w: 6.2,
  h: 0.5,
  fontFace: "Aptos Display",
  fontSize: 34,
  bold: true,
  color: white,
  margin: 0,
});

slide.addText("AIコーディングエージェントで、開発・レビュー・修正・リリースを支援", {
  x: 0.62,
  y: 1.02,
  w: 7.8,
  h: 0.35,
  fontSize: 15,
  color: gray,
  margin: 0,
});

// Hero circle
slide.addShape(pptx.ShapeType.ellipse, {
  x: 9.25,
  y: 0.5,
  w: 2.9,
  h: 2.9,
  fill: { color: blue, transparency: 8 },
  line: { color: cyan, width: 2 },
});
slide.addText("</>", {
  x: 9.55,
  y: 1.35,
  w: 2.3,
  h: 0.7,
  fontSize: 40,
  bold: true,
  color: white,
  align: "center",
  margin: 0,
});

// Section cards
const cards = [
  {
    title: "できること",
    body: "機能実装\nコードベースQ&A\nバグ修正\nPR提案",
    x: 0.65,
  },
  {
    title: "使い方",
    body: "IDEで横に置く\n大きな作業をCloudへ委任\n複数タスクを並列実行",
    x: 4.65,
  },
  {
    title: "向いている用途",
    body: "既存コードの理解\nリファクタリング\nテスト修正\n小〜中規模の機能追加",
    x: 8.65,
  },
];

for (const c of cards) {
  slide.addShape(pptx.ShapeType.roundRect, {
    x: c.x,
    y: 2.45,
    w: 3.4,
    h: 2.4,
    rectRadius: 0.16,
    fill: { color: light },
    line: { color: "E2E8F0", width: 1 },
  });

  slide.addText(c.title, {
    x: c.x + 0.25,
    y: 2.72,
    w: 2.9,
    h: 0.35,
    fontSize: 17,
    bold: true,
    color: blue,
    margin: 0,
  });

  slide.addText(c.body, {
    x: c.x + 0.25,
    y: 3.22,
    w: 2.9,
    h: 1.25,
    fontSize: 15,
    breakLine: false,
    fit: "shrink",
    color: darkGray,
    margin: 0,
    paraSpaceAfterPt: 8,
  });
}

// Bottom workflow
slide.addText("基本ワークフロー", {
  x: 0.65,
  y: 5.25,
  w: 2.2,
  h: 0.3,
  fontSize: 15,
  bold: true,
  color: white,
  margin: 0,
});

const steps = ["依頼", "調査", "編集", "実行/検証", "レビュー"];
const startX = 2.3;

steps.forEach((step, i) => {
  const x = startX + i * 1.8;

  slide.addShape(pptx.ShapeType.roundRect, {
    x,
    y: 5.05,
    w: 1.35,
    h: 0.62,
    rectRadius: 0.12,
    fill: { color: i === 0 ? cyan : blue },
    line: { color: "FFFFFF", transparency: 70 },
  });

  slide.addText(step, {
    x,
    y: 5.22,
    w: 1.35,
    h: 0.25,
    fontSize: 12,
    bold: true,
    color: white,
    align: "center",
    margin: 0,
  });

  if (i < steps.length - 1) {
    slide.addShape(pptx.ShapeType.line, {
      x: x + 1.38,
      y: 5.36,
      w: 0.35,
      h: 0,
      line: { color: gray, width: 1.5, beginArrowType: "none", endArrowType: "triangle" },
    });
  }
});

// Note
slide.addText("ポイント:Codexは「コードを書くAI」ではなく、調査・編集・実行・検証まで任せやすい開発エージェントとして使うと効果的。", {
  x: 0.65,
  y: 6.35,
  w: 11.6,
  h: 0.45,
  fontSize: 13,
  color: gray,
  margin: 0,
});

await pptx.writeFile({ fileName: "codex-overview.pptx" });
特に問題はないコードができたようなので、処理を実行してみます。
処理結果
上記を実行した結果は、以下のとおりです。

こちらも処理を実行してから、すぐに .pptx のファイルが生成されました。