この記事は、「Microsoft Azure Advent Calendar 2024」の 23日目の記事です。
はじめに
久しぶりに Azure OpenAI Service を触ってみて、そして以下の記事を書いていました。
●Windows のコマンドプロンプトで curl + Azure OpenAI Service(VS Code の REST Client での例を参考に)【Microsoft Azure】 - Qiita
https://qiita.com/youtoy/items/7e8bcd4664de80bb5abc
その続きでやった内容があり、今回の記事ではその内容をメモとして残します。
実装の前段の話
今回の内容は、記事のタイトルのとおり「Azure OpenAI Service を Node.js で扱う」という内容です。
v2 のライブラリ
昨日・今日と、久しぶりに、Azure OpenAI Service を Node.js で扱う場合のやり方について公式サンプルを探していたのですが、その流れで以下にたどり着きました。
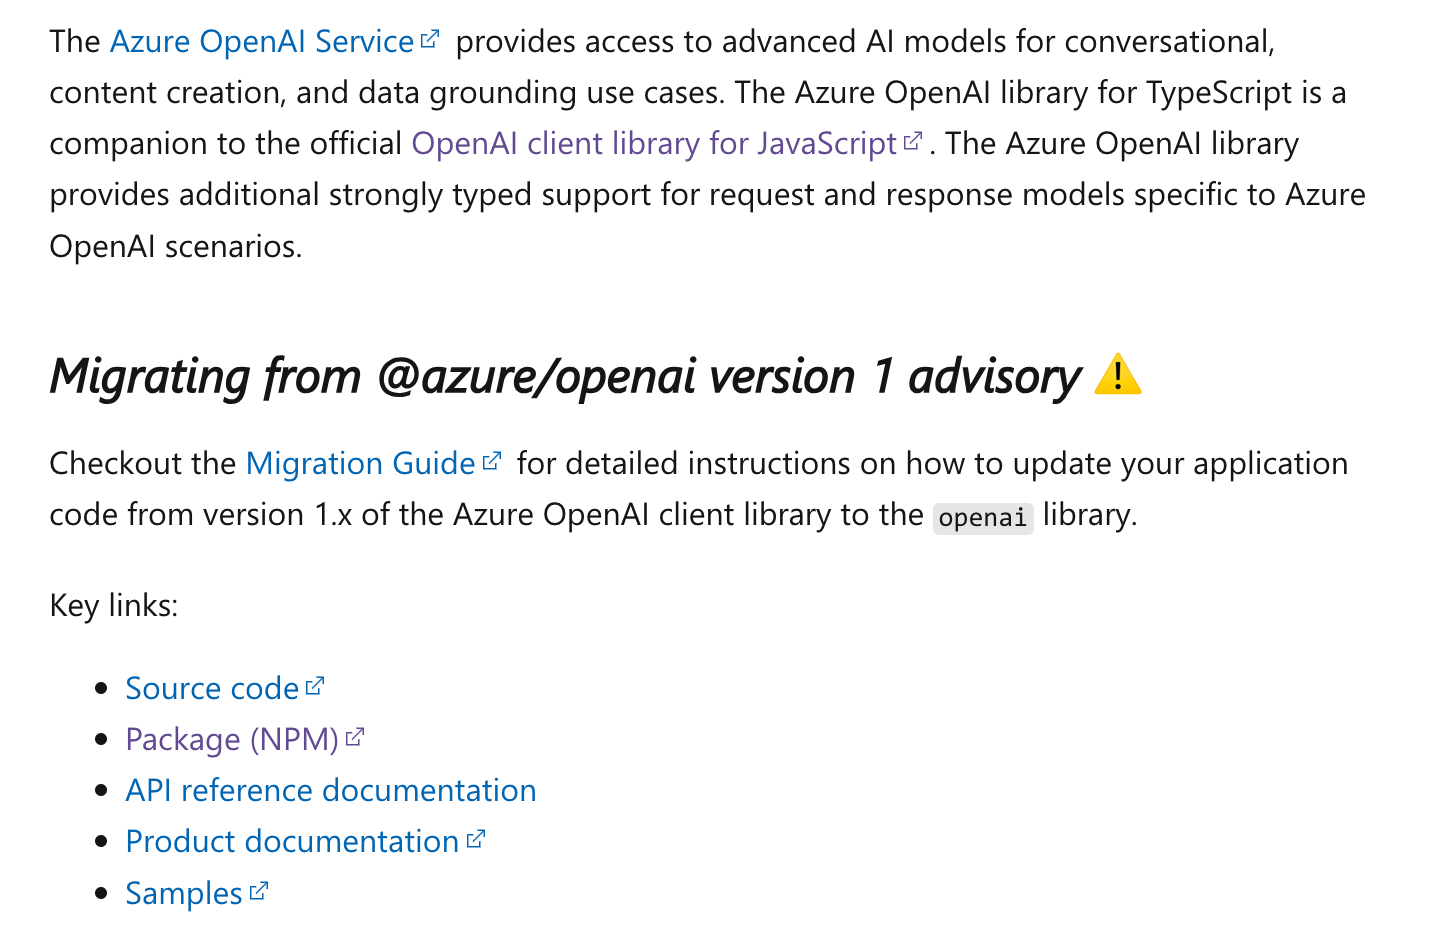
●Azure OpenAI library for TypeScript - 2.0.0 | Microsoft Learn
https://learn.microsoft.com/en-us/javascript/api/overview/azure/openai-readme?view=azure-node-latest
それを見ると、以前「【小ネタ】Node.js用の OpenAI パッケージ(OpenAI版・Azure版)を軽く見比べてみる」などという記事を書いたり、API を試してみたりしていた時からの変化があるようでした。
それについて、以下にある「v1 からのマイグレーション」という話が出ていたので、過去にお試しで作っていたものの関数を変更したり、パラメータを変更したりする必要があるのかと思っていました。
OpenAI公式のパッケージを使う
そして、さらに情報を見ていく中で以下を見かけました。
これを見ると、どうやら現在では、「@azure/openai」を使うのではなく、「OpenAI公式のパッケージである openai」を使う方向のものもあるようです。
実際に実装してみる
上で見かけた「OpenAI公式のパッケージを使う方法」で、Azure OpenAI Service を使ってみます。
参照するのに良さそうな公式情報を探してみたのですが、以下が活用できそうでした。
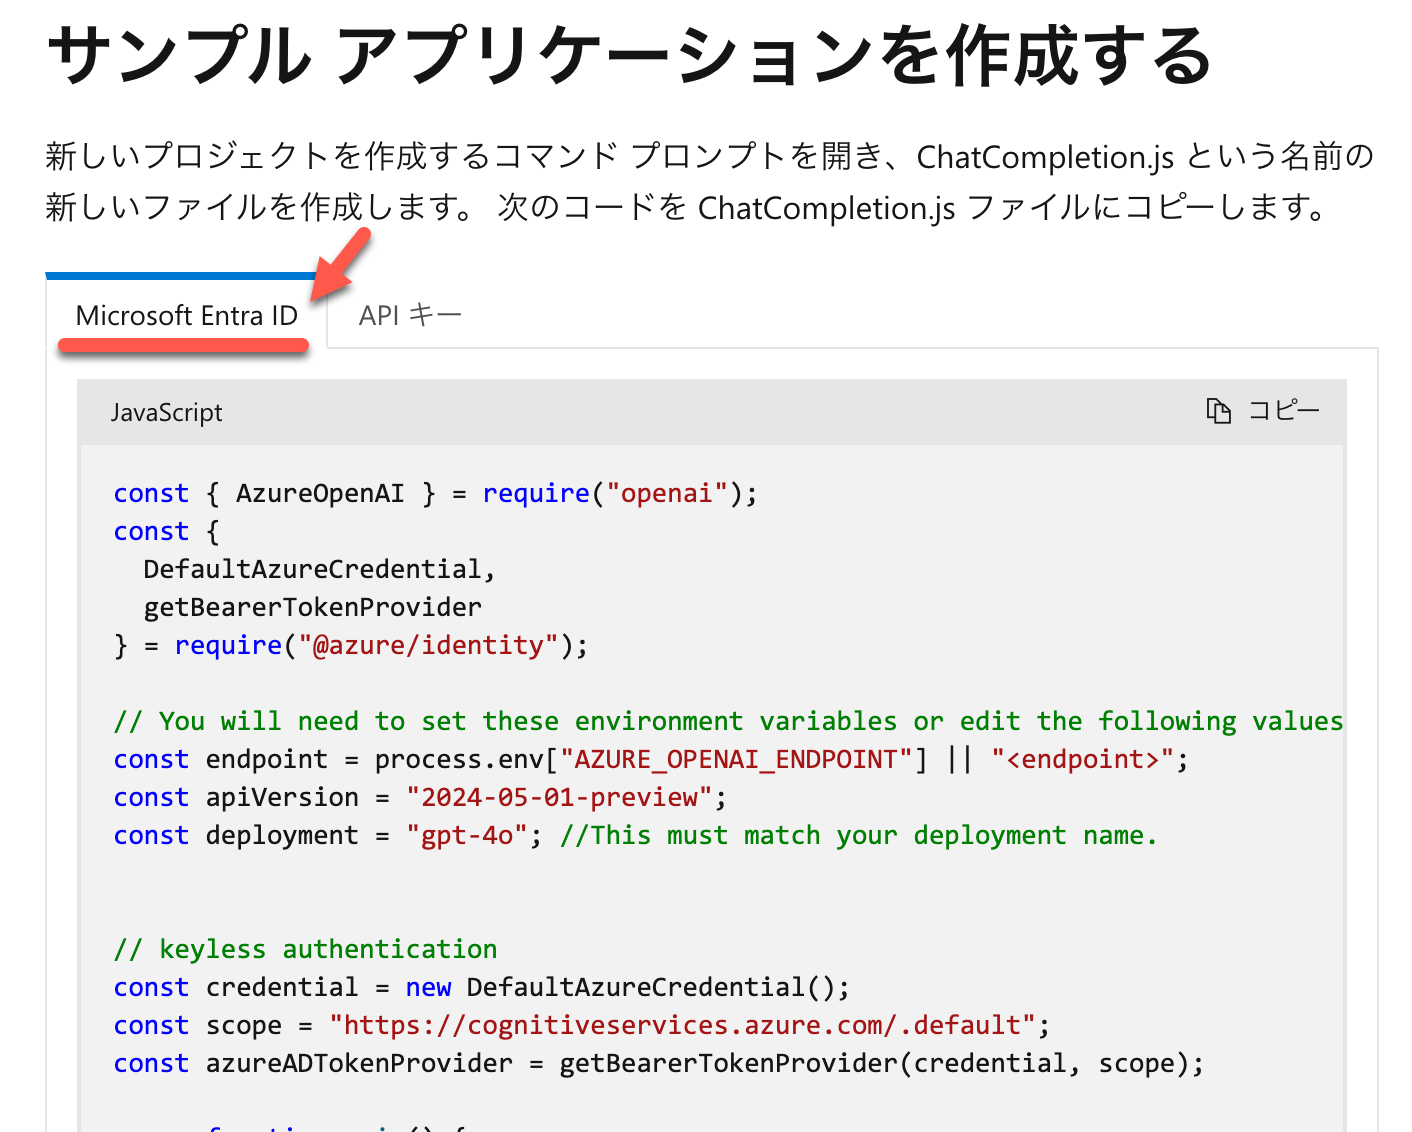
API を使う場合の認証方法についての説明が書いてあり、その下のほうにはそれぞれの実装について触れられていました。
実装方法について
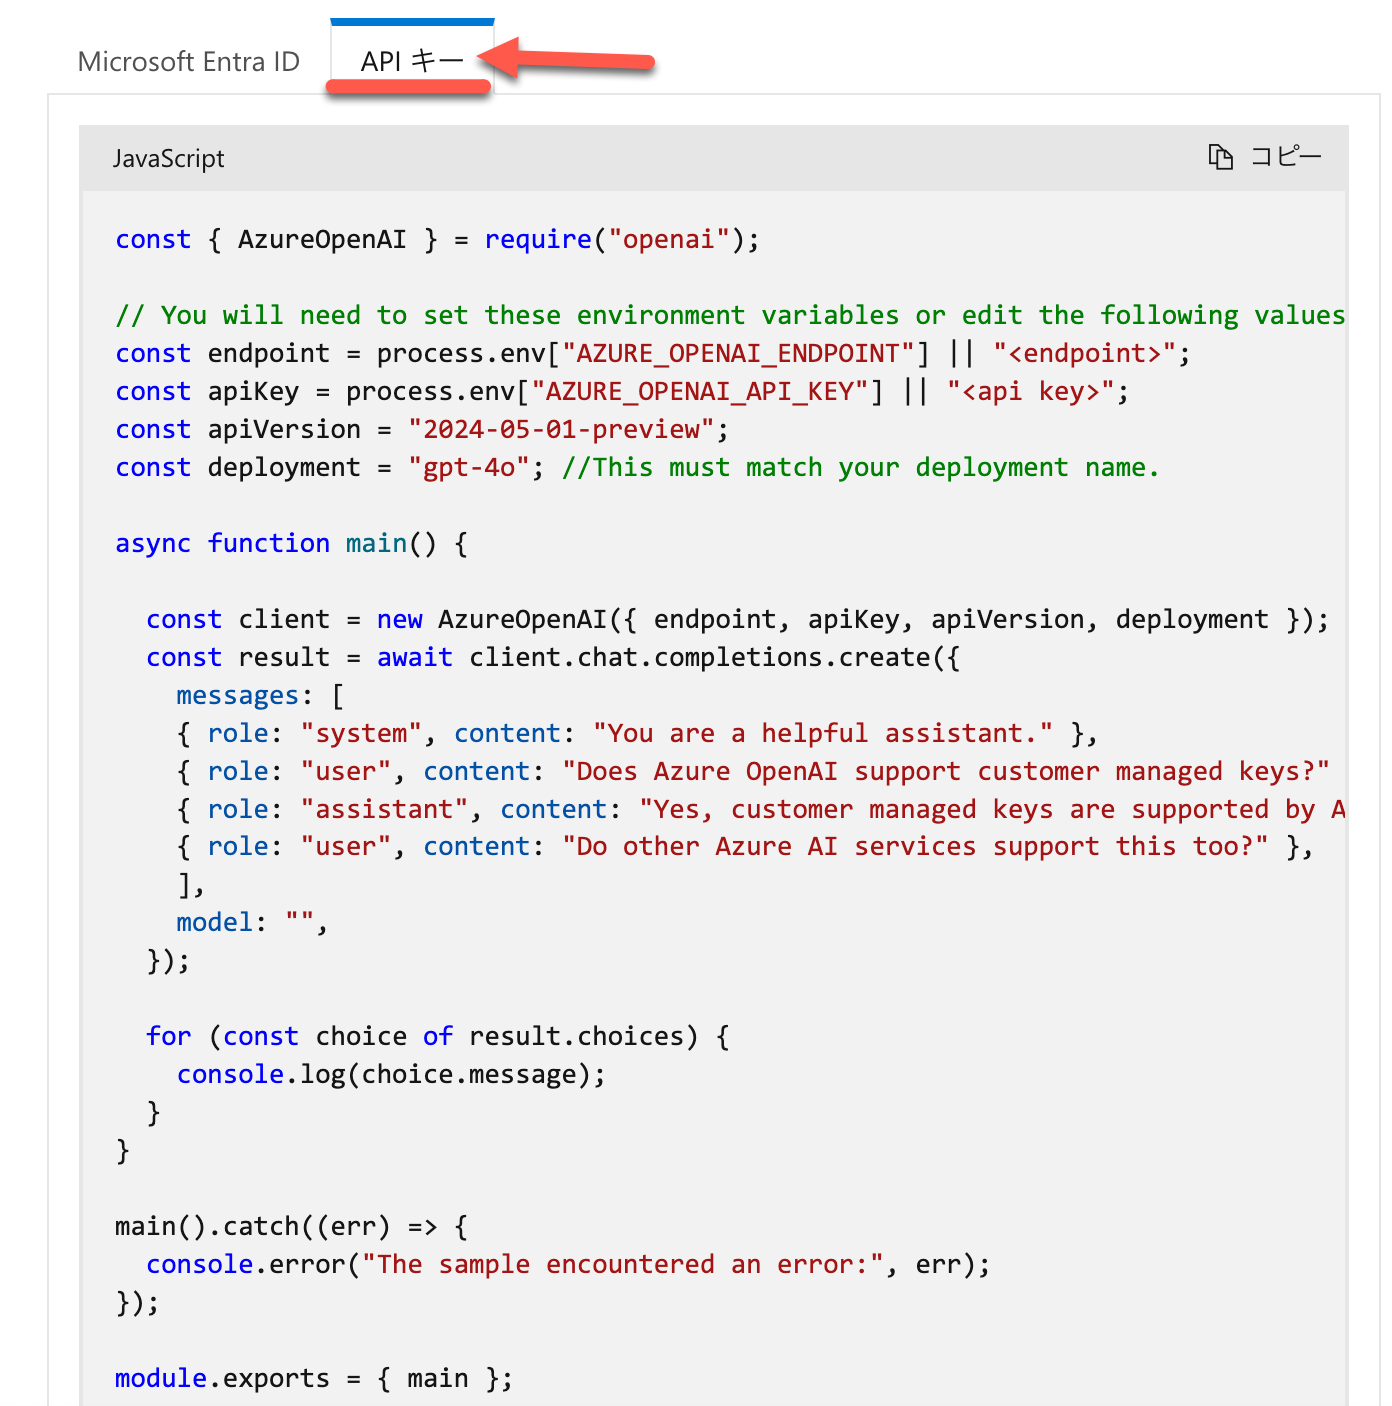
それらの具体的な内容は以下のとおりです。
今回は、冒頭で紹介した直近で書いた記事の内容を活用できそうな(同じようなやり方になっている)、「APIキー認証」のほうを使うことにしました。
実装内容
上記の公式ページで示されていたサンプルは以下になっていました。
const { AzureOpenAI } = require("openai");

// You will need to set these environment variables or edit the following values
const endpoint = process.env["AZURE_OPENAI_ENDPOINT"] || "<endpoint>";
const apiKey = process.env["AZURE_OPENAI_API_KEY"] || "<api key>";
const apiVersion = "2024-05-01-preview";
const deployment = "gpt-4o"; //This must match your deployment name.

async function main() {

  const client = new AzureOpenAI({ endpoint, apiKey, apiVersion, deployment });
  const result = await client.chat.completions.create({
    messages: [
    { role: "system", content: "You are a helpful assistant." },
    { role: "user", content: "Does Azure OpenAI support customer managed keys?" },
    { role: "assistant", content: "Yes, customer managed keys are supported by Azure OpenAI?" },
    { role: "user", content: "Do other Azure AI services support this too?" },
    ],
    model: "",
  });

  for (const choice of result.choices) {
    console.log(choice.message);
  }
}

main().catch((err) => {
  console.error("The sample encountered an error:", err);
});

module.exports = { main };
これを少しシンプルに書き換えたり、環境変数を利用する形に変更してみます。
具体的には以下のとおりです。
const { AzureOpenAI } = require("openai");

const endpoint = process.env["AZURE_OPENAI_ENDPOINT"];
const apiKey = process.env["AZURE_OPENAI_API_KEY"];

const apiVersion = "2024-05-01-preview";
const deployment = "gpt-4o";

const message = "あなたは誰?";

async function main() {
  const client = new AzureOpenAI({ endpoint, apiKey, apiVersion, deployment });
  const result = await client.chat.completions.create({
    messages: [{ role: "user", content: message }],
  });

  for (const choice of result.choices) {
    console.log(choice.message);
  }
}

main().catch((err) => {
  console.error("The sample encountered an error:", err);
});

module.exports = { main };
上記に関し、「AZURE_OPENAI_ENDPOINT」「AZURE_OPENAI_API_KEY」に該当する情報(エンドポイント・APIキー)はご自身で準備してください。そして、それらを「AZURE_OPENAI_ENDPOINT」「AZURE_OPENAI_API_KEY」という変数名の環境変数にしてください。
以下の部分は、前回の記事で書いていた、「APIバージョン」「プロイID」に該当するものです。
Azure上でデプロイしたモデルや、Azure OpenAI Service の API仕様に関連して決まる部分です。
const apiVersion = "2024-05-01-preview";
const deployment = "gpt-4o";
処理を実行した結果
それでは上記の処理を使って、「あなたは誰?」という内容を API経由で送ってみます。
その結果、以下のようなレスポンスを得ることができました。


