背景
TensorFlow.js が楽しそうだった。
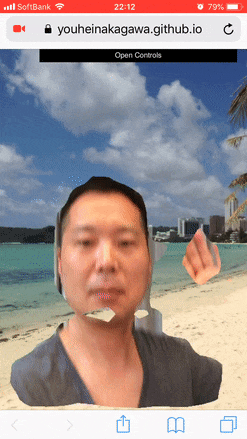
勉強がてらなんかウケ狙いの作ってみようと思った。
こんな感じの。
デモ
ソース
元ネタ
人物を残して他の部分をぼかすというのがあり、それを元にしています。
仕組み
Body Pix のデモをカスタマイズしていますが、元のデモには人物だけを残すような仕組みがなかったので作ってみました。
画像データをestimatePersonSegmentation関数に渡すと、画像の中に人物がいる部分をピクセル単位で返すようになっているようでそのデータを元に切り抜き用のマスクデータを生成しています。
estimatePersonSegmentationから返ってくる値のざっくりとしたイメージ:
1の部分が人物らしきものが写っている部分。
estimatePersonSegmentation.data
{0,0,0,0,0,0,0,0,0,0,0,0,0,0,0,0,
 0,0,0,0,0,0,0,1,0,0,0,0,0,0,0,0,
 0,0,0,0,0,0,1,1,1,0,0,0,0,0,0,0,
 0,0,0,0,0,0,0,1,1,0,0,0,0,0,0,0,
 0,0,0,0,0,1,1,1,1,1,0,0,0,0,0,0,
 0,0,0,0,0,0,1,1,0,1,0,0,0,0,0,0,
 0,0,0,0,0,1,1,0,0,1,1,0,0,0,0,0}
このあたりのマスク処理は以下のページを参考にさせていただきました。
ありがとうございました。
estimatePersonSegmentationから帰ってきた 0, 1 の値をマスク化したのが下記の関数になります。
ctxには video タグから取得した画像データが予め入っている状態です。
    const drawMask = function (bodySegmentation) {
        const image_data = ctx.getImageData(0, 0, bodySegmentation.width, bodySegmentation.height);

        for (let i = 0; i < bodySegmentation.data.length; ++i) {
            if (bodySegmentation.data[i] === 1) {
                image_data.data[i * 4 + 3] = 255;
            } else {
                image_data.data[i * 4 + 3] = 0;
            }
        }

        ctx.putImageData(image_data, 0, 0);
    };
もとのデモから変更した部分は他にもフルスクリーンに対応したりなどありますがざっくりとこんなところです。
画像を変更する場合は CSS の body に指定されている画像を変更することで可能になります。
それではみなさま、良い年末年始を!