Sysdig Agent v.12.18.0以上で実装されたAgent Local Forwarding機能を使うと、SysdigのSaaSバックエンドを経由せずにSysdig Agentから直接SIEM等にイベントを転送できます。本記事ではSplunkに対する転送の設定手順をご紹介します。
Agent Local Fowardingは、通常のイベント転送に対して以下の点が異なるのでご注意ください。
- ローカルフォワーダは X.509 認証をサポートしていません。
- イベントは永続化されないため、エージェントの再起動時に転送されないと失われます。
- 一部のラベルは、スキップされた後処理フェーズで入力される可能性があるため、利用できない場合があります。
-
descriptionとagentIdフィールドは利用できません。 - UIによる設定ではなく、Agent設定ファイルに対する手動設定が必要です。
関連ドキュメント
テスト環境
- AWS
- Kubernetes 1.28.2
- Sysdig Agent 12.20.0
- Splunk Enterprise 9.1.2
Splunk側でのEvent Collector Tokenの作成
下記記事をご参照ください。
AWS Security Groupの設定
K8sノードからSplunk Enterprise Serverに対する8088ポートのInbound接続を許可します。

K8sノードからSplunk Enterprise Serverに対するイベント転送接続が問題なくできるかを、確認します。
K8sノードにSSH接続し、以下のコマンドを実行します。
curl --insecure https://<SPLUNK_PUBLIC_IP>:8088/services/collector/event -H 'Authorization: Splunk <SPLUNK_TOKEN>' -d '{"sourcetype": "demo", "event":"Hello, world!"}'
successと返れば問題なく通信できています。
Agent Local Forwardingの設定
本記事では、新規にSysdig AgentをインストールするためのHelmファイル(values.yaml)で、Agent Local Forwardingの有効化を設定する例をご紹介します。ハイライトしている箇所がAgent Local Forwardingに固有の設定になります(行頭の+は不要です)。
global:
  clusterConfig:
    name: "yo-sysdig-aws"
  sysdig:
    region: "<SYSDIG_SAAS_REGION>"
    accessKey: "<SYSDIG_ACCESS_KEY>"
  kspm:
    deploy: false

agent:
  enabled: true
+ localForwarder:
+   enabled: true
+   transmitMessageTypes:
+    - POLICY_EVENTS
+    - SECURE_AUDIT
+   integrations:
+   - type: SPLUNK
+     channels:
+     - SECURE_EVENTS_POLICIES
+     - ACTIVITY_AUDIT
+     configuration:
+       Index: <indexname>
+       ServiceToken: "<SPLUNK_TOKEN>"
+       ServiceURL: "https://<SPLUNK_IP>:8088"
+       insecure: true

nodeAnalyzer:
  enabled: false

admissionController:
  enabled: false

rapidResponse:
  enabled: false
上記Helmファイルを使ってSysdig Agentをインストールします。
helm repo add sysdig https://charts.sysdig.com
helm repo update
helm install sysdig-agent --namespace sysdig-agent --create-namespace \
    --values ./values.yaml \
    sysdig/sysdig-deploy
ConfigMapにAgent Local Forwardingの設定が入っていることを確認します。ハイライトしている箇所がAgent Local Forwardingに固有の設定になります(行頭の+は不要です)。
$ kubectl -n sysdig-agent describe cm sysdig-agent
Name:         sysdig-agent
Namespace:    sysdig-agent
Labels:       app=sysdig-agent
              app.kubernetes.io/instance=sysdig-agent
              app.kubernetes.io/managed-by=Helm
              app.kubernetes.io/name=agent
              app.kubernetes.io/version=12.20.0
              helm.sh/chart=agent-1.19.4
Annotations:  meta.helm.sh/release-name: sysdig-agent
              meta.helm.sh/release-namespace: sysdig-agent

Data
====
dragent.yaml:

new_k8s: true
k8s_cluster_name: yo-sysdig-aws
collector: ingest.us4.sysdig.com
security:
  enabled: true
  k8s_audit_server_enabled: true
  k8s_audit_server_port: 7765
  k8s_audit_server_url: 0.0.0.0

+local_forwarder:
+  enabled: true
+  transmit_message_types:
+    - POLICY_EVENTS
+    - SECURE_AUDIT

BinaryData
====

Events:  <none>
Sysdig Agentコンテナの中にlocal_forwarder_config.yamlファイルが作成されていることを確認します。
$ kubectl exec -it -n sysdig-agent sysdig-agent-xxxxx -- cat /opt/draios/etc/local_forwarder_config.yaml
Defaulted container "sysdig" out of: sysdig, sysdig-agent-kmodule (init)
integrations:
  - channels:
    - SECURE_EVENTS_POLICIES
    - ACTIVITY_AUDIT
    configuration:
      ServiceToken: <Redacted>
      ServiceURL: https://<Redacted>:8088
      insecure: true
    type: SPLUNK
イベント転送テスト
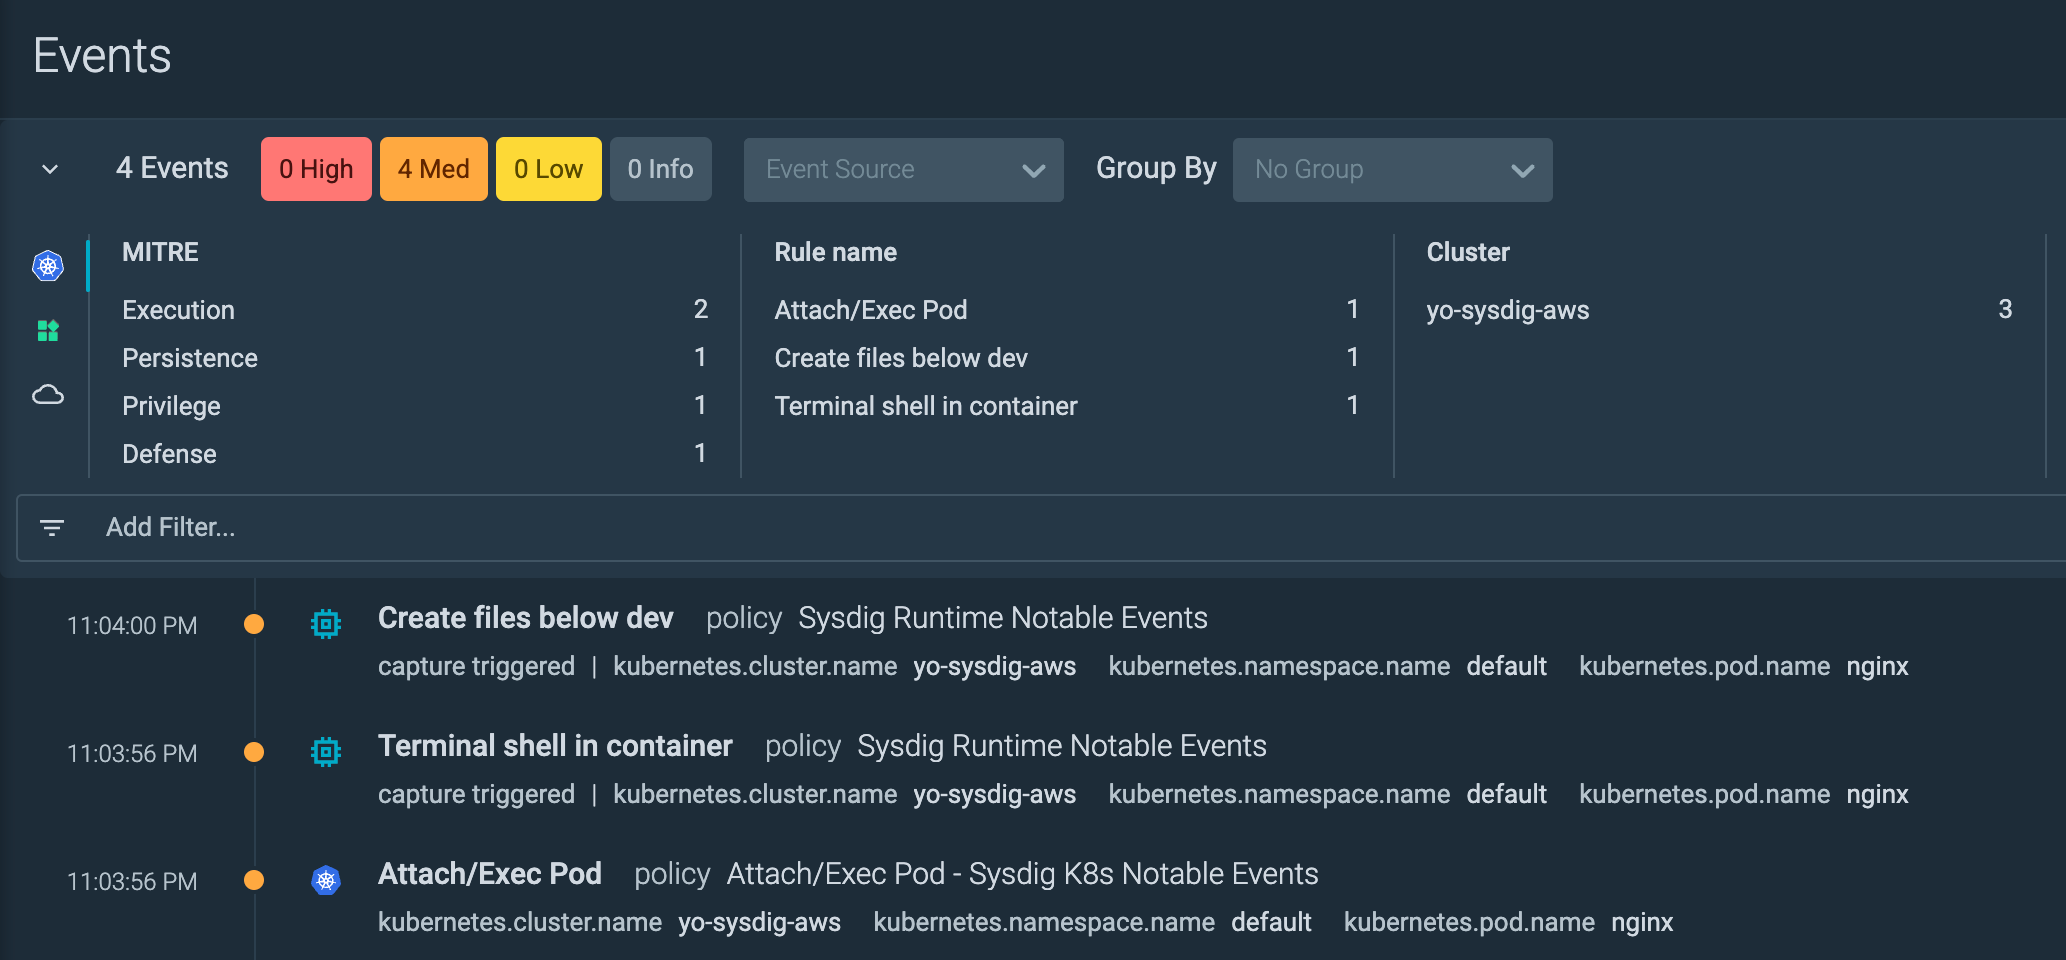
テスト用のNginx Podを起動します。
kubectl run nginx --image nginx
Nginx Podに入ります。
kubectl exec -it nginx -- bash
セキュリティイベントを発生させます
# touch /dev/testfile
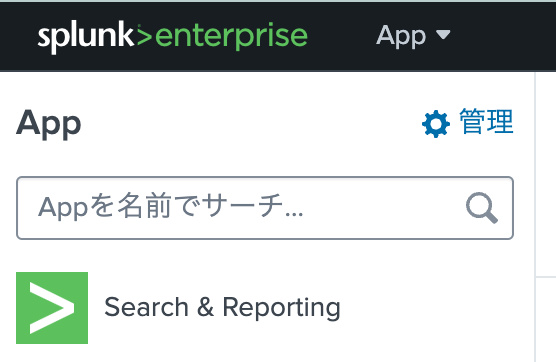
Splunk UIにログインし、Search & Reporting に移動します。
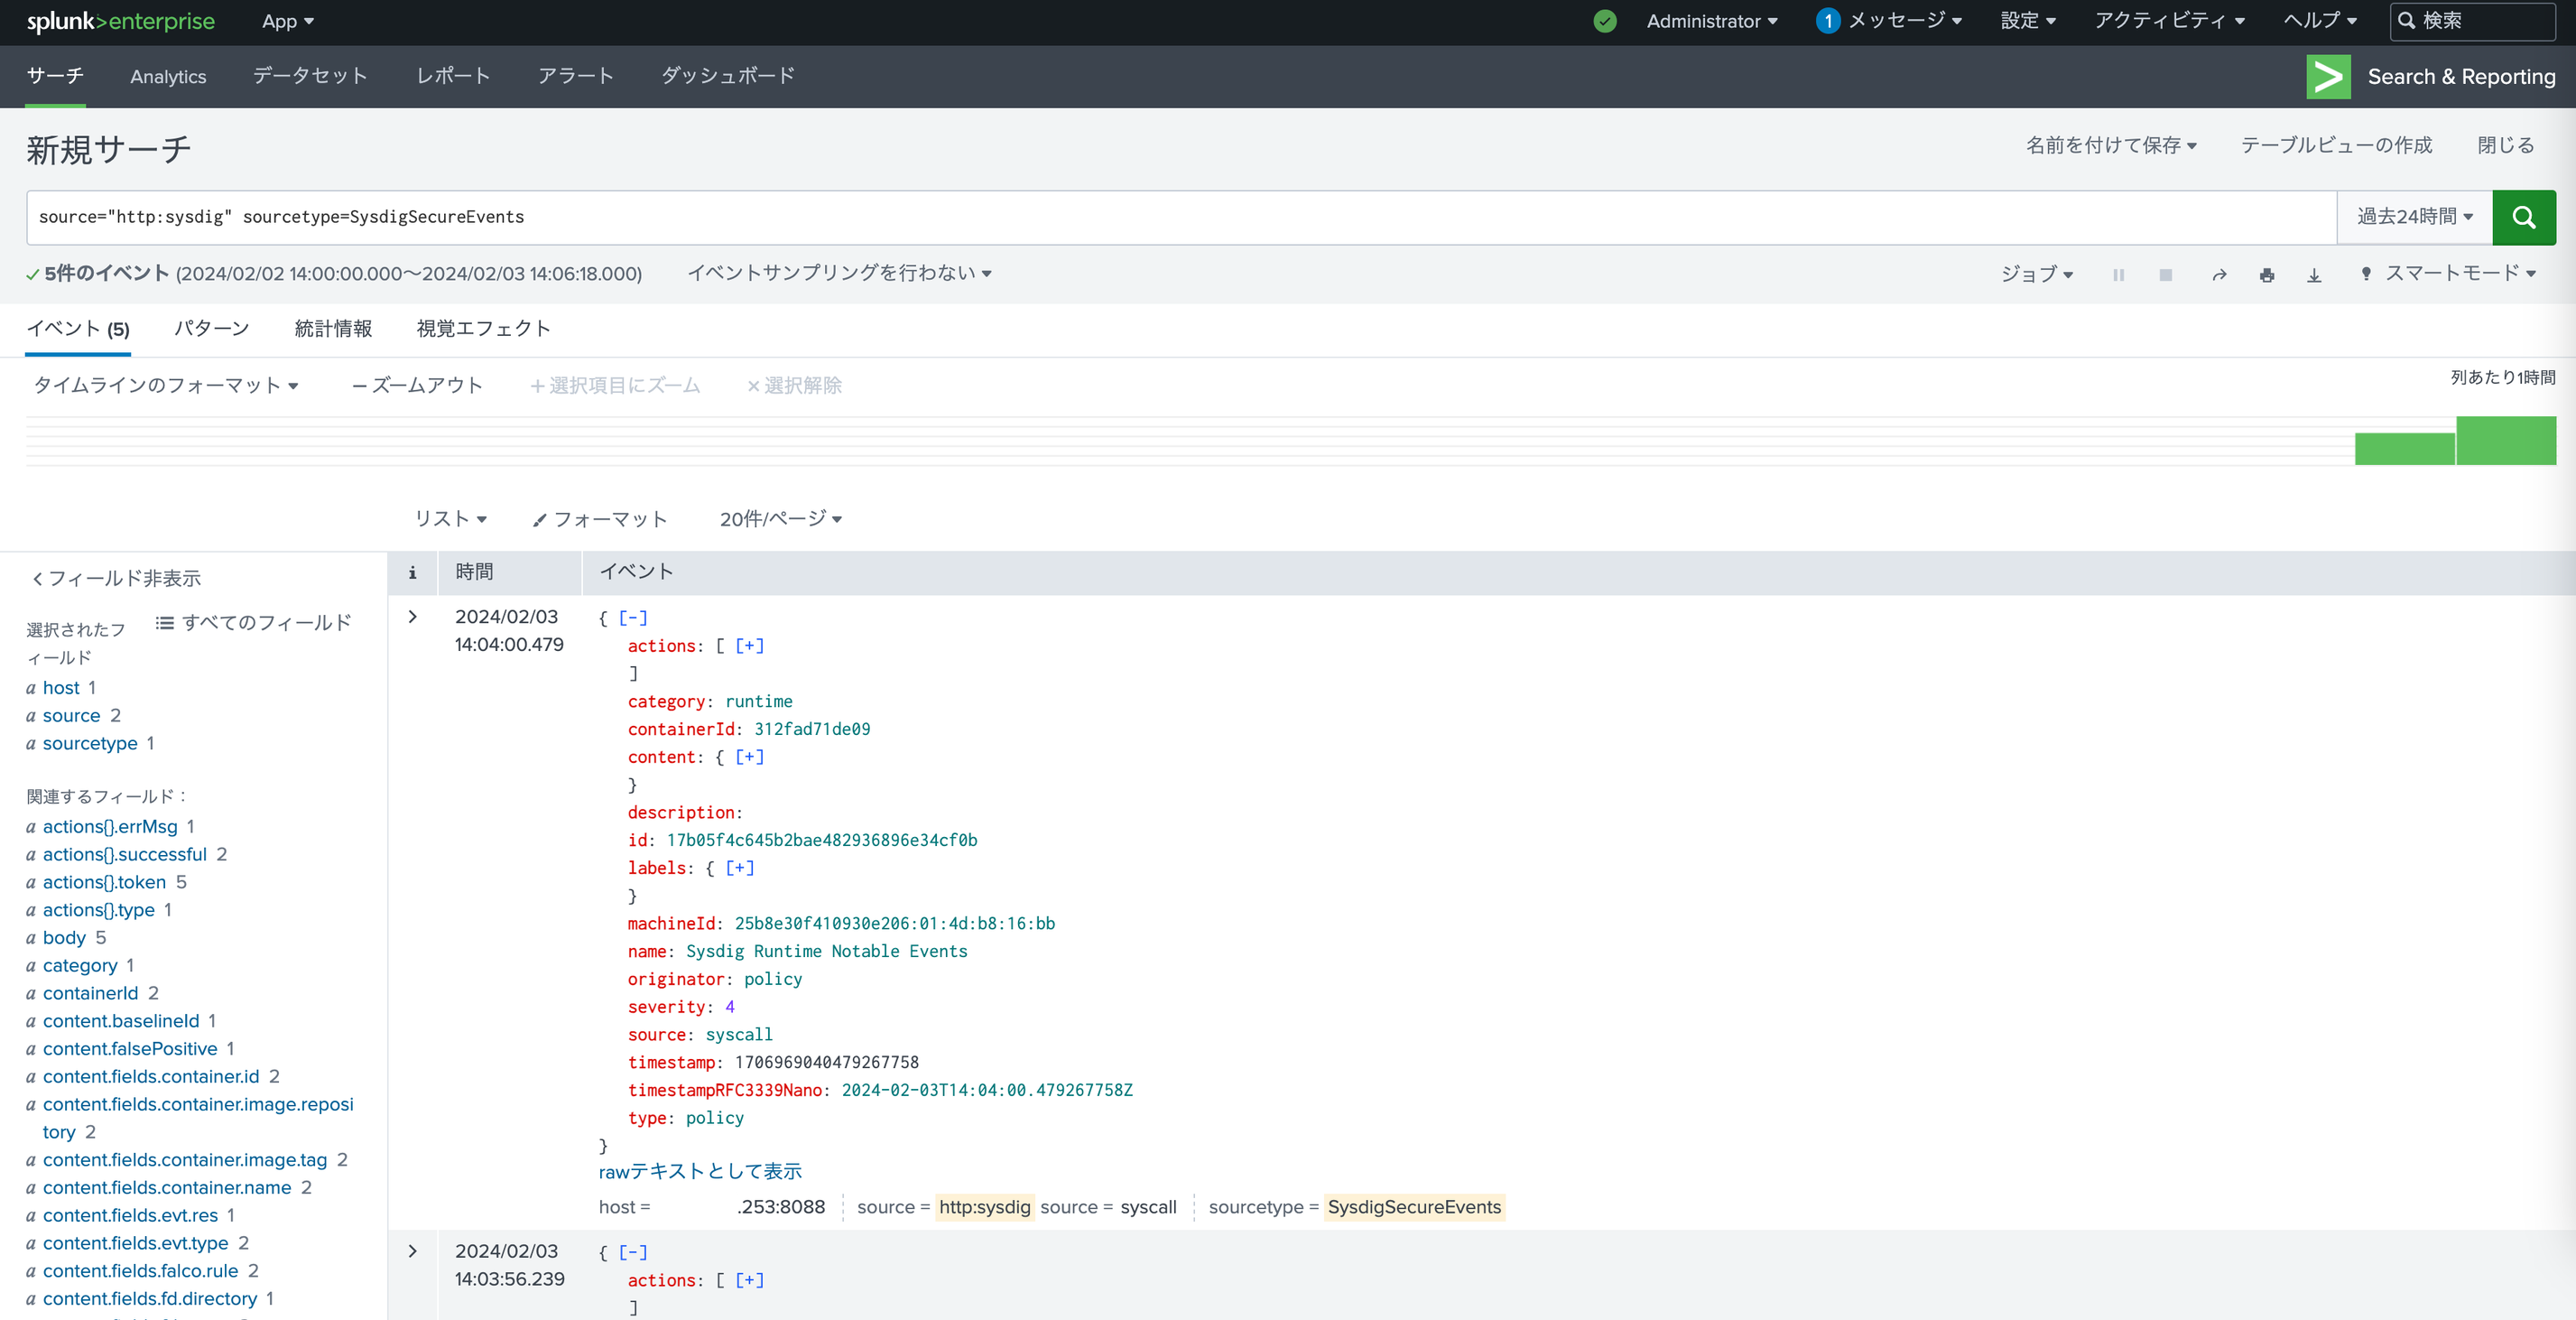
サーチ欄にsource="http:sysdig"と入力して検索し、発生させたイベントがSplunkに転送されていることを確認します。
Sysdig UIから設定する通常のSplunk転送とAgent Local Forwardingの両方を有効にした場合は、同一のイベントが重複して転送されるのでご注意ください。
まとめ
Agent Local Forwardingを使って、SysdigのSaaSバックエンドを経由せずにSysdig Agentから直接Splunkに簡単にイベント転送できることが確認できました。