本手順は、Orchestrator Agentが不要になったServerless Agent 5.3.0以上を対象とした手順になります。
Sysdig Serverless Agentで保護しているAWS Fargateに対する脅威検知テストとして、下記Security Playgroundイメージから作成したFargateタスクを使用する方法をご紹介します。
Security Playgroundでは、外部からcurlコマンドを介してコンテナ上で任意のコマンド実行が可能です。これをリモートコード実行の脆弱性を有するアプリケーションを模擬した被害者コンテナとして使用します。
SysdigのFargateランタイムセキュリティに関して詳しく知りたい方は、当社が7/28に実施したウェビナーの録画もご参照ください。
環境のデプロイ
Terraformで以下をデプロイします。
● Security Playground(擬似アタック被害コンテナ) + Sysdig Workload Agent
Security Playgroundを使ったサンプルのTerraformファイルは以下になります。
必ずTerraformファイルの記述をよく確認し、ご自身の環境で使用しても問題ないことをご確認ください。Sysdig Serverless Agentのドキュメントは下記になります。
https://docs.sysdig.com/en/docs/installation/sysdig-secure/install-agent-components/ecs-on-fargate/
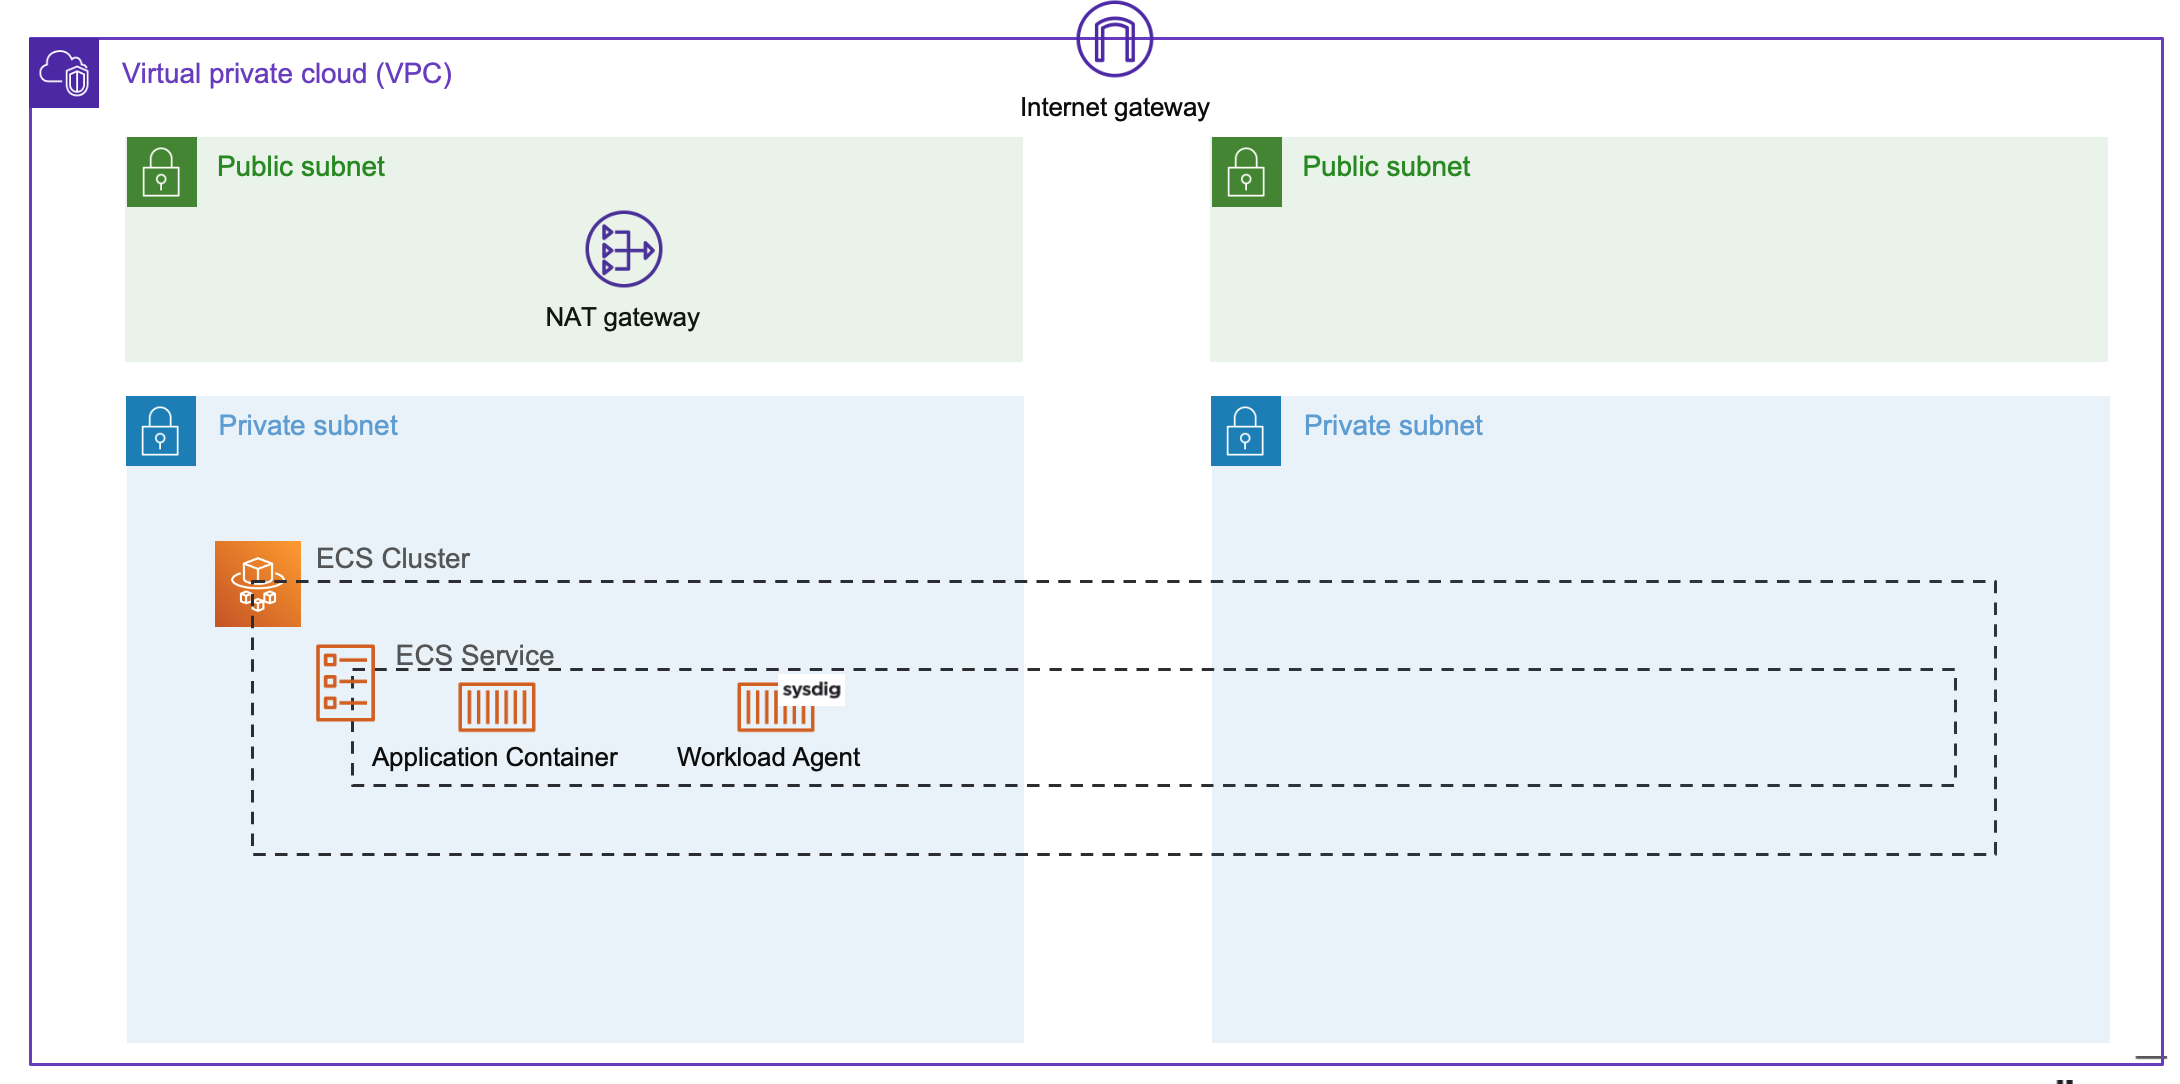
上記Terraformファイルを使用すると、以下のような構成でデプロイされます(NAT gatewayは含みません)。デプロイ先のサブネットは変数設定で指定可能です。
変数の設定
Terraformファイルのvariables.tfの値を、ご自身の環境に合わせて修正してください。
# AWS Region
variable "region" {
  default = "ap-northeast-1"
}

variable "vpc_id" {
  default = "vpc-xxxxxxxxxxxx"
}

variable "subnet_a_id" {
  default = "subnet-xxxxxxxxxxxx"
}

variable "subnet_b_id" {
  default = "subnet-xxxxxxxxxxxx"
}

# タスクにPublic IPをアサインするか否か。Private Subnetにデプロイする場合はfalseに設定してください
variable "public_ip" {
  default = "true"
}

# Sysdig Access key
variable "access_key" {
  default = ""
}

# ご自身のSysdig SaaSリージョンの値を入力してください(下記はus2の場合)
variable "collector_url" {
  default = "ingest-us2.app.sysdig.com"
}

# タスク名などの前につけるプレフィックス
variable "prefix" {
  default = "test"
}

# Curlコマンドを打って疑似アタックを実行する端末のIPアドレスを入力してください
# このIPアドレスからWorkloadタスクに対する8080ポート接続を許可するSecurity Group設定を作成します
variable "source_ip" {
  default = "192.168.0.100/32"
}
collector_urlの値はご利用のSysdig SaaSリージョンにより異なります。下記ドキュメントをご参照ください。
https://docs.sysdig.com/en/docs/administration/saas-regions-and-ip-ranges/
プライベート レジストリから取得したイメージの場合は、コンテナ定義でentrypointもしくはcommandを明示的に指定しないと、Agentをインストールできません。元のコンテナ定義のentrypointとcommandの値が両方とも空の場合(もしくは記載自体がない場合)は、docker inspectコマンド等でコンテナイメージのENTRYPOINTもしくはCMDの記述を確認し、明示的に記載してください。
デプロイ実施
terraform init & terraform apply
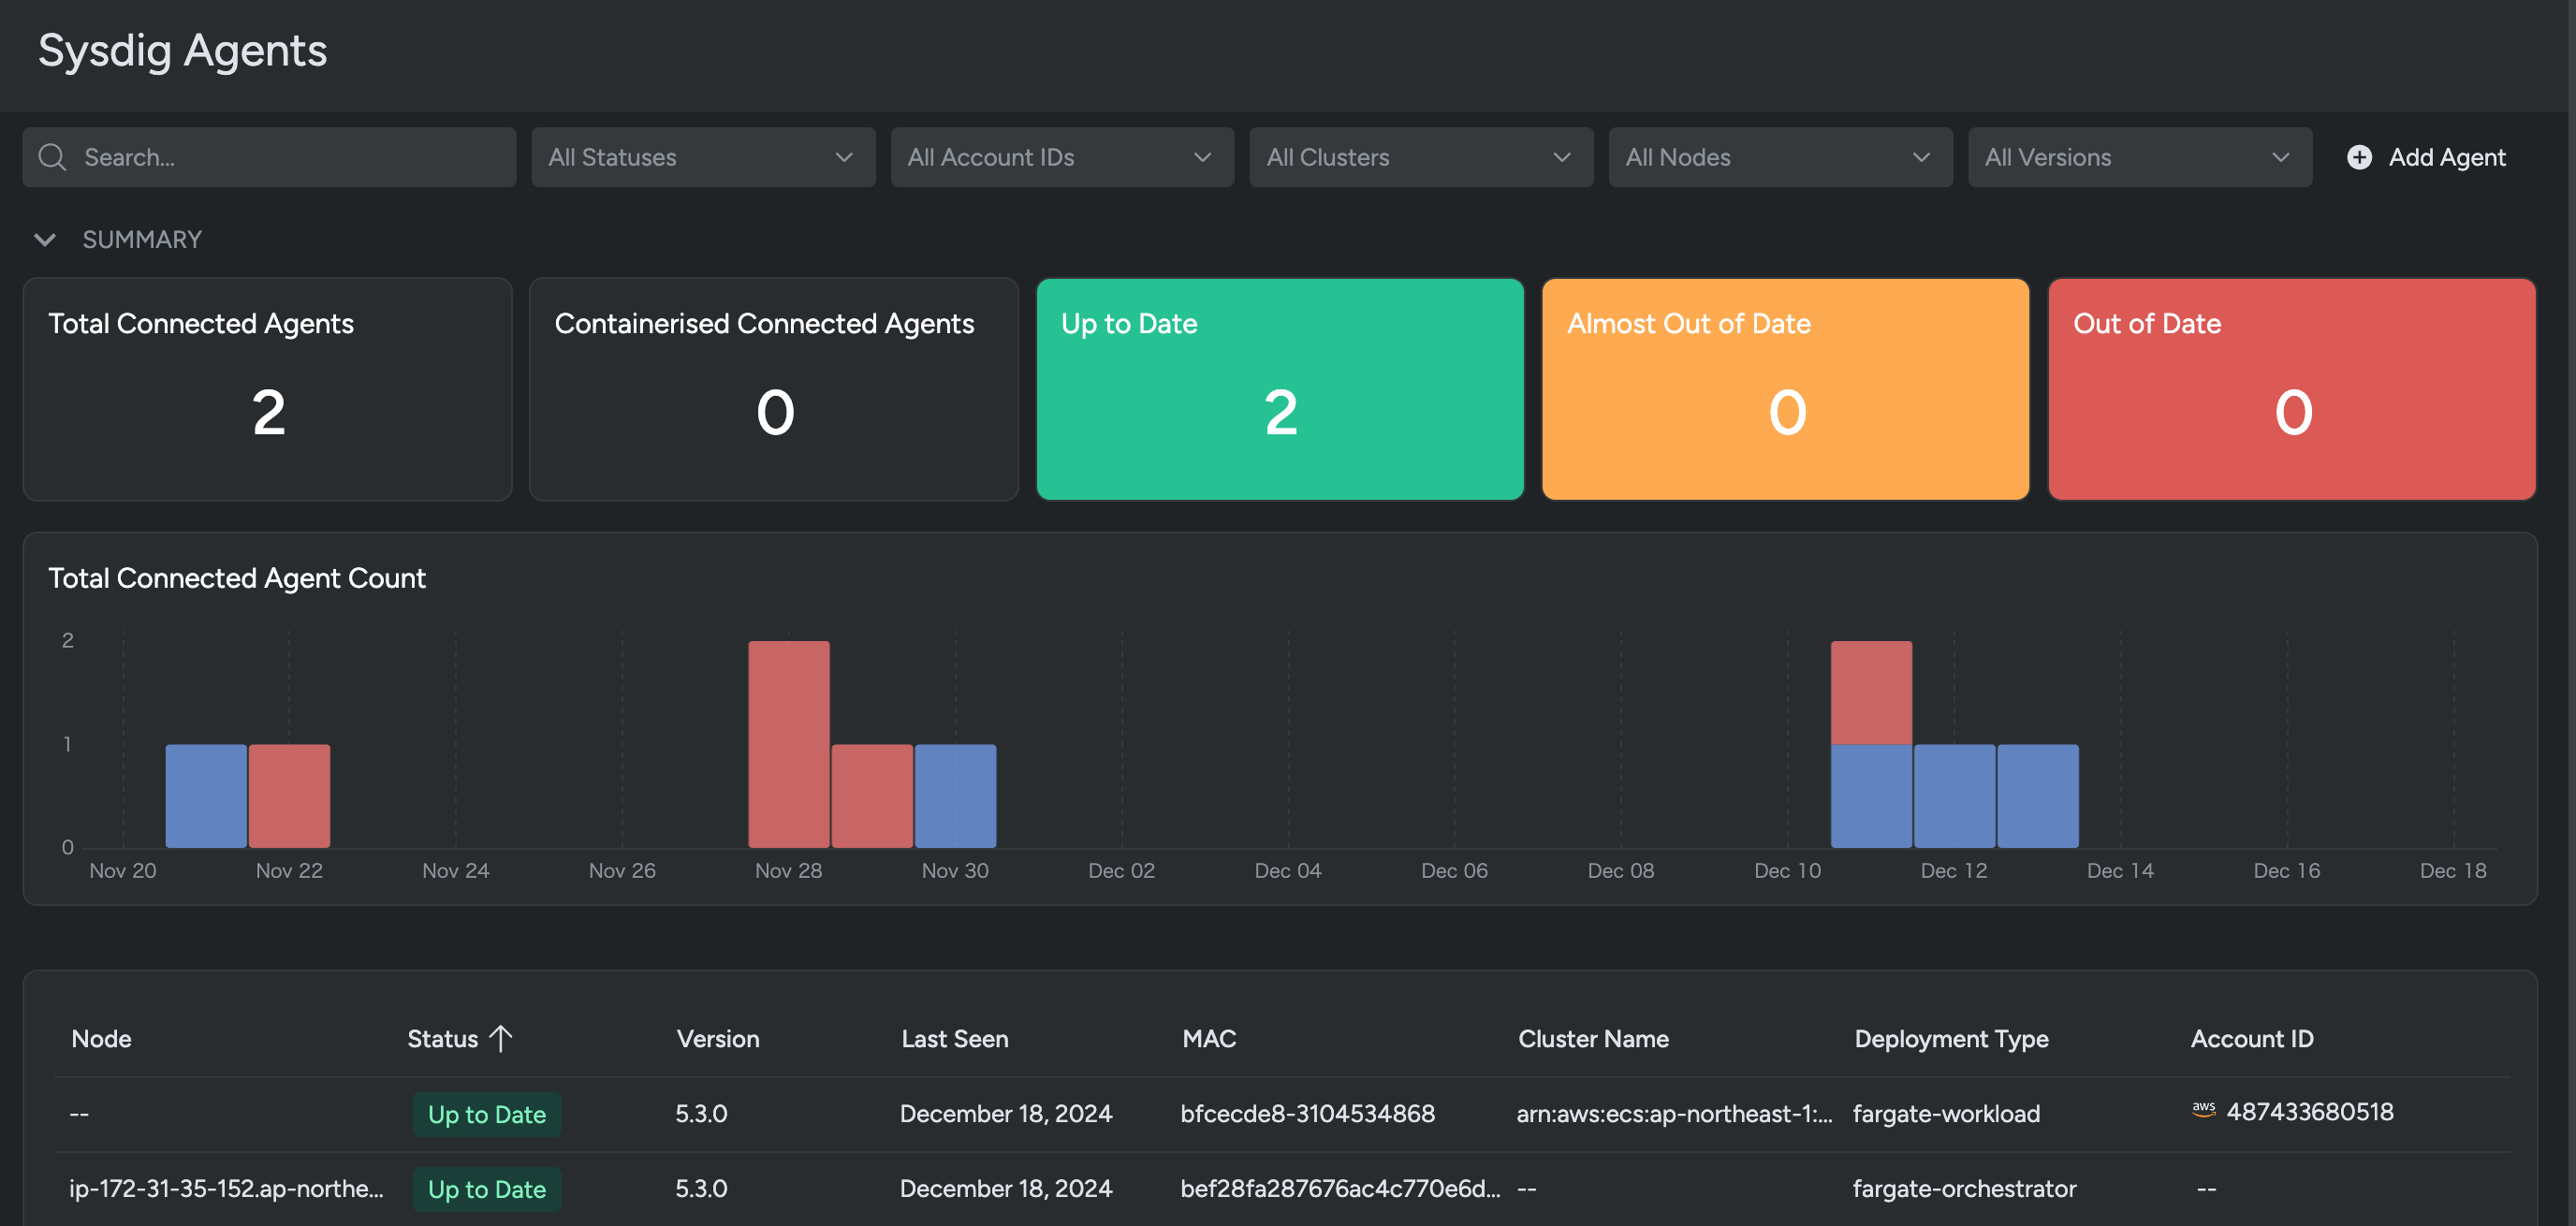
デプロイが完了すると、Serverless AgentをSysdig UI上で確認できます。
Integrations > Data Sources > Sysdig Agents に移動します。
Deployment Type が fargate のSysdig Agentが接続されていることを確認します。
脅威検知テスト
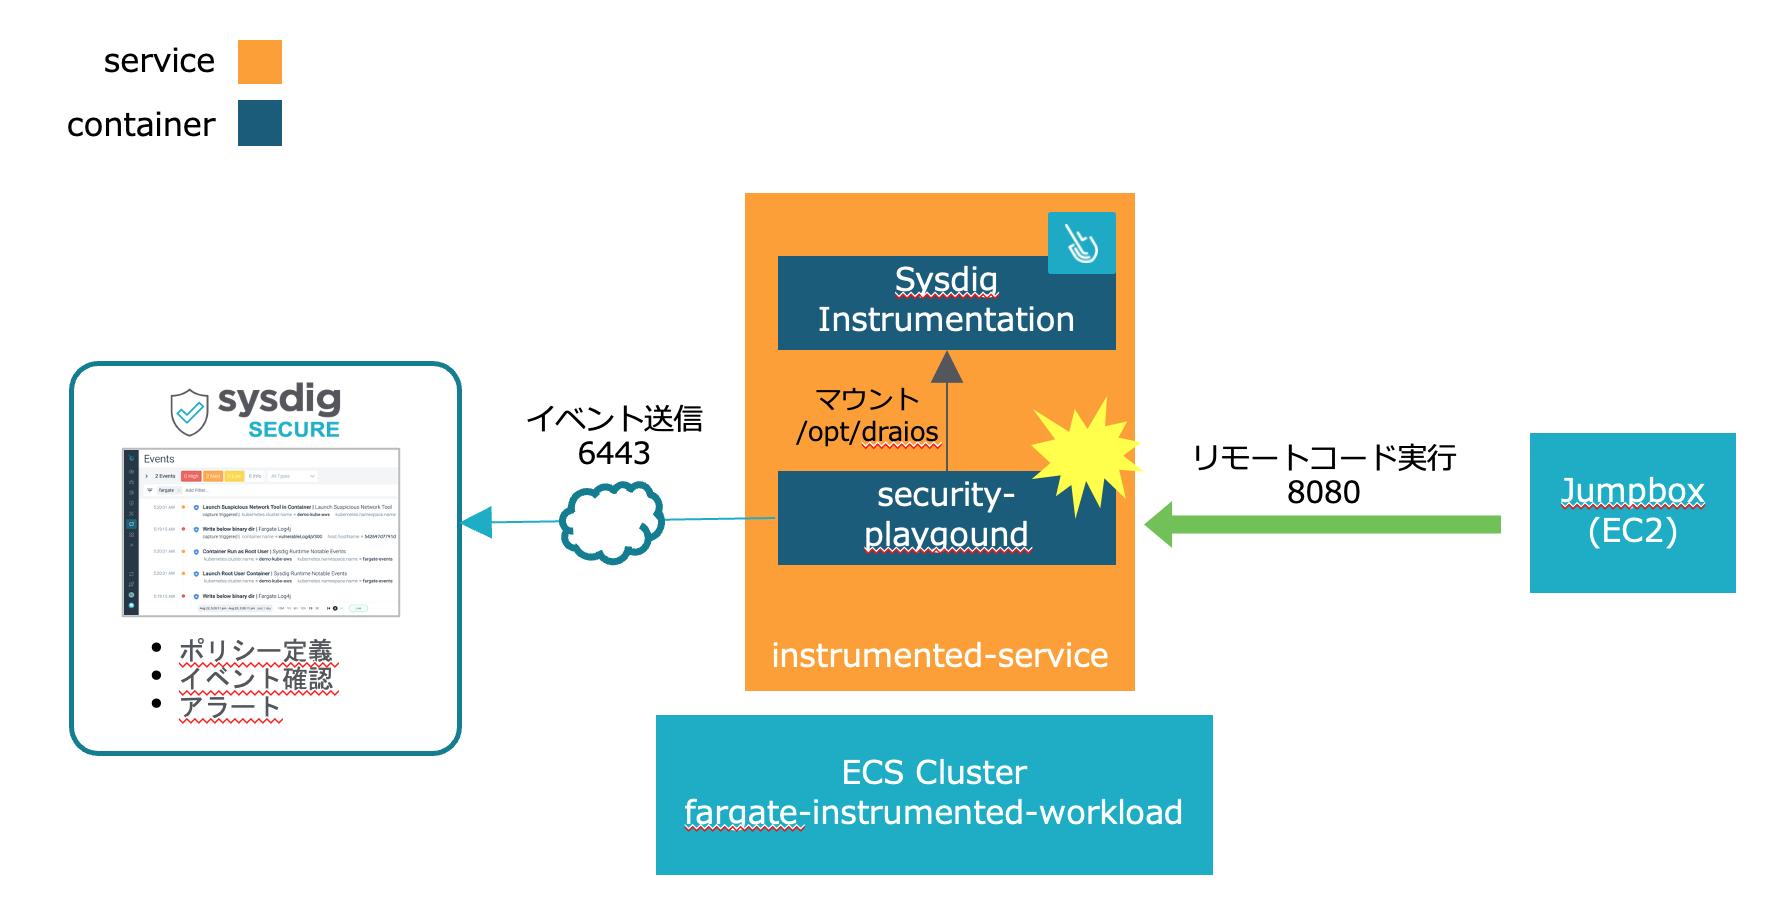
脅威検知では、以下のような経路でSysdig UIに検知イベント結果が表示されます。
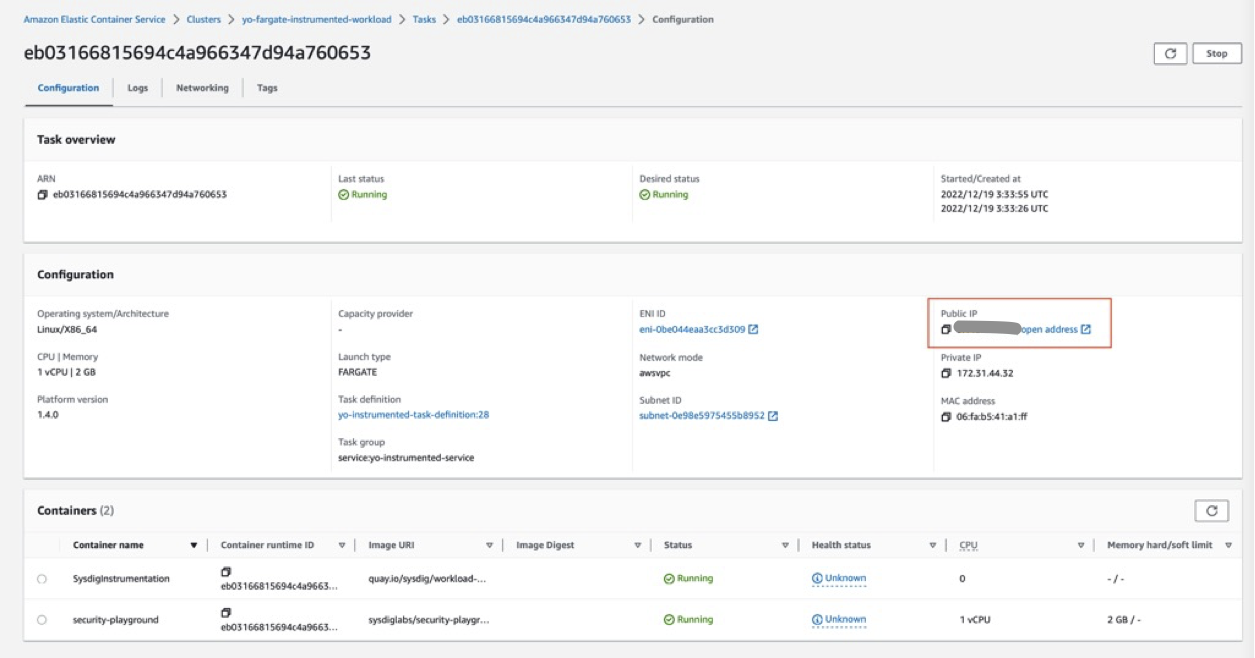
下記curlコマンドの引数にFargate workload taskのPublicもしくはPrivate IPアドレスを指定します。
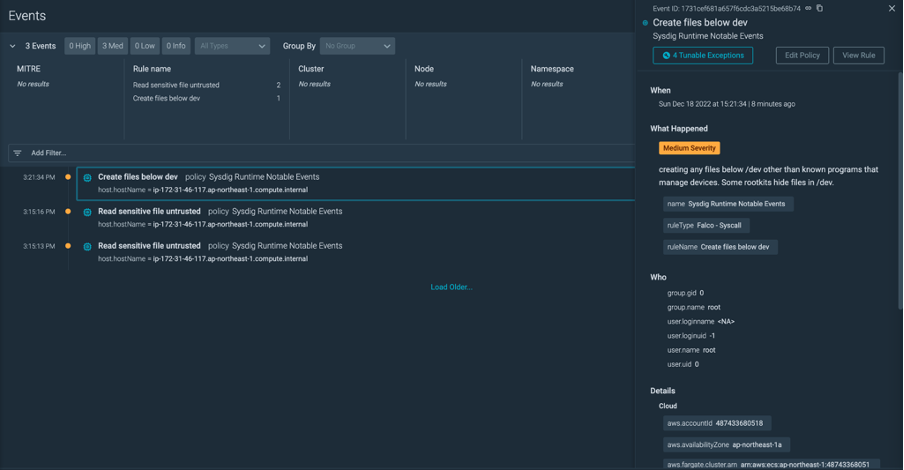
攻撃例1:shadowファイルの読み込み
curl <Workload_Task_IP>:8080/etc/shadow
攻撃例2:/dev配下へのファイル書き込み
curl -X POST <Workload_Task_IP>:8080/exec -d 'command=touch /dev/bbb'
Sysdig UIにログインし、Eventsに検知イベントが表示されていることを確認します。
まとめ
Security Playgroundイメージを使用することで、Sysdig Serverless Agentで保護しているAWS Fargateに対する脅威検知テストを、簡単に実施できることが確認できました。
