UITextViewでは、dataDetectorTypesを指定することにより、カレンダーイベント、住所、飛行機の番号などを認識し、タップアクションとコンテキストメニューが提供できるようになります。
しかし、テキストをメインに扱うアプリケーションでは、#(ハッシュタグ)や@(メンション)などの特殊なトークンに対して自分達の定義したコンテキストメニューを実現したい場合があります。
この記事では、そういった場合にどう実装するかを解説します。
※ハッシュタグを利用した実装を行いますが、その解説はこの記事では行いません。
主なオブジェクト
- UIContextMenuConfiguration
- UIContextMenuInteraction
- UIContextMenuInteractionDelegate
- UITargetedPreview
- UIPreviewParameters
- UIPreviewTarget
- UITextViewとTextKit
ステップ0: 目的
この記事を通して**「システムの認識に加え、ハッシュタグを認識するUITextView」**を実装していきます。
ステップ1: UITextViewの配置
ViewControllerでUITextViewのインスタンス化とviewへの追加を行います。設定したdataDetectorTypesが有効になるのはisEditableがfalseかつ、isSelectableがtrueの時のみです。
このプロパティを使って、テキストビューで自動的にURLに変換するデータの種類(電話番号,httpリンクなど)を指定することができます。(中略)なお、テキストビューのisEditableプロパティがtrueに設定されている場合は、データの検出は行われません。
(1Apple Developer Documentation, dataDetectorTypes)
今回実装するカスタムコンテキストメニューはこの限りではありませんが、システムの認識機能を利用したい場合はこのように設定します。
let textView: UITextView = {
    let view = UITextView()
    view.isScrollEnabled = false
    view.isEditable = false
    view.isSelectable = true
    view.dataDetectorTypes = .all
    view.font = .preferredFont(forTextStyle: .body)
    view.backgroundColor = .clear
    return view
}()

override func viewDidLoad() {
    super.viewDidLoad()

    view.addSubview(textView)
    textView.translatesAutoresizingMaskIntoConstraints = false

    NSLayoutConstraint.activate([
        textView.leadingAnchor.constraint(equalTo: view.leadingAnchor),
        textView.trailingAnchor.constraint(equalTo: view.trailingAnchor),
        textView.topAnchor.constraint(equalTo: view.topAnchor),
        textView.bottomAnchor.constraint(equalTo: view.bottomAnchor)
    ])

}
ステップ2: ContextMenuInteractionをUITextViewに追加
UIContextMenuInteractionを先ほど作成したUITextViewに追加します。
override func viewDidLoad() {
    super.viewDidLoad()

    view.addSubview(textView)
    textView.translatesAutoresizingMaskIntoConstraints = false

    NSLayoutConstraint.activate([
        textView.leadingAnchor.constraint(equalTo: view.leadingAnchor),
        textView.trailingAnchor.constraint(equalTo: view.trailingAnchor),
        textView.topAnchor.constraint(equalTo: view.safeAreaLayoutGuide.topAnchor),
        textView.bottomAnchor.constraint(equalTo: view.bottomAnchor)
    ])

    let hashTagContextMenuInteraction = UIContextMenuInteraction(delegate: self)
    textView.addInteraction(hashTagContextMenuInteraction)

}
初期化の際に必須パラメーターとしてdelegateを求められるのでここではselfと設定し、ViewControllerを拡張しておきます。
extension ViewController: UIContextMenuInteractionDelegate {

}
ステップ3: configurationForMenuAtLocationを実装する
ステップ2の状態ではプロトコルに必要な実装をまだしていないのでType 'ViewController' does not conform to protocol 'UIContextMenuInteractionDelegate'というエラーが出ます。これを解決し、必要なオブジェクトを返していきます。
ユーザーがインタラクションした場所(CGPoint)に応じて、カスタムのインタラクションを実行するべきかスルーするべきかを決めなければなりません。そのため別途定義したhastagRange(closestTo: location)メソッドを利用して、UITextViewの位置に応じて認識ずみのハッシュタグを取得して返しています。取得できなければnilで返し、ContextMenuを出しません。
コンテキストメニューのメニュー項目とプレビュー(プレビューという用語が複数登場してややこしいですが、ここでは先の内容を覗き見する機能としてのプレビュー)を実装する必要があります。今回は、コンテキストメニューのアクション自体はダミーで、プレビューとしてSFSafariViewControllerでグーグル検索を行った結果を表示することにしました。
このメソッド以外のUIContextMenuInteractionDelegateでは引数にUIContextMenuInteractionかUIContextMenuConfigurationしか持たないものが多く、自分で好きに生成できるのが後者のみのため、メタ情報の受け渡しを円滑に行うためにはUIContextMenuConfigurationをサブクラスして扱うのが便利です。
ここでは以下のようにサブクラスを行い、textLineRectsとsymbolRangeというプロパティを持っています。
class CustomContextMenuConfiguration: UIContextMenuConfiguration {

    var textLineRects: [CGRect]? = nil

    var symbolRange: NSRange? = nil

}
上記の事項を考慮して実装を行うと以下のような実装になります。
// locationはreceiver's coordinateで返される。
func contextMenuInteraction(_ interaction: UIContextMenuInteraction, configurationForMenuAtLocation location: CGPoint) -> UIContextMenuConfiguration? {

    guard let nsRange = hashtagRange(closestTo: location) else {
        print("ContextMenu is nil.")
        return nil
    }

    let shareAction = UIAction(title: "Share", image: UIImage(systemName: "square.and.arrow.up")!) { _ in }
    let deleteAction = UIAction(title: "Delete", image: UIImage(systemName: "trash")!, attributes: .destructive) { _ in }

    var rects = [CGRect]()

    textView.layoutManager.enumerateEnclosingRects(forGlyphRange: nsRange, withinSelectedGlyphRange: NSRange(location: NSNotFound, length: 0), in: textView.textContainer) { (rect, stop) in
        rects.append(rect)
    }

    print("Glyph rects: \(rects)")

    let keyword = (textView.text as NSString).substring(with: nsRange).dropFirst()
    let urlString = "https://www.google.com/search?q=\(keyword)".addingPercentEncoding(withAllowedCharacters: .urlQueryAllowed)!
    let configuration = CustomContextMenuConfiguration(identifier: nil, previewProvider: {
        let safariVC = SFSafariViewController(url: URL(string: urlString)!)
        return safariVC
    }) { _ in
        return UIMenu(options: .displayInline, children: [shareAction, deleteAction])
    }
    configuration.textLineRects = rects
    configuration.symbolRange = nsRange

    return configuration

}
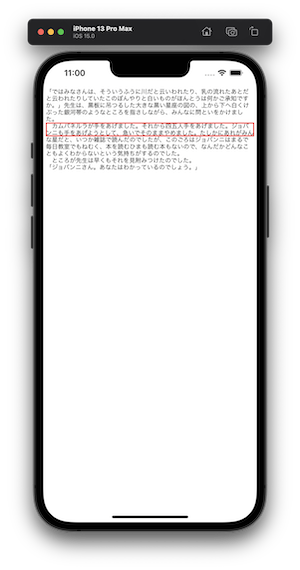
enumerateEnclosingRects(forGlyphRange:withinSelectedGlyphRange: in:using:)は、指定した範囲のグリフを取り囲むように短形領域を返すメソッドです。
このメソッドの挙動に関しては、他のメソッドも見た方が良いので簡単に解説します。
TextKitの短形領域を返す系メソッド紹介
折りたたみ表記にしましたので、必要な方は開いてご確認ください。
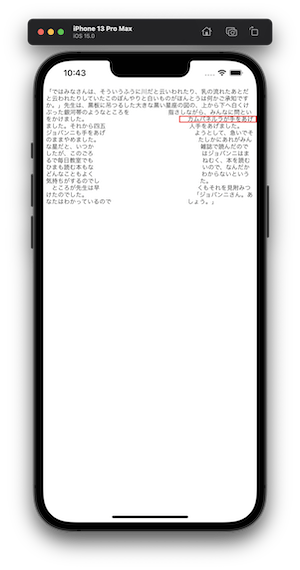
lineFragmentRect(forGlyphAt:effectiveRange:)
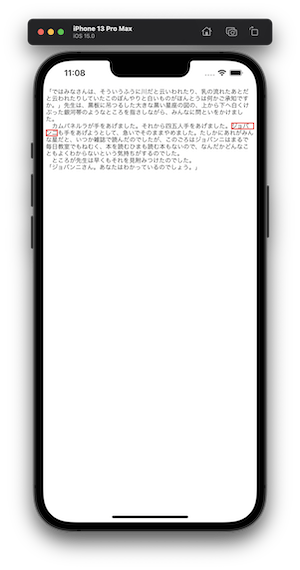
中心に円形のexclusionを追加した際の結果です。円の右側のみボーダーが付いている事が分かります。
addCircleExclusion()
addLineFragmentBorder(of: "カムパネルラ")
exclusionがない場合は端までの短形領域を返します。
addLineFragmentBorder(of: "カムパネルラ")
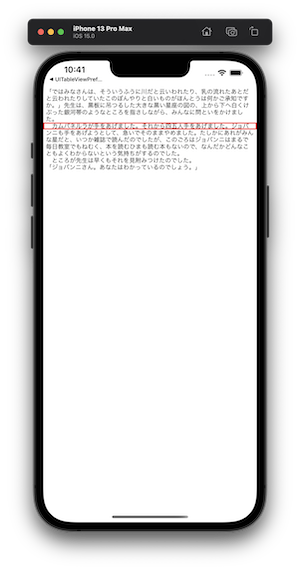
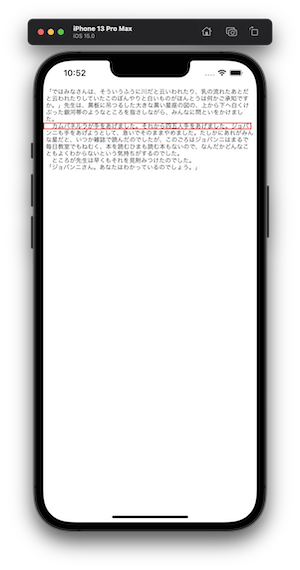
lineFragmentUsedRect(forGlyphAt:effectiveRange:)
boundingRect(with:options:attributes:context:)
enumerateEnclosingRects(forGlyphRange:withinSelectedGlyphRange: in:using:)
ステップ4: プレビューの実装を行う
ここまでで実装したUIContextMenuInteractionDelegateのメソッドは1つだけですが、プレビューに必要なcontextMenuInteraction(_:previewForHighlightingMenuWithConfiguration:)とcontextMenuInteraction(_:previewForDismissingMenuWithConfiguration:)
という2つのメソッドを実装していきます。
UIKitでは、上記の2つのデリゲートメソッドを使うことでコンテキストメニューのハイライト時/消える時にそれぞれ異なるプレビューを返せるようになっていますが、この記事では簡単にするために両方で同じ実装を返します。
プレビューの実装で利用するオブジェクトは3つあり
- UIPreviewTarget
- UITargetedPreview
- UIPreviewParameters
です。何度もPreviewという単語が行き交うためややこしいですが、UIPreviewTargetは「プレビューの表示元viewとプレビューアニメーション中心位置」を指定するためのものです。ここではUIPreviewTarget(container: textView, center: animationStartingPointCenter)のようにtextViewを渡します。
UIPreviewParametersはプレビューのパラメーターを指定するオブジェクトで、実はUITextViewの任意のテキストでコンテキストメニューを提供する実装のキモになります。
このオブジェクトのイニシャライザに先ほどCustomContextMenuConfigurationに詰めたtextLineRectsを取り出して渡すと、UIKitが指定領域に対して上下左右にシステムと同じパディングとcornerRadiusを与えたクリッピングを行なってくれます。visiblePathというUIBezierPathを自分で指定するためのプロパティもあるのですが、パディングや角丸の考慮などを自分で調整しないといけないので大変面倒です。特筆して理由がない場合は、init(textLineRects:)の方の利用をおすすめします。
このUIPreviewParametersが期待する引数を提供するために、ステップ3ではenumerateEnclosingRects(forGlyphRange:withinSelectedGlyphRange: in:using:)を利用して、指定した範囲の文字列を囲む短形領域の配列を作成してCustomContextMenuConfigurationにセットしていました。
UITargetPreviewオブジェクトは、上記2つとアニメーション用のビューを引数に取るプレビューオブジェクトの本体で、関連デリゲートメソッドではこのオブジェクトを返すのが目的です。
上記の内容を考慮し、以下のように実装しました。
func contextMenuInteraction(_ interaction: UIContextMenuInteraction, previewForHighlightingMenuWithConfiguration configuration: UIContextMenuConfiguration) -> UITargetedPreview? {
    return makeTargetedPreview(for: configuration)
}

func contextMenuInteraction(_ interaction: UIContextMenuInteraction, previewForDismissingMenuWithConfiguration configuration: UIContextMenuConfiguration) -> UITargetedPreview? {
    return makeTargetedPreview(for: configuration)
}

private func makeTargetedPreview(for configuration: UIContextMenuConfiguration) -> UITargetedPreview? {

    guard
        let customConfiguration = configuration as? CustomContextMenuConfiguration,
        let textLineRects = customConfiguration.textLineRects,
        let symbolRange = customConfiguration.symbolRange
    else {
        return nil
    }

    let topAdjustment = textView.textContainerInset.top // textLineRects doesn't consider about container inset, so we have to care them by ourself.
    let adjustedRects = textLineRects.map({
        CGRect(x: $0.minX, y: $0.minY + topAdjustment, width: $0.width, height: $0.height)
    })


    var minX: CGFloat = .greatestFiniteMagnitude, maxX: CGFloat = .leastNonzeroMagnitude, minY: CGFloat = .greatestFiniteMagnitude, maxY: CGFloat = .leastNonzeroMagnitude
    for rect in adjustedRects {
        minX = min(rect.minX, minX)
        maxX = max(rect.maxX, maxX)
        minY = min(rect.minY, minY)
        maxY = max(rect.maxY, maxY)
    }

    print("adjustment rects: \(adjustedRects)")

    let animationStartingPointCenter = CGPoint(x: (minX + maxX) / 2 - textView.frame.minX, y: (minY + maxY) / 2)

    let textViewCopy = UITextView(frame: textView.frame)
    textViewCopy.isUserInteractionEnabled = false

    // .clear以外の場合は、言語化するのが難しいですが、違和感のあるアニメーションになります。
    textViewCopy.backgroundColor = .clear

    let attributedString = NSMutableAttributedString(attributedString: textView.attributedText)
    attributedString.setAttributes([.foregroundColor: UIColor.clear, .font: UIFont.preferredFont(forTextStyle: .body)], range: NSRange(location: 0, length: symbolRange.location))
    attributedString.setAttributes([.foregroundColor: UIColor.clear, .font: UIFont.preferredFont(forTextStyle: .body)], range: NSRange(location: symbolRange.upperBound, length: attributedString.length - symbolRange.upperBound))
    textViewCopy.attributedText = attributedString


    let parameters = UIPreviewParameters(textLineRects: adjustedRects as [NSValue])
    let target = UIPreviewTarget(container: textView, center: animationStartingPointCenter)

    return UITargetedPreview(view: textViewCopy, parameters: parameters, target: target)
}
apple developer forumのhttps://developer.apple.com/forums/thread/650338のポストでは、Appleのエンジニアが「UITextViewのコピーを取るとやや重たそうなので、resizableSnapshotの利用を考慮してみて」とコメントしていますが、複数行にまたがるテキストの場合にlet snapshotView = textView.resizableSnapshot(...)でスナップショットを取ってinit(textLineRects:)でクリッピングを行わせると、上下左右に位置する対象範囲外のテキストがアニメーションビューに映り込んでしまいます。
どうにもこの挙動を回避するのが難しいので、それほどパフォーマンス上の問題が深刻でない場合はUITextViewのコピーを取ってアニメーション用のビューとして渡す方法を採用するのが良いのではと筆者は考えています。
ステップ5: 実行と検証
実行の前に認識用のコードをviewDidLoad()に追加しておきます。
textView.text = source
highlightHashtag()
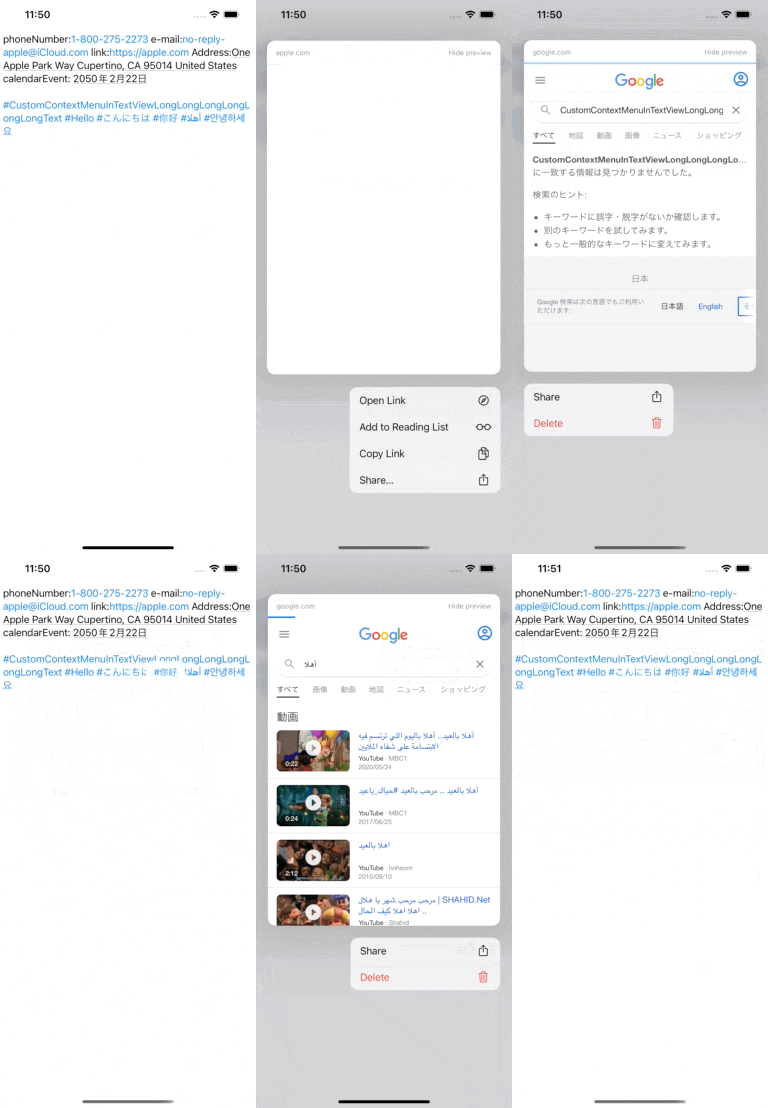
検証用の文章は、システム認識用のテキストとしてAppleの事務所電話番号、no-replyのメールアドレス、公式サイト、Appleパークの住所を用意し、カスタム認識用のテキストとして、2行にまたがる長いハッシュタグ、英語・日本語・中国語、アラビア語・韓国語のハッシュタグを用意しました。
phoneNumber:1-800-275-2273 e-mail:no-reply-apple@iCloud.com link:https://apple.com Address:One Apple Park Way Cupertino, CA 95014 United States calendarEvent: 2050年2月22日

# CustomContextMenuInTextViewLongLongLongLongLongLongText #Hello #こんにちは #你好 #أهلا #안녕하세요
認識結果のそれぞれをコンテキストメニューで開いていきます。
上記のgif画像のように、無事システム認識とカスタム認識の両方を行うことができました。
おまけ: 応用の可能性
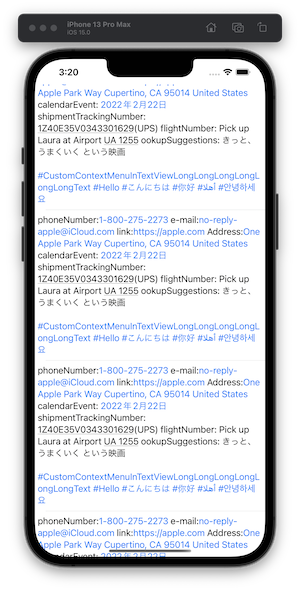
例えばSNS系のアプリケーションを作る場合なら、この記事のように任意のトークンに対してNSRegularExpressionを利用してメタ属性を付与し、UITableViewCell上のUITextViewでもタップやコンテキストメニューを提供できます。(ハッシュタグからコンテキストメニューを開いて、そのタグを検索/共有など)
総括
この記事ではUITextViewの任意のテキストに対してカスタムContextMenuを提供する方法について解説しました。
- UIContextMenuInteractionを対象のビューに追加した。
- UIContextMenuDelegateの
configurationForMenuAtLocationで、渡されるCGPointの位置にあるハッシュタグのNSRangeが取得できたら設定オブジェクトを返し、そうでない場合はnilを返した。 - UIPreviewTargetでプレビューを実行させたいビューと開始位置を指定し、UIPreviewParametersでクリッピングに必要なパラメーターを渡し、それらからUITargetedPreviewを作成してデリゲートの返り値とした。
これら一連の実装を行うことで、ハッシュタグに対してコンテキストメニューを提供できるUITextViewを実現することができました。
この記事では触れませんでしたが、dataDetectorTypesによって認識されるテキストは、コンテキストメニューだけではなくタップでアクションを実行することができます。この挙動もUITapGestureRecognizerなどを利用して再現することも可能なのですが、その解説はまた別の機会とします。
ソースコード
今回利用したソースコードはこちらです。
https://github.com/yosshi4486/CustomContextMenuInTextView/blob/main/CustomContextMenuInTextView/ViewController.swift
お手元で実行して動作を試してみてください。
-
Apple inc., dataDetectorTypes, Discussion, https://developer.apple.com/documentation/uikit/uitextview/1618607-datadetectortypes, viewed: 2021/11/08 ↩
