#初めに
世の中、よくKubernates(以下k8s)と聞くようになったのですが、解説読んでも雰囲気わからず、動かしてみるのが良いのでは、となりました。普通に試すと複数台のLinux PCか、何らかのクラウド環境が必要になります。家にあるのはラズパイ複数台、調べるとインストール記事は出ているのですが、k8sを使うところまでがありません。k8sの速習の記事があり挑戦するも、x86 PC向けであったため、コンテナを作りなおす必要がありました。
本記事では、手早くk8sを体験するために、raspberry piのubuntuを使用して、最小構成でhellow worldアプリを動作させることを目的としています。ちなみに筆者はk8sを仕事で使用したことありません。
#どんな人向けか
- k8sがどんなものか一度動作させてみたい。でもラズパイくらいしかない。
- ラズパイ4を買い足しラズパイ3とかと連動させたい。
#参考ページ
大体以下の内容を組み合わせたものです。
Raspberry PiでおうちKubernetes構築【論理編】
クラスター内のアプリケーションにアクセスするために外部IPアドレスを公開する
#使用機材・環境
- raspberry pi 4 2GB RAM以上1台(master用)
- raspberry pi 3 or 4 1台以上(worker用)
- 有線LANで接続
- 使用OS 双方とも ubuntu 20.04 arm64版
#実行手順
今回はraspberry pi向けのubuntu 20.04 64bit版を使用します。初めての方は、こちらからイメージをダウンロードしてsdカードに焼いてください。初回ログインはubuntuでパスワードがubuntuになります。最低2台をセットアップするのですが、master、worker共にk8sのインストールまでは同じ作業となります。
まずはお約束。
$ sudo apt update
$ sudo apt upgrade
swapが無いことがk8sの動作条件なので、freeコマンドで、swapが0であることを確認します。ubuntuインストールしたてであればオフされています。特段やることはありません。
複数マシンのホスト名が違っている必要があるので、変更します。
$ sudo vi /etc/hostname
masterノード rpi-01
workerノード rpi-02 …
と変更していきます。
次にcgroupsの設定をするために、カーネルパラメータを編集します。
$ sudo vi /boot/firmware/cmdline.txt
1行のファイルなので、最後に
cgroup_enable=cpuset cgroup_memory=1 cgroup_enable=memory
と3パラメータ追加します。
net.ifnames=0 dwc_otg.lpm_enable=0 console=serial0,115200 console=tty1 root=LABEL=writable rootfstype=ext4 elevator=deadline rootwait fixrtc
net.ifnames=0 dwc_otg.lpm_enable=0 console=serial0,115200 console=tty1 root=LABEL=writable rootfstype=ext4 elevator=deadline rootwait fixrtc cgroup_enable=cpuset cgroup_memory=1 cgroup_enable=memory
そしてリブートしてください。
$ sudo reboot
ここからはrootで作業をします。
$ sudo su
まずはdockerをインストールします。大体docker-ceをインストールしているのですが、debianなので、debianで管理しているdocker.ioを入れます。
# apt install docker.io
dockerのデーモンを起動します。
# systemctl start docker
# systemctl enable docker
# systemctl status docker
最後のsystemctl status dockerでactiveが確認できれば、起動OKです。
次にk8sのインストールをします。
# curl -s https://packages.cloud.google.com/apt/doc/apt-key.gpg | apt-key add -
# echo "deb http://apt.kubernetes.io/ kubernetes-xenial main" | tee /etc/apt/sources.list.d/kube.list
# apt update
# apt install kubelet kubeadm kubectl
これで主要モジュールのインストールができました。
この後の作業は断りが無い限り、masterノードの作業になります。
まず、イニシャライズします。
# kubeadm init --pod-network-cidr=10.244.0.0/16
以下のような実行結果になります。
ubuntu@ubuntu:~$ sudo kubeadm init --pod-network-cidr=10.244.0.0/16
W0619 02:47:20.555563    9650 configset.go:202] WARNING: kubeadm cannot validate component configs for API groups [kubelet.config.k8s.io kubeproxy.config.k8s.io]
[init] Using Kubernetes version: v1.18.4
   :
   :
[addons] Applied essential addon: CoreDNS
[addons] Applied essential addon: kube-proxy

Your Kubernetes control-plane has initialized successfully!

To start using your cluster, you need to run the following as a regular user:

  mkdir -p $HOME/.kube
  sudo cp -i /etc/kubernetes/admin.conf $HOME/.kube/config
  sudo chown $(id -u):$(id -g) $HOME/.kube/config

You should now deploy a pod network to the cluster.
Run "kubectl apply -f [podnetwork].yaml" with one of the options listed at:
  https://kubernetes.io/docs/concepts/cluster-administration/addons/

Then you can join any number of worker nodes by running the following on each as root:

kubeadm join 192.168.43.17:6443 --token gz7cd8.4wlgon1273f1q4gq \
    --discovery-token-ca-cert-hash sha256:4884d1ca78d3e6fa8cbe2aca1e0d828bbd879e9f9e1acd95b6420f5dc3024dec
一番最後に書かれけているkubeadmから始まる2行をPCのメモ帳などにコピペしてください。workerノードの立ち上げに使用する、大事なコマンドです。
次に.kube/ディレクトリを作成します。現在rootで作業をしているので、/rootの下に作成されます。
# mkdir -p $HOME/.kube
# cp -i /etc/kubernetes/admin.conf $HOME/.kube/config
次にflannelを立ち上げます。
# kubectl apply -f https://raw.githubusercontent.com/coreos/flannel/master/Documentation/kube-flannel.yml
これでmasterノードが立ち上がりました。ノードを確認します。
# kubectl get nodes
NAME     STATUS   ROLES    AGE   VERSION
rpi-01   Ready    master   14h   v1.18.4
ここでworkerノードを立ち上げます。
workerノード側で先ほどコピペしたコマンドをroot権限で実行します。
# kubeadm join 192.168.43.17:6443 --token gz7cd8.4wlgon1273f1q4gq \
    --discovery-token-ca-cert-hash sha256:4884d1ca78d3e6fa8cbe2aca1e0d828bbd879e9f9e1acd95b6420f5dc3024dec
これでworkerの登録ができました。
masterで確認します。
# kubectl get nodes
NAME     STATUS   ROLES    AGE   VERSION
rpi-01   Ready    master   14h   v1.18.4
rpi-02   Ready    <none>   13h   v1.18.4
早すぎるとNotReadyになっていたりしますが、時間を置けばReadyになります。ROLESのnoneは特に問題ないようです。
これでk8sの環境が立ち上がりました。
#Hello worldアプリを動かすまで
ここからは、Kubernetes 速習会にありますHello world環境をお借りしまして、アプリの動作まで持っていこうと思います。まず、今回dockerのコンテナを一つ作るため、docker hubのアカウント(無料)が必要になります。無い方はここで作成してください。
次にgitからHello world環境を持ってきます。
# git clone https://github.com/koudaiii/docker-hello-world.git
# cd docker-hello-world/
この環境はx86のPC向けの環境で、少々年月が経っているため、いくつかのファイルに修正を加えます。ファイル中2か所に<Your docker ID>が出てきますが、ご自分のdocker IDに置き換えてください。
# vi Dockerfile
3c3
< FROM debian:jessie
---
> FROM debian:buster

# vi kubernetes/pod.yaml
11c11
<     - image: koudaiii/hello-world:latest
---
>     - image: <Your docker ID>/hello-world:latest


# vi kubernetes/production.yaml
1c1
< apiVersion: extensions/v1beta1
---
> apiVersion: apps/v1
16a17,20
>   selector:
>     matchLabels:
>       name: docker-hello-world
>       role: web
25c29
<       - image: koudaiii/hello-world:latest
---
>       - image: <Your docker ID>/hello-world:latest
30c34
<             memory: 1G
---
>             memory: 200M
33c37
<             memory: 1G
---
>             memory: 200M
参照元の作者のdocker hubのイメージはx86向けですので、raspberry piでは動作しません。そこで、自分でイメージを作成します。本Hello worldでは、rubyを使っており、build中にbundleが古いとエラーを起こすため、bundleをインストールしてアップデートかけます。
# apt install ruby-bundler
# bundle update --bundler
次に自分のdocker IDでdockerにログインします。
# docker login
buildしてイメージをpushします。<Your docker ID>は自分のdocker IDに置き換えてください。
# docker build -t <Your docker ID>/hello-world .
# docker image push <Your docker ID>/hello-world:latest
これでaarch64イメージのコンテナの準備ができました。
ここからk8sに戻ります。
まずは、docker-hello-worldというnamespaceを生成します。
# kubectl create -f kubernetes/namespace.yaml
# kubectl get namespace
NAME                 STATUS   AGE
default              Active   23h
docker-hello-world   Active   23h
kube-node-lease      Active   23h
kube-public          Active   23h
kube-system          Active   23h
workerで動くpodを生成します。
# kubectl create -f kubernetes/production.yaml --namespace=docker-hello-world
# kubectl get pods -o wide --namespace=docker-hello-world
NAME                                  READY   STATUS    RESTARTS   AGE     IP            NODE     NOMINATED NODE   READINESS GATES
docker-hello-world-5bc8b958d7-4vsmv   0/1     Pending   0          7h32m   <none>        <none>   <none>           <none>
docker-hello-world-5bc8b958d7-4xzlw   1/1     Running   1          7h32m   10.244.1.15   rpi-02   <none>           <none>
docker-hello-world-5bc8b958d7-7c2lm   0/1     Pending   0          7h32m   <none>        <none>   <none>           <none>
docker-hello-world-5bc8b958d7-bgz75   0/1     Pending   0          7h32m   <none>        <none>   <none>           <none>
docker-hello-world-5bc8b958d7-fh678   1/1     Running   1          7h32m   10.244.1.13   rpi-02   <none>           <none>
docker-hello-world-5bc8b958d7-k77dc   0/1     Pending   0          7h32m   <none>        <none>   <none>           <none>
docker-hello-world-5bc8b958d7-kck4l   0/1     Pending   0          7h32m   <none>        <none>   <none>           <none>
docker-hello-world-5bc8b958d7-ktq8m   1/1     Running   1          7h32m   10.244.1.14   rpi-02   <none>           <none>
docker-hello-world-5bc8b958d7-prxrz   0/1     Pending   0          7h32m   <none>        <none>   <none>           <none>
docker-hello-world-5bc8b958d7-sqfl6   0/1     Pending   0          7h32m   <none>        <none>   <none>           <none>
podができていることが確認できます。NODEの欄でどのworkerで動いているかがわかります。この例ではrpi-02で3つのpodが動作状態になっております。使用メモリサイズを変更することでRunningの数量が変わります。
さて、podが動いたので、何かしらできるかというと、まだで、次にserviceを立てないと外部から確認できません。きちっとhello-worldには準備されていました。
# kubectl apply -f kubernetes/docker-hello-world-svc.yaml --namespace=docker-hello-world
状態を確認してみます。
# kubectl get deployments docker-hello-world --namespace=docker-hello-world
NAME                 READY   UP-TO-DATE   AVAILABLE   AGE
docker-hello-world   3/10    10           2           8h

# kubectl describe replicasets docker-hello-world --namespace=docker-hello-world
Name:           docker-hello-world-5bc8b958d7
Namespace:      docker-hello-world
Selector:       name=docker-hello-world,pod-template-hash=5bc8b958d7,role=web
Labels:         name=docker-hello-world
                pod-template-hash=5bc8b958d7
                role=web
Annotations:    deployment.kubernetes.io/desired-replicas: 10
                deployment.kubernetes.io/max-replicas: 11
                deployment.kubernetes.io/revision: 1
Controlled By:  Deployment/docker-hello-world
Replicas:       10 current / 10 desired
Pods Status:    3 Running / 7 Waiting / 0 Succeeded / 0 Failed
Pod Template:
  Labels:  name=docker-hello-world
           pod-template-hash=5bc8b958d7
           role=web
  Containers:
   docker-hello-world:
    Image:      XXXXXXXXXXXXXXX/hello-world:latest
    Port:       8080/TCP
    Host Port:  0/TCP
    Limits:
      cpu:     2
      memory:  200M
    Requests:
      cpu:     1
      memory:  200M
    Environment:
      MESSAGE:  Hello Wantedly
    Mounts:     <none>
  Volumes:      <none>
Events:
  Type    Reason            Age    From                   Message
  ----    ------            ----   ----                   -------
  Normal  SuccessfulCreate  2m58s  replicaset-controller  Created pod: docker-hello-world-5bc8b958d7-ktq8m
  Normal  SuccessfulCreate  2m58s  replicaset-controller  Created pod: docker-hello-world-5bc8b958d7-4xzlw
  Normal  SuccessfulCreate  2m58s  replicaset-controller  Created pod: docker-hello-world-5bc8b958d7-fh678
  Normal  SuccessfulCreate  2m58s  replicaset-controller  Created pod: docker-hello-world-5bc8b958d7-4vsmv
  Normal  SuccessfulCreate  2m58s  replicaset-controller  Created pod: docker-hello-world-5bc8b958d7-kck4l
  Normal  SuccessfulCreate  2m58s  replicaset-controller  Created pod: docker-hello-world-5bc8b958d7-bgz75
  Normal  SuccessfulCreate  2m58s  replicaset-controller  Created pod: docker-hello-world-5bc8b958d7-sqfl6
  Normal  SuccessfulCreate  2m58s  replicaset-controller  Created pod: docker-hello-world-5bc8b958d7-k77dc
  Normal  SuccessfulCreate  2m58s  replicaset-controller  Created pod: docker-hello-world-5bc8b958d7-7c2lm
  Normal  SuccessfulCreate  2m58s  replicaset-controller  (combined from similar events): Created pod: docker-hello-world-5bc8b958d7-prxrz
my-serviceというサービスオブジェクトを作成します。
# kubectl expose deployment docker-hello-world --type=LoadBalancer --name=my-service --namespace=docker-hello-world
# kubectl get services my-service --namespace=docker-hello-world
NAME         TYPE           CLUSTER-IP       EXTERNAL-IP   PORT(S)          AGE
my-service   LoadBalancer   10.107.231.225   <pending>     8080:31199/TCP   8h
これでサービスが立ち上がり、外部との通信ができるようになります。
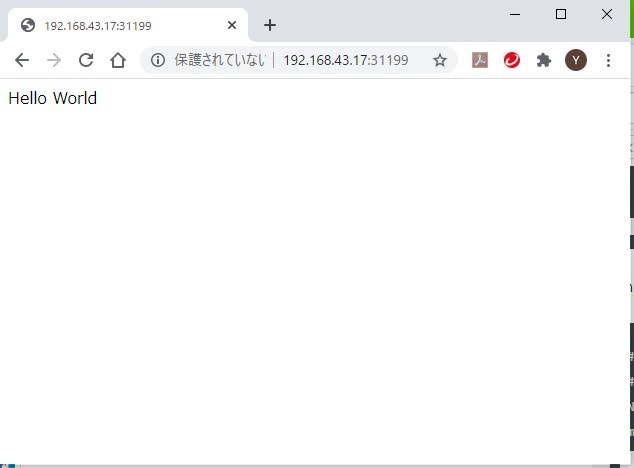
EXTERNAL-IPがpendingになっていますが、masterノードのIPアドレスになっています。PORTSの8080でない方、用例だと31199がアクセスポートです。作業PCのブラウザから:でアクセスすると下のように「Hellow World」が表示されれば、動作OKです。
以上、やっと動いてこれだけか、と思うかもしれませんが、複雑な機構を使って動いていることが面白いので、興味ある方は試してみてください。
