概要
- ある日、とあるイベントで New Relic のデモを見た時に衝撃が走った。
- そう。あ、これめっちゃ便利なやつだと。笑
- ということで、初心者ながら New Relic One を terraform から触ってみるという強行に走ってみようと思います。
New Relic One を Terraform から触ってみる
- New Relic を使うにあたり個人アカウントで使用してみたのだが、なんということだろう。無料枠でも十分検証できそうです。
- さて、ではアカウント作成をし早速試していきます。
- New Relic One の Terraform-provider は下記となります。
- これを使用することで、アラートやダッシュボードの作成などを terraform で管理することができます。
- まずは、Providerの設定、などをしていきます。
providers.tf
terraform {
  required_providers {
    newrelic = {
      source = "newrelic/newrelic"
      version = "3.9.0"
    }
  }
  required_version = "1.1.6"
}

provider "newrelic" {
  account_id = "12345678"
  api_key = "NRAK-testtesttets"
  region = "US"
}
- また、tfstate の保存先を下記のように設定しておくと便利です。今回は aws の s3 を選択しました。
backend.tf
terraform {
  backend "s3" {
    bucket = "demo-terraform-newrelic"
    key    = "terraform/dev/infra.tfstate"
    region = "ap-northeast-1"
  }
}

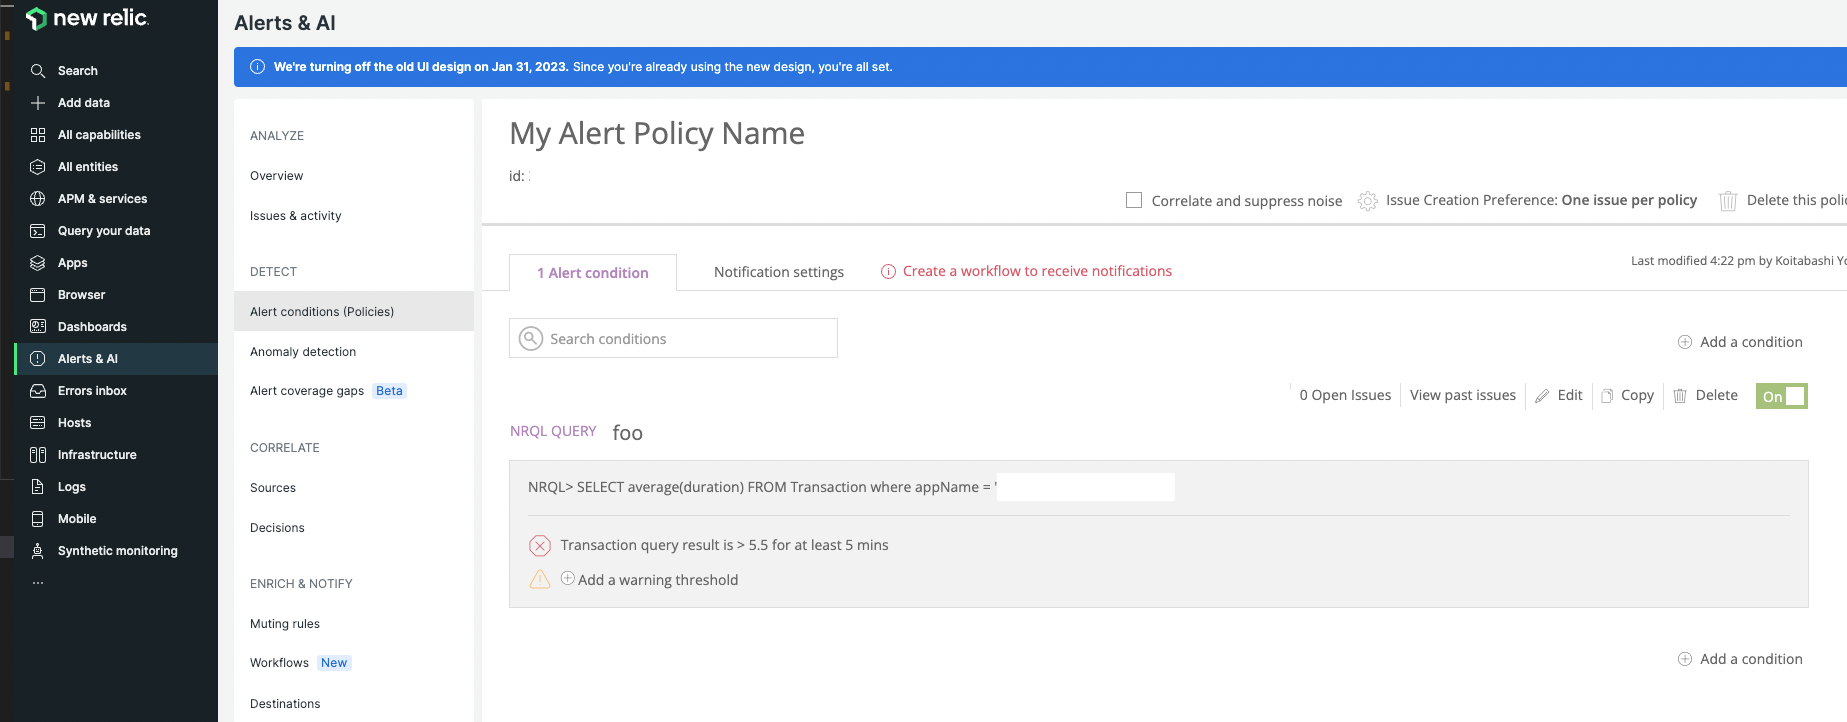
アラート条件を追加
- 次に、アラート条件を追加して、特定のシナリオが発生したときにアラートを表示できるようにします。
- 下記のアラート条件は、あるアプリケーションの平均応答時間が 5 分間で 5.5 のしきい値を超えるとトリガーされるようになります。
newrelic_entity.tf
data "newrelic_entity" "app_name" {
  name = "test"
  type = "Host"
}

resource "newrelic_alert_policy" "alert_policy_name" {
  name = "My Alert Policy Name"
}

# NRQL alert condition
resource "newrelic_nrql_alert_condition" "foo" {
  policy_id                    = newrelic_alert_policy.alert_policy_name.id
  type                         = "static"
  name                         = "foo"
  description                  = "Alert when transactions are taking too long"
  runbook_url                  = "https://www.example.com"
  enabled                      = true
  violation_time_limit_seconds = 3600

  nrql {
    query             = "SELECT average(duration) FROM Transaction where appName = '${data.newrelic_entity.app_name.name}'"
    evaluation_offset = 3
  }

  critical {
    operator              = "above"
    threshold             = 5.5
    threshold_duration    = 300
    threshold_occurrences = "ALL"
  }
}
通知チャネルを追加
- 次に、このシナリオが発生した場合のアラートの通知チャネルを作成していきます。
alert_channels.tf
resource "newrelic_alert_channel" "alert_notification_email" {
  name = "username@example.com"
  type = "email"

  config {
    recipients              = "username@example.com"
    include_json_attachment = "1"
  }
}

resource "newrelic_alert_policy_channel" "alert_policy_email" {
  policy_id  = newrelic_alert_policy.alert_policy_name.id
  channel_ids = [
    newrelic_alert_channel.alert_notification_email.id
  ]
}
作成した資源を適用していく。
- terraform planで結果を確認し資源を当てていきましょう。
> terraform apply

Terraform used the selected providers to generate the following execution plan. Resource actions are indicated with the following symbols:
  + create

Terraform will perform the following actions:

  # module.new-relic-modules.newrelic_alert_channel.alert_notification_email will be created
  + resource "newrelic_alert_channel" "alert_notification_email" {
      + account_id = (known after apply)
      + id         = (known after apply)
      + name       = "username@example.com"
      + type       = "email"

      + config {
          + include_json_attachment = "1"
          + recipients              = "username@example.com"
        }
    }

  # module.new-relic-modules.newrelic_alert_policy.alert_policy_name will be created
  + resource "newrelic_alert_policy" "alert_policy_name" {
      + account_id          = (known after apply)
      + id                  = (known after apply)
      + incident_preference = "PER_POLICY"
      + name                = "My Alert Policy Name"
    }

  # module.new-relic-modules.newrelic_alert_policy_channel.alert_policy_email will be created
  + resource "newrelic_alert_policy_channel" "alert_policy_email" {
      + account_id  = (known after apply)
      + channel_ids = (known after apply)
      + id          = (known after apply)
      + policy_id   = (known after apply)
    }

  # module.new-relic-modules.newrelic_nrql_alert_condition.foo will be created
  + resource "newrelic_nrql_alert_condition" "foo" {
      + account_id                   = (known after apply)
      + aggregation_window           = (known after apply)
      + description                  = "Alert when transactions are taking too long"
      + enabled                      = true
      + entity_guid                  = (known after apply)
      + id                           = (known after apply)
      + name                         = "foo"
      + policy_id                    = (known after apply)
      + runbook_url                  = "https://www.example.com"
      + type                         = "static"
      + violation_time_limit         = (known after apply)
      + violation_time_limit_seconds = 3600

      + critical {
          + operator              = "above"
          + threshold             = 5.5
          + threshold_duration    = 300
          + threshold_occurrences = "all"
        }

      + nrql {
          + evaluation_offset = 3
          + query             = "SELECT average(duration) FROM Transaction where appName = 'test'"
        }
    }

Plan: 4 to add, 0 to change, 0 to destroy.
結果
- 資源が無事できましたね!
- 第一歩としてはまあいい結果な気がします。
作成した資源
- 参考程度に今回使用したコードをご参照いただけましたら幸いです。
- aws の資源と統合したい場合は、下記の設定を入れるとできるようです。(これはまた別記事で)
参考文献