概要
- サーバレスキャッシュサービスである Momento を AWS 環境で試していきます。
- Momento ってなにーという人は下記の記事を一読いただけますと幸いです。
検証 (API Gateway + Lambda + DynamoDB 構成)
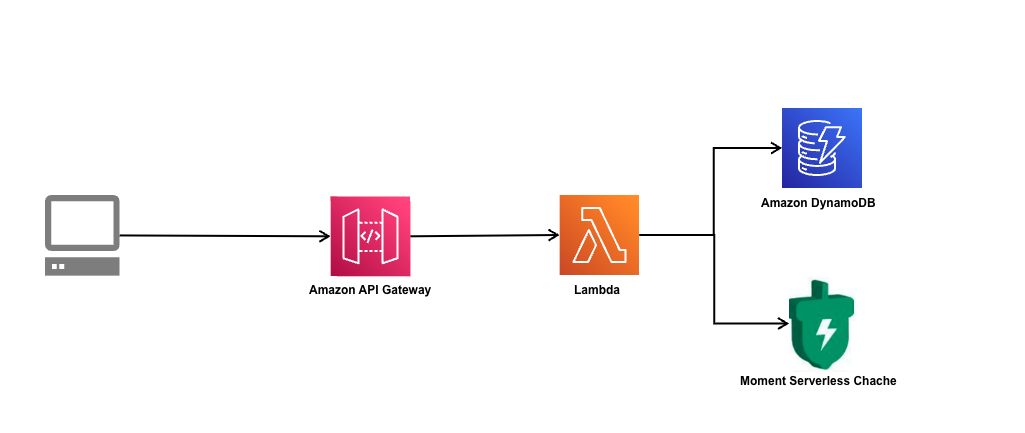
- よくあるサーバレスパターンである API Gateway + Lambda + DynamoDB の構成で Momento を簡単に検証できるサンプルコードが用意されているので、そちらを使っていく。
- AWS の資源を作るのは、サンプルコード内に aws-cdk のコードが内包されているので、cdk deployをするだけで試せます。
- 用意されている API は、よくあるようなソーシャルサービスをイメージしたものとなっています。
- メインは2つのエンドポイントです。
- /users
- /followers/
# Generate base users in DynamoDB to use for test
POST /bootstrap-users

# Get single user
GET /users/1
GET /cached-users/1

# Get passed users followers names
GET /followers/1
GET /cached-followers/1
- GET /users & /cached-users の API は、 DynamoDB からレコードを1つとってくるようなものです。
$ curl $API_URL/cached-users\?id\=1 -s | jq .
{
  "id": "1",
  "followers": [
    "63",
    "60",
    "81",
    "18",
    "60"
  ],
  "name": "Happy Sloth"
}
- GET /followers & /cached-followers の API は、重い処理を行なっていて、まずは key に基づいて上記の user の情報を取得した後にそのユーザに含まれる followers の情報を取得するような処理をします。
$ curl https://x949ucadkh.execute-api.us-east-1.amazonaws.com/Prod/cached-followers/1 -s
["Dumb Rabbit","Excited Wombat","Lazy Squirrel","Lazy Sloth","Strange Rabbit","Lazy Squirrel","Mystical Dog","Strange Cat","Dumb Dog","Excited Dog","Clingy Lion","Strange Frog","Strange Rabbit","Lazy Frog","Happy Sloth","Happy Sloth","Sad Cat","Clingy Cat","Happy Sloth","Obnoxious Fish","Excited Lion","Spacey Frog","Goofy Dog","Goofy Dog","Happy Hamster","Obnoxious Dog","Sad Cat","Obnoxious Lion","Happy Sloth","Obnoxious Otter","Angry Dog","Sad Rabbit","Excited Fish","Dumb Hamster","Clingy Otter","Angry Dog","Happy Hamster","Happy Hamster","Clingy Hamster","Happy Sloth","Happy Dog","Spacey Wombat","Clingy Lion","Clingy Sloth","Clingy Hamster","Rare Lion","Spacey Wombat","Angry Rabbit","Mystical Zebra","Excited Frog","Happy Dog","Angry Dog","Spacey Wombat"]%
- cached- がついているものとついていないものがありますが、これは Momento を使用し API を高速化しているものになります。
試していく
- git からソースを落としてきて、依存関係をインストールしていきます。
> git clone git@github.com:momentohq/serverless-api-demo.git
> cd serverless-api-demo/src
> npm install
> cd ..
- aws の credential が正しく設定されていることを確認します。
- 次に momento CLI をインストールします。
> brew tap momentohq/tap
> brew install momento-cli
- momento CLI のセットアップを行います。
> momento account signup aws --region ap-northeast-1 --email my-email@demo.com
Signing up for Momento...
Success! Your access token will be emailed to you shortly.
-
メールに認証トークンが届くので、そちらを使い src/repository/users.ts の REPLACE_ME を更新します。
-
momento cli でデモ用のキャッシュを作成します。
> momento configure --quick
> momento cache create --name momento-demo-users
- 次に cdk インフラをビルドします。
> cd infra/aws
> npm install
> npm run build
- CDK の aws アカウントをブートストラップします。
> npm run cdk bootstrap
- aws 環境にデプロイしていきます。
> npm run cdk deploy
- npm run cdk deploy の後に表示される出力からOutputs: demo-serverless-api.demoserviceapiEndpoint~~~~~に続くURLを取得し、env 変数に設定します。
> 例: export API_URL=https://xxxx.execute-api.us-east-1.amazonaws.com/Prod
- ブートストラップテストユーザーで curl します。
> curl -X POST "$API_URL/bootstrap"
- ベンチマークのスクリプトを開始します。
- そうすると、ローカルで 負荷試験ツールの locust が起動します。
> cd bench && ./start.sh
・
・
・
[2022-12-20 17:17:23,107] 31fd7912a242/INFO/locust.main: Starting web interface at http://0.0.0.0:8089 (accepting connections from all network interfaces)
[2022-12-20 17:17:23,112] 31fd7912a242/INFO/locust.main: Starting Locust 2.14.0
-
Number of users と Spawn rate と Host (先ほど cdk Deploy で出力されたやつ)を設定します。
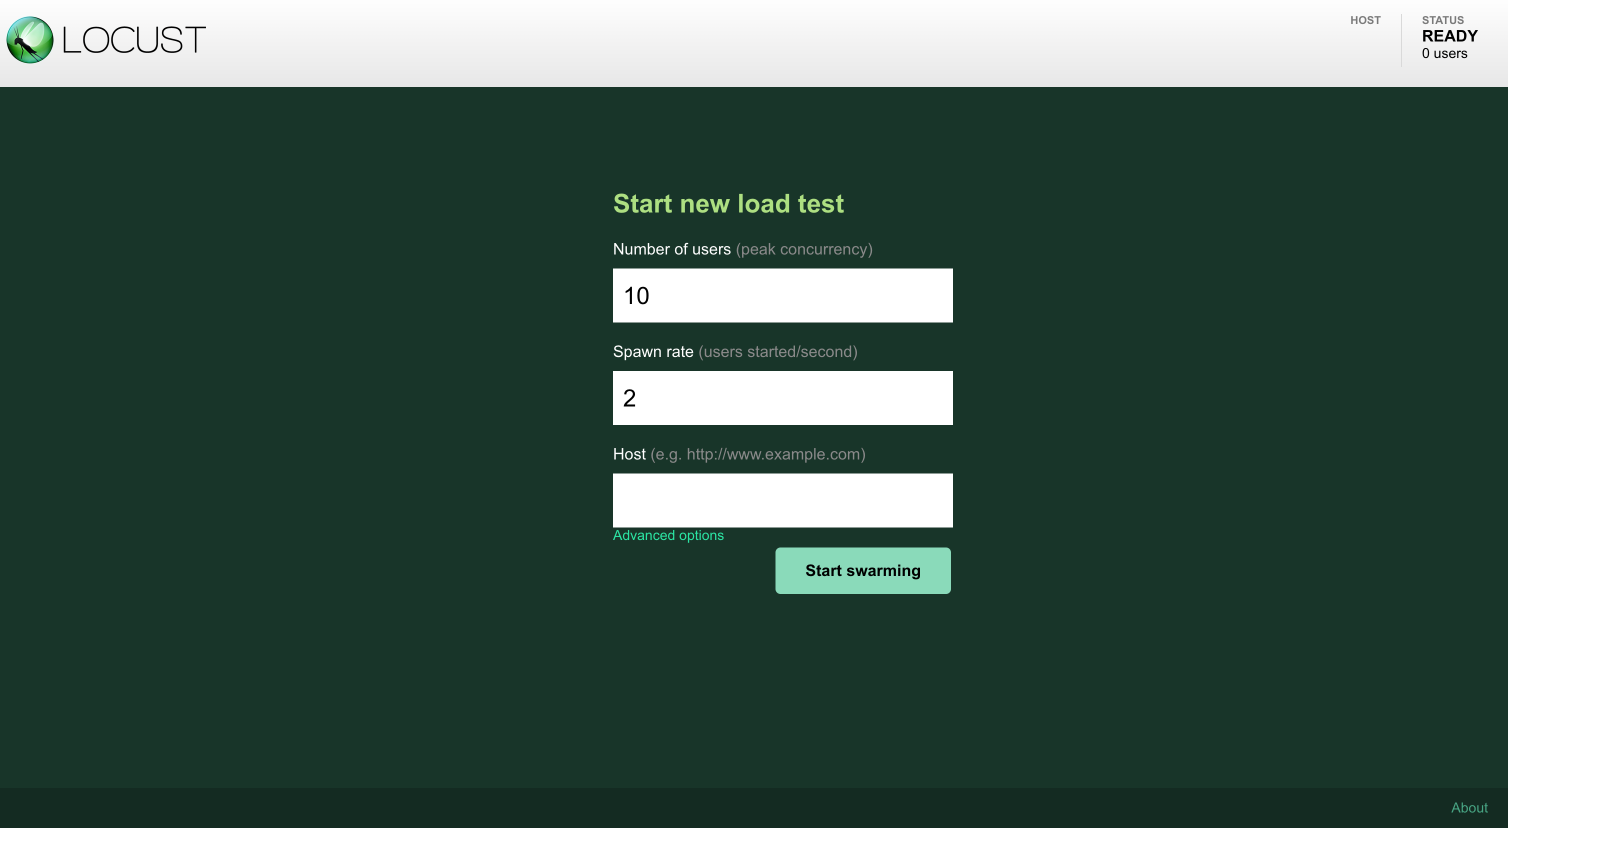
-
さて実行してみると下記のようにそれぞれの APIのセットを繰り返し叩いていってくれます。
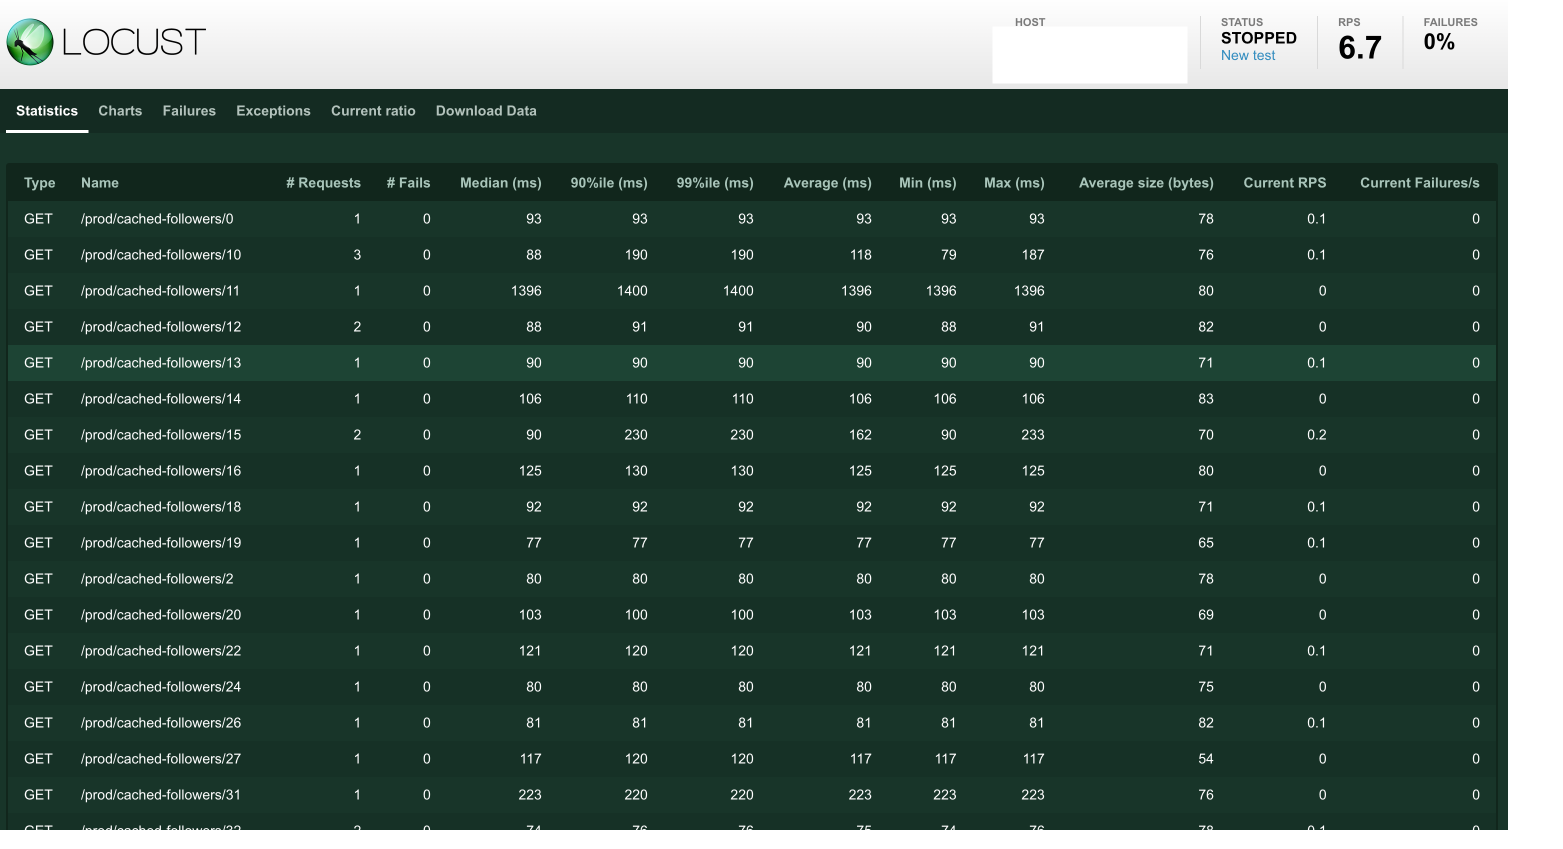
- さてここまできたら、あとは 叩かれた API がキャッシュされた2回目以降にどうなっていったかを確認していきましょう。
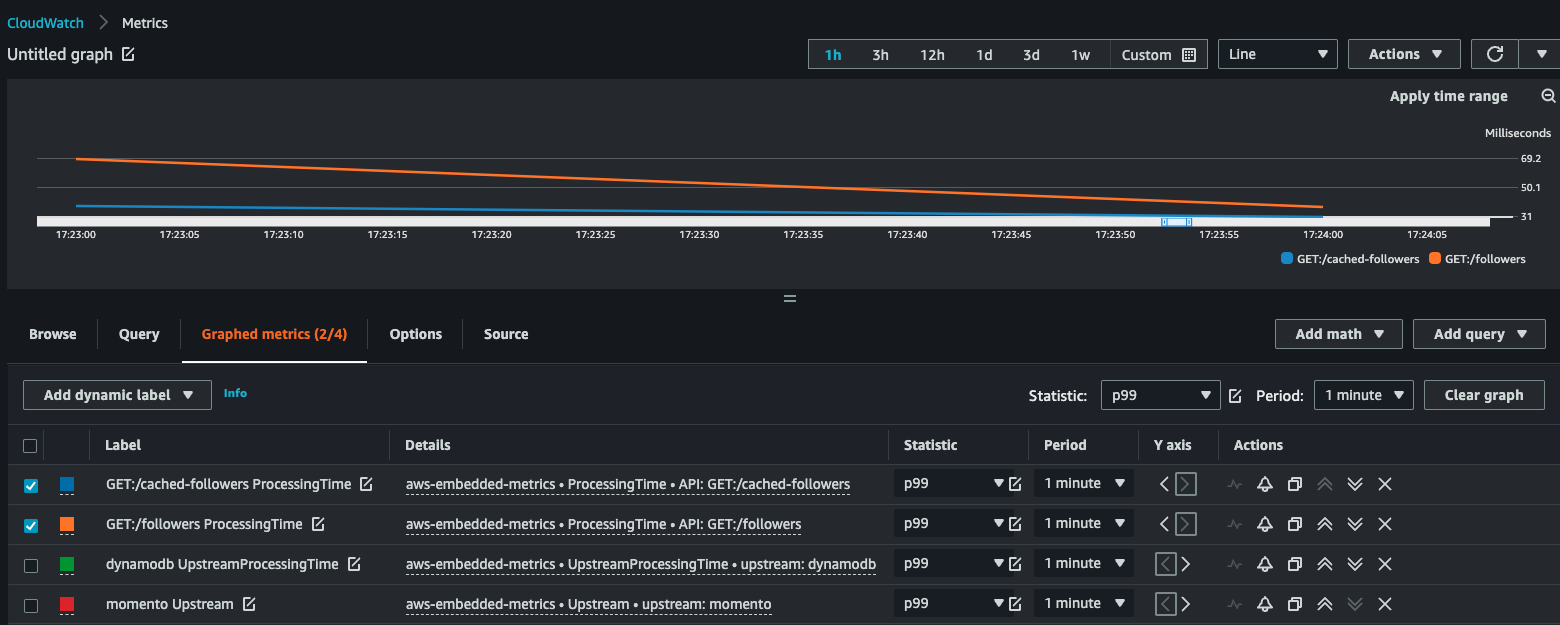
- Cloudwacth より確認していきます。
- なるほど、確かに cached- がついている momento によってキャッシュされている方の API は徐々にキャッシュが効いているからこそ ProcessingTime が低い結果を見ることができます。
- 最後はお片付け。
- まずは、実行したシェルを停止し、その後下記コマンドで作成した資源を削除していきます。
> npm run cdk destroy
参考資料