WindowsでMQTTのブローカー mosquitto を動作させる
Windows 10/11でMQTTブローカー、mosquitto を動作させる設定方法の説明です。
インストール
ダウンロードはここから
- mosquitto-2.0.14-install-windows-x64.exe (64-bit build, Windows Vista and up, built with Visual Studio Community 2019)
- mosquitto-2.0.14-install-windows-x32.exe (32-bit build, Windows Vista and up, built with Visual Studio Community 2019)
ほとんどの人は64bit版でいいでしょう。
2022/4/14時点の 2.0.14 / 64bit版を使って説明しています。
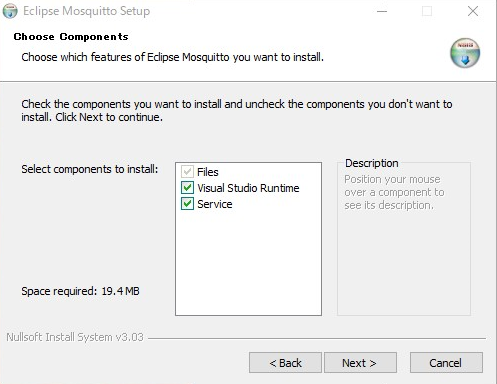
ダウンロードしたexeを実行してインストールします。
下のコンポーネントの選択で、"Service"をチェックしたままインストールすると、サービスとして登録されます。
ここではチェックしたままインストールします。
【別PCから接続させたい場合】mosquitto設定の変更
インストールしたままの状態では、mosquittoはローカルモード(自分自身からのデータのみ処理)になっているので、他のコンピュータから接続できません。
設定ファイルはインストールしたディレクトリ(64bitなら C:\Program Files\mosquitto)にある mosquitto.conf です。
このファイルをテキストエディタで編集します。
外部からの接続を許可するために、 listener [ポート番号] を追加します。
特定のIPからのみ接続させたい場合は、ポート番号の後ろにIPまたはホスト名を加えることで、そのIPからのみ接続します。
なお、listenerは複数行書いて、複数ポートからのアクセスを許可することも可能です。
# listener port-number [ip address/host name/unix socket path]
listener 1883
ログイン認証をしないなら allow_anonymous true を指定します。
# Defaults to false, unless there are no listeners defined in the configuration
# file, in which case it is set to true, but connections are only allowed from
# the local machine.
allow_anonymous true
mosquittoの実行
mosquittoをサービスから起動します。
[スタートを右クリック] - [コンピューターの管理(G)]で "コンピューターの管理" を開きます。
[サービスとアプリケーション] - [サービス]を開きます。
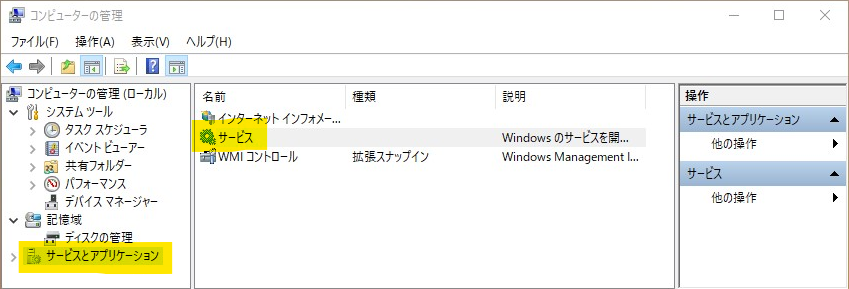
Mosquitto Broker というサービスがmosquitto.exeです。
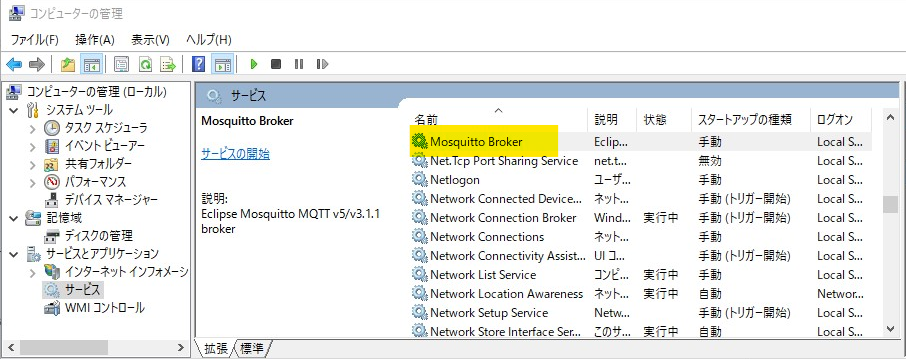
- 「状態」が「実行中」になってるなら右クリックから[再起動]
- 「状態」が空白なら右クリックから[開始]
で実行開始します。
「スタートアップの種類」を「自動」にしておけば、Windows起動時に自動で起動します。
【別PCから接続させたい場合】ファイアウオールの設定
Windowsのファイアウォールが外部からの接続をブロックしているので、これを解除します。
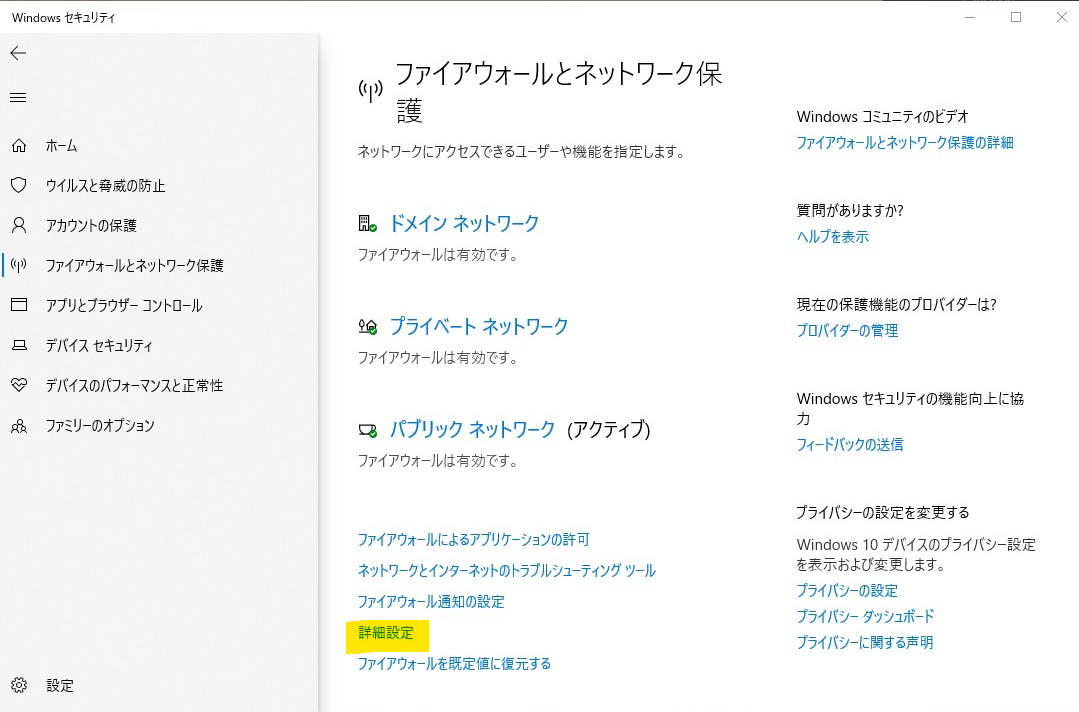
[スタートを右クリック] - [ネットワーク接続]で「設定」を開きます

[状態] (※Windows11では[ネットワークの詳細設定]) の[Windowsファイアウォール]を選び、「Windowsセキュリティ」を開きます。
この時、アクティブになっているネットワークを覚えておきます。(この例ではパブリック)
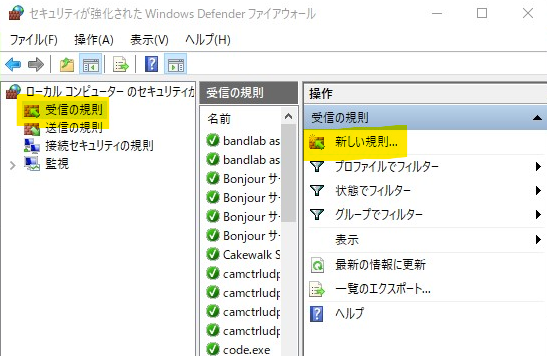
[詳細設定]をで「セキュリティーが強化されたWindows Defender」が開きます。
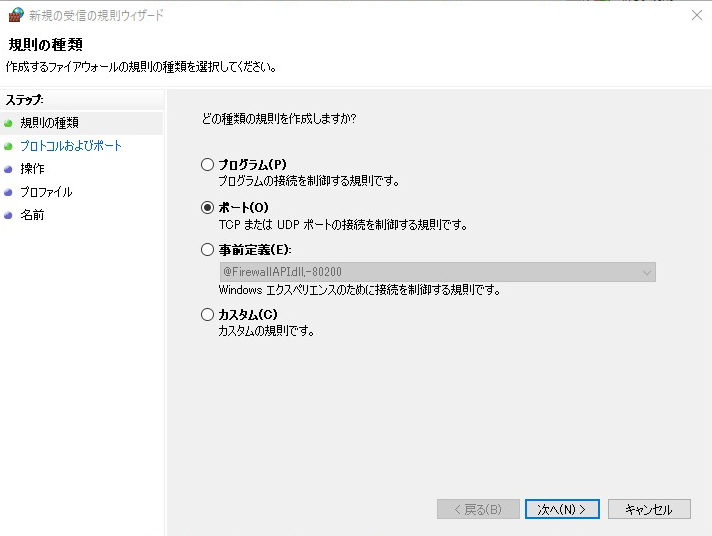
[受信の規則]-[新しい規則...]をクリックして、mosquitto.exe が受信で使うポートを許可します。
- [規則の種類]は[ポート]
- [プロトコルおよびポート]はTCPで1883を指定します。この1883は上のmosquitto.confのListenerで指定した値です。
もし別のポートを使う場合は、mosquitto.confと同じ値にします。
mosquitto.confで複数のListenerを書いている場合は全てのポートを記述します。
例:1883,1884,1885 - [操作]は[接続を許可する]
- [プロファイル]はmosquitto.exeを使う時のネットワークのタイプを指定。現在のタイプと揃えておけばいいでしょう。
(上で覚えてもらったやつです。この例ではパブリック) - 最後に名前(mosquittoとか)と説明をつけて[完了]します。
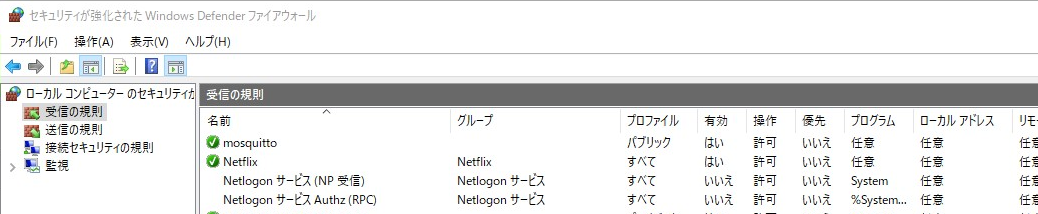
設定が終了すると、[受信の規則]に登録されます。
以上で mosquitto.exe の設定は完了です。