エッジデバイスで動かせる画像認識ライブラリとして有名なtensorflow liteを2 in 1 のChromeBook動かしてみました。
環境
- Chromebook(Lenovo ideapad duet)
- Python 3.7.3
手順
予めLinuxを有効化したChromeBookで作業することを前提にしています。
以下チュートリアルを参考にしています。
numpy,pillow,tensorFlow Liteのインストール
pip install numpy
pip install Pillow
# python3.7のarm64用のtensorFlow liteをインストール
pip install https://dl.google.com/coral/python/tflite_runtime-1.14.0-cp37-cp37m-linux_aarch64.whl
model・labelのダウンロード
以下コマンドでサンプルのモデルファイルとラベルをダウンロードしてきます。
curl -O https://storage.googleapis.com/download.tensorflow.org/models/tflite/mobilenet_v1_1.0_224_quant_and_labels.zip
unzip mobilenet_v1_1.0_224_quant_and_labels.zip -d /tmp
rm mobilenet_v1_1.0_224_quant_and_labels.zip
上記で/tmpにモデル・ラベルファイルがダウンロードできました。
画像認識処理を実装
チュートリアルに習ってtensorFlow Liteの画像認識処理を実装していきます。
ここでは画像を引数に指定することによってその認識結果を標準出力しています。
※チュートリアルではカメラの映像にバウンディングボックスと認識結果を表示させるものでしたが、現状ChromeBookのLinuxからデバイスのカメラにはアクセスできないようです。
main.py
from __future__ import absolute_import
from __future__ import division
from __future__ import print_function

import argparse
import io
import time
import numpy as np

from PIL import Image
from tflite_runtime.interpreter import Interpreter


def load_labels(path):
  with open(path, 'r') as f:
    return {i: line.strip() for i, line in enumerate(f.readlines())}


def set_input_tensor(interpreter, image):
  tensor_index = interpreter.get_input_details()[0]['index']
  input_tensor = interpreter.tensor(tensor_index)()[0]
  input_tensor[:, :] = image


def classify_image(interpreter, image, top_k=1):
  """Returns a sorted array of classification results."""
  set_input_tensor(interpreter, image)
  interpreter.invoke()
  output_details = interpreter.get_output_details()[0]
  output = np.squeeze(interpreter.get_tensor(output_details['index']))

  if output_details['dtype'] == np.uint8:
    scale, zero_point = output_details['quantization']
    output = scale * (output - zero_point)

  ordered = np.argpartition(-output, top_k)
  return [(i, output[i]) for i in ordered[:top_k]]


def main():
  parser = argparse.ArgumentParser(
      formatter_class=argparse.ArgumentDefaultsHelpFormatter)
  parser.add_argument(
      '--model', help='File path of .tflite file.', required=True)
  parser.add_argument(
      '--labels', help='File path of labels file.', required=True)
  parser.add_argument(
      '--image', help='File path of labels file.', required=True)
  args = parser.parse_args()

  labels = load_labels(args.labels)

  interpreter = Interpreter(args.model)
  interpreter.allocate_tensors()
  _, height, width, _ = interpreter.get_input_details()[0]['shape']

  image = Image.open(args.image).convert('RGB').resize((width,height),Image.ANTIALIAS)
  results = classify_image(interpreter, image)
  label_id, prob = results[0]
  print('result:::: {0} {1}'.format(labels[label_id],prob))

if __name__ == '__main__':
  main()
画像認識処理の実行
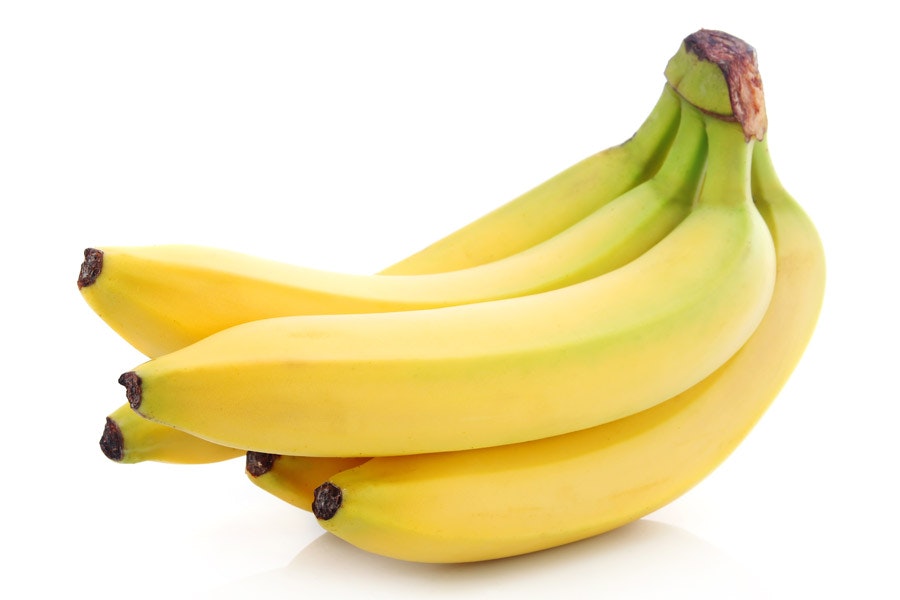
以下画像を使用

python3 main.py \
  --model /tmp/mobilenet_v1_1.0_224_quant_edgetpu.tflite \
  --labels /tmp/labels_mobilenet_quant_v1_224.txt \
  --image banana.jpg
認識できたようです。
INFO: Initialized TensorFlow Lite runtime.
result:::: banana 0.99609375
何も特に考えずサクッと試せるのがいいですね。画像認識のフレームワークは敷居が高く、動かすにはハイスペックなマシンが必要だというイメージが有りましたが、3万円くらいの端末で簡単に試すことができます。