はじめに
シスコ有志によるCisco Advent Calendar 2017も24日目。クリスマスイブです。今流行りのWebRTC だとかは全く関係のないビデオ会議端末ネタで切り込みます。
成果予定物と利用した素材
Cisco Spark Room Kit はカメラ・マイク・スピーカーを内蔵したビデオ会議製品です。性能の良いスピーカーはビデオ会議の臨場感を出すためのものですが、せっかくなので、内蔵している音源を使って音楽プレイヤーを マクロ機能を使って作っていきます。シスコ製のビデオ会議製品で CE 9.2.1 以降であれば、SX10 を除き今回のマクロを動作させることができます。ただ、リモコンよりもTouch 10 コントローラがないと UI の作り込みが難しいです。
マクロ機能について詳しいことはTelePresence EP : CE 9.2 マクロチュートリアル に記載しました。一言で言うと JavaScript で各種設定・状態管理をビデオ会議専用機で実装できるのがマクロ機能です。一般的には標準で足りていない設定の UI や動作を作成するのに利用されます。例えば Cisco DX70/DX80 を使ってキオスク端末向けに発信先をロックする実装も可能です。今回の音楽プレイヤーはマクロとUIの動作説明用で、一般的には非実用です。ご容赦ください。
成果物はこんな感じです。
#CiscoSpark Room Kit Music player powered by Macro pic.twitter.com/6Z0tJImWAT
— Yuki Iwagishi (@yiwagish) 2017年12月22日
音源を探ってみよう
マクロで端末操作をする際は xAPI と呼ばれる元々あった API を利用します。これはコマンドラインで叩くのが一番簡単です。ssh でCisco Spark Room Kit にログインし、どのような処理をするがコマンドを叩きながら良いか考えてみます。買ったばかりでパスワード変更していない場合は admin / パスワードなし でログインできます。
$ ssh -l admin <IP Address>
Password:
Welcome to RoomKit
Cisco Codec Release ce 9.2.1 360d0bf 2017-11-10
SW Release Date: 2017-11-10
*r Login successful

OK
今回は音源として既存の着信音を利用します。どの選択肢があるかのリストを取得します。コマンドは途中入力した状態で Tab やそのまま入力すると一覧が出てきます。 API のガイドドキュメント もありますが、数が多いわけではないのと、 Cisco IOS のような複雑なコマンドはほとんどないので恐れずにどんどん叩いていくのが近道です。xcommand は端末に一度きりの命令を実行します。
xcommand Audio SoundsAndAlerts Ringtone List

OK
*r RingtoneListResult (status=OK):
*r RingtoneListResult Ringtone 1 Id: "Sunrise"
*r RingtoneListResult Ringtone 2 Id: "Mischief"
*r RingtoneListResult Ringtone 3 Id: "Ripples"
*r RingtoneListResult Ringtone 4 Id: "Reflections"
*r RingtoneListResult Ringtone 5 Id: "Vibes"
*r RingtoneListResult Ringtone 6 Id: "Delight"
*r RingtoneListResult Ringtone 7 Id: "Evolve"
*r RingtoneListResult Ringtone 8 Id: "Playful"
*r RingtoneListResult Ringtone 9 Id: "Ascent"
*r RingtoneListResult Ringtone 10 Id: "Calculation"
*r RingtoneListResult Ringtone 11 Id: "Mellow"
*r RingtoneListResult Ringtone 12 Id: "Ringer"
これを再生するには
xcommand Audio SoundsAndAlerts Ringtone Play RingTone: Sunrise
止めるには Stop を使います。
xcommand Audio Sound Stop
UI を作ろう
コマンドで実施した作業、再生/停止/選択 をまずはユーザインターフェースにマッピングしていきます。
TelePresence Web管理画面にログインします。
https://IP Address/
Integration > In Room Control を選択します。

Launch Editor をクリックし、新規パネル + をクリックして画面に Widget を並べていきます。
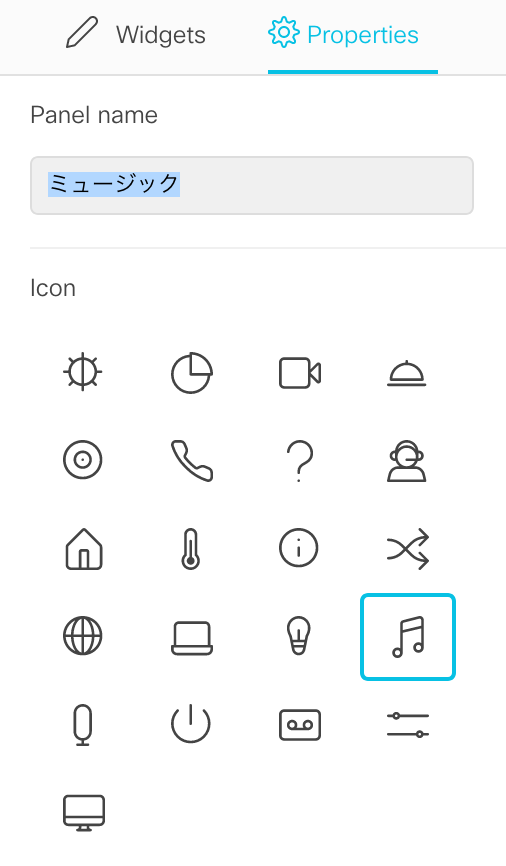
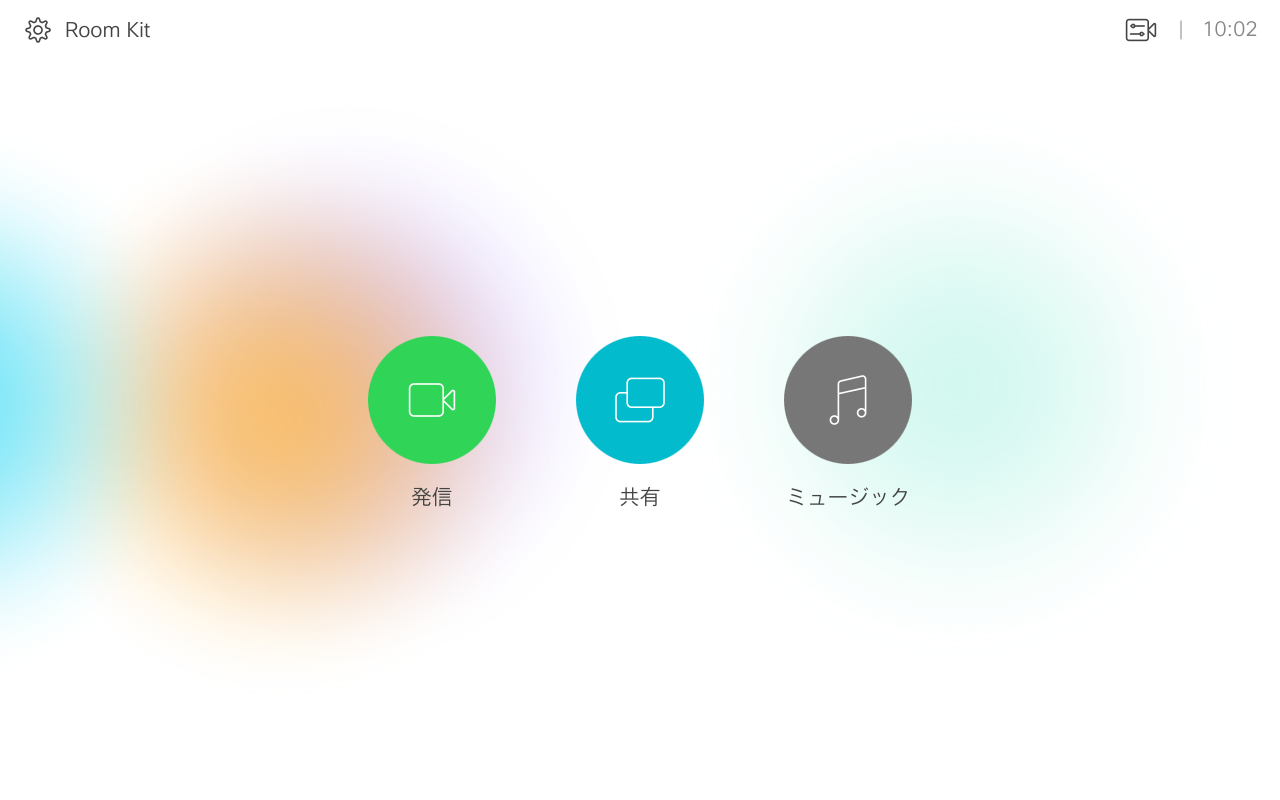
UI を呼び出すためのアイコンとキャプションを音楽再生っぽいものにします。

右上のExport でGUI 上に実装できます。
このミュージックアイコンをタップされた後のGUI を並べていきます。「アイコン」Widget を駆使し、また、それぞれのWidget ID をわかりやすいものにしていきます。
stop/play/list というWidget ID を名付け 再び Export しました。

アイコンが押された動作にマクロで動作をつけていきます。コマンドラインから
xfeedback register event/UserInterface/Extensions
を入力し、アイコンをタップしてみます。
*e UserInterface Extensions Event Pressed Signal: "stop"
** end
*e UserInterface Extensions Widget Action WidgetId: "stop"
*e UserInterface Extensions Widget Action Value: ""
*e UserInterface Extensions Widget Action Type: "pressed"
** end
*e UserInterface Extensions Event Released Signal: "stop"
** end
*e UserInterface Extensions Widget Action WidgetId: "stop"
*e UserInterface Extensions Widget Action Value: ""
*e UserInterface Extensions Widget Action Type: "released"
** end
*e UserInterface Extensions Event Clicked Signal: "stop"
** end
*e UserInterface Extensions Widget Action WidgetId: "stop"
*e UserInterface Extensions Widget Action Value: ""
*e UserInterface Extensions Widget Action Type: "clicked"
** end
一つのアイコンを押して離しただけでも多くのイベントが取れることがわかります。
この処理に合わせてマクロを組んでいきます。
マクロを作ろう
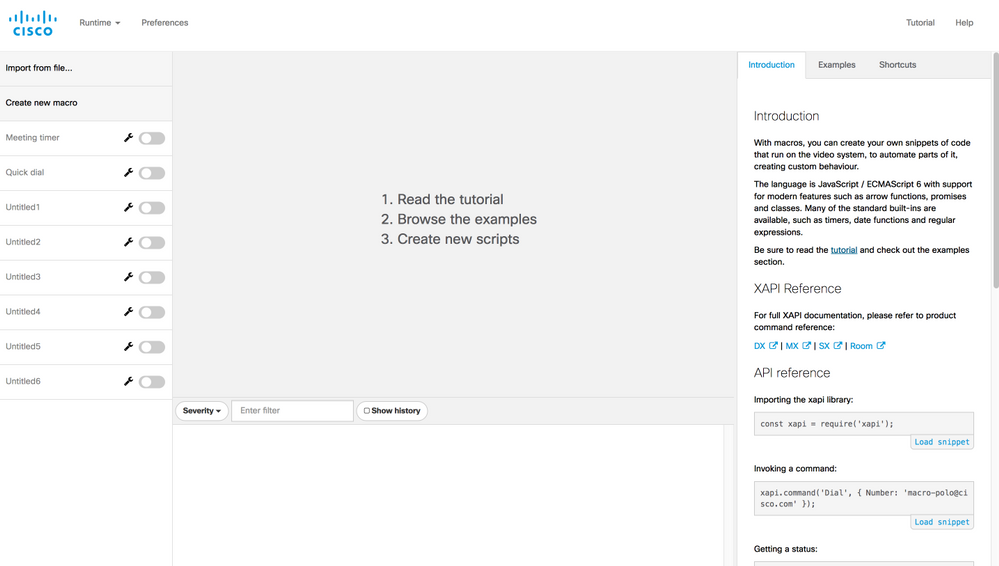
TelePresence Web管理画面からマクロエディタを選択します。
Integration > Macro Editor

先人の偉大なマクロが Examples にありますので、それを探りながら作っていきます。
というか、Quick dial のスクリプトをコピー & ペーストしました。Load しますとせっかく作ったUIが上書きされてしまうのでご注意くださいませ。
元々のスクリプトは UI をモニタしてボタンが "clicked" されたら発信と言う処理です。これを参考に編集していきます。
/**
 * A small In-Room controls panel with 4 quick dial numbers
 */
const xapi = require('xapi');

// These match the widget ids of the In-Room control buttons
const numbers = {
  dial_catering: 'catering@acme.com',
  dial_it_support: 'itsupport@acme.com',
  dial_taxi: 'taxi@acme.com',
  dial_reception: 'reception@acme.com',
};

function dial(number) {
  console.log('dial', number);
  xapi.command('dial', { Number: number });
}

function listenToGui() {
  xapi.event.on('UserInterface Extensions Widget Action', (event) => {
    if (event.Type === 'clicked') {
      const number = numbers[event.WidgetId];
      if (number) dial(number);
      else console.log('Unknown button pressed', event.WidgetId);
    }
  });
}

listenToGui();
先ほどまで登場していたコマンドをマクロで表現していきます。
xcommand は xapi.command, xstatus は xapi.status などにマッピングされます。xAPI ライブラリの呼び出し const xapi = require('xapi'); を忘れないようにしましょう。
xcommand Audio SoundsAndAlerts Ringtone Play RingTone: Evolve
これをマクロの記法で表現します。ほぼコマンド通りの順番ですが引数の渡し方だけ注意です。
xapi.command('Audio SoundsAndAlerts Ringtone Play',{RingTone: 'Evolve'};
Quick Dial から 拝借したコードと Widget ID の分岐をとりあえず Play まで作った例となります。これでマクロを有効にし、Play をクリックしたときに音がなることを確認します。
/**
 * 音楽プレイヤーもどき
 */
const xapi = require('xapi');

// These match the widget ids of the In-Room control buttons
function listenToGui() {
  xapi.event.on('UserInterface Extensions Widget Action', (event) => {
    if (event.Type === 'clicked') {
        switch (event.WidgetId) {
          case 'play':
             xapi.command('Audio SoundsAndAlerts Ringtone Play',{RingTone: 'Evolve'});
              break;

  }
    }
  });
}

listenToGui();
音楽の停止は先ほど述べた通りコマンドだと
xcommand Audio Sound stop
と表現されます。先ほどと同じようにマクロの形式に変形させ、 'stop' アイコンがタップされた時の処理を追加します。
 case 'stop':
   xapi.command('Audio Sound stop');
     break;
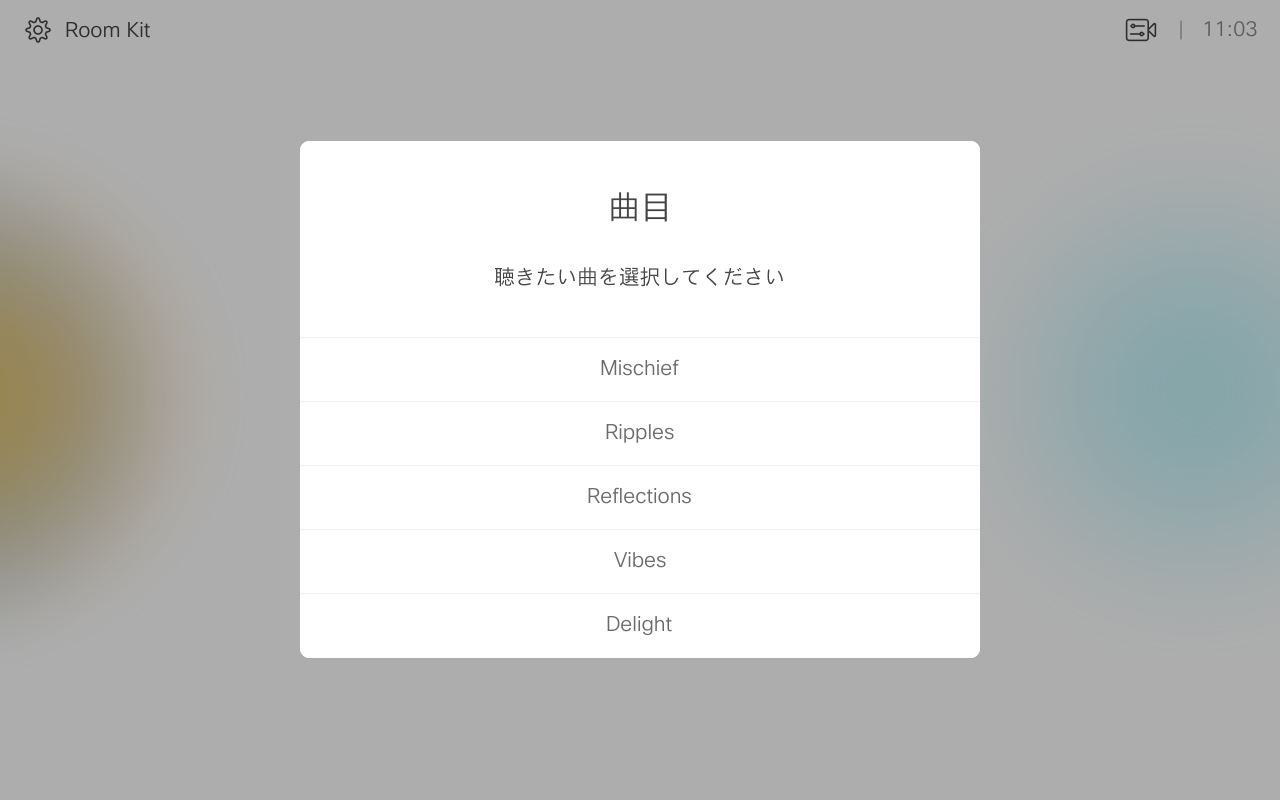
リストはその他の曲の選択一覧表示に利用します。この表示にプロンプト窓を利用しました。
曲目変更の可能性を考え、曲の名前は配列 songs に入れています。
function playList() {
  xapi.command('UserInterface Message Prompt Display', {
  Title: '曲目',
  Text: '聴きたい曲を選択してください',
  FeedbackId: 'select-music',
  /* 曲名を表示 */
  'Option.1': songs[1],
  'Option.2': songs[2],
  'Option.3': songs[3],
  'Option.4': songs[4],
  'Option.5': songs[5],
  });
}
このリストでタップされた時の再生処理と、 Spark Room Kit の着信音にセットする処理を加えます。
function playMusic() {
/* ボタン押下をモニタ */
  xapi.event.on('UserInterface Message Prompt Response OptionId', (event) => {
         const song = songs[event];
          xapi.command('Audio SoundsAndAlerts Ringtone Play',{RingTone: song});
          xapi.config.set('Audio SoundsAndAlerts RingTone:', song);
  });
}
完成形
最終的な完成形はこんな感じです。音楽プレイヤーと言いつつ、着信音変更機能までつけました。設定変更処理となるので xapi.config.set を利用します。
/**
 * 音楽プレイヤーもどき
 */
const xapi = require('xapi');

// 曲目
const songs = {
  1:'Mischief',
  2:'Ripples',
  3: 'Reflections',
  4: 'Vibes',
  5: 'Delight',
};

// These match the widget ids of the In-Room control buttons
function listenToGui() {
  xapi.event.on('UserInterface Extensions Widget Action', (event) => {
    if (event.Type === 'clicked') {
        switch (event.WidgetId) {
          case 'play':
             xapi.command('Audio SoundsAndAlerts Ringtone Play',{RingTone: 'Evolve'});
              break;
          case 'stop':
             xapi.command('Audio Sound stop');
            break;
          case 'list':
            playList();
            break;
  }
    }
  });
}
function playList() {
  xapi.command('UserInterface Message Prompt Display', {
  Title: '曲目',
  Text: '聴きたい曲を選択してください',
  FeedbackId: 'select-music',
  /* 曲名を表示 */
  'Option.1': songs[1],
  'Option.2': songs[2],
  'Option.3': songs[3],
  'Option.4': songs[4],
  'Option.5': songs[5],
  });
}
function playMusic() {
/* ボタン押下をモニタ */
  xapi.event.on('UserInterface Message Prompt Response OptionId', (event) => {
         const song = songs[event];
          xapi.command('Audio SoundsAndAlerts Ringtone Play',{RingTone: song});
          xapi.config.set('Audio SoundsAndAlerts RingTone:', song);
  });
}

listenToGui();
playMusic();
まとめ
ビデオ会議の世界でもちょっとしたプログラミングを知っているだけで、より一層使い勝手がよくなったり、遊び心をくすぐる実装ができます。 API そのものは以前からあり、別サーバから叩くことができたのですが、最近では端末単体で自走運転可能なマクロが実装されました。SX10 を除く各種現行 Cisco TelePresence CE9.2 で利用可能ですのでぜひお試し or アイディアを考えてみましょう〜

