Storyboardでのやり方と、コードで生成するやり方をまとめてみます
UITableViewControllerには触れてないです
Storyboardで
-
UITableViewを配置して、outlet接続します -
UITableViewCellを配置して、識別子をつけます -
UITableViewCellのスタイルを設定します
customにする場合は、UITableViewCellを継承したカスタムクラスを作る必要があります
そしてUITableViewCellに必要なものを配置します -
datasourceを用意して、セルを生成します(下は簡単な例)
class ViewController: UIViewController {

    @IBOutlet weak var myTableView: UITableView!

    override func viewDidLoad() {
        super.viewDidLoad()

        myTableView.dataSource = self
    }
}

extension ViewController: UITableViewDataSource {
    func tableView(_ tableView: UITableView, numberOfRowsInSection section: Int) -> Int {
        return 10
    }

    func tableView(_ tableView: UITableView, cellForRowAt indexPath: IndexPath) -> UITableViewCell {
        let cell = myTableView.dequeueReusableCell(withIdentifier: "Cell", for: indexPath)
        cell.textLabel?.text = "\(indexPath.row)"
        return cell
    }
}
コードのみで
-
ViewControllerにUITableViewを追加します
class ViewController: UIViewController {
    var myTableView = UITableView()

    override func viewDidLoad() {
        super.viewDidLoad()

        // myTableViewのサイズ設定は必須。frameプロパティで設定しても、autoLayoutで設定しても良い
        self.view.addSubview(myTableView)
    }

    // myTableViewのサイズをautoLayoutで設定する
    override func viewWillLayoutSubviews() {
        super.viewWillLayoutSubviews()
        myTableView.translatesAutoresizingMaskIntoConstraints = false
        NSLayoutConstraint.activate([
            myTableView.leadingAnchor.constraint(equalTo: self.view.leadingAnchor, constant: 0),
            myTableView.trailingAnchor.constraint(equalTo: self.view.trailingAnchor, constant: 0),
            myTableView.topAnchor.constraint(equalTo: self.view.topAnchor, constant: 0),
            myTableView.bottomAnchor.constraint(equalTo: self.view.bottomAnchor, constant: 0)
        ])
    }
}
- セル用の識別子を登録します
customにする場合は、UITableViewCellを継承したカスタムクラスを作る必要があります
そしてUITableViewCell.selfをカスタムクラス.selfに変えます
    override func viewDidLoad() {
        // 省略
        myTableView.register(UITableViewCell.self, forCellReuseIdentifier: "Cell")
        // 省略
    }
-
datasourceを用意して、セルを生成します
class ViewController: UIViewController {

    var myTableView = UITableView()

    override func viewDidLoad() {
        // 省略
        myTableView.dataSource = self
    }

    // myTableViewのサイズをautoLayoutで設定する
    override func viewWillLayoutSubviews() {
        // 省略
    }
}

// 以下のコードはStoryboardの時と同じ
extension ViewController: UITableViewDataSource {
    func tableView(_ tableView: UITableView, numberOfRowsInSection section: Int) -> Int {
        return 10
    }

    func tableView(_ tableView: UITableView, cellForRowAt indexPath: IndexPath) -> UITableViewCell {
        let cell = myTableView.dequeueReusableCell(withIdentifier: "Cell", for: indexPath)
        cell.textLabel?.text = "\(indexPath.row)"
        return cell
    }
}
xibファイルを使う
xibファイルを使う場合、カスタムセルを利用しなければならないです
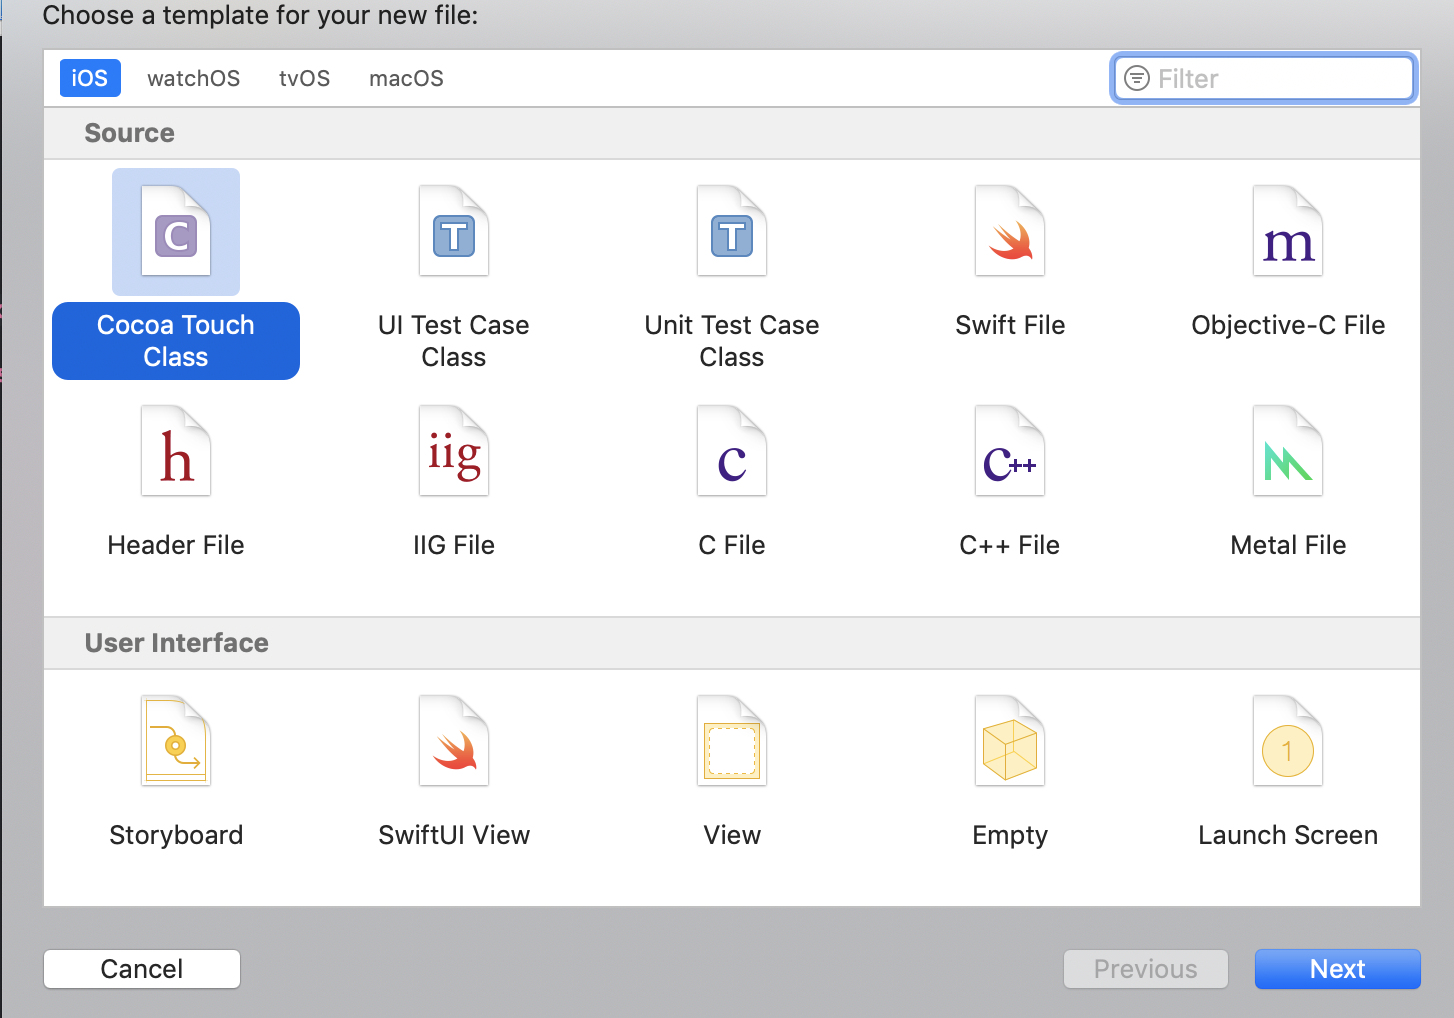
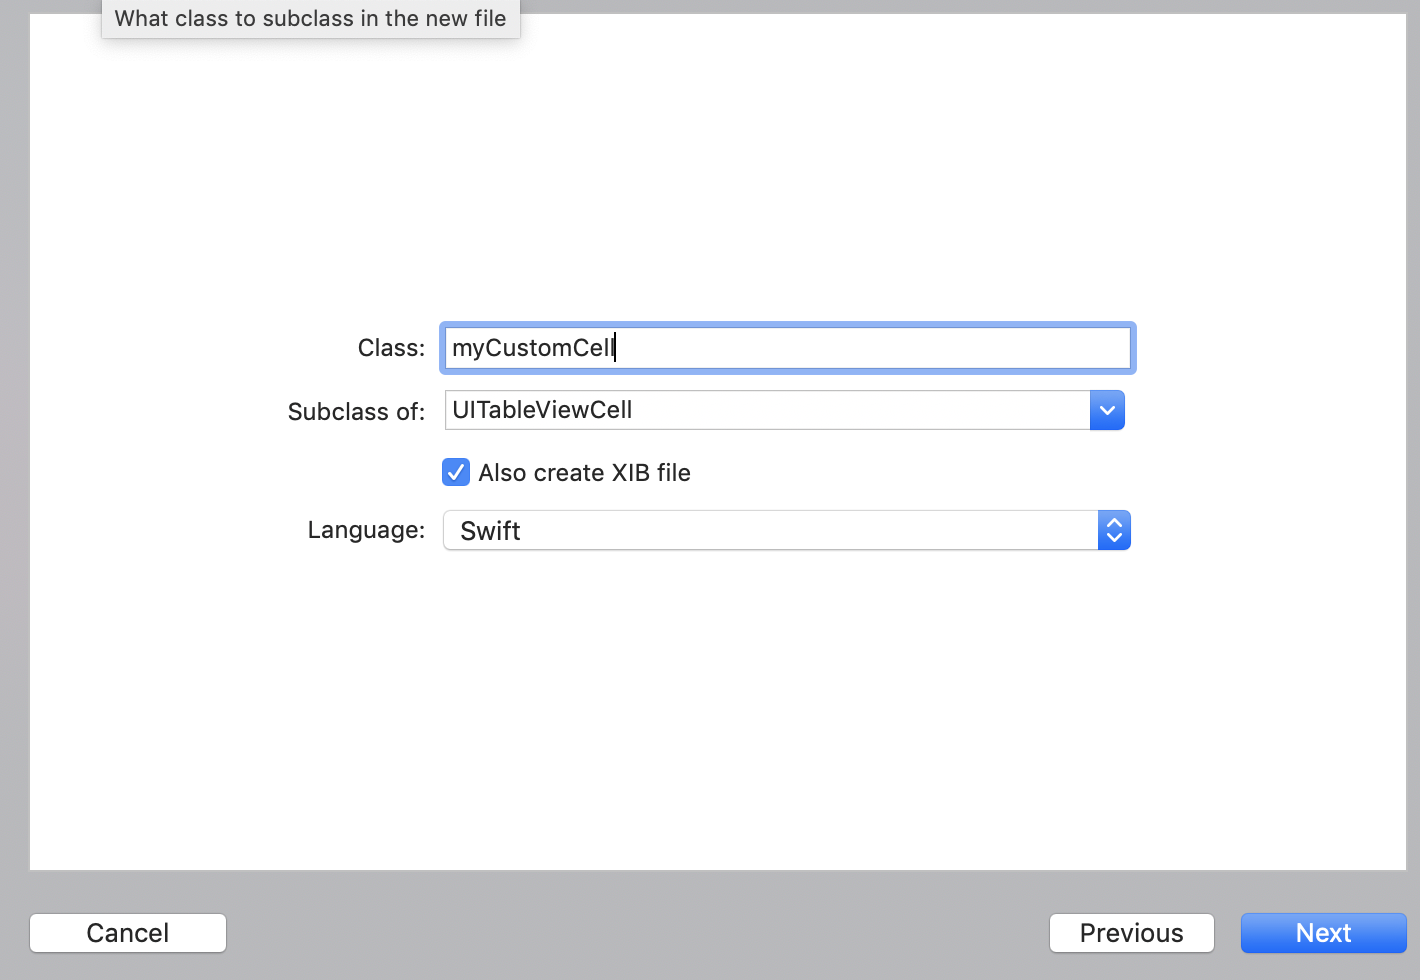
File > New > File...またはcommand Nで新しいセル用のクラスを作ります
xibファイルも一緒に作るのでチェックを入れます
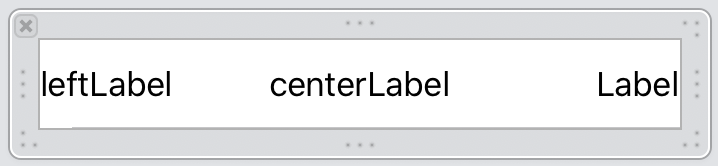
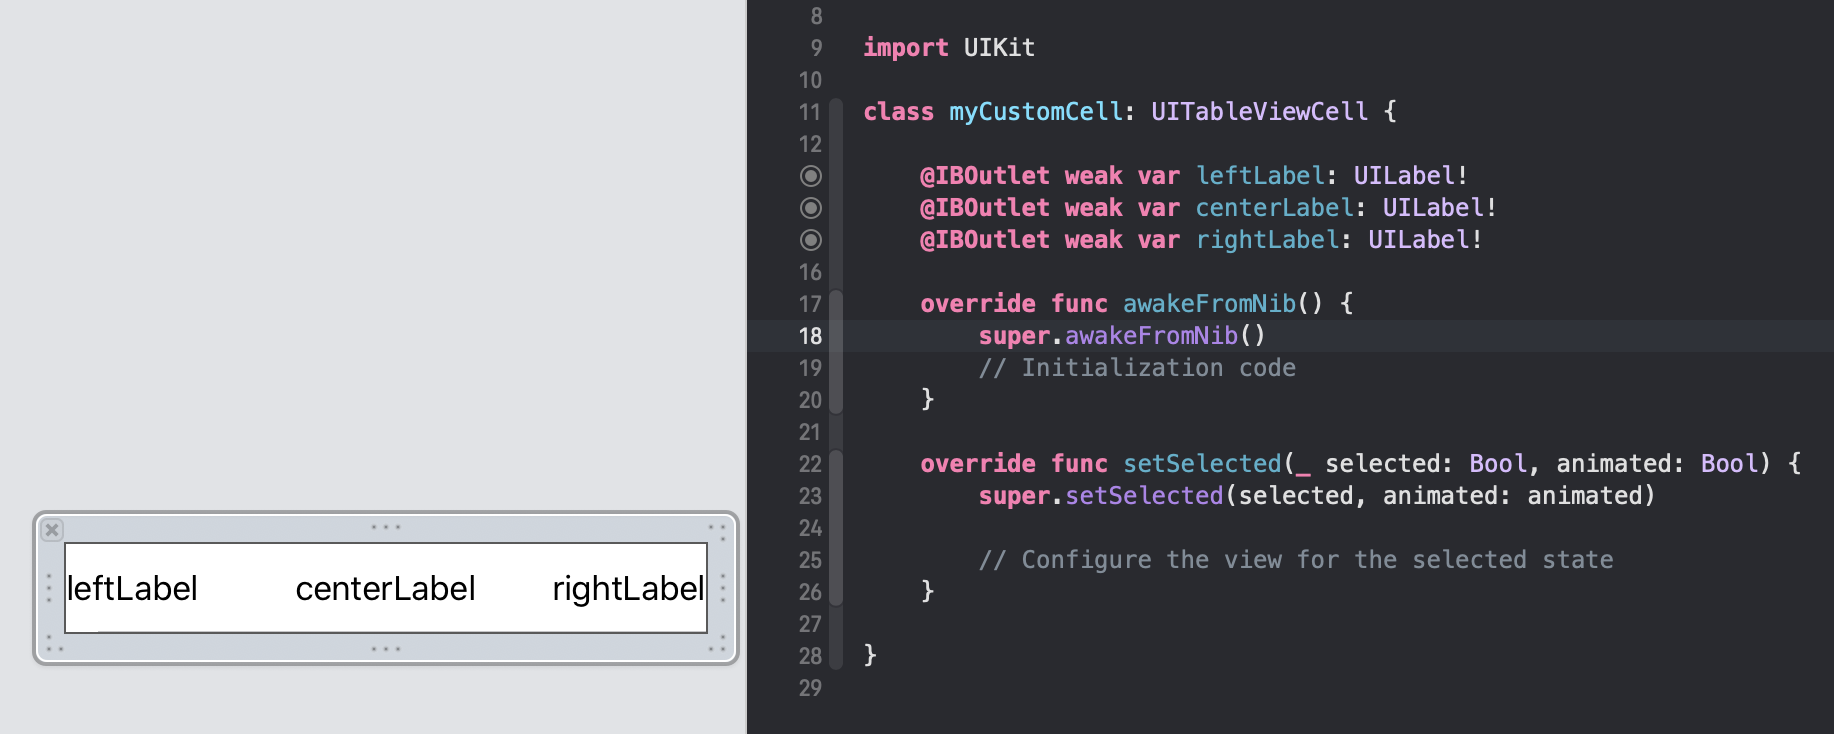
xibにはこのように3つのラベルを配置します
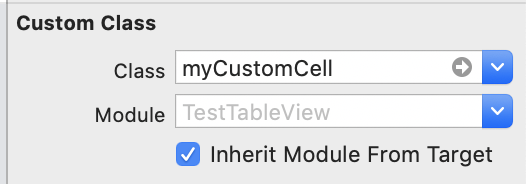
xibファイル内のViewのclass欄にカスタムセルのクラスを指定します。(自動生成の場合は自動で指定してくれます)
xibファイルのViewに配置したものを、カスタムセルのクラスにoutlet接続します
あとは上のコードのみの時のコードを少し変えれば動きます
class ViewController: UIViewController {

    var myTableView = UITableView()

    override func viewDidLoad() {
        super.viewDidLoad()

        // myTableViewのサイズ設定は必須。frameで設定しても、autoLayoutで設定しても良い
        self.view.addSubview(myTableView)

        // myTableView.register(UITableViewCell.self, forCellReuseIdentifier: "Cell")
        myTableView.register(UINib(nibName: "myCustomCell", bundle: nil), forCellReuseIdentifier: "xibCell")
        myTableView.dataSource = self
    }

    // myTableViewのサイズをautoLayoutで設定する
    override func viewWillLayoutSubviews() {
        // 省略
    }


}

extension ViewController: UITableViewDataSource {
    func tableView(_ tableView: UITableView, numberOfRowsInSection section: Int) -> Int {
        return 10
    }

    func tableView(_ tableView: UITableView, cellForRowAt indexPath: IndexPath) -> UITableViewCell {
        // let cell = myTableView.dequeueReusableCell(withIdentifier: "Cell", for: indexPath)
        // cell.textLabel?.text = "\(indexPath.row)"
        let cell = myTableView.dequeueReusableCell(withIdentifier: "xibCell", for: indexPath) as! myCustomCell
        cell.leftLabel.text = "\(indexPath.row)"
        cell.centerLabel.text = "\(indexPath.row)"
        cell.rightLabel.text = "\(indexPath.row)"
        return cell
    }
}
最後に
Storyboardとxibファイルを使わず、
完全にコードでUITableViewとカスタムセルを実装する場合は、
コードの記述量がたくさん増えるのがわかると思います。
特にAutoLayoutをコードで書けば非常に長くなります。
どう使い分けるべきかよくわからないですが、
もしコメントで教えていただければ幸いです。