CentOS7にEclipse GlassFish 5.1.0をインストールする手順を紹介します。
1. 環境
- CentOS Linux release 7.7.1908
root@CENTOS7 ~]# cat /etc/redhat-release
CentOS Linux release 7.7.1908 (Core)
[root@CENTOS7 ~]#
- jdk-8u241(jdk-8u241-linux-x64.rpm)(jdk14では動作しませんでした。)
[root@CENTOS7 ~]# rpm -ivh jdk-8u241-linux-x64.rpm
警告: jdk-8u241-linux-x64.rpm: ヘッダー V3 RSA/SHA256 Signature、鍵 ID ec551f03: NOKEY
準備しています...              ################################# [100%]
更新中 / インストール中...
   1:jdk1.8-2000:1.8.0_241-fcs        ################################# [100%]
Unpacking JAR files...
        tools.jar...
        plugin.jar...
        javaws.jar...
        deploy.jar...
        rt.jar...
        jsse.jar...
        charsets.jar...
        localedata.jar...
[root@CENTOS7 ~]#
2. Eclipse GlassFish 5.1.0のダウンロード
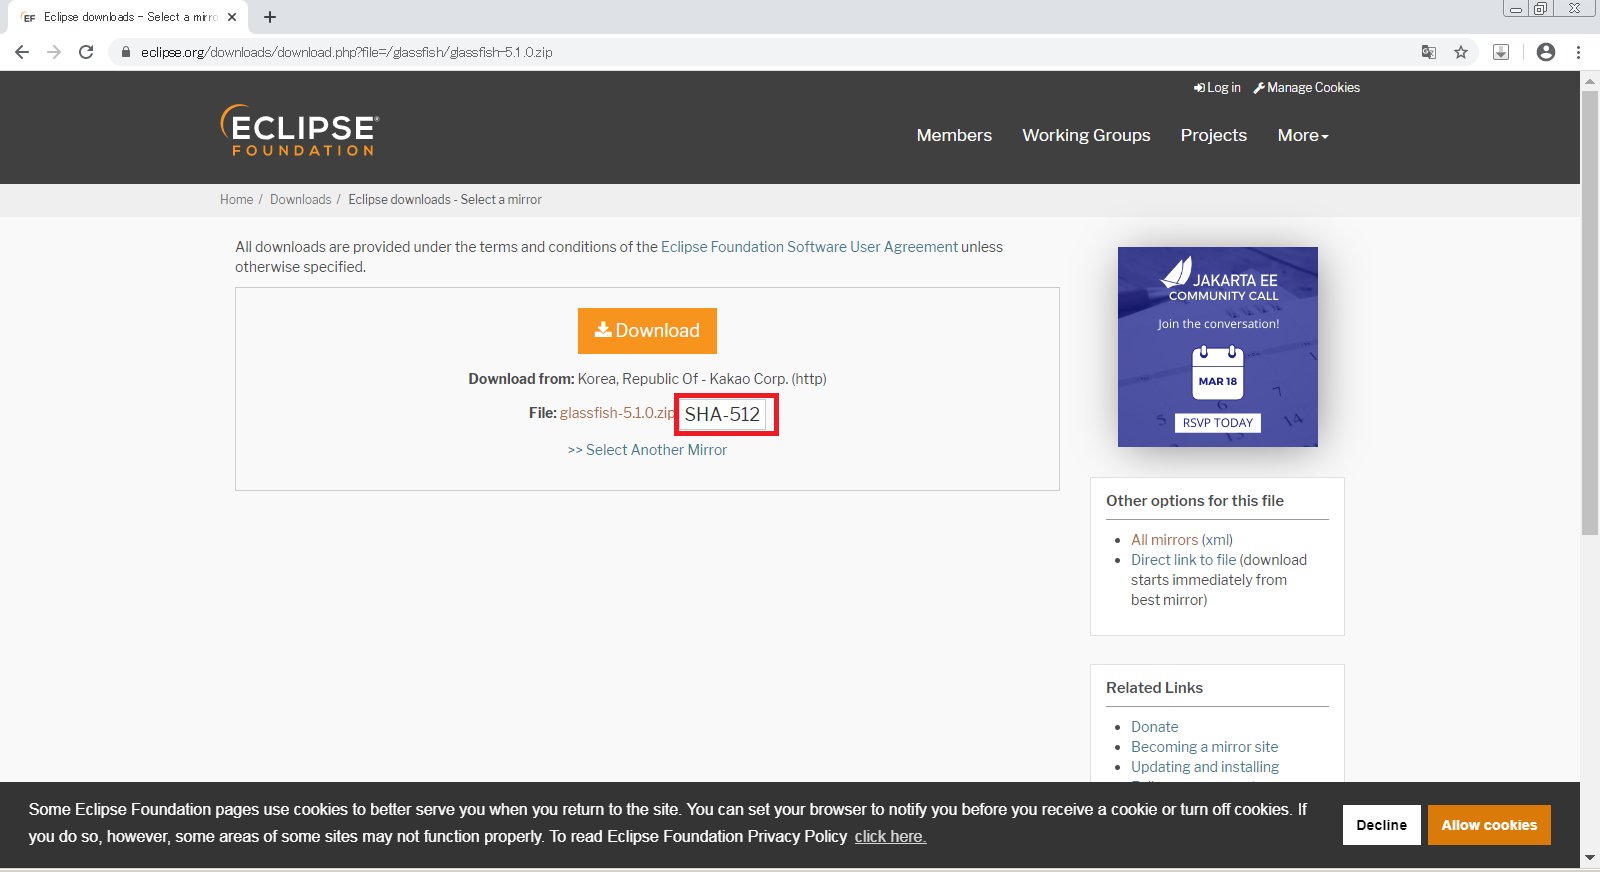
以下のコマンドでglassfish-5.1.0.zipをダウンロードします。(もしくはダウンロードサイトからダウンロードします。)
curl -OL http://mirror.kakao.com/eclipse/glassfish/glassfish-5.1.0.zip
[root@CENTOS7 ~]# curl -OL http://mirror.kakao.com/eclipse/glassfish/glassfish-5.1.0.zip
  % Total    % Received % Xferd  Average Speed   Time    Time     Time  Current
                                 Dload  Upload   Total   Spent    Left  Speed
100  111M  100  111M    0     0   292k      0  0:06:31  0:06:31 --:--:--  302k
[root@CENTOS7 ~]#
以下のコマンドでダウンロードしたファイルのハッシュ値がダウンロードサイトの値と同じであることを確認します。
sha512sum glassfish-5.1.0.zip
[root@CENTOS7 ~]# sha512sum glassfish-5.1.0.zip
10d99061319178d65e8f8604f41caaca2ea561cbdc426d0fdf6163ead549e9c63c154c6ff648133a5b37bec14940a48b7c893544fa19f900a8c62273e445ed14  glassfish-5.1.0.zip
[root@CENTOS7 ~]#
3. glassfish-5.1.0.zipを解凍
以下のコマンドでglassfish-5.1.0.zipを/opt配下に解凍します。
unzip -d /opt glassfish-5.1.0.zip
[root@CENTOS7 ~]# unzip -d /opt glassfish-5.1.0.zip
Archive:  glassfish-5.1.0.zip
   creating: /opt/glassfish5/
   creating: /opt/glassfish5/glassfish/
   creating: /opt/glassfish5/glassfish/domains/
   creating: /opt/glassfish5/glassfish/domains/domain1/
   creating: /opt/glassfish5/glassfish/domains/domain1/config/
  inflating: /opt/glassfish5/glassfish/domains/domain1/config/admin-keyfile

~~~ 省略 ~~~

  inflating: /opt/glassfish5/mq/lib/props/broker/default.properties
  inflating: /opt/glassfish5/mq/lib/props/broker/install.properties
  inflating: /opt/glassfish5/mq/lib/tyrus-standalone-client.jar
[root@CENTOS7 ~]# cd /opt
[root@CENTOS7 opt]# ls -l
合計 0
drwxr-xr-x. 7 root root 92  1月 28  2019 glassfish5
[root@CENTOS7 opt]#
4. glassfishユーザーの作成
以下のコマンドで「glassfish」ユーザーを作成します。(パスワードも「glassfish」)
useradd -p $(perl -e 'print crypt("glassfish", "\$6\$salt03")') glassfish
[root@CENTOS7 opt]# useradd -p $(perl -e 'print crypt("glassfish", "\$6\$salt03")') glassfish
[root@CENTOS7 opt]#
5. glassfish5ディレクトリのオーナー及びグループを変更
以下のコマンドでglassfish5ディレクトリのオーナー及びグループをglassfishに変更します。
chown -R glassfish:glassfish glassfish5
[root@CENTOS7 opt]# chown -R glassfish:glassfish glassfish5
[root@CENTOS7 opt]# ls -l
合計 0
drwxr-xr-x. 7 glassfish glassfish 92  1月 28  2019 glassfish5
[root@CENTOS7 opt]#
6. asenv.confの修正
/opt/glassfish5/glassfish/config/asenv.confの最後の行に
AS_JAVA="/usr/java/jdk1.8.0_241-amd64"
を追加します。
#
# Copyright (c) 2004, 2018 Oracle and/or its affiliates. All rights reserved.
#
# This program and the accompanying materials are made available under the
# terms of the Eclipse Public License v. 2.0, which is available at
# http://www.eclipse.org/legal/epl-2.0.
#
# This Source Code may also be made available under the following Secondary
# Licenses when the conditions for such availability set forth in the
# Eclipse Public License v. 2.0 are satisfied: GNU General Public License,
# version 2 with the GNU Classpath Exception, which is available at
# https://www.gnu.org/software/classpath/license.html.
#
# SPDX-License-Identifier: EPL-2.0 OR GPL-2.0 WITH Classpath-exception-2.0
#

#
#                       * * *    N O T E     * * *
#
# Although the lines in this file are formatted as environment
# variable assignments, this file is NOT typically invoked as a script
# from another script to define these variables.  Rather, this file is read
# and processed by a server as it starts up.  That scanning code resolves
# the relative paths against the GlassFish installation directory.
#
# Yet, this file is also where users of earlier versions have sometimes added
# a definition of AS_JAVA to control which version of Java GlassFish
# should use.  As a result, in order to run a user-specified version of Java,
# the asadmin and appclient scripts do indeed invoke this file as a
# script - but ONLY to define AS_JAVA.  Any calling script should not
# rely on the other settings because the relative paths will be resolved
# against the current directory when the calling script is run, not the
# installation directory of GlassFish, and such resolution will not work
# correctly unless the script happens to be run from the GlassFish installation
# directory.
#

AS_IMQ_LIB="../../mq/lib"
AS_IMQ_BIN="../../mq/bin"
AS_CONFIG="../config"
AS_INSTALL=".."
AS_DEF_DOMAINS_PATH="../domains"
AS_DEF_NODES_PATH="../nodes"
AS_DERBY_INSTALL="../../javadb"
AS_JAVA="/usr/java/jdk1.8.0_241-amd64"
7. ファイアウォールの設定
/usr/lib/firewalld/services配下に以下のglassfish.xmlを作成します。
<?xml version="1.0" encoding="utf-8"?>
<service>
  <short>glassfish</short>
  <description>GlassFish Server</description>
  <port protocol="tcp" port="4848"/>
  <port protocol="tcp" port="8080"/>
  <port protocol="tcp" port="8181"/>
</service>
以下のコマンドでglassfish.xmlで設定したポートを通すようにファイアウォールを設定します。
firewall-cmd --permanent --add-service=glassfish
[root@CENTOS7 services]# firewall-cmd --permanent --add-service=glassfish
success
[root@CENTOS7 services]#
以下のコマンドでfirewalldを再起動します。
systemctl restart firewalld.service
[root@CENTOS7 services]# systemctl restart firewalld.service
[root@CENTOS7 services]#
以下のコマンドでservicesにglassfishが追加されていることを確認します。
firewall-cmd --list-all
[root@CENTOS7 services]# firewall-cmd --list-all
public (active)
  target: default
  icmp-block-inversion: no
  interfaces: enp0s3
  sources:
  services: dhcpv6-client glassfish http ssh
  ports: 8888/tcp
  protocols:
  masquerade: no
  forward-ports:
  source-ports:
  icmp-blocks:
  rich rules:

[root@CENTOS7 services]#
8. glassfish起動
以下のコマンドでglassfishユーザーにスイッチします。
su - glassfish
[root@CENTOS7 services]# su - glassfish
最終ログイン: 2020/03/19 (木) 23:39:44 JST日時 pts/0
[glassfish@CENTOS7 ~]$
glassfishの起動、停止、再起動コマンドは以下となります。
起動:/opt/glassfish5/glassfish/bin/asadmin start-domain
停止:/opt/glassfish5/glassfish/bin/asadmin stop-domain
再起動:/opt/glassfish5/glassfish/bin/asadmin restart-domain
glassfishを起動します。
[glassfish@CENTOS7 ~]$ /opt/glassfish5/glassfish/bin/asadmin start-domain
Waiting for domain1 to start .......
Successfully started the domain : domain1
domain  Location: /opt/glassfish5/glassfish/domains/domain1
Log File: /opt/glassfish5/glassfish/domains/domain1/logs/server.log
Admin Port: 4848
Command start-domain executed successfully.
[glassfish@CENTOS7 ~]$
9. 接続確認
以下のURLでブラウザから接続します。
http://<サーバのIPアドレス>:8080/
以下の画面が開くと接続OKです。
10. 管理画面の設定
以下のURLでブラウザから管理画面に接続します。
http://<サーバのIPアドレス>:4848/
エラーが表示される場合、以下を設定します。
管理ユーザーのパスワードを設定します。
/opt/glassfish5/glassfish/bin/asadmin change-admin-password
[glassfish@CENTOS7 ~]$ /opt/glassfish5/glassfish/bin/asadmin change-admin-password
Enter admin user name [default: admin]>(そのまま)
Enter the admin password>(そのまま)
Enter the new admin password>admin
Enter the new admin password again>admin
Command change-admin-password executed successfully.
[glassfish@CENTOS7 ~]$
以下のコマンドでenable-secure-adminを有効にします。
/opt/glassfish5/glassfish/bin/asadmin --host localhost --port 4848 enable-secure-admin
[glassfish@CENTOS7 ~]$ /opt/glassfish5/glassfish/bin/asadmin --host localhost --port 4848 enable-secure-admin
Enter admin user name>  admin
Enter admin password for user "admin">
You must restart all running servers for the change in secure admin to take effect.
Command enable-secure-admin executed successfully.
[glassfish@CENTOS7 ~]$
glassfishを再起動します。
/opt/glassfish5/glassfish/bin/asadmin restart-domain
[glassfish@CENTOS7 ~]$ /opt/glassfish5/glassfish/bin/asadmin restart-domain
Successfully restarted the domain
Command restart-domain executed successfully.
[glassfish@CENTOS7 ~]$
再度以下のURLでブラウザから管理画面に接続します。
http://<サーバのIPアドレス>:4848/
設定した管理ユーザー/パスワード(admin/admin)でログインします。
管理画面にログインできました。
11. systemdのserviceファイル作成
/usr/lib/systemd/system配下に以下のglassfish.serviceを作成します。
[Unit]
Description=GlassFish Server v5.1
After=syslog.target network.target remote-fs.target

[Service]
Type=oneshot
RemainAfterExit=yes
PIDFile=/var/run/glassfish.pid
ExecStart=/opt/glassfish5/glassfish/bin/asadmin start-domain
ExecStop=/opt/glassfish5/glassfish/bin/asadmin stop-domain
ExecReload=/opt/glassfish5/glassfish/bin/asadmin restart-domain
TimeoutStartSec=300
TimeoutStopSec=30
User=glassfish
Group=glassfish

[Install]
WantedBy=multi-user.target
systemctlコマンドでの起動、停止、再起動は以下となります。
起動:systemctl start glassfish
停止:systemctl stop glassfish
再起動:systemctl restart glassfish
参考
エラー情報
今回はjavaとしてjdk-8u241をインストールして実行しました。
しかし、jdk14では以下のエラーが発生し実行できませんでした。
[glassfish@CENTOS7 ~]$ /opt/glassfish5/glassfish/bin/asadmin start-domain
Exception in thread "main" java.lang.NullPointerException
        at com.sun.enterprise.module.common_impl.AbstractModulesRegistryImpl.initializeServiceLocator(AbstractModulesRegistryImpl.java:128)
        at com.sun.enterprise.module.common_impl.AbstractModulesRegistryImpl.newServiceLocator(AbstractModulesRegistryImpl.java:120)
        at com.sun.enterprise.module.common_impl.AbstractModulesRegistryImpl.createServiceLocator(AbstractModulesRegistryImpl.java:194)
        at com.sun.enterprise.module.common_impl.AbstractModulesRegistryImpl.createServiceLocator(AbstractModulesRegistryImpl.java:200)
        at com.sun.enterprise.module.single.StaticModulesRegistry.createServiceLocator(StaticModulesRegistry.java:64)
        at com.sun.enterprise.admin.cli.CLIContainer.getServiceLocator(CLIContainer.java:193)
        at com.sun.enterprise.admin.cli.CLIContainer.getLocalCommand(CLIContainer.java:231)
        at com.sun.enterprise.admin.cli.CLICommand.getCommand(CLICommand.java:207)
        at com.sun.enterprise.admin.cli.AdminMain.executeCommand(AdminMain.java:347)
        at com.sun.enterprise.admin.cli.AdminMain.doMain(AdminMain.java:282)
        at org.glassfish.admin.cli.AsadminMain.main(AsadminMain.java:33)
[glassfish@CENTOS7 ~]$
以上


