PostgreSQL18 を Rocky Linux 9.5 にインストールしたので、その時の手順を紹介します。
環境
- OS:Rocky Linux release 9.5
[root@ROCKY95 ~]# cat /etc/redhat-release
Rocky Linux release 9.5 (Blue Onyx)
[root@ROCKY95 ~]
1. インストール手順
1.1. 概要
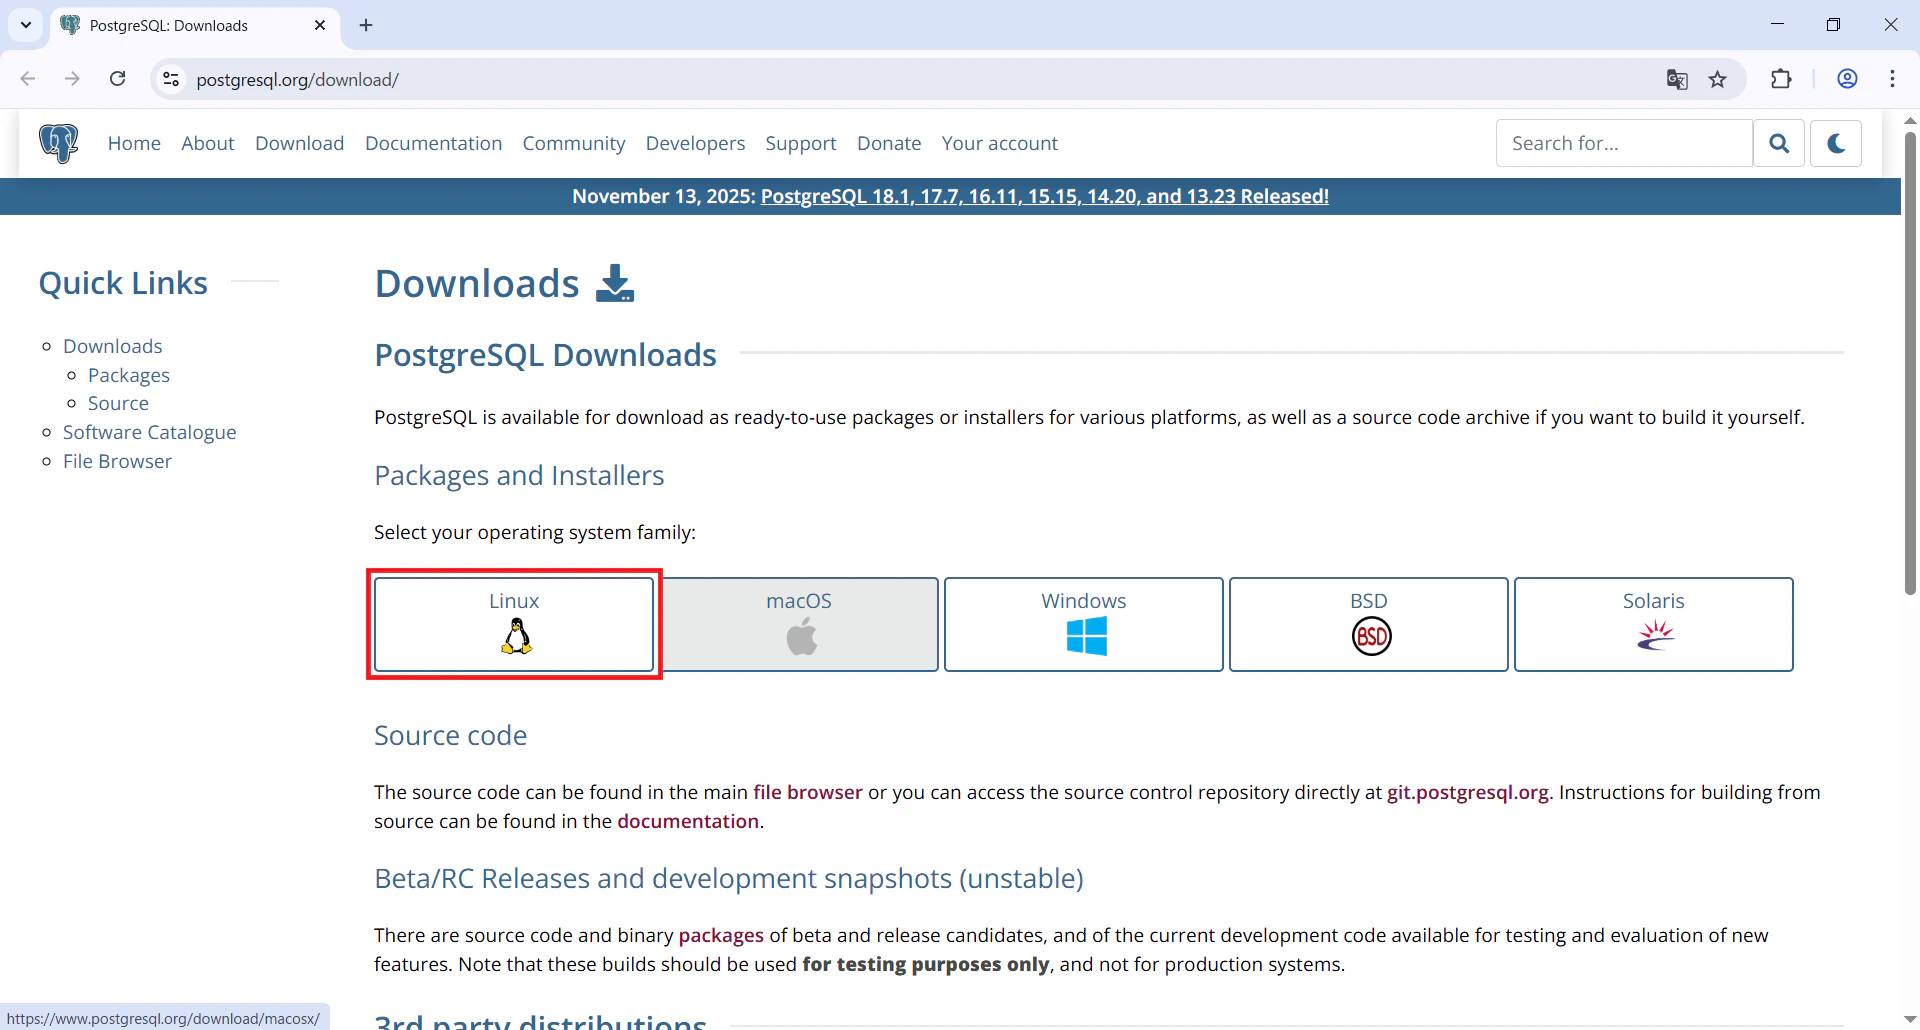
インストールの方法は「PostgreSQL: Downloads」のページから調べることができます。
「PostgreSQL: Downloads」のページを開き、「Linux」をクリックします。
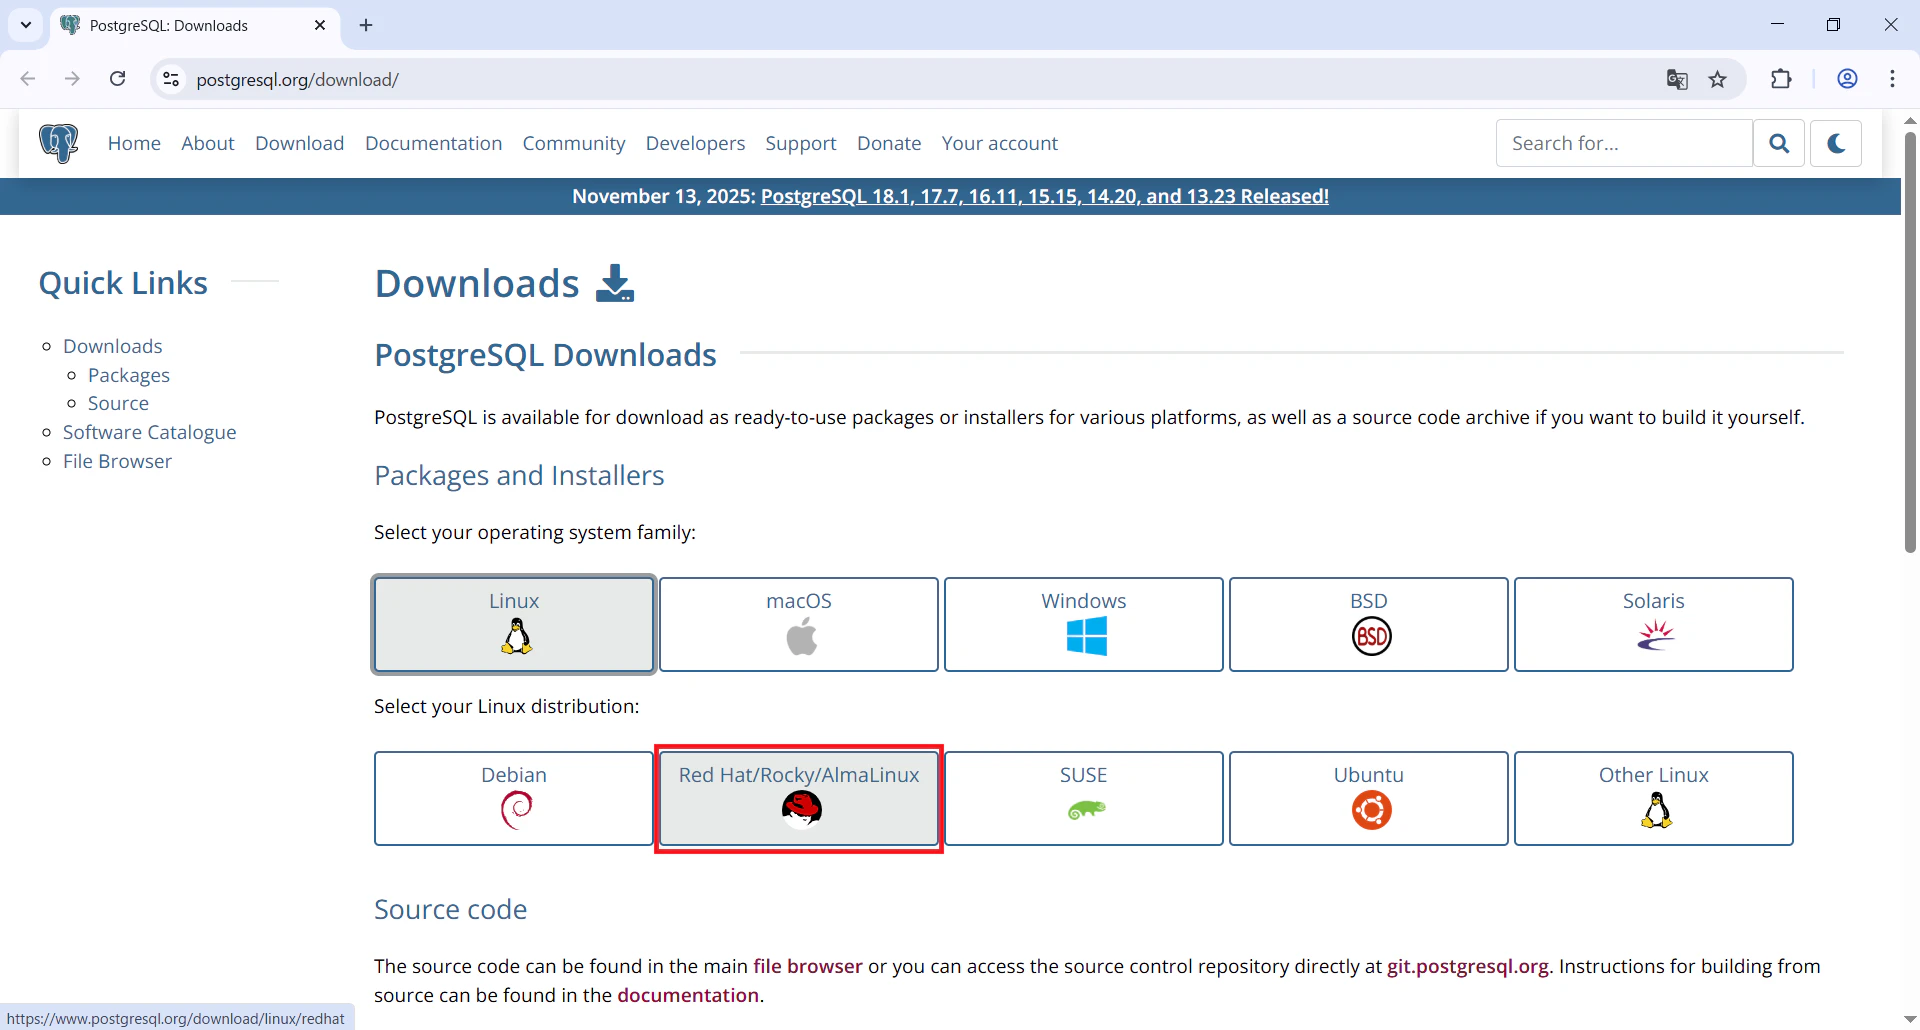
「Red Hat/Rocky/CentOS」をクリックします。
「1. Select platform:」で「Red Hat Enterprise Linux, Rocky Linux, or Oracle Version 9」を選択
「2. Select architecture:」で「x86_64」を選択します。
「3. Select version:」で「18」を選択
すると、「4. Copy, paste and run the relevant parts of the setup script:」にインストールコマンドが表示されます。

sudo dnf install -y https://download.postgresql.org/pub/repos/yum/reporpms/EL-9-x86_64/pgdg-redhat-repo-latest.noarch.rpm
sudo dnf install -y postgresql18-server
sudo /usr/pgsql-18/bin/postgresql-18-setup initdb
sudo systemctl enable postgresql-18
sudo systemctl start postgresql-18
1.2. PostgreSQLのリポジトリRPMのインストール
以下のコマンドでPostgreSQLのリポジトリRPMをインストールします。
dnf install -y https://download.postgresql.org/pub/repos/yum/reporpms/EL-9-x86_64/pgdg-redhat-repo-latest.noarch.rpm
[root@ROCKY95 ~]# dnf install -y https://download.postgresql.org/pub/repos/yum/reporpms/EL-9-x86_64/pgdg-redhat-repo-latest.noarch.rpm
Rocky Linux 9 - BaseOS                          3.0 MB/s | 9.8 MB     00:03
Rocky Linux 9 - AppStream                       2.9 MB/s |  14 MB     00:04
Rocky Linux 9 - Extras                          745  B/s |  17 kB     00:22
メタデータの期限切れの最終確認: 0:00:02 前の 2026年01月25日 00時41分12秒 に実施 しました。
pgdg-redhat-repo-latest.noarch.rpm               44 kB/s |  13 kB     00:00
依存関係が解決しました。
================================================================================
 パッケージ           Arch       バージョン              リポジトリー     サイズ
================================================================================
インストール:
 pgdg-redhat-repo     noarch     42.0-64.rhel9PGDG       @commandline      13 k

トランザクションの概要
================================================================================
インストール  1 パッケージ

合計サイズ: 13 k
インストール後のサイズ: 16 k
パッケージのダウンロード:
トランザクションを確認しています
トランザクションの確認に成功しました。
トランザクションをテストしています
トランザクションのテストに成功しました。
トランザクションを実行しています
  準備中           :                                                        1/1
  インストール中   : pgdg-redhat-repo-42.0-64.rhel9PGDG.noarch              1/1
  検証中           : pgdg-redhat-repo-42.0-64.rhel9PGDG.noarch              1/1

インストール済み:
  pgdg-redhat-repo-42.0-64.rhel9PGDG.noarch

完了しました!
[root@ROCKY95 ~]#
1.3. PostgreSQL18をインストール
以下のコマンドでPostgreSQL18をインストールします。
dnf install -y postgresql18-server
[root@ROCKY95 ~]# dnf install -y postgresql18-server
メタデータの期限切れの最終確認: 0:03:42 前の 2026年01月25日 00時45分41秒 に実施 しました。
依存関係が解決しました。
================================================================================
 パッケージ              Arch       バージョン              リポジトリー  サイズ
================================================================================
インストール:
 postgresql18-server     x86_64     18.1-1PGDG.rhel9        pgdg18        7.2 M
依存関係のインストール:
 libicu                  x86_64     67.1-10.el9_6           baseos        9.6 M
 liburing                x86_64     2.5-1.el9               appstream      38 k
 postgresql18            x86_64     18.1-1PGDG.rhel9        pgdg18        1.9 M
 postgresql18-libs       x86_64     18.1-1PGDG.rhel9        pgdg18        293 k

トランザクションの概要
================================================================================
インストール  5 パッケージ

ダウンロードサイズの合計: 19 M
インストール後のサイズ: 75 M
パッケージのダウンロード:
(1/5): postgresql18-18.1-1PGDG.rhel9.x86_64.rpm 2.0 MB/s | 1.9 MB     00:00
(2/5): postgresql18-libs-18.1-1PGDG.rhel9.x86_6 248 kB/s | 293 kB     00:01
(3/5): postgresql18-server-18.1-1PGDG.rhel9.x86 5.6 MB/s | 7.2 MB     00:01
(4/5): liburing-2.5-1.el9.x86_64.rpm            118 kB/s |  38 kB     00:00
(5/5): libicu-67.1-10.el9_6.x86_64.rpm          7.9 MB/s | 9.6 MB     00:01
--------------------------------------------------------------------------------
合計                                            5.0 MB/s |  19 MB     00:03
PostgreSQL 18 for RHEL / Rocky Linux / AlmaLinu 1.1 MB/s | 2.4 kB     00:00
GPG 鍵 0x08B40D20 をインポート中:
 Userid     : "PostgreSQL RPM Repository <pgsql-pkg-yum@lists.postgresql.org>"
 Fingerprint: D4BF 08AE 67A0 B4C7 A1DB CCD2 40BC A2B4 08B4 0D20
 From       : /etc/pki/rpm-gpg/PGDG-RPM-GPG-KEY-RHEL
鍵のインポートに成功しました
Rocky Linux 9 - BaseOS                          329 kB/s | 1.7 kB     00:00
GPG 鍵 0x350D275D をインポート中:
 Userid     : "Rocky Enterprise Software Foundation - Release key 2022 <releng@rockylinux.org>"
 Fingerprint: 21CB 256A E16F C54C 6E65 2949 702D 426D 350D 275D
 From       : /etc/pki/rpm-gpg/RPM-GPG-KEY-Rocky-9
鍵のインポートに成功しました
トランザクションを確認しています
トランザクションの確認に成功しました。
トランザクションをテストしています
トランザクションのテストに成功しました。
トランザクションを実行しています
  準備中           :                                                        1/1
  インストール中   : libicu-67.1-10.el9_6.x86_64                            1/5
  インストール中   : postgresql18-libs-18.1-1PGDG.rhel9.x86_64              2/5
  scriptletの実行中: postgresql18-libs-18.1-1PGDG.rhel9.x86_64              2/5
  インストール中   : postgresql18-18.1-1PGDG.rhel9.x86_64                   3/5
  scriptletの実行中: postgresql18-18.1-1PGDG.rhel9.x86_64                   3/5
  インストール中   : liburing-2.5-1.el9.x86_64                              4/5
  scriptletの実行中: postgresql18-server-18.1-1PGDG.rhel9.x86_64            5/5
Creating group 'postgres' with GID 26.
Creating user 'postgres' (PostgreSQL Server) with UID 26 and GID 26.

  インストール中   : postgresql18-server-18.1-1PGDG.rhel9.x86_64            5/5
  scriptletの実行中: postgresql18-server-18.1-1PGDG.rhel9.x86_64            5/5
  検証中           : postgresql18-18.1-1PGDG.rhel9.x86_64                   1/5
  検証中           : postgresql18-libs-18.1-1PGDG.rhel9.x86_64              2/5
  検証中           : postgresql18-server-18.1-1PGDG.rhel9.x86_64            3/5
  検証中           : libicu-67.1-10.el9_6.x86_64                            4/5
  検証中           : liburing-2.5-1.el9.x86_64                              5/5

インストール済み:
  libicu-67.1-10.el9_6.x86_64
  liburing-2.5-1.el9.x86_64
  postgresql18-18.1-1PGDG.rhel9.x86_64
  postgresql18-libs-18.1-1PGDG.rhel9.x86_64
  postgresql18-server-18.1-1PGDG.rhel9.x86_64

完了しました!
[root@ROCKY95 ~]#
1.4. マニュアル参照を設定
manコマンドで PostgreSQL のマニュアルを参照できるように/etc/man_db.confに以下を追加します。
MANDATORY_MANPATH /usr/pgsql-18/share/man/
~~ 省略 ~~
# every automatically generated MANPATH includes these fields
#
#MANDATORY_MANPATH                      /usr/src/pvm3/man
#
MANDATORY_MANPATH                       /usr/man
MANDATORY_MANPATH                       /usr/share/man
MANDATORY_MANPATH                       /usr/local/share/man
MANDATORY_MANPATH                       /usr/pgsql-18/share/man
~~ 省略 ~~
これにより、man psqlやman initdbのように、manコマンドで PostgreSQL のコマンドを参照できるようになります。
1.5. 環境変数の確認
postgresユーザーにスイッチし、PGDATAの値を確認します。デフォルトでは/var/lib/pgsql/18/dataになっています。
su - postgres
env | grep PGDATA
[root@ROCKY95 ~]# su - postgres
[postgres@ROCKY95 ~]$ env | grep PGDATA
PGDATA=/var/lib/pgsql/18/data
[postgres@ROCKY95 ~]$ exit
ログアウト
[root@ROCKY95 ~]#
なお、PGDATAはpostgresユーザーのホームディレクトリ/var/lib/pgsql配下の.bash_profileに設定されています。
[ -f /etc/profile ] && source /etc/profile
PGDATA=/var/lib/pgsql/18/data
export PGDATA
# If you want to customize your settings,
# Use the file below. This is not overridden
# by the RPMS.
[ -f /var/lib/pgsql/.pgsql_profile ] && source /var/lib/pgsql/.pgsql_profile
1.6. データベースの初期化(データベースクラスタの作成)
以下のコマンドで、データベースの初期化(データベースクラスタの作成)を行います。
(PGSETUP_INITDB_OPTIONSの環境変数で、エンコーディングを「UTF-8」に、ロケールを「無し」に設定しています。)
なお、データベースクラスタはPGDATAで指定されているディレクトリに作成されます。
PGSETUP_INITDB_OPTIONS='--encoding=UTF-8 --no-locale' /usr/pgsql-18/bin/postgresql-18-setup initdb
[root@ROCKY95 ~]# PGSETUP_INITDB_OPTIONS='--encoding=UTF-8 --no-locale' /usr/pgsql-18/bin/postgresql-18-setup initdb
Initializing database ... OK

[root@ROCKY95 ~]#
PGDATAの/var/lib/pgsql/18/dataを参照すると、以下の通りデータベースクラスタが作成されています。
[root@ROCKY95 ~]# ls -l /var/lib/pgsql/18/data
合計 56
-rw-------. 1 postgres postgres     3  1月 25 01:26 PG_VERSION
drwx------. 5 postgres postgres    33  1月 25 01:26 base
drwx------. 2 postgres postgres  4096  1月 25 01:26 global
drwx------. 2 postgres postgres     6  1月 25 01:26 log
drwx------. 2 postgres postgres     6  1月 25 01:26 pg_commit_ts
drwx------. 2 postgres postgres     6  1月 25 01:26 pg_dynshmem
-rw-------. 1 postgres postgres  5509  1月 25 01:26 pg_hba.conf
-rw-------. 1 postgres postgres  2681  1月 25 01:26 pg_ident.conf
drwx------. 4 postgres postgres    68  1月 25 01:26 pg_logical
drwx------. 4 postgres postgres    36  1月 25 01:26 pg_multixact
drwx------. 2 postgres postgres     6  1月 25 01:26 pg_notify
drwx------. 2 postgres postgres     6  1月 25 01:26 pg_replslot
drwx------. 2 postgres postgres     6  1月 25 01:26 pg_serial
drwx------. 2 postgres postgres     6  1月 25 01:26 pg_snapshots
drwx------. 2 postgres postgres    25  1月 25 01:26 pg_stat
drwx------. 2 postgres postgres     6  1月 25 01:26 pg_stat_tmp
drwx------. 2 postgres postgres    18  1月 25 01:26 pg_subtrans
drwx------. 2 postgres postgres     6  1月 25 01:26 pg_tblspc
drwx------. 2 postgres postgres     6  1月 25 01:26 pg_twophase
drwx------. 4 postgres postgres    77  1月 25 01:26 pg_wal
drwx------. 2 postgres postgres    18  1月 25 01:26 pg_xact
-rw-------. 1 postgres postgres    88  1月 25 01:26 postgresql.auto.conf
-rw-------. 1 postgres postgres 32306  1月 25 01:26 postgresql.conf
[root@ROCKY95 ~]#
2. PostgreSQLの起動、停止、自動起動有効化
PostgreSQLのサービスのユニット定義ファイルは/usr/lib/systemd/system/postgresql-18.serviceに作成されています。
# It's not recommended to modify this file in-place, because it will be
# overwritten during package upgrades.  It is recommended to use systemd
# "dropin" feature;  i.e. create file with suffix .conf under
# /etc/systemd/system/postgresql-18.service.d directory overriding the
# unit's defaults. You can also use "systemctl edit postgresql-18"
# Look at systemd.unit(5) manual page for more info.

# Note: changing PGDATA will typically require adjusting SELinux
# configuration as well.

# Note: do not use a PGDATA pathname containing spaces, or you will
# break postgresql-18-setup.
[Unit]
Description=PostgreSQL 18 database server
Documentation=https://www.postgresql.org/docs/18/static/
After=syslog.target
After=network-online.target

[Service]
Type=notify

User=postgres
Group=postgres

# Note: avoid inserting whitespace in these Environment= lines, or you may
# break postgresql-setup.

# Location of database directory
Environment=PGDATA=/var/lib/pgsql/18/data/

# Where to send early-startup messages from the server (before the logging
# options of postgresql.conf take effect)
# This is normally controlled by the global default set by systemd
# StandardOutput=syslog

# Disable OOM kill on postgres main process
OOMScoreAdjust=-1000
Environment=PG_OOM_ADJUST_FILE=/proc/self/oom_score_adj
Environment=PG_OOM_ADJUST_VALUE=0

ExecStartPre=/usr/pgsql-18/bin/postgresql-18-check-db-dir ${PGDATA}
ExecStart=/usr/pgsql-18/bin/postgres -D ${PGDATA}
ExecReload=/bin/kill -HUP $MAINPID
KillMode=mixed
KillSignal=SIGINT

# Do not set any timeout value, so that systemd will not kill postgres
# main process during crash recovery.
TimeoutSec=infinity

TimeoutStartSec=infinity
TimeoutStopSec=1h

[Install]
WantedBy=multi-user.target
Environment=PGDATA=/var/lib/pgsql/18/data/と「PGDATA」には「/var/lib/pgsql/18/data/」が設定されています。
(「PGDATA」を変更している場合、上記のファイルも変更する必要があります。)
PostgreSQLの起動、停止、自動起動有効化は以下のコマンドとなります。
-
起動
systemctl start postgresql-18 -
停止
systemctl stop postgresql-18 -
自動起動有効化
systemctl enable postgresql-18
3. 動作確認用DBの作成
3.1. PostgreSQL起動
systemctl start postgresql-18のコマンドでPostgreSQLを起動します。
[root@centos8 ~]# systemctl start postgresql-18
[root@centos8 ~]#
3.2. psqlで接続
postgresユーザーにスイッチし、psqlコマンドでデータベースに接続します。
su - postgres
psql
[root@ROCKY95 ~]# su - postgres
最終ログイン: 2026/01/25 (日) 00:57:49 JST 日時 pts/0
[postgres@ROCKY95 ~]$ psql
psql (18.1)
"help"でヘルプを表示します。

postgres=#
以下のSQLでバージョンを確認してみます。
select version();
postgres=# select version();
                                                  version

--------------------------------------------------------------------------------
---------------------------
 PostgreSQL 18.1 on x86_64-pc-linux-gnu, compiled by gcc (GCC) 11.5.0 20240719 (
Red Hat 11.5.0-11), 64-bit
(1 行)

postgres=#
3.3. ロールの作成
以下のSQLでロール(test_role)を作成します。
CREATE ROLE test_role WITH
  SUPERUSER
  CREATEDB
  CREATEROLE
  INHERIT
  LOGIN
  REPLICATION
  BYPASSRLS
  ENCRYPTED PASSWORD 'password';
postgres=# CREATE ROLE test_role WITH
  SUPERUSER
  CREATEDB
  CREATEROLE
  INHERIT
  LOGIN
  REPLICATION
  BYPASSRLS
  ENCRYPTED PASSWORD 'password';
CREATE ROLE
postgres=#
\duコマンドでロールの一覧を参照し、ロール(test_role)が作成されていることを確認します。
postgres=# \du
                                        ロール一覧
 ロール名  |                                     属性

-----------+--------------------------------------------------------------------
----------
 postgres  | スーパーユーザー, ロール作成可, DB作成可, レプリケーション可, RLS
バイパス
 test_role | スーパーユーザー, ロール作成可, DB作成可, レプリケーション可, RLS
バイパス

postgres=#
3.4. テーブルスペース作成
\qコマンドで、一旦psqlから抜けます。
postgres=# \q
[postgres@ROCKY95 ~]$
以下のコマンドでテーブルスペース(test_tbs)で使用するディレクトリを作成します。
mkdir /var/lib/pgsql/18/data/test_tbs
[postgres@ROCKY95 ~]$ mkdir /var/lib/pgsql/18/data/test_tbs
[postgres@ROCKY95 ~]$ ls -ld /var/lib/pgsql/18/data/test_tbs
drwxr-xr-x. 2 postgres postgres 6  1月 25 01:33 /var/lib/pgsql/18/data/test_tbs
[postgres@ROCKY95 ~]$
再度、psqlコマンドでデータベースに接続します。
[postgres@ROCKY95 ~]$ psql
psql (18.1)
"help"でヘルプを表示します。

postgres=#
以下のSQLで、テーブルスペース(test_tbs)を作成します。
CREATE TABLESPACE test_tbs
  OWNER test_role
  LOCATION '/var/lib/pgsql/18/data/test_tbs';
COMMENT ON TABLESPACE test_tbs IS 'テスト用テーブルスペース';
GRANT CREATE ON TABLESPACE test_tbs TO test_role;
postgres=# CREATE TABLESPACE test_tbs
  OWNER test_role
  LOCATION '/var/lib/pgsql/18/data/test_tbs';
COMMENT ON TABLESPACE test_tbs IS 'テスト用テーブルスペース';
GRANT CREATE ON TABLESPACE test_tbs TO test_role;
WARNING:  tablespace location should not be inside the data directory
CREATE TABLESPACE
COMMENT
GRANT
postgres=#
\dbでテーブルスペース(test_tbs)が作成されていることを確認します。
postgres=# \db
                     テーブル空間一覧
    名前    |  所有者   |              場所
------------+-----------+---------------------------------
 pg_default | postgres  |
 pg_global  | postgres  |
 test_tbs   | test_role | /var/lib/pgsql/18/data/test_tbs
(3 行)

postgres=#
3.5. データベース作成
以下のSQLでデーターベース(test_db)を作成します。
CREATE DATABASE test_db
    WITH
    OWNER = test_role
    ENCODING = 'UTF8'
    LC_COLLATE = 'C'
    LC_CTYPE = 'C'
    TABLESPACE = test_tbs
    ALLOW_CONNECTIONS = true
    CONNECTION LIMIT = -1;
COMMENT ON DATABASE test_db IS 'テスト用データベース';
postgres=# CREATE DATABASE test_db
    WITH
    OWNER = test_role
    ENCODING = 'UTF8'
    LC_COLLATE = 'C'
    LC_CTYPE = 'C'
    TABLESPACE = test_tbs
    ALLOW_CONNECTIONS = true
    CONNECTION LIMIT = -1;
COMMENT ON DATABASE test_db IS 'テスト用データベース';
CREATE DATABASE
COMMENT
postgres=#
\lコマンドでデーターベースの一覧を参照し、データベース(test_db)が作成されていることを確認します。
postgres=# \l
                                                                データベース一覧
   名前    |  所有者   | エンコーディング | ロケールプロバイダー | 照合順序 | Ctype(変換演算子) | ロケール | ICUルール: |     アクセス権限
-----------+-----------+------------------+----------------------+----------+-------------------+----------+------------+-----------------------
 postgres  | postgres  | UTF8             | libc                 | C        | C                 |          |            |
 template0 | postgres  | UTF8             | libc                 | C        | C                 |          |            | =c/postgres          +
           |           |                  |                      |          |                   |          |            | postgres=CTc/postgres
 template1 | postgres  | UTF8             | libc                 | C        | C                 |          |            | =c/postgres          +
           |           |                  |                      |          |                   |          |            | postgres=CTc/postgres
 test_db   | test_role | UTF8             | libc                 | C        | C                 |          |            |
(4 行)

postgres=#
3.6. スキーマ作成
\c test_dbコマンドで、test_dbに切り替えます。
postgres=# \c test_db
データベース"test_db"にユーザー"postgres"として接続しました。
test_db=#
以下のSQLで``test_dbに、スキーマ(test_schema`)を作成します。
CREATE SCHEMA test_schema AUTHORIZATION test_role;
COMMENT ON SCHEMA test_schema IS 'テスト用スキーマ';
GRANT ALL ON SCHEMA test_schema TO test_role;
test_db=# CREATE SCHEMA test_schema AUTHORIZATION test_role;
CREATE SCHEMA
test_db=# COMMENT ON SCHEMA test_schema IS 'テスト用スキーマ';
COMMENT
test_db=# GRANT ALL ON SCHEMA test_schema TO test_role;
GRANT
test_db=#
\dn+コマンドでスキーマの一覧を参照し、スキーマ(test_schema)が作成されていることを確認します。
test_db-# \dn+
                                           スキーマ一覧
    名前     |      所有者       |              アクセス権限              |          説明
-------------+-------------------+----------------------------------------+------------------------
 public      | pg_database_owner | pg_database_owner=UC/pg_database_owner+| standard public schema
             |                   | =U/pg_database_owner                   |
 test_schema | test_role         | test_role=UC/test_role                 | テスト用スキーマ
(2 行)

test_db-#
ここでは、スキーマとしてtest_schemaを作成しましたが、postgresql.confでsearch_pathに'"$user", public'が設定されているため、スキーマはデフォルトのpublicを使用するか、ユーザー(ロール)と同じ名前にしたほうが使い勝手がよさそうです。
[postgres@ROCKY95 ~]$ grep search_path /var/lib/pgsql/18/data/postgresql.conf
#search_path = '"$user", public'        # schema names
[postgres@ROCKY95 ~]$
3.7. テーブルとインデックスの作成
以下のSQLでtest_dbのtest_schemaにテーブル(test_table)を作成します。
CREATE TABLE test_schema.test_table (
  test_id varchar(8),
  test_name varchar(256),
  PRIMARY KEY (test_id)
) TABLESPACE test_tbs;
COMMENT ON TABLE test_schema.test_table IS 'テスト用テーブル';
test_db=# CREATE TABLE test_schema.test_table (
  test_id varchar(8),
  test_name varchar(256),
  PRIMARY KEY (test_id)
) TABLESPACE test_tbs;
COMMENT ON TABLE test_schema.test_table IS 'テスト用テーブル';
CREATE TABLE
COMMENT
test_db=#
\dt test_schema.*コマンドで、テーブル(test_table)が作成されていることを確認します。
test_db=# \dt test_schema.*
                  テーブル一覧
  スキーマ   |    名前    |  タイプ  |  所有者
-------------+------------+----------+----------
 test_schema | test_table | テーブル | postgres
(1 行)

test_db=#
以下のSQLでtest_tableにデータを投入します。
INSERT INTO test_schema.test_table(test_id, test_name) VALUES('00000001', 'テスト名称1');
INSERT INTO test_schema.test_table(test_id, test_name) VALUES('00000002', 'テスト名称2');
test_db=# INSERT INTO test_schema.test_table(test_id, test_name) VALUES('00000001', 'テスト名称1');
INSERT 0 1
test_db=# INSERT INTO test_schema.test_table(test_id, test_name) VALUES('00000002', 'テスト名称2');
INSERT 0 1
test_db=#
以下のSQLでtest_tableを参照します。
select * from test_schema.test_table;
test_db=# select * from test_schema.test_table;
 test_id  |  test_name
----------+--------------
 00000001 | テスト名称1
 00000002 | テスト名称2
(2 行)

test_db=#
\qコマンドでpsqlから抜けます。
test_db=# \q
[postgres@ROCKY95 ~]$
4. ネットワーク設定(クライアント端末から接続のため)
4.1. postgresql.confの修正
/var/lib/pgsql/18/data/postgresql.confのlisten_addressesとportの項目を修正します。
listen_addressesには接続を受け付けるサーバー側のIPアドレスを設定します。(ここではPostgreSQLをインストールしたサーバーのIPアドレスの192.168.0.22)
portには接続を受け付けるサーバー側のポートを設定します。(PostgreSQLのポートである5432)
~~ 省略 ~~
#listen_addresses = 'localhost'         # what IP address(es) to listen on;
                                        # comma-separated list of addresses;
                                        # defaults to 'localhost'; use '*' for all
                                        # (change requires restart)
#port = 5432                            # (change requires restart)
~~ 省略 ~~
~~ 省略 ~~
listen_addresses = '192.168.0.22'       # what IP address(es) to listen on;
                                        # comma-separated list of addresses;
                                        # defaults to 'localhost'; use '*' for all
                                        # (change requires restart)
port = 5432                             # (change requires restart)
~~ 省略 ~~
4.2. pg_hba.confの修正
/var/lib/pgsql/18/data/pg_hba.confに以下の設定を追加します。
- TYPE: host
- DATABASE: test_db
- USER: test_role
- ADDRESS: 192.168.0.0/24
- METHOD: scram-sha-256
192.168.0.0/24はサーバーに接続するクライアントのネットワークアドレスです。
host test_db test_role 192.168.0.0/24 scram-sha-256
4.3. PostgreSQLの再起動
su -コマンドでrootユーザーにスイッチします。
[postgres@ROCKY95 ~]$ su -
パスワード:
最終ログイン: 2026/01/25 (日) 00:24:02 JST 192.168.0.107から開始 日時 pts/0
[root@ROCKY95 ~]#
systemctl restart postgresql-18コマンドでPostgreSQLを再起動します。
[root@ROCKY95 ~]# systemctl restart postgresql-18
[root@ROCKY95 ~]#
4.4. firewallの設定
/usr/lib/firewalld/services/postgresql.xmlのファイルが存在することを確認します。
<?xml version="1.0" encoding="utf-8"?>
<service>
  <short>PostgreSQL</short>
  <description>PostgreSQL Database Server</description>
  <port protocol="tcp" port="5432"/>
</service>
以下のコマンドでfirewall にpostgresqlのサービスを追加します。
firewall-cmd --add-service=postgresql --permanent --zone=public
[root@ROCKY95 ~]# firewall-cmd --add-service=postgresql --permanent --zone=public
success
[root@ROCKY95 ~]#
以下のコマンドで firewall を再起動します。
systemctl restart firewalld.service
[root@ROCKY95 ~]# systemctl restart firewalld.service
[root@ROCKY95 ~]#
以下のコマンドで、firewall にpostgresqlが追加されていることを確認します。
firewall-cmd --list-services --zone=public
[root@ROCKY95 ~]# firewall-cmd --list-services --zone=public
cockpit dhcpv6-client postgresql ssh
[root@ROCKY95 ~]#
5. A5M2.exe で接続確認
クライアント端末(ここではWindowsPC)で A5M2.exe を起動します。
A5M2.exe は「A5:SQL Mk-2 - フリーのSQLクライアント/ER図作成ソフト (松原正和)」からダウンロードできます。
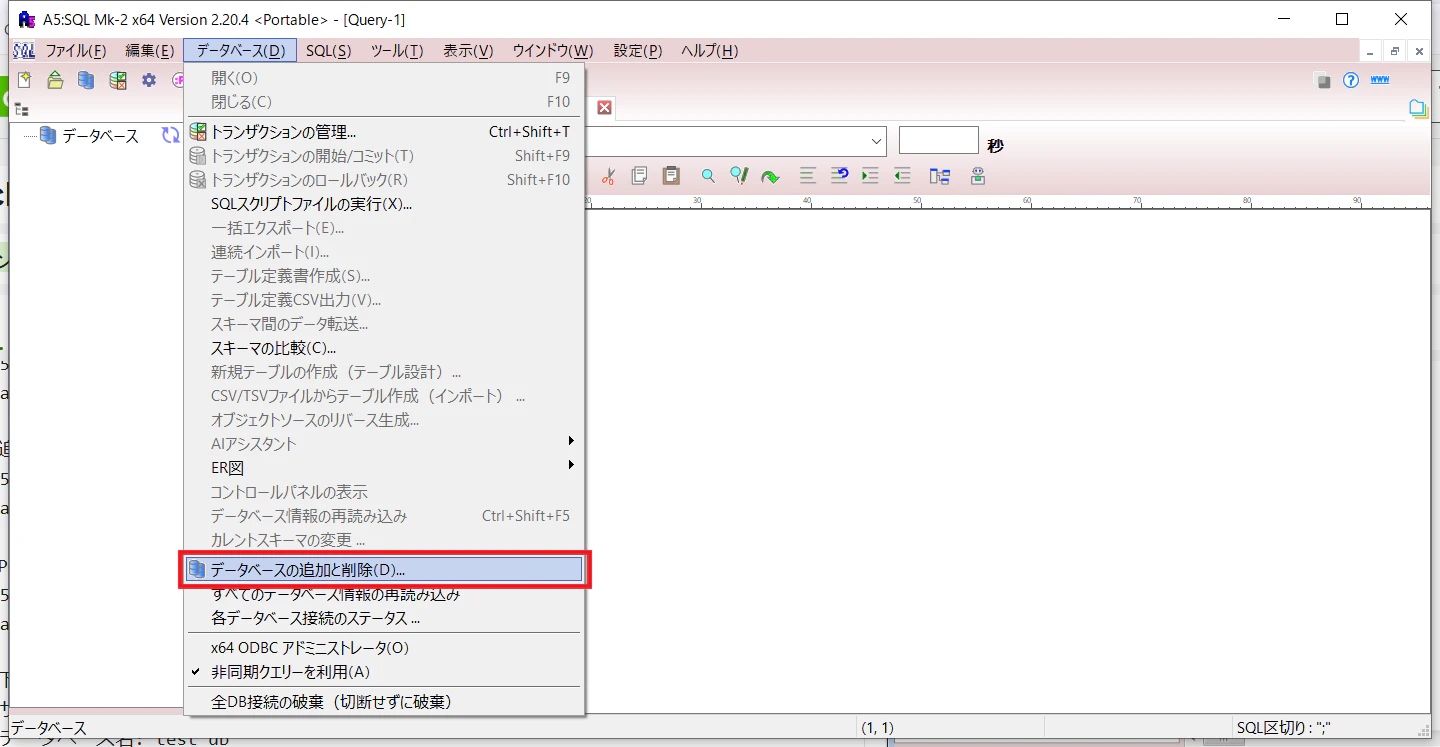
メニューから「データベース」-「データベースの追加と削除」を選択します。
「追加」をクリックします。

「PostgreSQL(直接接続)」をクリックします。

以下を入力し、「OK」をクリックします。
- サーバー名: サーバのIPアドレス(ここでは
192.168.0.22) - データベース名: test_db
- ユーザーID: test_role
- パスワード: password
- パスワードを保存する: チェック

そのまま「OK」をクリックします。

「閉じる」をクリックします。
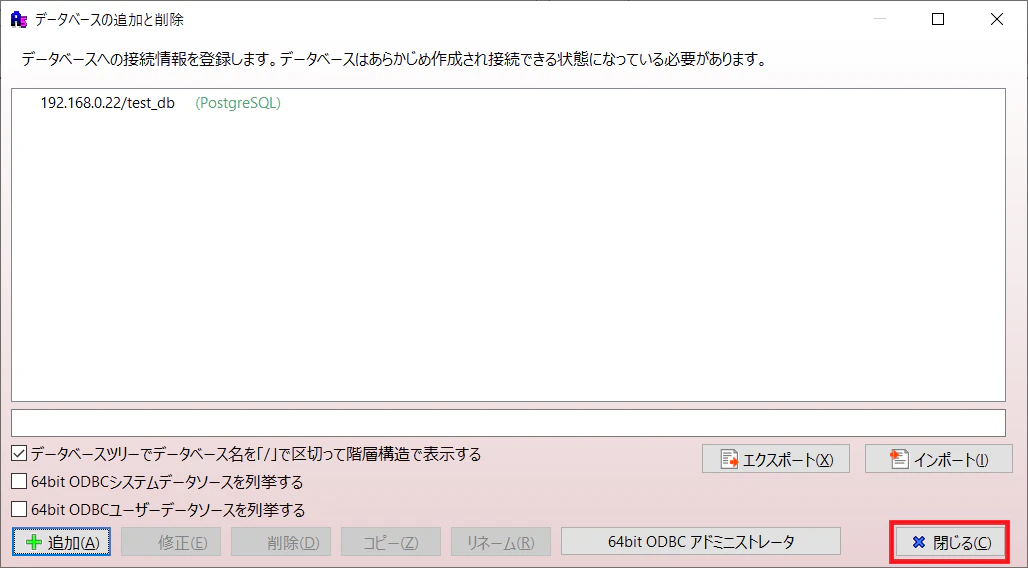
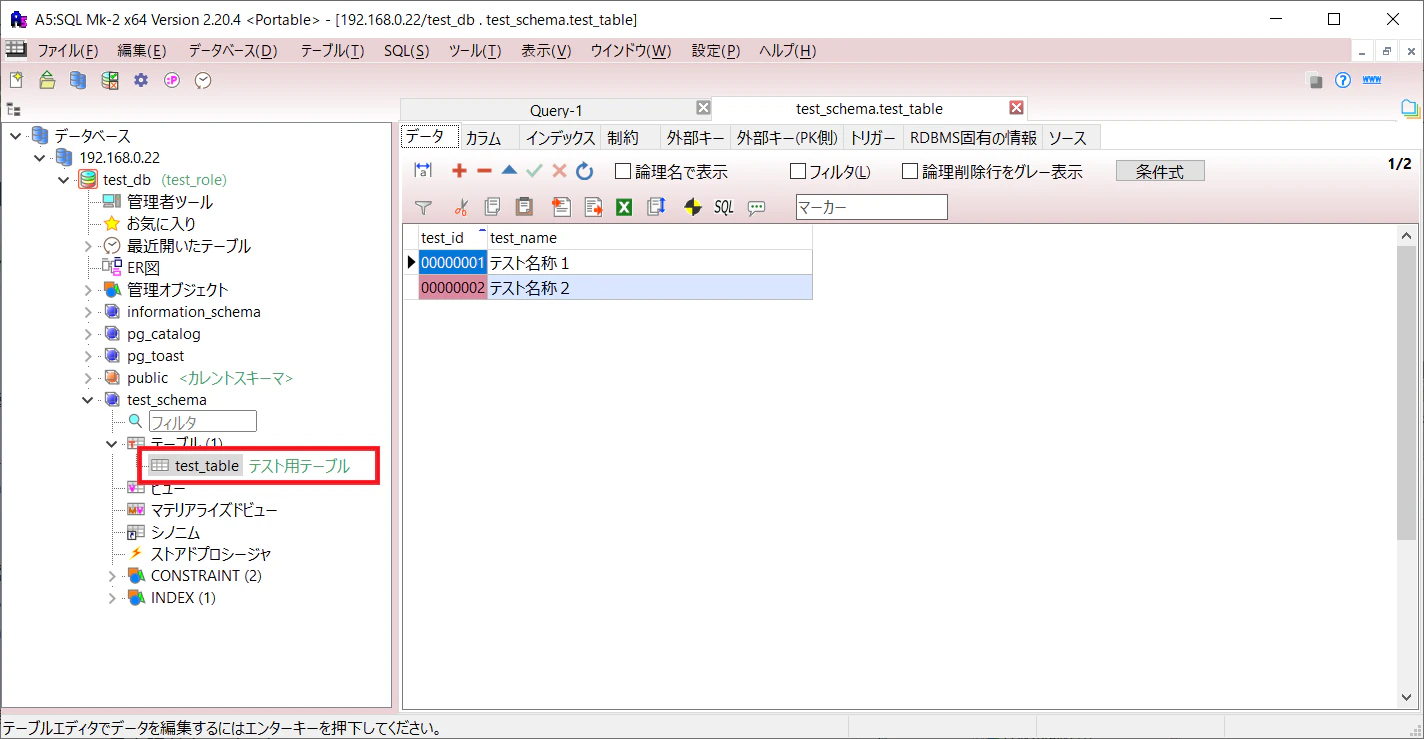
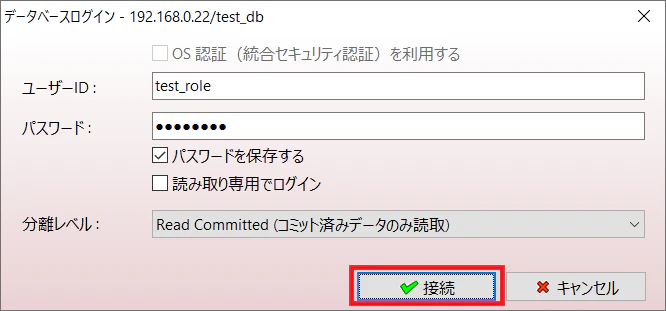
「test_db」をクリックします。

「接続」をクリックします。
「test_db」-「test_schema」-「test_table」を選択し、テーブルが参照できることを確認できました。