はじめに
ZEITが作っているNode.js用フレームワークMicroを使って、モック用のGraphQL APIサーバーをローカルに立てて、GraphQL APIを使ってみるまでの方法をご紹介します。
Microって何?という方は、
という分かりやすい記事が既にあるので、こちらを一読してMicroをざっくりと理解し、
を確認してみるのがオススメです。
対象読者
- GraphQLに関する知識をある程度有している方
- GraphQL APIを提供するサーバーを簡単に素早く作りたい方
- 言語はTypeScriptで書きたい方
実行環境
- Mac OS Sierra: v10.12.6
- node: v11.2.0(8系以上が必須)
- npm: v6.5.0
- yarn: v1.12.3
サーバー構築手順
作業用ディレクトリ〜package.jsonの作成
$ mkdir micro-typescript-graphql-sample
$ cd micro-typescript-graphql-sample
$ yarn init -y
必要なパッケージのインストール
$ yarn add micro microrouter apollo-server-micro graphql graphql-tools
$ yarn add -D micro-dev typescript ts-node @types/graphql @types/micro @types/microrouter
-
microrouter
- クライアントからのリクエストをルーティングするために必要
-
apollo-server-micro
- Apollo Serverの機能をMicroで使うために必要
-
graphql-tools
- 定義されたGraphQLスキーマとリゾルバを合成し、Apollo Serverに渡すオブジェクトを生成するmakeExecutableSchema関数を使用するために必要
-
micro-dev
- 開発環境でMicroサーバーを起動し、Hot Reloading、ログ出力などの機能を使うために必要
-
ts-node
-
.tsファイルに書かれたスクリプトをコンパイル無しでNode環境で実行するために必要
-
tsconfig.jsonの作成
{
  "compilerOptions": {
    "esModuleInterop": true,
    "module": "commonjs",
    "outDir": "./build",
    "resolveJsonModule": true,
    "strict": true,
    "target": "esnext"
  },
  "include": ["./src/**/*"],
  "exclude": ["node_modules"]
}
任意に設定できますが、"esModuleInterop": trueと"outDir": "./build"はビルドする際に必要です。
また、JSONファイルをimportするのにも"resolveJsonModule": trueが必要です。
src/index.tsの作成
import { send } from 'micro';
import { get, post, router } from 'microrouter';
import { ApolloServer, gql } from 'apollo-server-micro';
import { makeExecutableSchema } from 'graphql-tools';

const mockData = [
  {
    director: 'Bryan Singer',
    title: 'Bohemian Rhapsody',
  },
  {
    director: 'Bob Persichetti',
    title: 'Spider-Man: Into the Spider-Verse',
  },
];

const typeDefs = gql`
  type Movie {
    title: String
    director: String
  }
  type Query {
    movies: [Movie]
  }
`;

const resolvers = {
  Query: { movies: () => mockData },
};

const schema = makeExecutableSchema({
  typeDefs,
  resolvers,
});

const apolloServer = new ApolloServer({ schema });
const graphqlPath = '/data';
const graphqlHandler = apolloServer.createHandler({ path: graphqlPath });

module.exports = router(
  get('/', (req, res) => 'Welcome!'),
  post(graphqlPath, graphqlHandler),
  get(graphqlPath, graphqlHandler),
  (_, res) => send(res, 404, 'Not Found'),
);
package.jsonへのコマンド追記
package.jsonにscriptsプロパティを追記します。
{
  "name": "micro-typescript-graphql-sample",
  "version": "1.0.0",
  "main": "index.js",
  "license": "MIT",
  "dependencies": {
    "apollo-server-micro": "^2.3.1",
    "graphql": "^14.0.2",
    "graphql-tools": "^4.0.3",
    "micro": "^9.3.3",
    "microrouter": "^3.1.3"
  },
  "devDependencies": {
    "@types/graphql": "^14.0.3",
    "@types/micro": "^7.3.3",
    "@types/microrouter": "^3.1.0",
    "micro-dev": "^3.0.0",
    "ts-node": "^7.0.1",
    "typescript": "^3.2.2"
  },
  "scripts": {
    "start": "micro ./build/index.js",
    "dev": "node -r ts-node/register node_modules/.bin/micro-dev ./src/index.ts",
    "build": "tsc -b"
  }
}
これでターミナルで
$ yarn dev
もしくは
yarn build && yarn start
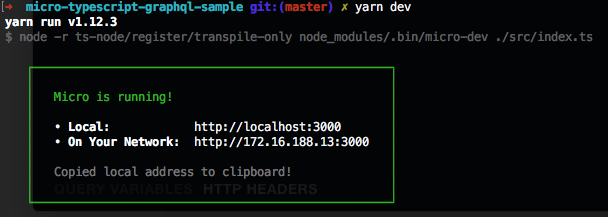
を実行すると、Microサーバーが立ち上がります。
(Ctrl + Cでサーバーを止めることができます)
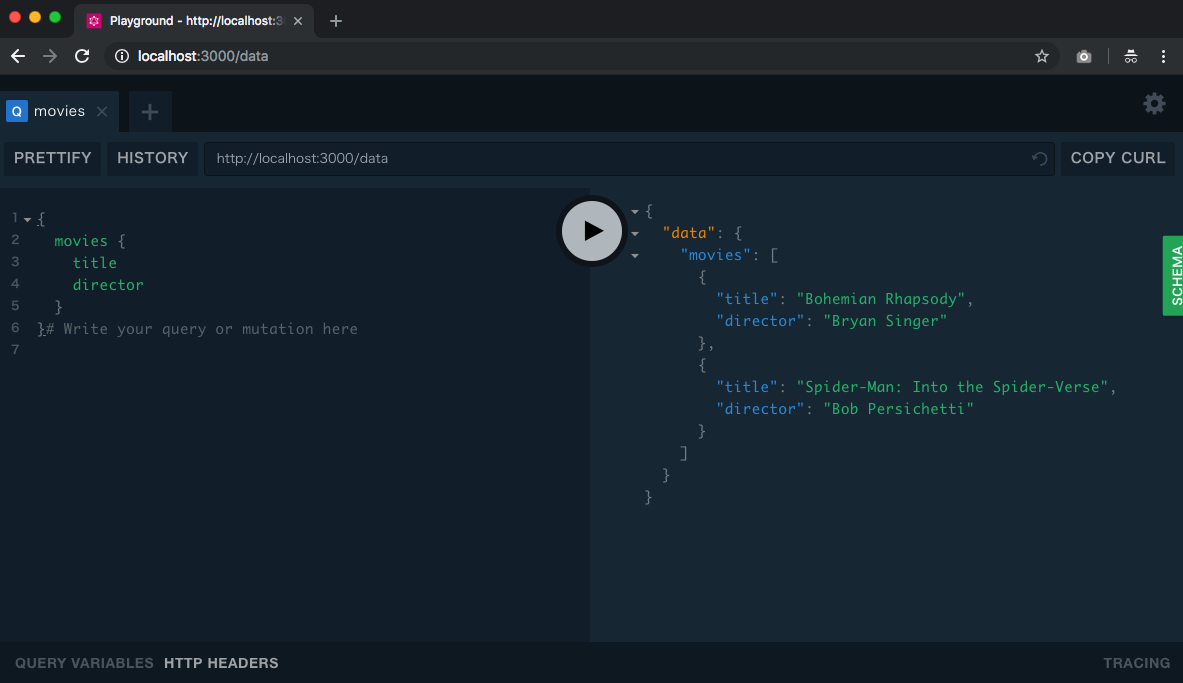
サーバーが立ち上がっている状態でhttp://localhost:3000/dataへブラウザでアクセスすると、PrismaのGraphQL Playground上でGraphQL APIを試すことができます。
開発中はログを見たり、ソースの変更を検知して自動的に再起動するHot Reloading機能などを利用するために、micro-devを使うyarn devでサーバーを起動する方が効率的です。
リファクタリング(GraphQLスキーマの分離など)
上記の例だけでもsrc/index.tsの中でGraphQL APIを作って試すことができましたが、スキーマ定義などは別ファイルで管理したいと思います。
graphql-importのインストール
型定義は.graphqlファイルで作成し、それらをexport/importできるよう、graphql-importを追加インストールします。
$ yarn add graphql-import
続いて、次の様なディレクトリ構成で、型からリゾルバ、スキーマ定義用のファイルを作成します。
├── node_modules
├── package.json
├── src
│   ├── index.ts
│   ├── mocks
│   │   └── movies.json
│   ├── resolvers
│   │   ├── index.ts
│   │   └── movies.ts
│   ├── schema.ts
│   └── typeDefs
│       ├── movie.graphql
│       ├── query.graphql
│       └── schema.graphql
├── tsconfig.json
└── tslint.json
型定義ファイルを作成
type Movie {
  title: String
  director: String
}
# import Movie from "movie.graphql"

type Query {
  movies: [Movie]
}
# import Query from "query.graphql"

schema {
  query: Query
}
リゾルバを作成
import mockMovies from '../mocks/movies.json';

export const movies = () => mockMovies;
import { movies } from './movies';

export const resolvers = {
  Query: {
    movies,
  },
};
スキーマを作成
import { importSchema } from 'graphql-import';
import { makeExecutableSchema } from 'graphql-tools';

import { resolvers } from './resolvers';

const typeDefs = importSchema('src/typeDefs/schema.graphql');

export const schema = makeExecutableSchema({
  resolvers,
  typeDefs,
});
src/index.tsを修正
import { send } from 'micro';
import { get, post, router } from 'microrouter';
import { ApolloServer } from 'apollo-server-micro';

import { schema } from './schema';

const apolloServer = new ApolloServer({ schema });
const graphqlPath = '/data';
const graphqlHandler = apolloServer.createHandler({ path: graphqlPath });

module.exports = router(
  get('/', (req, res) => 'Welcome!'),
  post(graphqlPath, graphqlHandler),
  get(graphqlPath, graphqlHandler),
  (_, res) => send(res, 404, 'Not Found'),
);
結果は最初にGraphQL APIを構築した時と同じですが、拡張しやすい構造になりました。
おわりに
今回は取り敢えずお試しでモックデータを作成し、Query操作のGraphQL APIを使ってみるところまででしたが、今後はMutationによる操作や、JWT認証、CORS対応なども試してみたいと思います。
サンプルソース
今回ご紹介したソースは以下のGitHubより手に入れることができます。
https://github.com/galoi/micro-typescript-graphql-sample

