はじめに
UL Systems Advent Calendar 2020 - 19日目。
システム開発の最終段階ではUIからバックエンドロジックまでを含めて期待通りの結果になっているか確認をE2Eテストで行うと思います。
ただE2Eテストでは人手による操作を行い目視での確認を行うケースが多いのではないでしょうか。そうした場合、一部のロジックを修正し再度テストを行う場合も自動で行う事は出来ません。
また、Seleniumを使用したテストではE2Eテストを自動で行う事はできますがテストコード作成に対する工数がかかり採用されないケースもあります。
そこで、画像比較を用いる事でテストコード作成の工数を削減出来るのでは無いかと思いSeleniumと画像比較を使用したUIテストをご紹介いたします。
今回使用するImageComparisonは、画像の比較を行うライブラリです。
ImageComparisonとは
同じサイズの2つの画像を比較し、異なる部分に長方形を描画することで違いを視覚的に示すことが出来るライブラリです。
ライブラリのプロパティ説明
ライブラリを使用して指定可能なプロパティです。
| プロパティ | 説明 |
|---|---|
| threshold | 等しくないと判断するピクセル間の最大距離の閾値(デフォルト:5) |
| rectangleLineWidth | 長方形の線幅(デフォルト:1) |
| destination | 比較結果ファイルの保存先 |
| minimalRectangleSize | 最小長方形サイズ(デフォルト:1) |
| maximalRectangleCount | 描画される長方形の最大数(デフォルト:-1[制限無]) |
| pixelToleranceLevel | ピクセル許容レベル(デフォルト:0.1[10%]) |
| excludedAreas | 画像を比較するときに無視されるリスト |
| drawExcludedRectangles | 除外された長方形を描くの可否 |
| fillExcludedRectangles | 除外された長方形を塗りつぶすかの可否 |
| percentOpacityExcludedRectangles | 除外された長方形の不透明度 |
| fillDifferenceRectangles | 差分長方形の可否 |
| percentOpacityDifferenceRectangles | 差分長方形の不透明度 |
| allowingPercentOfDifferentPixels | 無視されるピクセル割合(デフォルト:-1[制限無]) |
Seleniumを使用した例
今回はSeleniumを使用しGoogleでウルシステムズ株式会社と検索した検索結果画面とウルシステムズと検索した検索結果画面の比較を行う自動テストを行います。テスト結果がfalseの場合は、異なる箇所が長方形で囲まれた比較画像を生成します。
現状の画面キャプチャを取得する
まず始めに比較元となる画面キャプチャ画像を取得します。
Seleniumを使用しchromeを起動後にGoogleでウルシステムズ株式会社と検索し検索結果を表示した画面のキャプチャ画像を保存します。
public class ExpectedImage {
    public static void main(String[] args) throws InterruptedException {
        // Chrome
        System.setProperty("webdriver.chrome.driver", "selenium/webdriver/chrome/87.0.4280.88/win32/chromedriver.exe");
        // Chrome 起動オプションを構成
        ChromeOptions options = new ChromeOptions();
        options.addArguments("--headless");
        WebDriver driver = new ChromeDriver(options);

        driver.get("https://www.google.co.jp/");
        WebElement element = driver.findElement(By.name("q"));
        element.sendKeys("ウルシステムズ株式会社");
        element.submit();
        driver.manage().timeouts().pageLoadTimeout(15, TimeUnit.SECONDS);
        Thread.sleep(5000L);
        driver.manage().window().setSize(new Dimension(Integer.parseInt("1500"), Integer.parseInt("3000")));
        File screenFile = ((TakesScreenshot) driver).getScreenshotAs(OutputType.FILE);
        Files.copy(screenFile.toPath(), Paths.get("src/test/resources/screenshot/expected/ウルシステムズ株式会社.png"), StandardCopyOption.REPLACE_EXISTING);

        driver.quit();
    }
}
比較元の検索結果画面
検索結果のUI自動テスト
SeleniumとImageComparisonを使用してUI自動テストコードを書き比較元の画面キャプチャ画像と比較を行います。比較結果が異なる場合は異なる部分が長方形で覆われた画像が出力されます。
今回はSeleniumを使用しchromeを起動後にGoogleでウルシステムズと検索し検索結果画面の画像比較を行いたいと思います。
public class SearchULSTest {
    private WebDriver driver;

    @Before
    public void setUp() {
        // Chrome
        System.setProperty("webdriver.chrome.driver", "selenium/webdriver/chrome/87.0.4280.88/win32/chromedriver.exe");
        // Chrome 起動オプションを構成
        ChromeOptions options = new ChromeOptions();
        options.addArguments("--headless");
        this.driver = new ChromeDriver(options);
    }

    @After
    public void closeDriver() {
        this.driver.quit();
    }

    @Test
    public void test0001() throws IOException, InterruptedException {
        driver.get("https://www.google.co.jp/");
        WebElement element = driver.findElement(By.name("q"));
        element.sendKeys("ウルシステムズ");
        element.submit();
        driver.manage().timeouts().pageLoadTimeout(15, TimeUnit.SECONDS);
        Thread.sleep(5000L);
        driver.manage().window().setSize(new Dimension(Integer.parseInt("1500"), Integer.parseInt("3000")));

        File screenFile = ((TakesScreenshot) driver).getScreenshotAs(OutputType.FILE);
        Files.copy(screenFile.toPath(), Paths.get("src/test/resources/screenshot/actual/ウルシステムズ.png"), StandardCopyOption.REPLACE_EXISTING);
        Thread.sleep(5000L);

        boolean result = compareImage("screenshot/expected/ウルシステムズ株式会社.png", "screenshot/actual/ウルシステムズ.png");
        Assert.assertTrue(result);
    }

    private static boolean compareImage(String expected, String actual) {
        // 比較する画像のロード
        BufferedImage expectedImage = ImageComparisonUtil.readImageFromResources(expected);
        BufferedImage actualImage = ImageComparisonUtil.readImageFromResources(actual);
        // 比較結果ファイルの保存先
        File resultDestination = new File("compareimage.png");
        // 画像比較オブジェクトの生成
        ImageComparison imageComparison = new ImageComparison(expectedImage, actualImage, resultDestination);

        // 画像比較を判断するピクセル間の最大距離
        imageComparison.setThreshold(10);
        // 差分長方形の線幅
        imageComparison.setRectangleLineWidth(2);
        // 差分長方形の内側を塗りつぶすかの指定と透明度
        imageComparison.setDifferenceRectangleFilling(true, 10.0);
        // 除外長方形の内側を塗りつぶすかの指定と透明度
        imageComparison.setExcludedRectangleFilling(true, 10.0);
        // 描画される長方形の最大数
        imageComparison.setMaximalRectangleCount(100);
        // 最小長方形サイズ
        imageComparison.setMinimalRectangleSize(10);
        // ピクセル許容レベル
        imageComparison.setPixelToleranceLevel(0.2);

        // 画像の比較
        ImageComparisonResult imageComparisonResult = imageComparison.compareImages();
        if (ImageComparisonState.MATCH == imageComparisonResult.getImageComparisonState()) return true;

        // 比較結果の画像を保存する
        ImageComparisonState imageComparisonState = imageComparisonResult.getImageComparisonState();
        BufferedImage resultImage = imageComparisonResult.getResult();
        ImageComparisonUtil.saveImage(resultDestination, resultImage);
        return false;
    }
}
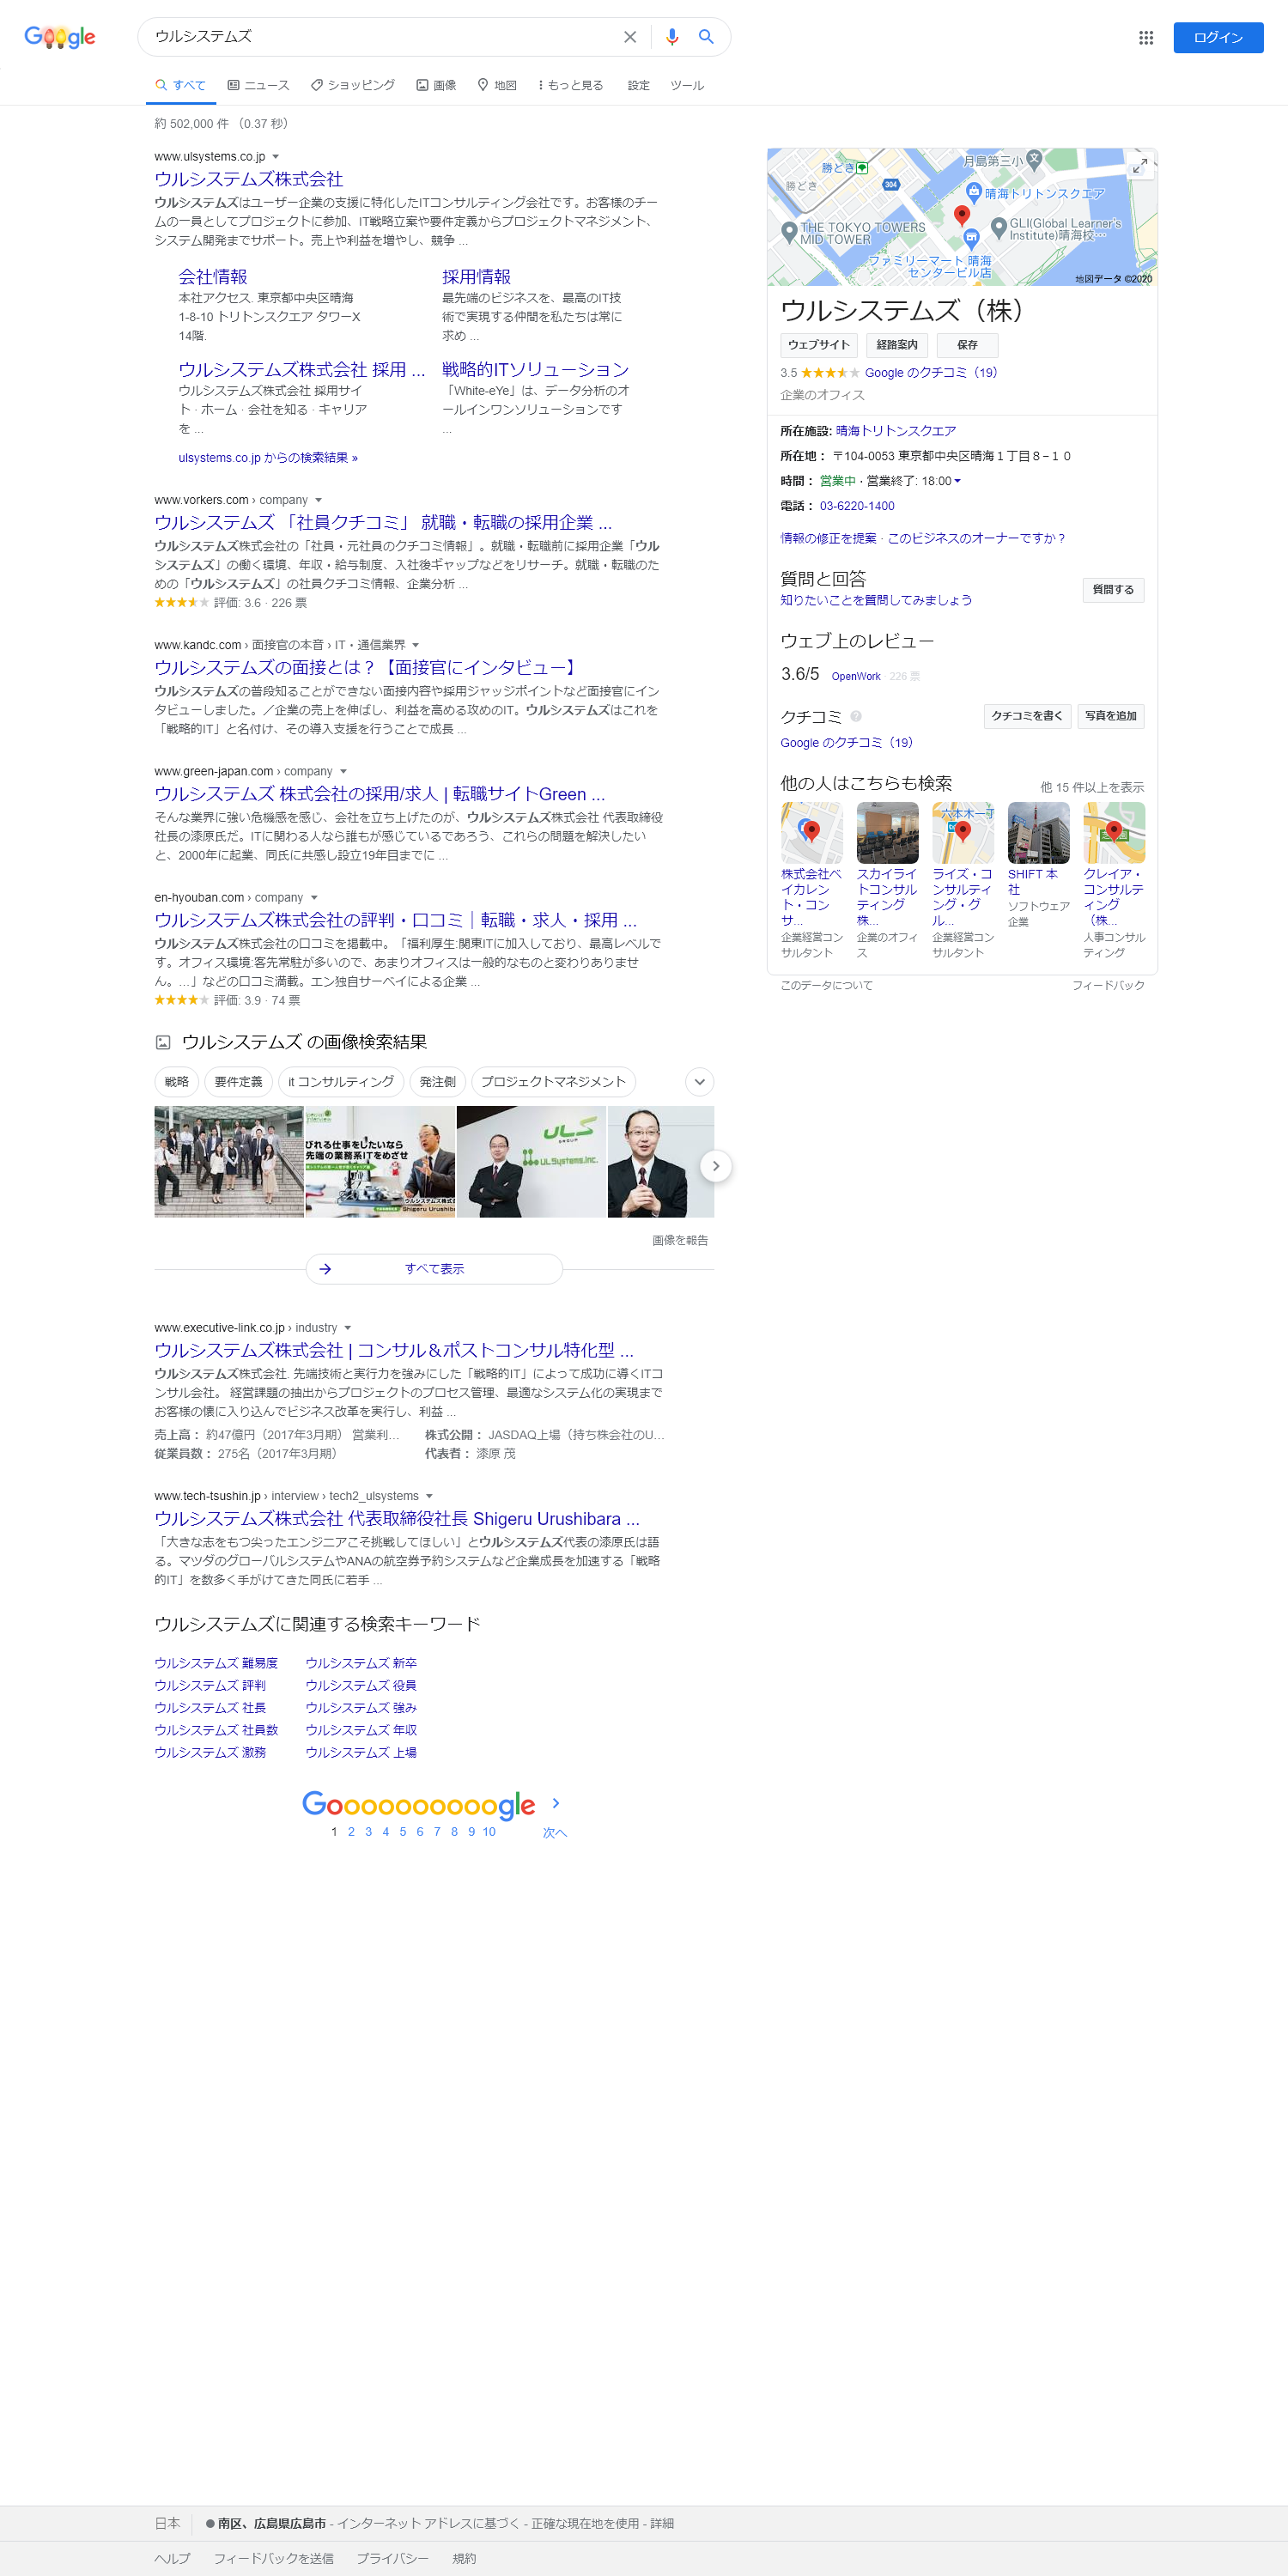
比較対象の検索結果画面
比較するGoogleでウルシステムズと検索し検索結果を表示した画面のキャプチャ画像です。
比較結果の画像
元画像と比較を行い異なった部分が赤い長方形でマークされた画像です。

まとめ
今回はImageComparisonを使用し画像比較による自動テストを行ってみました。
画面の一つ一つの項目に対して検証用コードを書くのはとても大変ですが、画像比較を活用する事で同一かどうか違う場合は何処が違っているのかを一気に見つける事が出来ます。
注意点としては、事前に正となる画面の画像が必要、あくまで静的な画面画像による比較検証ですので画面の動作検証には適用できません。
このように画像比較を使用しテストコード作成の工数削減を図ってみてはどうでしょうか。

