はじめに
画像に映りこんだ人物の顔をぼかしたい!というタイミングがあり、ChatGPTにサポートしてもらいつつ初めて画像処理に挑戦してみたので、その結果を備忘録として残しておきます。
今回は、画像の読み込みや表示、ぼかし処理にOpenCVを、顔の検出にRetinaFaceを使用してみました。
やりたいこと
画像に人物が映っていた場合、顔をぼかす
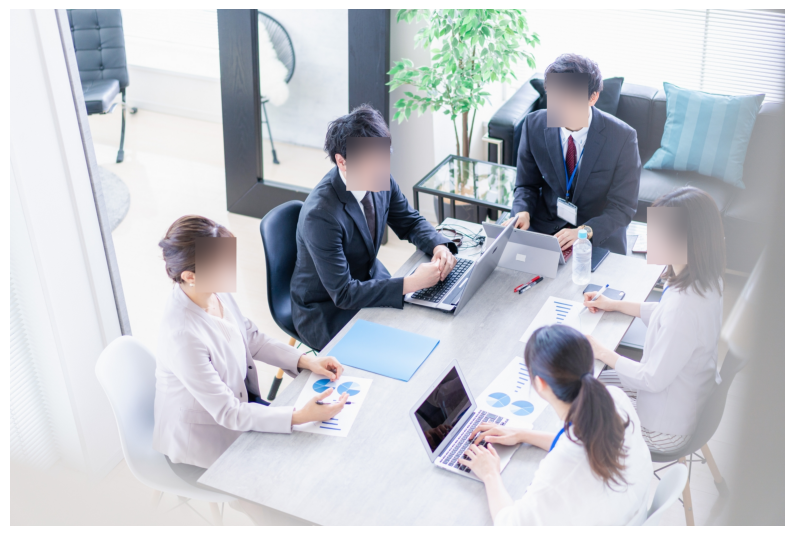
テストに使用した画像
こちらの写真ACのフリー画像を使用します。

環境
Google Colaboratoryを使用します。
準備
まずは、pipでライブラリをインストールします。
!pip install tensorflow opencv-python retina-face
次に、ライブラリをインポートします。
import cv2
import numpy as np
from google.colab.patches import cv2_imshow
from retinaface import RetinaFace
import matplotlib.pyplot as plt
顔検出とぼかし処理
準備が終わったら、Colaboratoryに画像をアップロードします。
# Select the target image
from google.colab import files
uploaded = files.upload()
「ファイル選択」ボタンを押して、画像をアップロードします。
画像がアップロードできたら、OpenCVで読み込み → ぼかし処理を行います。
(ぼかし処理では、検出された各顔に対してぼかしを適用し、ぼかされた部分を元の画像に反映するということをやっているようです。)
# Load selected images
image_path = list(uploaded.keys())[0]
image = cv2.imread(image_path)

# Detect faces
img_faces = RetinaFace.detect_faces(image)

for i in img_faces.keys():
    facial_parts = img_faces[i]
    recognize_face_area = facial_parts["facial_area"]

    x1, y1, x2, y2 = recognize_face_area
    face_region = image[y1:y2, x1:x2]

    # Blur the face
    face_blurred = cv2.GaussianBlur(face_region, (99, 99), 30)

    # Blurred areas are reflected in the original image
    image[y1:y2, x1:x2] = face_blurred

plt.figure(figsize= (10, 10))
plt.imshow(image[:, :, ::-1])
plt.axis('off')
plt.show()
結果はこんな感じになりました。
斜めの顔や横顔も認識してぼかすことができました ![]()

補足
顔の認識とぼかしをコードのどの部分で行っているのかについて補足します。
顔の認識
img_faces = RetinaFace.detect_faces(image)
-
detect_faces関数は、画像内の顔の位置や大きさなどの情報を返してくれます。
顔をぼかす
for i in img_faces.keys():
    facial_parts = img_faces[i]
    recognize_face_area = facial_parts["facial_area"]

    x1, y1, x2, y2 = recognize_face_area
    face_region = image[y1:y2, x1:x2]

    # Blur the face
    face_blurred = cv2.GaussianBlur(face_region, (99, 99), 30)

    # Blurred areas are reflected in the original image
    image[y1:y2, x1:x2] = face_blurred
ここで、検出した顔の情報を元に、画像の中のその顔の部分だけをぼかしています。
-
face_region = image[y1:y2, x1:x2]- 顔が画像のどの部分にあるのかを切り取っています。
-
cv2.GaussianBlur(face_region, (99, 99), 30)- 切り取った顔の部分をぼかす処理をしています。
-
(99, 99)はぼかしの大きさ、30はぼかしの強さを表しています。
-
image[y1:y2, x1:x2] = face_blurred- ここで、元の画像の中の顔の部分を、ぼかしたものに置き換えています。
おわりに
今回はこちらの企画の一環で、写真をアップロードする際にプライバシーな情報が映っていたらぼかしたい!と思い、挑戦してみました。
ちなみに、企画自体は一旦クローズとなりました、、経緯などはこちらのブログに載せています。気になったかたは是非ご覧ください。