この記事は、Zoom Advent Calendar 2022 12/11公開の記事です
はじめに
アドベントカレンダー、申し込んでみたはいいものの作るもの思いつかんな、そもそも何が作れるんやろか、とzoom developersをダラダラと眺めていたところ、チャットボット作成のチュートリアルがあったので試してみました。
割と簡単にそれっぽいものができました(送信内容をそのまま返すだけですが)
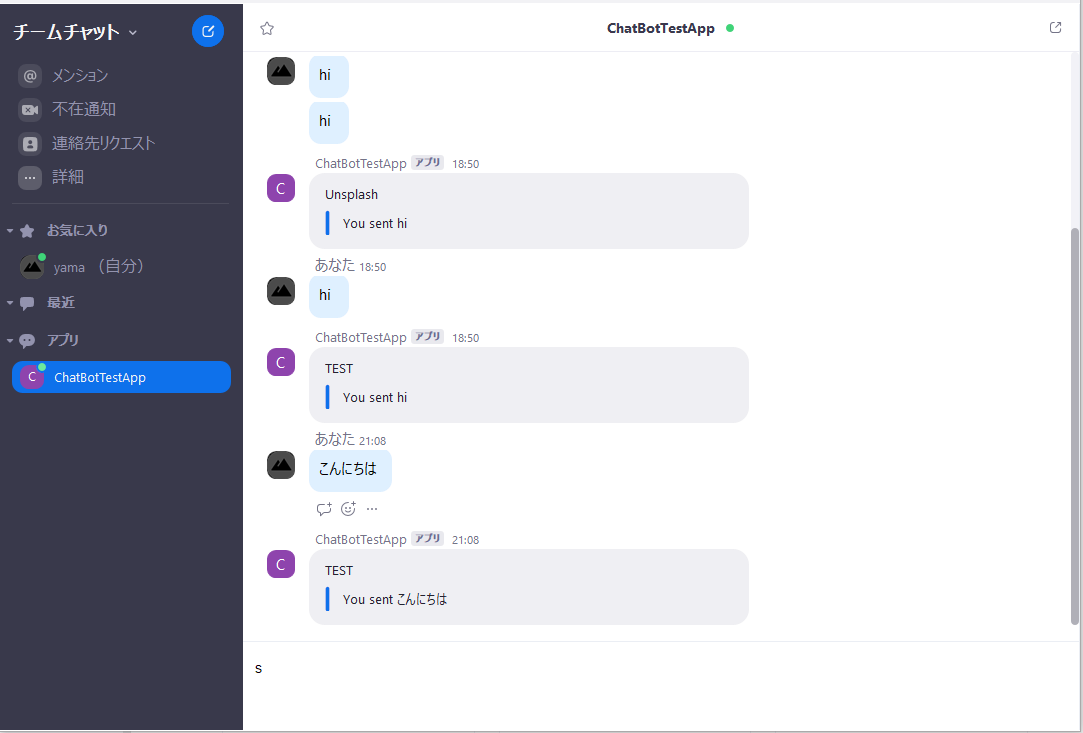
この記事では↑のチャットボット作成の手順を軽くまとめていきます。
手順
1. 準備
2. Zoom App作成
3. コード書く
4. 設定変更
5. 完成!!
準備
必要なもの
- 時間(1~2時間)
- zoom(フリーアカウントでおk)
- ngrok(ローカルサーバ(localhost:XXXXとか)を外部に公開できる、エングロックと読むらしい)
- Node.jsのインストール(既にしてあれば大丈夫)
ZoomApp作成
Create a Chatbot on the Zoom App Marketplace.
↑にアクセスしてZoomApp作成する。選ぶタイプはTeam Chat Apps
コード書く
$ mkdir zoom-chatbot
$ cd zoom-chatbot

$ git init
$ npm init

$ touch index.js .gitignore .env
.env
node_modules
"start": "node index.js"
以下のenvファイルのキー・IDの設定は公式ページを参考にしてください、すみません。。。
unsplash_access_key=UNSPLASH_ACCESS_KEY_HERE
zoom_client_id=ZOOM_CLIENT_ID_HERE
zoom_client_secret=ZOOM_CLIENT_SECRET_HERE
zoom_bot_jid=ZOOM_BOT_JID_HERE
zoom_verification_token=ZOOM_VERIFICATION_TOKEN_HERE
DATABASE_URL=
$ npm install request pg express dotenv body-parser --save
index.jsのコードです、長いので折り畳み
require('dotenv').config()
const express = require('express')
const bodyParser = require('body-parser')
const request = require('request')

const app = express()
const port = process.env.PORT || 4000

app.use(bodyParser.json())

app.get('/', (req, res) => {
  res.send('Welcome to the Unsplash Chatbot for Zoom!')
})

app.get('/authorize', (req, res) => {
  res.redirect('https://zoom.us/launch/chat?jid=robot_' + process.env.zoom_bot_jid)
})

app.get('/support', (req, res) => {
  res.send('See Zoom Developer Support  for help.')
})

app.get('/privacy', (req, res) => {
  res.send('The Unsplash Chatbot for Zoom does not store any user data.')
})

app.get('/terms', (req, res) => {
  res.send('By installing the Unsplash Chatbot for Zoom, you are accept and agree to these terms...')
})

app.get('/documentation', (req, res) => {
  res.send('Try typing "island" to see a photo of an island, or anything else you have in mind!')
})

app.get('/zoomverify/verifyzoom.html', (req, res) => {
  res.send(process.env.zoom_verification_code)
})

app.post('/unsplash', (req, res) => {
  console.log(req.body)
  res.send('Chat received')
})

app.post('/deauthorize', (req, res) => {
  if (req.headers.authorization === process.env.zoom_verification_token) {
    res.status(200)
    res.send()
    request({
      url: 'https://api.zoom.us/oauth/data/compliance',
      method: 'POST',
      json: true,
      body: {
        'client_id': req.body.payload.client_id,
        'user_id': req.body.payload.user_id,
        'account_id': req.body.payload.account_id,
        'deauthorization_event_received': req.body.payload,
        'compliance_completed': true
      },
      headers: {
        'Content-Type': 'application/json',
        'Authorization': 'Basic ' + Buffer.from(process.env.zoom_client_id + ':' + process.env.zoom_client_secret).toString('base64'),
        'cache-control': 'no-cache'
      }
    }, (error, httpResponse, body) => {
      if (error) {
        console.log(error)
      } else {
        console.log(body)
      }
    })
  } else {
    res.status(401)
    res.send('Unauthorized request to Unsplash Chatbot for Zoom.')
  }
})

app.listen(port, () => console.log(`Unsplash Chatbot for Zoom listening on port ${port}!`))
$ npm install nodemon -g
$ nodemon
以下へアクセスすると
http://localhost:4000/
Welcome to the Unsplash Chatbot for Zoom! と表示される
ローカルホストを実行したまま、新しいターミナルで
以下コマンドを実行すると外部からアクセス可能なngrokのURLが生成されます
$ ngrok http 4000
設定変更
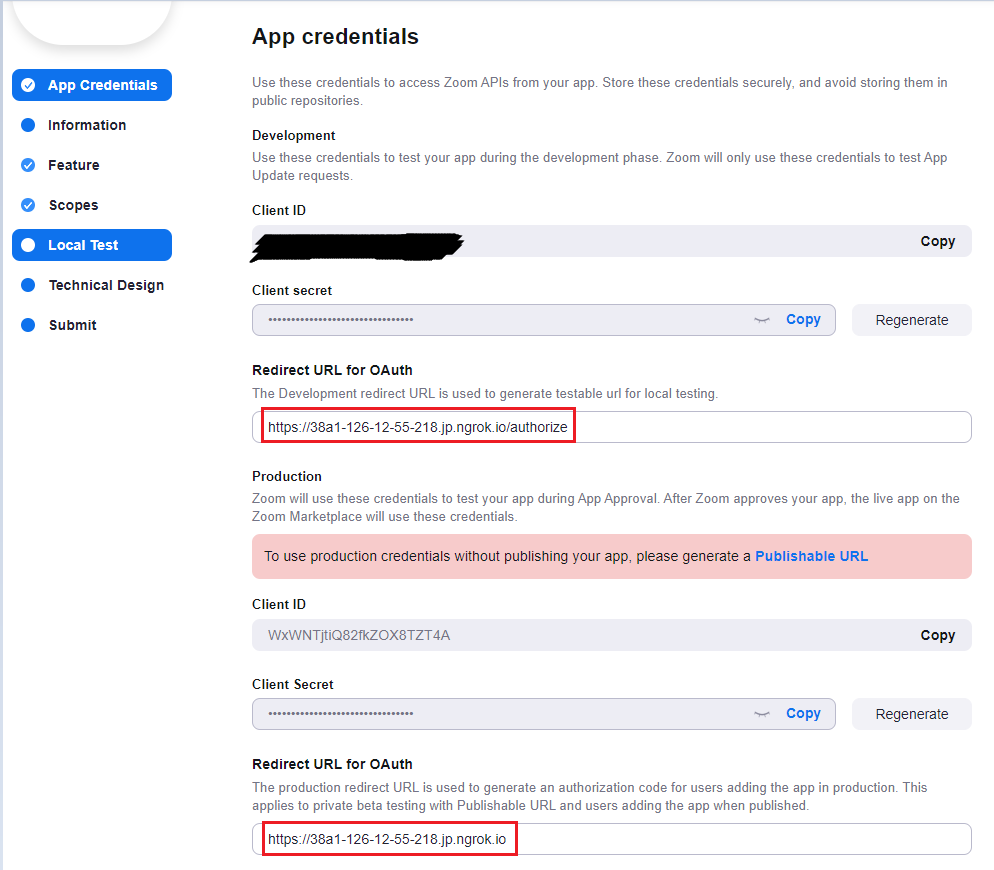
2. Zoom App作成で作成したZoomAppのページにアクセスします。
取得したURLは以下の赤枠内へコピペします。上のほうは/authorizeを追加します。
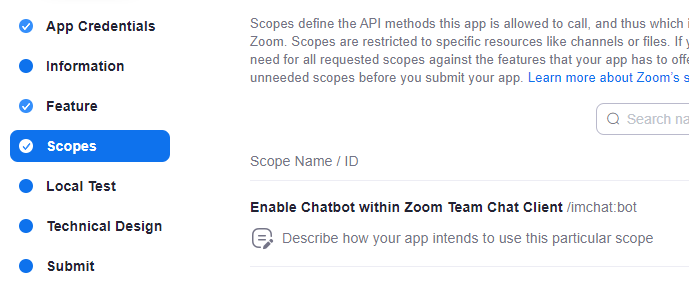
スコープはimchat:botを選択
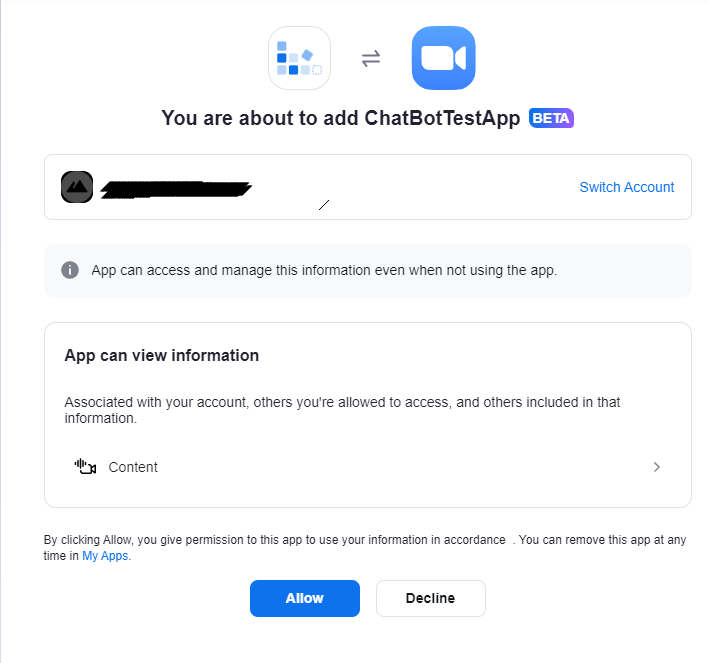
あとは、Local Testタブに移動し、Addをクリックします。
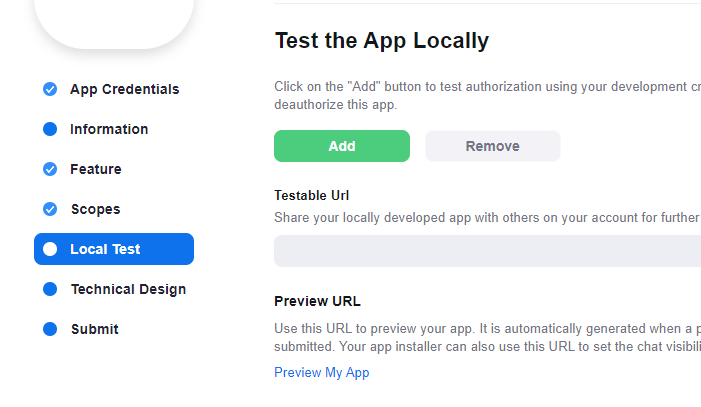
その後表示される画面でAllowをクリック
完成!!
これでZoomのアプリを開くと以下のような表示になっていると思います
(やったぜ)
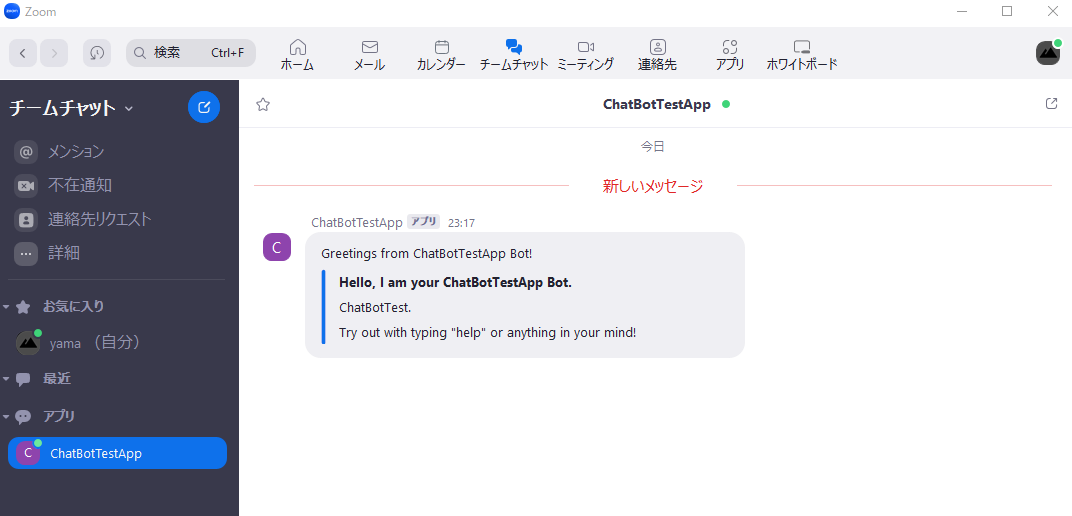
わりと簡単にチャットボットが作れました。
チャットボット作成のチュートリアルではテキスト・画像を返信させる、といったところまでやっているので興味のある方はぜひやってみてください。
