ConstraintLayoutを使用するための設定については、ConstraintLayout入門その1をご覧ください。
制約に合致 (MATCH_CONSTRAINT)
以下の2つのレイアウトXML記述例では、 <ChildView> の垂直方向の長さはともに「親Viewと同じ」になります。
<ParentLayout
    ...
    >
    <ChildView
        ...
        android:layout_height="match_parent"
        ...
    />
</ParentLayout>
<androidx.constraintlayout.widget.ConstraintLayout
    ...
    >
    <ChildView
        ...
        android:layout_height="0dp"
        app:layout_constraintTop_toTopOf="parent"
        app:layout_constraintBottom_toBottomOf="parent"
        ...
    />
</androidx.constraintlayout.widget.ConstraintLayout>
<ChildView> の記述は、2つとも「上端と下端が親Viewに一致する」ことを表現していますが、ConstraintLayoutの子Viewでは app:layout_constraintTop_toTopOf などの値に "parent" 以外に他の子ViewのView IDを指定することができ、他のViewよりも多様な設定を可能にしています。
ConstraintLayoutの子Viewの android:layout_width および android:layout_height の値に "0dp" が設定されている場合、それは文字通りの「長さゼロ」の意味にはならず、「制約に合致する」という意味になります。
余白を埋める
以下の2つのレイアウトXML記述例では(親Viewの垂直方向の長さが300dp以上ある場合)ともに、親Viewの上部に <TopView>, 下部に <BottomView>, 上下に挟まれる形で <MidView> が上30dpと下50dpを除いた部分に表示されます。
<LinearLayout
    ...
    android:orientation="vertical"
    ...
    >
    <TopView
        ...
        android:layout_height="30dp"
        ...
    />
    <MidView
        ...
        android:layout_height="0dp"
        android:layout_weight="1"
        ...
    />
    <BottomView
        ...
        android:layout_height="50dp"
        ...
    />
</LinearLayout>
<androidx.constraintlayout.widget.ConstraintLayout
    ...
    >
    <TopView
        android:id="@+id/topView"
        ...
        android:layout_height="30dp"
        app:layout_constraintTop_toTopOf="parent"
        ...
    />
    <MidView
        ...
        android:layout_height="0dp"
        app:layout_constraintTop_toBottomOf="@id/topView"
        app:layout_constraintBottom_toTopOf="@id/bottomView"
        ...
    />
    <BottomView
        android:id="@+id/bottomView"
        ...
        android:layout_height="50dp"
        app:layout_constraintBottom_toBottomOf="parent"
        ...
    />
</androidx.constraintlayout.widget.ConstraintLayout>
LinearLayoutにおける android:layout_weight は、ConstraintLayout入門その3で紹介したような、子View間の長さの比を決める用途だけでなく、単純に「長さが決まっている子Viewで埋めた後に残った余白を埋める」という目的で単独でもよく用いられてきました。linear_layout_2.xmlでは android:layout_weight が設定されている子Viewは1つだけなので、weightの値が "2" でも "3" でも表示結果は同じになります。weightに正の数が設定されていれば、その子Viewは「伸びようとする」性質を帯びます(<TopView> と <BottomView> のweightにはデフォルト値として0が与えられていて、伸びようとはしません)。
ConstraintLayoutの場合は、 <MidView> に android:layout_height="0dp" を設定して「制約に合致」とし、 app:layout_constraintTop_toBottomOf と app:layout_constraintBottom_toTopOf を設定して上下の位置を明示することで「余白を埋め」ます。
とはいえ、これだけならRelativeLayoutでも従来から似た記述で同じレイアウトを表現できました。ConstraintLayoutの「制約に合致」はこの他にもいくつかレイアウト表現を提供します。
片端+長さの制約
上端の位置、下端の位置、垂直方向の長さ、の3者の間には、
(上端の座標)+(垂直方向の長さ)=(下端の座標)
という関係が成り立ちます。
水平方向の場合は、
(左端の座標)+(水平方向の長さ)=(右端の座標)
が成り立ちます。
したがって、子Viewの長さが制約で決まれば、子Viewの位置の制約は片端だけあれば足ります。
以下の2つのレイアウトXML記述例はともに、垂直方向に1:2:3の比で3つの子Viewを縦に並べています。
<LinearLayout
    ...
    android:orientation="vertical"
    ...
    >

    <TopView
        ...
        android:layout_height="0dp"
        android:layout_weight="1"
    />

    <MidView
        ...
        android:layout_height="0dp"
        android:layout_weight="2"
    />

    <BottomView
        ...
        android:layout_height="0dp"
        android:layout_weight="3"
    />

</LinearLayout>
<androidx.constraintlayout.widget.ConstraintLayout
    ...
    >

    <TopView
        android:id="@+id/view1"
        ...
        android:layout_height="0dp"
        app:layout_constraintTop_toTopOf="parent"
        app:layout_constraintHeight_default="percent"
        app:layout_constraintHeight_percent="0.167"
        ...
    />

    <MidView
        android:id="@+id/view2"
        ...
        android:layout_height="0dp"
        app:layout_constraintTop_toBottomOf="@id/view1"
        app:layout_constraintHeight_default="percent"
        app:layout_constraintHeight_percent="0.333"
        ...
    />

    <BottomView
        ...
        android:layout_height="0dp"
        app:layout_constraintTop_toBottomOf="@id/view2"
        app:layout_constraintHeight_default="percent"
        app:layout_constraintHeight_percent="0.5"
        ...
    />

</androidx.constraintlayout.widget.ConstraintLayout>
constraint_layout_3.xmlでは、 <TopView>, <MidView> の垂直方向の位置制約は上端のみ、 <BottomView> の垂直方向の位置制約は下端のみです。しかし、いずれも app:layout_constraintHeight_percent の指定によって垂直方向の長さが決まっているので、もう一方の端の位置も決まってレイアウトのすべての情報が決まります。このような使い方は、RelativeLayoutではサポートされていませんでした。
ConstraintLayout入門その3で紹介した通り、percentは親View(すなわちConstraintLayout)に対する比を指定します。値は0〜1の小数です。
両端+長さの制約
上記の通り、子Viewの両端の位置と長さの間には等式の関係が成り立つので、両端の位置と長さの3つの制約のうち2つが与えられていればもう1つの制約が自動的に決まり、したがって3つの制約を与える必要はなく2つで足ります。
では、2つの制約で足りるところへあえて3つの制約が与えられ、かつ、それらが「(上端の座標)+(垂直方向の長さ)=(下端の座標)」という関係を満たしていなかったらどうなるでしょうか?
このようなとき、ConstraintLayoutでは3つの制約がバランスするようにレイアウトの微調整が行われます(相矛盾するパラメータのうちいずれかを無視する、といった消極的な調整ではなく、3つの制約のすべてが意味をもつような積極的な調整が行われます)。この性質が、他のレイアウトクラスには見られないConstraintLayoutならではの主要な特徴です。
<LinearLayout
    ...
    android:orientation="vertical"
    ...
    >

    <TopView
        ...
        android:layout_height="0dp"
        android:layout_weight="10"
        ...
    />

    <Space
        ...
        android:layout_height="0dp"
        android:layout_weight="16" />

    <MidView
        ...
        android:layout_height="0dp"
        android:layout_weight="20"
        ...
    />

    <Space
        ...
        android:layout_height="0dp"
        android:layout_weight="24" />

    <BottomView
        ...
        android:layout_height="0dp"
        android:layout_weight="30"
        ...
    />

</LinearLayout>
<androidx.constraintlayout.widget.ConstraintLayout
    ...
    >

    <TextView
        android:id="@+id/view421"
        android:layout_width="match_parent"
        android:layout_height="0dp"
        app:layout_constraintTop_toTopOf="parent"
        app:layout_constraintHeight_default="percent"
        app:layout_constraintHeight_percent="0.1"
        ...
    />

    <MidView
        android:id="@+id/view422"
        android:layout_width="match_parent"
        android:layout_height="0dp"
        app:layout_constraintTop_toBottomOf="@id/view421"
        app:layout_constraintBottom_toTopOf="@id/view423"
        app:layout_constraintHeight_default="percent"
        app:layout_constraintHeight_percent="0.2"
        app:layout_constraintVertical_bias="0.4"
        ...
    />

    <BottomView
        android:id="@+id/view423"
        android:layout_width="match_parent"
        android:layout_height="0dp"
        app:layout_constraintBottom_toBottomOf="parent"
        app:layout_constraintHeight_default="percent"
        app:layout_constraintHeight_percent="0.3"
        ...
    />

</androidx.constraintlayout.widget.ConstraintLayout>
具体的には、制約が3つだったとき、子Viewの長さを制約の長さに合致させつつ、子Viewの位置が両端の中間に位置するように調整されます。
このとき、 app:layout_constraintVertical_bias の値を設定することで、垂直方向の「中間」の位置を比率で設定することができます。
上のConstraintLayout内の <MidView> には3つの制約とbiasが与えられており、この調整によって表示が決定されます。
app:layout_constraintVertical_bias が0のときは上端の制約に張りつきます(下端の制約を省略したのと同じ結果になります)。app:layout_constraintVertical_bias が1のときは下端の制約に張りつきます(上端の制約を省略したのと同じ結果になります)。
水平方向の場合は app:layout_constraintHorizontal_bias で同様の設定ができます。
app:layout_constraintHorizontal_bias が0のときは 'Left' もしくは 'Start' に設定した制約に張りつき、1のときは 'Right' もしくは 'End' に設定した制約に張りつきます。
'Start' 〜 'End' で制約を設定したとき、right to leftレイアウトか否かで app:layout_constraintHorizontal_bias の偏りの方向が反転します。
app:layout_constraintVertical_bias, app:layout_constraintHorizontal_bias のどちらも、0と1の間の値を設定することで中間の位置取りを行えます。biasの値を省略したときのデフォルト値は0.5、すなわち子Viewの位置は両端の真ん中になります。
上記の2つのレイアウトXML記述例では、ConstraintLayoutがbiasの設定で <MidView> の位置を調整しているのに対し、LinearLayoutでは <Space> を挟んで空白を作り出して調整しています。
サンプルコード
今回のサンプルコードは以下のリポジトリにあります。
https://github.com/csayamada/ConstraintLayout5
画面例
LinearLayoutとConstraintLayoutの結果を並べた表示例は下のようになります。
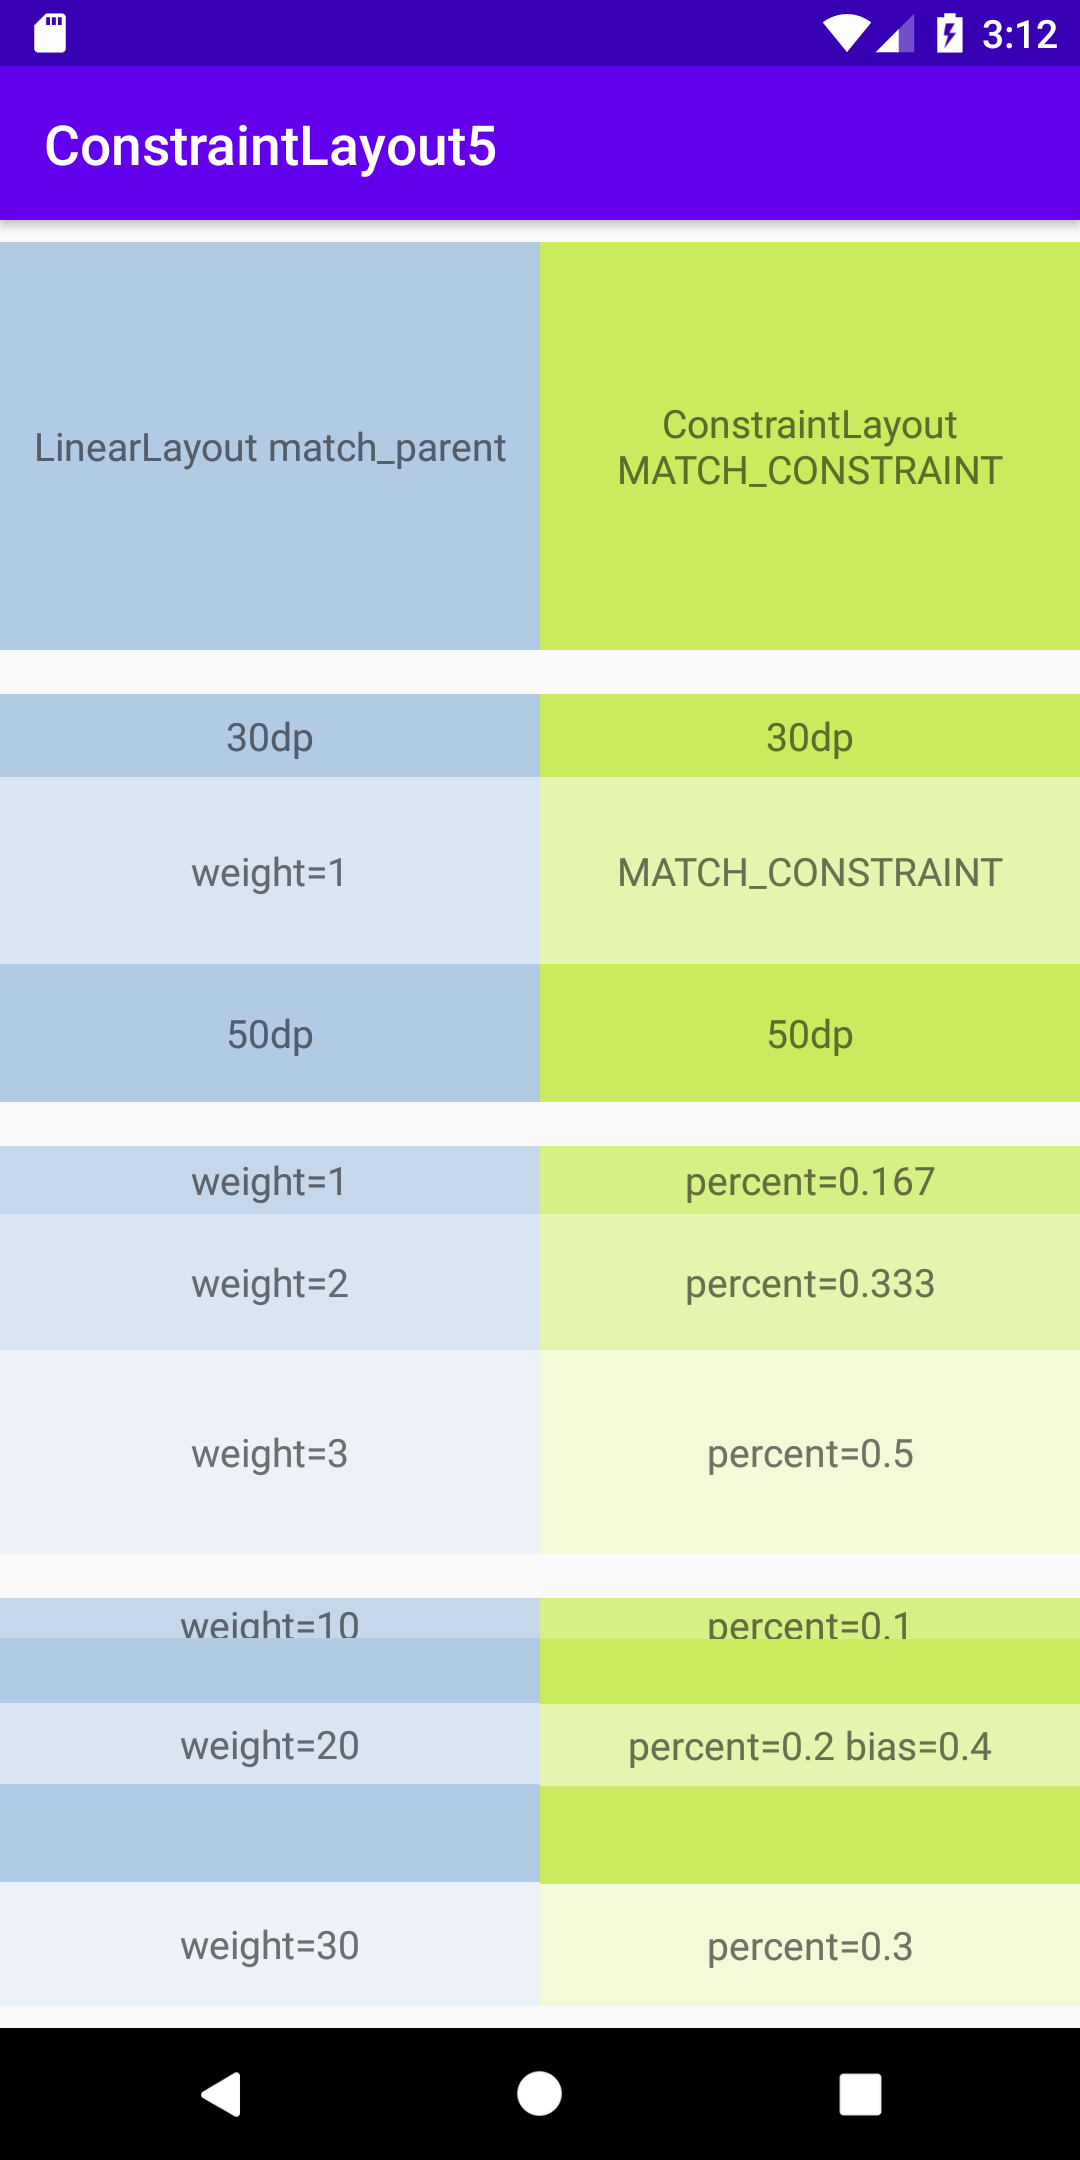
最下段(biasを使って表現した部分)をよく見ると、LinearLayoutの表示とConstraintLayoutの表示との間にわずかなズレがありますが、これはLinearLayoutとConstraintLayoutの実装の違いによる誤差のよう(Android OSのバージョンによって変化するかもしれません)で、計算原理は両者同じのようです。