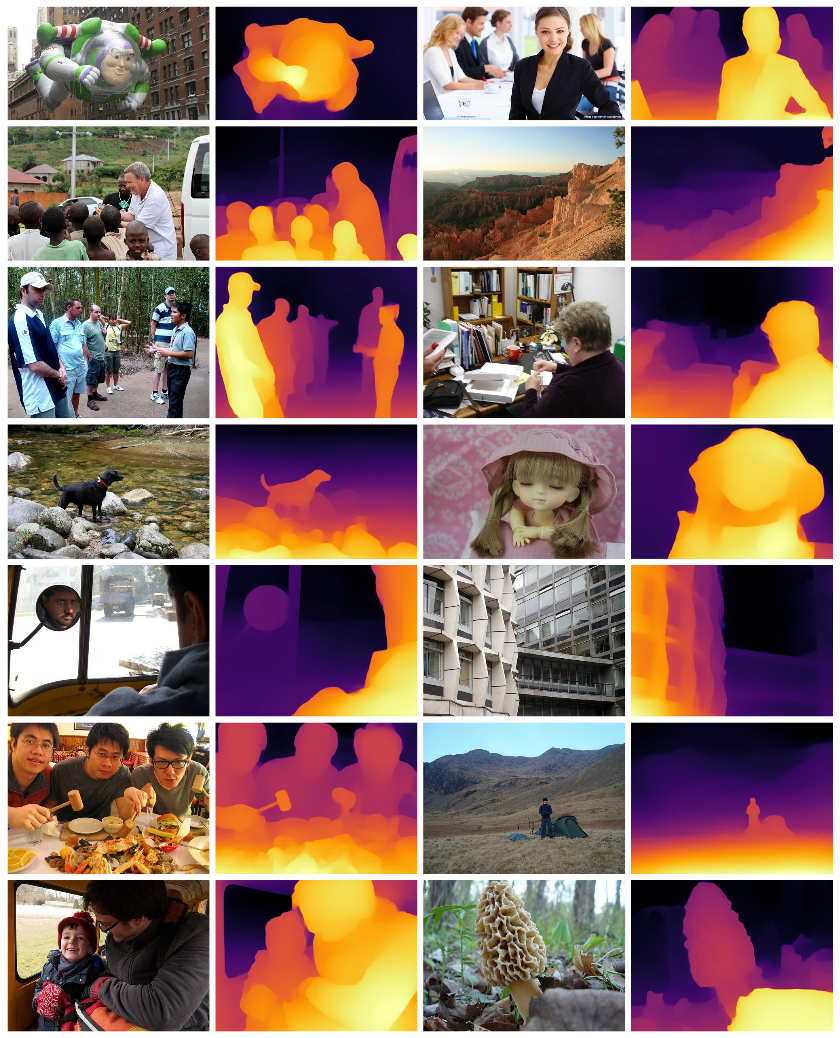
MiDaSとは
Zero-shot (Fine-tuning なし) で使える単眼深度推定モデル

「MIDAS」より
Pytorchのサイトによると、
MiDaS computes relative inverse depth from a single image. The repository provides multiple models that cover different use cases ranging from a small, high-speed model to a very large model that provide the highest accuracy. The models have been trained on 10 distinct datasets using multi-objective optimization to ensure high quality on a wide range of inputs.
和訳:MiDaSは、1枚の画像から相対的な逆深度を計算します。このリポジトリでは、小型の高速モデルから、最高の精度を実現する超大型モデルまで、さまざまなユースケースをカバーする複数のモデルを提供しています。これらのモデルは、多目的最適化を用いて10種類のデータセットで学習されており、幅広い入力に対して高い品質を確保しています。
個人的にいいなと思ったポイント
- Zero-shotでつかえる(深度範囲やスケールの変化に影響されないロバスト性)
- リアルタイム推定向けのライトなモデルがある
- ROSやモバイルにも対応している
環境構築
以下の環境で動作確認しました。今回はGPUを使用していません。
- CPU: Ryzen 5 3500
- OS: Windows10 Home
いつもはWSL2上でpyenv+pyenv-virtualenvでpythonの環境を構築するのですが、WSL2はUSBデバイスはサポートしていないよう(Webcamが認識されない)。そこで、今回はAnacondaを用いてWindows上にpython環境を構築していきます。Anacondaのインストール方法は省略します。
midasという名前の仮想環境(Python3.7.4)が作成します。
conda create -n midas python==3.7.4
仮想環境を有効化します。
conda activate midas
必要なライブラリをpipでインストールします。
pip install torch==1.8.0 torchvision
pip install opencv-python
pip install timm==0.4.5
インストールされたライブラリのバージョンは以下の通りです。
numpy==1.21.0
opencv-python==4.5.2.54
Pillow==8.3.0
timm==0.4.5
torch==1.8.0
torchvision==0.9.0
とりあえず試してみる
準備
MiDaSのリポジトリをクローン
git clone https://github.com/intel-isl/MiDaS.git
READMEのsetupにあるリンクから学習済みモデルをダウロードする。モデルは以下の4種類がある。
-
dpt_large: 最も高精度 -
dpt_hybrid: 画質はやや劣るが、CPUや低速のGPUで速度が向上 -
midas_v21_small: リソースに制約のあるデバイス、もしくはリアルタイムアプリケーション向け -
midas_v21: レガシー(convolutional model)
ダウンロードした学習済みモデルはweightsフォルダーに入れる。
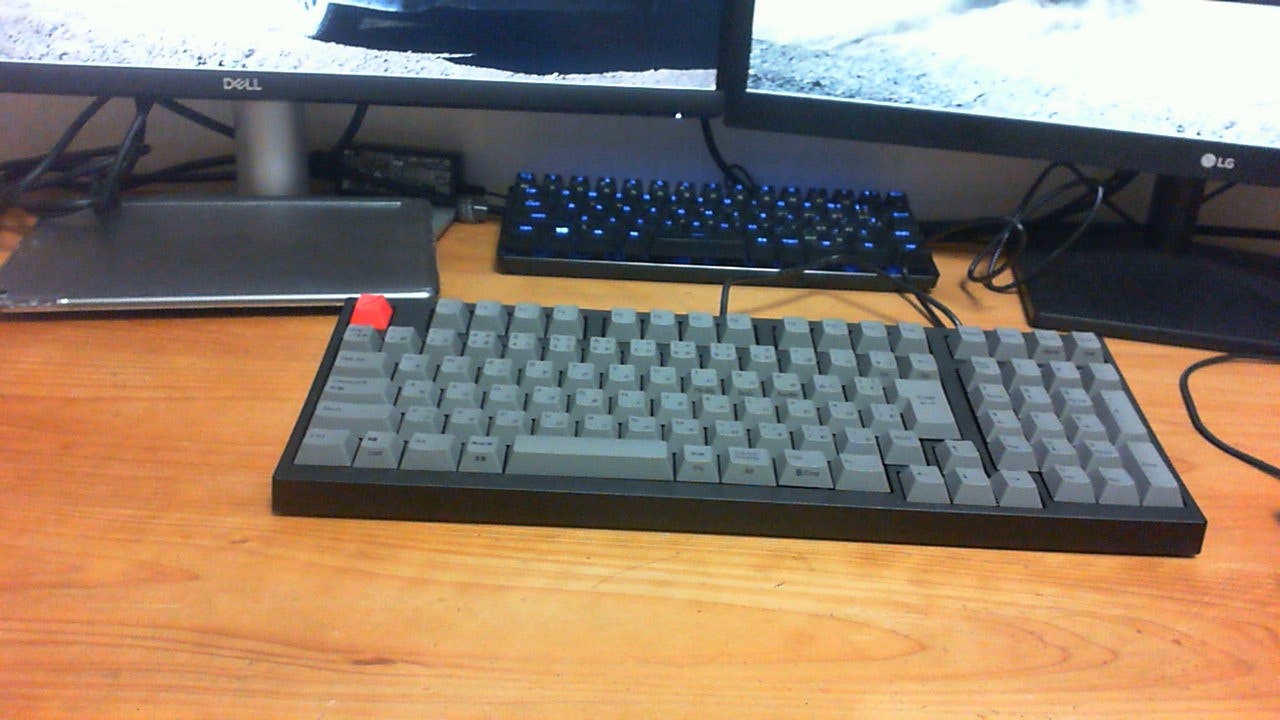
inputに深度推定したい画像を入れる。今回使用した以下の画像のサイズは1280x720です。

あとはrun.pyを実行するだけです。結果はoutputへ出力されます。
実行
python run.py --model_type dpt_large
python run.py --model_type dpt_hybrid
python run.py --model_type midas_v21_small
python run.py --model_type midas_v21
感想
やはり推定時間と精度はトレードオフのようですね。結果を定量的には評価していませんが、見た目から明らかに精度に差が出ていることがわかります。dpt_largeとmidas_v21_smallを比べると一目瞭然でしょう。dpt_largeははオブジェクトの輪郭がくっきりしているのに対して、midas_v21_smallはぼやけています。しかし、dpt_largeとdpt_hybridを比べてみると微妙なところです。違いははっきり分かりますが、どちらの精度がいいかはわかりません。ちなみに各モデルの推定精度と推定時間をオープンデータセットで評価した結果はREADMEに記載してありました。
結論、リアルタイムで予測を行う際はmidas_v21_smallを使うのがよさそうです。今回の目的はWebcamで(そこそこのフレームレートの)リアルタイム深度推定することなので。
Webcamでリアルタイム単眼深度推定
モデルの読み込み
model_type = "MiDaS_small"  # MiDaS v2.1 - Small   (lowest accuracy, highest inference speed)

midas = torch.hub.load("intel-isl/MiDaS", model_type)
モデルをGPUへ転送
今回のデモはCPUのみで計算を行っています。
device = torch.device("cuda") if torch.cuda.is_available() else torch.device("cpu")
midas.to(device)
midas.eval()
transformの読み込み
モデルの大きさに合わせて画像のサイズを変更したり、正規化するためのtransformを読み込む
midas_transforms = torch.hub.load("intel-isl/MiDaS", "transforms")

if model_type == "DPT_Large" or model_type == "DPT_Hybrid":
    transform = midas_transforms.dpt_transform
else:
    transform = midas_transforms.small_transform
Webcamで撮影したフレームを深度画像に変換
cv2.VideoCapture(0)でカメラ番号を指定します。
推定時はwith torch.no_grad():と記述することで、勾配の計算を行わなくなります。それによって余計なメモリを使わなくて済みます。
cap = cv2.VideoCapture(0)

while True:
    ret, frame = cap.read()
    input_batch = transform(frame).to(device)
    with torch.no_grad():
        prediction = midas(input_batch)
        prediction = torch.nn.functional.interpolate(
            prediction.unsqueeze(1),
            size=frame.shape[:2],
            mode="bicubic",
            align_corners=False,
        ).squeeze()
    depth_frame = prediction.cpu().numpy()
    depth_frame = normalize_depth(depth_frame, bits=2)
    cv2.imshow('Depth Frame', depth_frame)

    if cv2.waitKey(1) == 27:
        break

cap.release()
cv2.destroyAllWindows()
深度画像の正規化
今回は画像の深度をわかりやすく可視化するために、推定した深度画像を正規化します(画像が8bitなら0~255、16bitなら0~65535)。
def normalize_depth(depth, bits):
    depth_min = depth.min()
    depth_max = depth.max()
    max_val = (2**(8*bits))-1
    if depth_max - depth_min > np.finfo("float").eps:
        out = max_val * (depth - depth_min) / (depth_max - depth_min)
    else:
        out = np.zeros(depth.shape, dtype=depth.type)
    if bits == 1:
        return out.astype("uint8")
    elif bits == 2:
        return out.astype("uint16")
全体のコード
import cv2
import torch
import numpy as np


def normalize_depth(depth, bits):
    depth_min = depth.min()
    depth_max = depth.max()
    max_val = (2**(8*bits))-1
    if depth_max - depth_min > np.finfo("float").eps:
        out = max_val * (depth - depth_min) / (depth_max - depth_min)
    else:
        out = np.zeros(depth.shape, dtype=depth.type)
    if bits == 1:
        return out.astype("uint8")
    elif bits == 2:
        return out.astype("uint16")


def main():
    model_type = "MiDaS_small"  # MiDaS v2.1 - Small   (lowest accuracy, highest inference speed)

    midas = torch.hub.load("intel-isl/MiDaS", model_type)

    device = torch.device("cuda") if torch.cuda.is_available() else torch.device("cpu")
    midas.to(device)
    midas.eval()

    midas_transforms = torch.hub.load("intel-isl/MiDaS", "transforms")

    if model_type == "DPT_Large" or model_type == "DPT_Hybrid":
        transform = midas_transforms.dpt_transform
    else:
        transform = midas_transforms.small_transform

    cap = cv2.VideoCapture(0)

    while True:
        ret, frame = cap.read()
        input_batch = transform(frame).to(device)
        with torch.no_grad():
            prediction = midas(input_batch)
            prediction = torch.nn.functional.interpolate(
                prediction.unsqueeze(1),
                size=frame.shape[:2],
                mode="bicubic",
                align_corners=False,
            ).squeeze()
        depth_frame = prediction.cpu().numpy()
        depth_frame = normalize_depth(depth_frame, bits=2)
        cv2.imshow('Depth Frame', depth_frame)

        if cv2.waitKey(1) == 27:
            break

    cap.release()
    cv2.destroyAllWindows()


if __name__ == '__main__':
    main()
実行
以下のコマンドを叩くだけです。
python midas_realtime_webcam.py
ESCキーを押すとループから抜け、終了します。
MiDaSを用いてリアルタイム単眼深度推定をしてみました。ライトなモデルを使うとレスポンスもいい感じです。ROSやモバイルにも対応しているようなのでいろいろと遊べそう。#Python #PyTorch #Midas https://t.co/0YQm2qgcQg pic.twitter.com/ZDBG9GS8ZH
— yakiimo121 (@yakiimo121) July 7, 2021


