はじめに
ログイン不要のお問い合わせページにbotから入力がありました。
ログイン不要は続けたいものの、botは弾きたいところです。
そこで、今回はreCAPTCHAを入れることで対応を試みました。
reCAPTCHAには、v2 → v3 → Enterprise と様々な種類があります。
参考までに v2、v3、Enterpriseの違いを軽く載せておきます。
詳しくはgoogle公式記事をご覧ください
| バージョン | 判定 | 値段 |
|---|---|---|
| v2 | 画像認証 | 無料 |
| v3 | 自動 | 無料 |
| Enterprise | 自動 | 100万回/月以上は有料 |
個人〜中規模開発では通常のreCAPTCHAでの判定で基本は問題ない認識です。
その中でも、v2 は「画像認証が手間だが確実に判断できる」v3 は「自動認証で楽だが人間を却下する可能性がある」という点で相違があります。
また、v2の中にも チェックボックス付き画像認証の v2 と、自動判定 + 画像認証のv2 invisible があります。
この記事では、あえて チェックボックス付き画像認証の v2 を入れたい方の参考用に、実際にreCAPTCHAを動かした手順をお伝えします。
実装手順
reCAPTCHA側の下準備
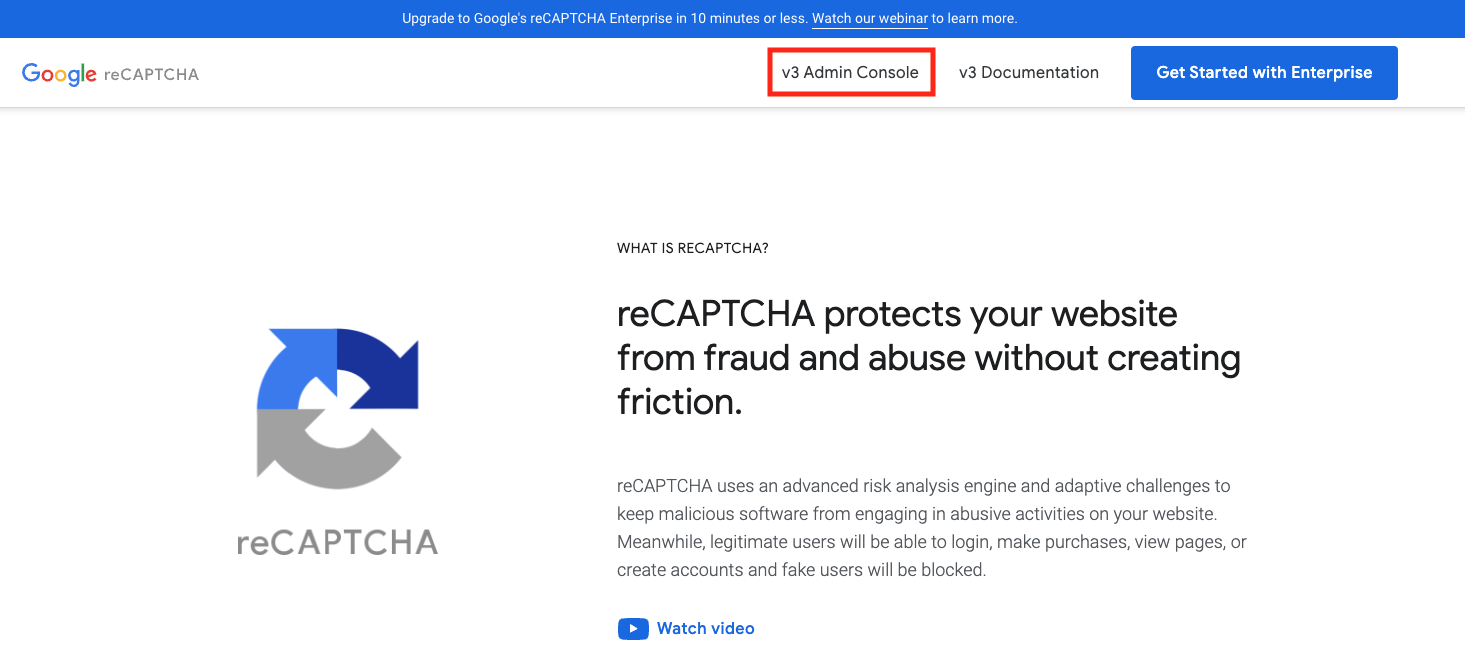
- Google reCAPTCHAの公式ページへ飛びます。(https://www.google.com/recaptcha/about/)
2. v3 Admin Console を開きます。 青いボタンの「Get Started with Enterprise」を押してしまうと、Enterpriseの方に行ってしまうため注意が必要です。 (私はここを間違えたため時間をだいぶ使ってしまいました…….)
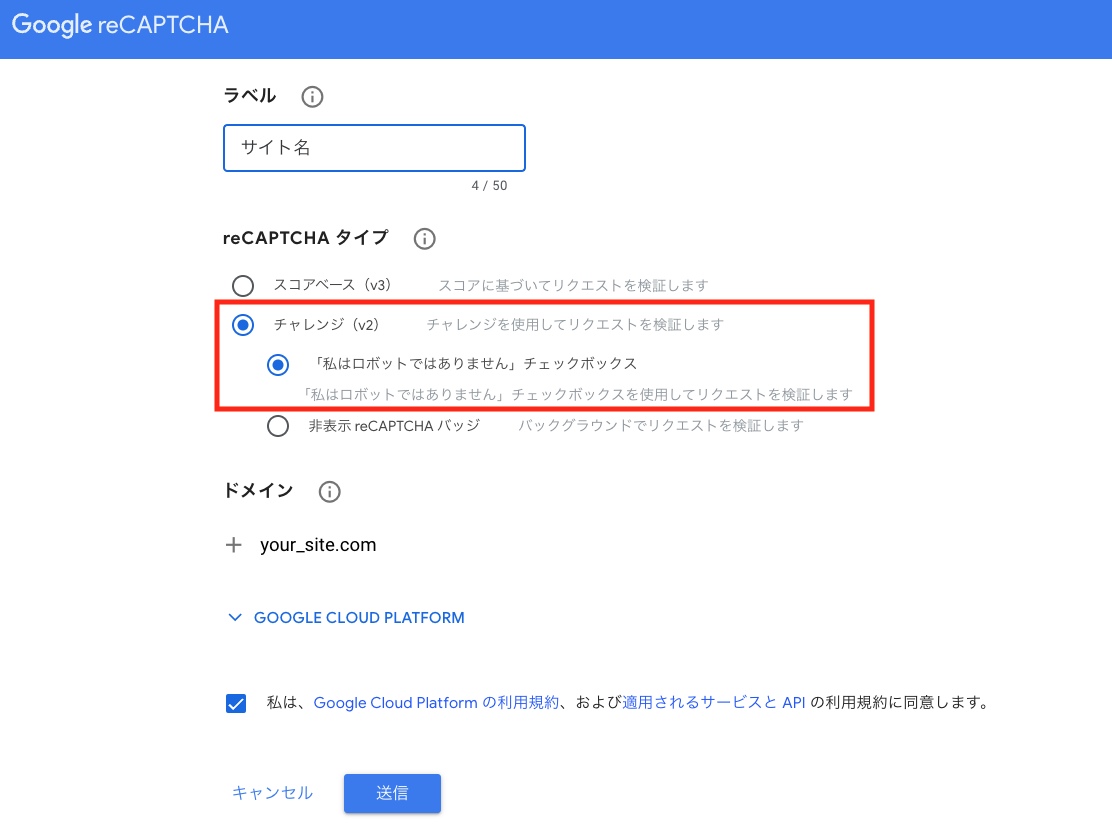
3. ラベル、reCAPTCHAタイプ、ドメインを求められるので適宜入力します。 (開発環境 → localhost等) reCAPTCHAタイプは チャレンジ(v2)「私はロボットではありません」チェックボックス を選択した想定で進めます。
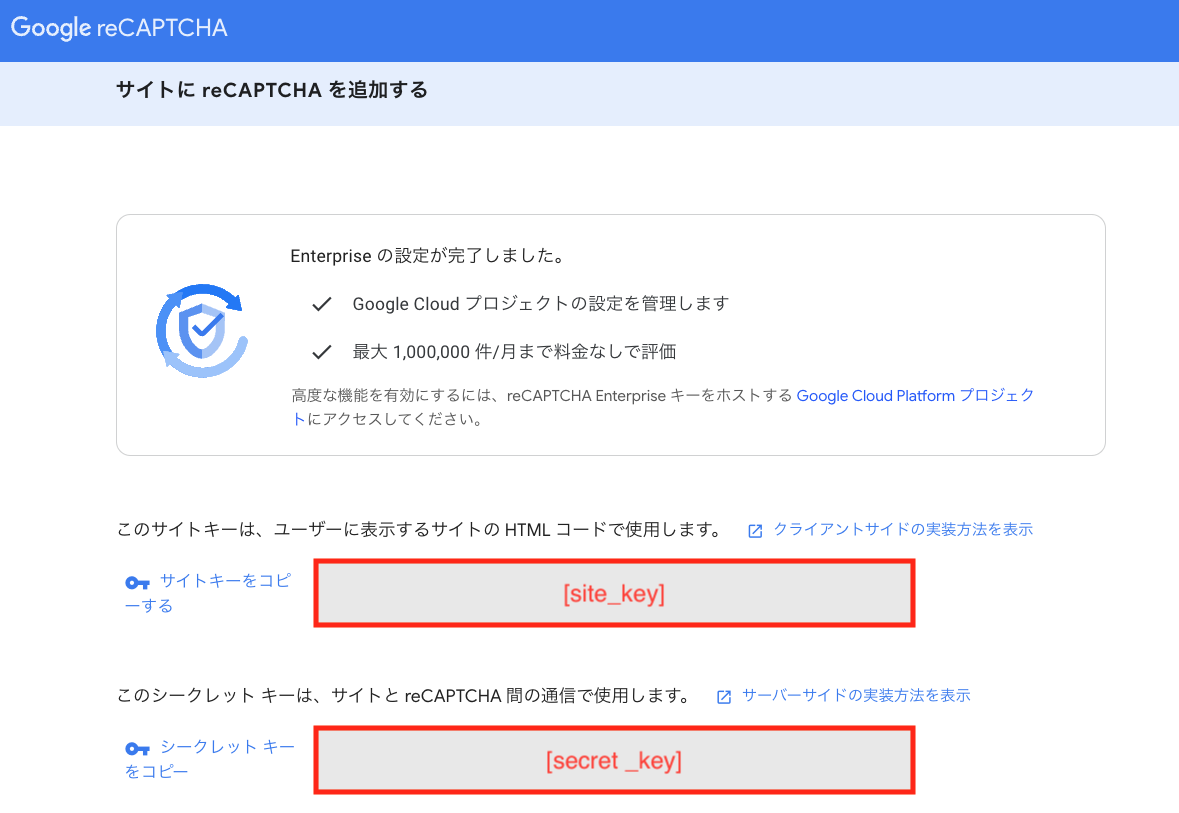
4. 送信ボタンを押すと、サイトキーとシークレットキーが出てくるので、ローカルに保存しておきます。
5. 環境によって必要な分だけ、2~4を繰り返します。
下準備はこれで完了です。
開発
- gemをインストールします。
# Gemfile
gem 'recaptcha', require: 'recaptcha/rails'

# config/application.rb
require 'recaptcha/rails'
2. 環境変数用の.gitignoreされたファイルに、先ほど保存したキーをそれぞれ登録します。
config.recaptcha_site_key = '[site_key]'
config.recaptcha_secret_key = '[secret_key]'
3. reCAPTCHAの設定ファイルを作成します。 config/initializers 配下に、recaptcha.rbを作成し、以下のコードを貼り付けます。
Recaptcha.configure do |config|
  config.site_key = Rails.application.config.recaptcha_site_key
  config.secret_key = Rails.application.config.recaptcha_secret_key
end
4. reCAPTCHAを入れるコントローラを編集します。 verify_recaptchaという変数に、自動で判定結果が入るのでそれを利用します。
def confirm
    unless verify_recaptcha
        # flash.to_hash.values[0]に reCAPTCHAエラーが入る(環境によって変わる可能性あり)
        flash.now[:error] = flash.to_hash.values[0]
        render :new
        return
    end
    ・・・
end
5. ビューを編集します。 ※ 以下はslimの例です
= form_with(model: @hoge, url: confirm_path, local: true, id: 'hoge-form') do |f|
    ・・・
    = recaptcha_tags
    = f.button '提出', type: 'submit', id: 'submit-button'

- content_for :local_js do
  javascript:
    document.addEventListener('DOMContentLoaded', function() {
      grecaptcha.ready(function () {
        document.getElementById('submit-button'), {
          'sitekey': "#{Rails.application.config.recaptcha_site_key}",
          'callback': onSubmit
        };
      });
    });
    function onSubmit(token) {
      document.getElementById('hoge-form').submit();
    };
6. 開発環境を確認し、以下のマークが出ていれば成功です。
まとめ
今回は、reCAPTCHAを新たに導入する手順を書きました。
もっと工夫することは可能だと思いますが、初めてreCAPTCHAマークが出てきた時の感動はひとしおでした。
今回はテストのしやすさを優先してv2にしましたが、v2 invisibleに移行できるとよりユーザー体験を損なわずに検証できそうです。
ご覧いただきありがとうございました。
参考記事


