まえがき
※この記事は、以下の後続記事です。
Deno/TypeScriptの概要については以下の記事に記載しています。
最近私はツールを開発する環境として「Deno」が気に入っています。
シンプルで、軽くて、ランタイムAPIや標準ライブラリが充実していて、開発体験が良いと感じています。
私のところではDenoを本番で採用しようとすると諸々ハードルがありますが、ツールの開発であれば選択肢として大いにアリです。
iOS/Androidアプリケーションや、シングルページ・Webアプリケーションを開発する際、よく使うツールの一例として「スタブ・サーバー」があります。
特に、バックエンド側(Web API)とフロントエンド側が別チームだったりする場合に、
「バックエンド側の実装が完了するまでの間、フロントエンド側の実装が停滞してしまう」
といった状況が発生することがあります。
そのような場合、ダミーのレスポンスを返す「スタブ・サーバー」があると開発がスムーズになります。
この記事では、Deno/TypeScriptによるスタブ・サーバーのサンプルを解説します。
私自身も初学者なので、間違い等があればコメントでご教示ください。
前提環境
Deno 1.20.5
Denoのインストール
公式ドキュメントを参照するのが確実です。
Visual Studio Code (VSCode) の環境構築
テキストエディタでも開発は可能ですが、統合開発環境(IDE)の方が、コード補完や静的チェックが効きますので開発が捗ります。
Denoでは皆さんVSCodeを使っていらっしゃるようです。
以下の記事に素晴らしくまとまっています。
あれこれ調べるのがめんどくさかったら(笑)、
拡張機能「Deno for Visual Studio Code」をインストールして、
作業フォルダ配下に.vscodeフォルダを作成し、
以下のファイルを格納すれば、とりあえず開発を始められると思います。
{
    "debug.javascript.unmapMissingSources": true,
    "deno.enable": true,
    "deno.lint": true,
    "deno.unstable": true,
    "deno.suggest.imports.hosts": {
        "https://deno.land": true
    }
}
VSCodeのデバッグ実行を使いたい場合はlaunch.jsonも格納します。
launch.json
{
    "version": "0.2.0",
    "configurations": [
      {
        "name": "Deno",
        "type": "pwa-node",
        "request": "launch",
        "cwd": "${workspaceFolder}",
        "runtimeExecutable": "deno",
        "runtimeArgs": ["run", "--inspect-brk", "-A", "./app.ts"],
        "attachSimplePort": 9229
      }
    ]
}
※app.tsはアプリケーションのエントリーポイントとなるファイル名ですので、適宜書き変えてください。
スタブ・サーバーの開発
コード
import { Application, Router, Context, helpers } from "https://deno.land/x/oak@v10.5.1/mod.ts";

// 型定義
interface User {
  id: number;
  name: string;
  address: string | null;
}

// データ定義
const userA: User = {id: 1, name: "user-a", address: "東京都豊島区池袋"};
const userB: User = {id: 2, name: "user-b", address: null};
const userC: User = {id: 3, name: "user-c", address: "北海道札幌市北区"};
const users: User[] = [userA, userB, userC]

/* APIごとの関数定義 */

// 全取得用関数
const fetch = (context: Context) => {
  context.response.body = {"users": users};
}

// ID指定取得用関数
const find = (context: Context) => {
  const { id } = helpers.getQuery(context, { mergeParams: true });
  const foundUser = users.find(user => user.id == Number(id));
  if (foundUser) {
    context.response.body = foundUser;
  } else {
    context.response.status = 404;
    context.response.body = "Not found.";
  }
}

// 生成用関数
const create = async (context: Context) => {
  const { id, name, address } = await context.request.body().value;
  if (id && name) {
    const newUser: User = {id: id, name: name, address: address}
    users.push(newUser);
    context.response.body = "Success.";
  } else {
    context.response.status = 403;
    context.response.body = "Bad parameter(s).";
  }
}

/* アプリケーションのエントリーポイント */

const router = new Router();
router
  .get("/", (context) => {
    context.response.body = "Hello world!";
  })
  .get("/users", fetch)
  .get("/users/:id", find)
  .post("/users", create)
  ;

const app = new Application();
app.use(router.routes());
app.use(router.allowedMethods());

console.log("Stub-Server runs at 'http://localhost:8000/'");
await app.listen({ port: 8000 });
起動
Denoのセキュリティ機構としてネットワークを許可するための--allow-netオプションを付けて実行します。
$ deno run --allow-net app.ts
動作確認
cURLなどHTTPリクエストを投げるツールはいろいろあるかと思いますが、今回はVSCodeを使って開発しているので、その拡張機能「REST Client」が便利です。
GET
レスポンス:
HTTP/1.1 200 OK
content-type: application/json; charset=utf-8
vary: Accept-Encoding
content-encoding: gzip
content-length: 146
date: Fri, 06 May 2022 02:52:06 GMT

{
  "users": [
    {
      "id": 1,
      "name": "user-a",
      "address": "東京都豊島区池袋"
    },
    {
      "id": 2,
      "name": "user-b",
      "address": null
    },
    {
      "id": 3,
      "name": "user-c",
      "address": "北海道札幌市北区"
    }
  ]
}
レスポンス:
HTTP/1.1 200 OK
content-type: application/json; charset=utf-8
vary: Accept-Encoding
content-encoding: gzip
content-length: 84
date: Fri, 06 May 2022 02:55:01 GMT

{
  "id": 1,
  "name": "user-a",
  "address": "東京都豊島区池袋"
}
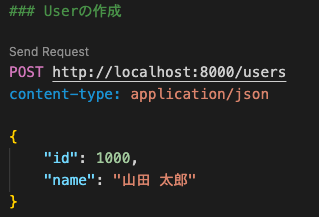
POST
レスポンス:
HTTP/1.1 200 OK
content-type: text/plain; charset=utf-8
vary: Accept-Encoding
content-length: 8
date: Fri, 06 May 2022 03:09:24 GMT

Success.
※↑をPOSTした後のGETでは、ちゃんと{"id": 1000, "name": "山田 太郎"}も返ってきます。
コードのちょっとした解説
「oak」について
oakはHTTPのルーティングと、Webアプリケーション・サーバーの役割を持つサードパーティ・ライブラリです。
外部モジュール(標準ライブラリやサードパーティ・ライブラリ)をimportする際は/oak@v10.5.1のようにバージョン番号をpathで指定します。
oakのRouterでは、"/:id"のような形式でpathをパラメータとして扱うことができ、helpers.getQueryで取得できます。
レスポンスデータの定義について
なんと言っても、静的な型を定義できることがTypeScriptの強みです。
型の間違いは、VSCodeでリアルタイムにチェックが働きます。
また、nullを許容するか否か (nullable) を宣言でき、IDEで静的なチェックが働きます。
参考リンク:
TypeScript Deep Dive 日本語版 > TypeScriptの型システム
さらに詳細な情報を得られるお勧めリンク集
Deno
TypeScript
VSCode拡張「REST Client」


