環境
- Ubuntu Server 14.04 LTS (HVM), SSD Volume Type
- rbenv 0.4.0 [rbenv -v -->rbenv 0.4.0-153-g3b6faa8)]
- Ruby 2.2.0 [ruby -v --->ruby 2.2.0p0 ]
- nginx [nginx -v -->nginx version: nginx/1.4.6 (Ubuntu)]
- unicorn [unicorn -v ---->unicorn v4.9.0]
环境搭建
AWS-EC2
1.下記のAMIを利用して、[rails_study]というインスタンスを作る

2.前作成したキーペアを選択
3. Elastic Ip を割り当てして 先作ったインスタンスを関連付けさせる
4. ローカルで.ssh/configに下記のように記載して、デフォルトユーザ(ubuntu)でインスタンスへアクセス
  Host rails_study
  HostName 52.69.252.160
  Port 22
  User ubuntu
  IdentityFile ~/.ssh/xu_aws_private_key.pem
5.ssh rails_study
新規ユーザ
sudo adduser rails_study- ユーザをsudo groupグループに追加
sudo gpasswd -a rails_study sudo
3.sudoパスワードなし
sudo visudo 下記の1行を追加して
rails_study ALL=NOPASSWD:ALL
保存Ctrl+x → y → 回车
ssh 公開鍵認証 (あれば、1を飛ばし2から)
-
ssh-keygen -t rsa(ローカル) - リモートで先作成したユーザのホームDir
$ mkdir ~/.ssh
$ touch ~/.ssh/authorized_keys
$ cat ~/id_rsa.pub >> ~/.ssh/authorized_keys    ※这里不用这么做,可以直接把本地的公有key代开,然后贝authorized_keys文件里面
$ chmod 600 ~/.ssh/authorized_keys
$ chmod 700 ~/.ssh/
3.ssh/config書き直す
Host rails_study
  HostName 52.69.252.160
  Port 22
  User rails_study
  IdentityFile ~/.ssh/rails_study_key_rsa
- ユーザrails_studyで登録
ssh rails_study
Ruby on rails
- 各種パッケージのインストール
sudo apt-get update
sudo apt-get install git
sudo apt-get install curl g++
sudo apt-get install build-essential libssl-dev libffi-dev libxslt-dev libxml2-dev zlib1g-dev libreadline-dev libyaml-dev
sudo apt-get nodejs
sudo apt-get install sqlite3 libsqlite3-dev
sudo apt-get install libmysqld-dev libmysqlclient-dev mysql-server mysql-client
2.RVM の除去 あなたのUbuntuにRVMがインストールされている場合は、除去します
rvm implode
3.rbenv のインストール (ZSHをお使いの方は、.bashrc を .zshrc で置き換えてください。)
> cd
> git clone git://github.com/sstephenson/rbenv.git .rbenv
> echo 'export PATH="$HOME/.rbenv/bin:$PATH"' >> ~/.bashrc
> echo 'eval "$(rbenv init -)"' >> ~/.bashrc
> exec $SHELL
4.ruby-build のインストール
mkdir -p ~/.rbenv/plugins
cd ~/.rbenv/plugins
git clone git://github.com/sstephenson/ruby-build.git
5.ruby のインストール
rbenv install -l
rbenv install 2.2.0
rbenv rehash
rbenv global 2.2.0
たまには下記ようなエラーに遭遇します、これは大体パッケージのインストールが足りない、ログファイルを開いてみたら、g++がインストールしない
BUILD FAILED (Ubuntu 14.04 using ruby-build 20150719-13-g86919c8)
Inspect or clean up the working tree at /tmp/ruby-build.20150801132726.10327
Results logged to /tmp/ruby-build.20150801132726.10327.log
sudo apt-get install curl g++
6.設定を確認します。
6.1 rubyバンジョー
rbenv version
2.2.0 (set by /home/rails_study/.rbenv/version)
ruby -v
ruby 2.2.0p0 (2014-12-25 revision 49005) [x86_64-linux]
6.2
which ruby
/home/rails_study/.rbenv/shims/ruby
※rbenv -v rbenvのバンジョー
7.bundlerをインストール
gem install bundler
8.Railsのインストールと動作確認
gem install rails --no-ri --no-rdoc
なお、--no-ri、--no-rdocオプションはそれぞれri、rdoc形式のドキュメントの自動生成を行わないことを意味します。これらはいわゆるリファレンスドキュメントのようなものです。
以上でRailsのインストールは完了です。あとは動作確認を行います
cd
mkdir railsapp
cd railsapp
rails new first_app
cd first_app
rails g scaffold user name:string email:string
rake db:migrate
rails server -b 0.0.0.0
上記のrails serverはrails sという短縮形でも実行できます。また、-b 0.0.0.0は、どこからのアクセスでも受け付けるようにするためのオプションになります。
development環境のデフォルト設定ではlocalhostからのアクセスしか受付ません
9.rails 動作確認
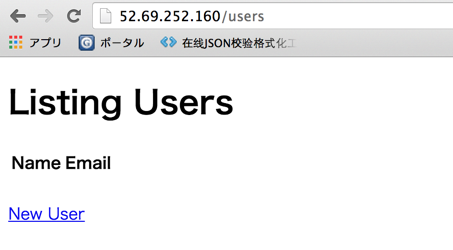
在AWS上部署之后,直接看到使用 https://xxxxx:3000是链接不上的看下面的文章,是因为securitygrop中没有加入3000端口

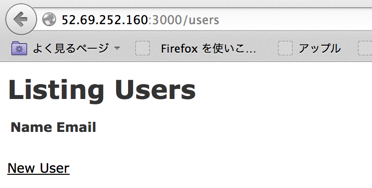
curl -s http://52.69.252.160:3000/
curl -s http://52.69.252.160:3000/users
nginxのインストールと設定
1: nginxのインストール
$ sudo apt-get update
$ sudo apt-get install nginx
2: /etc/nginx/nginx.conf 修正 (只要修改下面的就行,别的都默认)
ユーザwww-dataが使わないので、注释掉
sudo vim /etc/nginx/nginx.conf
user www-data; ---> #user www-data;
worker_connections数が修正しないと、[worker_connections are not enough]っていうエラーが
error.logに残ります。
worker_connections 768; ----> worker_connections 2048
# user www-data;
worker_processes 4;
pid /run/nginx.pid;

events {
        #worker_connections 768;
        worker_connections 2048;
        # multi_accept on;
}
3: /etc/nginx/sites-available/default
修正前先备份,当然也可以使用别的
cd /etc/nginx/sites-available/
sudo cp default default_bk
ls -al
upstream unicorn {
  server unix:/home/rails_study/railsapp/first_app/tmp/unicorn_rails_study.sock fail_timeout=0;
}

server {
  listen   80;
  charset  utf-8;
  server_name  52.69.212.13;

  keepalive_timeout 5;

  root        /home/rails_study/railsapp/first_app;
  #add
  index index.php index.html index.htm;
  access_log  /home/rails_study/railsapp/first_app/log/nginx_access.log;
  error_log   /home/rails_study/railsapp/first_app/log/nginx_error.log;
  rewrite_log on;

  location /first_app/ {
     try_files $uri $uri.html $uri/index.html @unicorn;
  }

  location ~ ^/assets/(.*) {
     alias /home/rails_study/railsapp/first_app/public/assets/$1;
  }

  location / {
    proxy_set_header Host $http_host;
    proxy_pass http://unicorn;
  }

  location @unicorn {
    proxy_set_header X-Real-IP $remote_addr;
    proxy_set_header X-Forwarded_For $proxy_add_x_forwarded_for;
    proxy_set_header Host $http_host;
    proxy_pass http://unicorn;
  }

  error_page 500 502 503 504 /500.html;
  location = /500.html {
    root /home/rails_study/railsapp/first_app/public;
  }
}
如果不是使用default而是自己命令的配置文件的话,需要添加一个软连接 比如自己的配置文件的名称为
sample的情况下
ln -s /etc/nginx/sites-available/sample /etc/nginx/sites-enabled/sample

使用default之所以不用添加这个软连接的理由是,安装完nginx 之后,这个默认做好了

rails_study@ip-172-31-24-213:/etc/nginx/sites-enabled$ cd /etc/nginx/sites-enabled/
rails_study@ip-172-31-24-213:/etc/nginx/sites-enabled$ ls -l
total 0
lrwxrwxrwx 1 root root 34 Aug  1 14:40 default -> /etc/nginx/sites-available/default
4 以下のコマンドでnginxの設定ファイルを再読み込みし、さらに起動できるかを確認しておきます。
sudo service nginx reload
sudo service nginx start
ps aux | grep nginx

1: unicorn インストール
unicorn インストール Gemfileに下記のように記載します,後bundle installを実行
gem 'unicorn'
$ bundle install
2: Railsのunicronの設定ファイルとして/home/rails_study/railsapp/first_app/configにunicorn.rbを作成します。そして以下を記述します
app_path = File.expand_path(File.dirname(__FILE__) + '/..')

worker_processes 2

working_directory app_path
timeout 30

# listen
socket_file = app_path + '/tmp/unicorn_rails_study.sock'
listen 8080, tcp_nopush: false
listen socket_file, backlog: 64


# Pid
pid app_path + '/tmp/unicorn_rails_study.pid'

# log
log_file = app_path + '/log/unicorn.log'
err_log  = app_path + '/log/unicorn_error.log'

stderr_path err_log
stdout_path log_file

# Preload
preload_app true

# GC
GC.respond_to?(:copy_on_write_friendly=) and GC.copy_on_write_friendly = true

# Before_forc
before_fork do |server, worker|
  defined?(ActiveRecord::Base) and ActiveRecord::Base.connection.disconnect!

  old_pid = "#{ server.config[:pid] }.oldbin"
  unless old_pid == server.pid
     begin
       sig = (worker.nr + 1) >= server.worker_processes ? :QUIT : :TTOU
       Process.kill :QUIT, File.read(old_pid).to_i
       rescue Errno::ENOENT, Errno::ESRCH
     end
   end
end

# After_fork
after_fork do |server, worker|
    defined?(ActiveRecord::Base) and ActiveRecord::Base.establish_connection
end
app_path + '/tmp/unicorn_rails_study.sock',そしてこの部分は/etc/nginx/sites-available/defaultに記述したserver server unix:/home/rails_study/railsapp/first_app/tmp/unicorn_rails_study.sock;と合わせる必要があります
3: 启动脚本
今 下記のコマンドでunicornを起動させられます。
bundle exec unicorn -D -c /home/rails_study/railsapp/first_app/config/unicorn.rb -E production
下記のコマンドでstop
kill ps awux | grep -v grep | grep 'unicorn master' | awk '{print $2}'`
いちいち手動で実行するのは面倒なので起動スクリプトを作成しました!
# !/bin/sh
BUNDLE=$(which bundle)
UNICORN=unicorn
CONFIG_FILE=/home/rails_study/railsapp/first_app/config/unicorn.rb
APP_HOME=/home/rails_study/railsapp/first_app

case "$1" in
   start)
     $BUNDLE exec $UNICORN -c $CONFIG_FILE -E development -D
;;
   stop)
     kill -QUIT `cat $APP_HOME/tmp/unicorn_rails_study.pid`
;;
   restart|force-reload)
     kill -USR2 `cat APP_HOME/tmp/unicorn_rails_study.pid`
;;
   *)
     echo "Usage: $SCRIPTNAME {start|stop|restart|force-reload}" >&2
     exit 3
;;
esac
chmod +x unicorn-start.sh
./unicorn-start.sh start
rails_study@ip-172-31-24-213:~/railsapp/first_app/bin$ ./unicorn-start.sh start
rails_study@ip-172-31-24-213:~/railsapp/first_app/bin$ ps aux | grep unicorn
rails_s+  7613  8.4  7.2 186364 73488 ?        Sl   06:08   0:01 unicorn master -c /home/rails_study/railsapp/first_app/config/unicorn.rb -E development -D
rails_s+  7616  0.0  6.9 186364 70880 ?        Sl   06:08   0:00 unicorn worker[0] -c /home/rails_study/railsapp/first_app/config/unicorn.rb -E development -D
rails_s+  7618  0.0  6.9 186364 70908 ?        Sl   06:08   0:00 unicorn worker[1] -c /home/rails_study/railsapp/first_app/config/unicorn.rb -E development -D
今下記のフォルダに下記の二つファイルが生成されました
/home/rails_study/railsapp/first_app/tmp
- unicorn_rails_study.pid
- unicorn_rails_study.sock
/home/rails_study/railsapp/first_app/log中に各ログファイルがある
動作確認
AWSセキュリティグループにhttp 追加

参考資料
http://www.virment.com/ubuntu-nginx-unicorn-rails/
http://qiita.com/akito1986/items/56198edcafc222b320a8
http://www.oiax.jp/rails/zakkan/rails_3_2_installation_on_ubuntu.html
http://prototype-beta.com/server/entry/12_ubuntuでnginx_+_unicorn_-_設定編
1:Amazon LinuxにRuby on Rails環境構築(rbenv + ruby-build + Ruby 2.2.1 + Rails 4.2.1インストール)
http://qiita.com/na0AaooQ/items/5bd62e630a2faf051a52
使用Nginx + unicorn搭建ruby on rails的生产环境
http://my.oschina.net/mogralee/blog/299890
配置文件
https://gist.github.com/mimosz/3547765
http://stackoverflow.com/questions/17264845/rails-3-2-nginx-unicorn-always-try-to-load-index-html-403-from-public-folder
ruby-china
https://github.com/huacnlee/ruby-china/blob/master/config/unicorn.rb