2
1

Delete article

Deleted articles cannot be recovered.

Draft of this article would be also deleted.

Are you sure you want to delete this article?

More than 5 years have passed since last update.

mobmap2 カスタムマッピングの方法

Last updated at Posted at 2015-01-26

mobmapで属性値に応じてカラーリングしたいとき、手動で色を指定してカラーリングするカスタムマッピング機能(Custom mapping)についてまとめました。

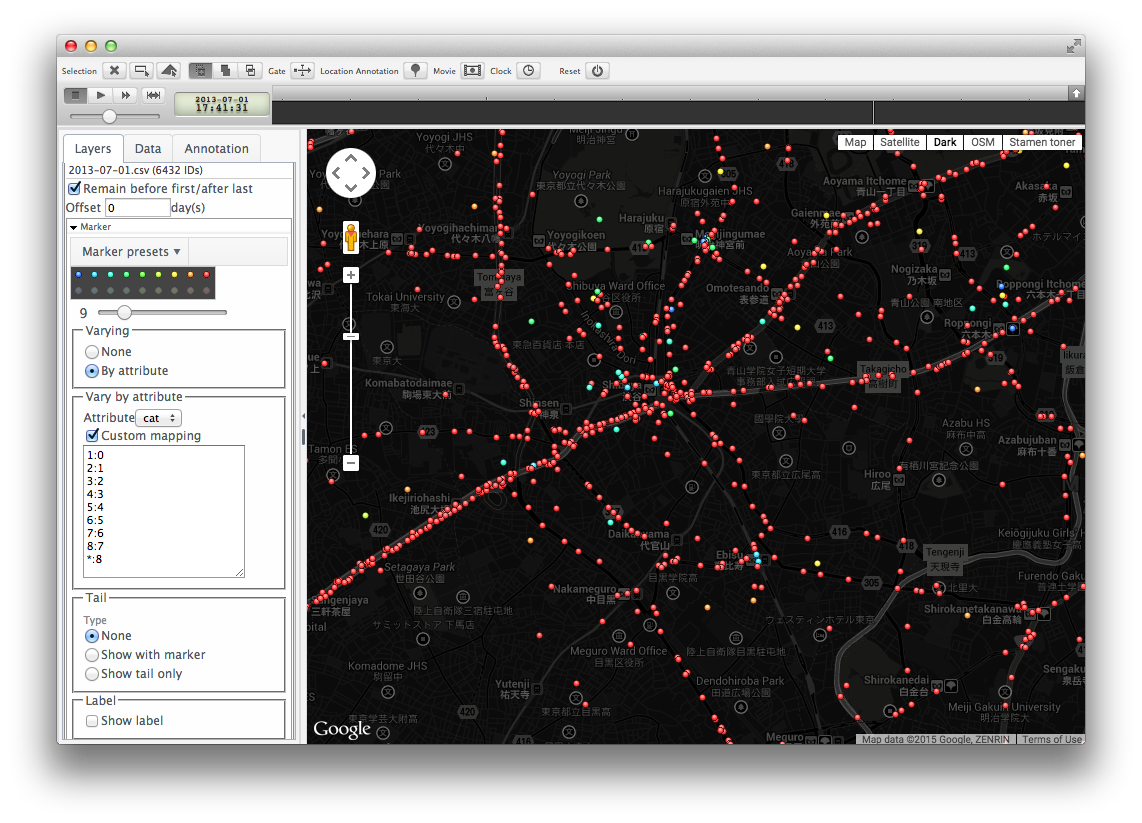
Screen Shot 2015-01-26 at 4.41.36 PM.png

#手順

###1.mobmapを立ち上げ、Layerタブにある「Add」から「Moving objects CSV」を選択し、属性を指定してデータを読み込み

###2.Layersタブに読み込んだ「Moving Objects」レイヤ内にある「Marker > varying」の「By attribute」にチェック
 ※デフォルトだと「None」にチェックされている

###3.その後、「Marker > Vary by attribute」において、「Attribute」にカラーリングしたい属性名が設定されていることを確認後、「Custom mapping」にチェックを入れる

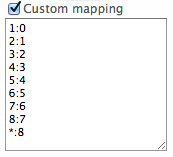
###4.Custom mappingフォームに条件を記入

Screen Shot 2015-01-26 at 4.53.08 PM.png

#####記入方法

属性値 : 色
コロン(:)区切りで情報を指定します。
左:属性値を入力します。上記の例では9種類の属性にそれぞれ色をつけています。
  ※属性値は整数のみ対応しています。
右:色番号を入力します。色番号は0はじまりで、「Marker presets」で指定したカラーセットの一番左からの順に番号が振られます。
ex) 1:0の場合(上記画面例に従って例)
  属性「cat」の属性「1」には、「0」番目の色を割当(この例だと青色)

※「(アスタリスク)」を入力すると、それ以外の属性値を指定するという意味になります。
 ex)上記の「
:8」の場合
   既に指定されている属性値「1~8」を除いた値が該当します。仮に属性値のレンジが「1~32」の場合、「9~32」が該当します。
2
1
0

Register as a new user and use Qiita more conveniently

  1. You get articles that match your needs
  2. You can efficiently read back useful information
  3. You can use dark theme
What you can do with signing up
2
1

Delete article

Deleted articles cannot be recovered.

Draft of this article would be also deleted.

Are you sure you want to delete this article?