obnizはLineBeaconになれるのか?と質問があったので,試してみました.
LINE BOOT AWARDSに関連してひとつ質問させて頂きたいのですが、obnizでLINE Beaconを動作させることは可能でしょうか?
— 田中みそ (@miso_develop) August 23, 2018
ESP32で動作させることは可能なようなのですが…https://t.co/5JEzoMsYFo
LINE Beaconの概要
特定のadvertisementを出しているBeaconをLineが発見するとbotのwebhookに,beaconが見つかったよと通知を出します.
サーバー側で,そのbeacon情報をもとにどういう処理をするか決めて,対応します.
例だと,商品に付いてるボタンを押したらその商品の情報がbotから送られてくる などがありました.
LINE の設定
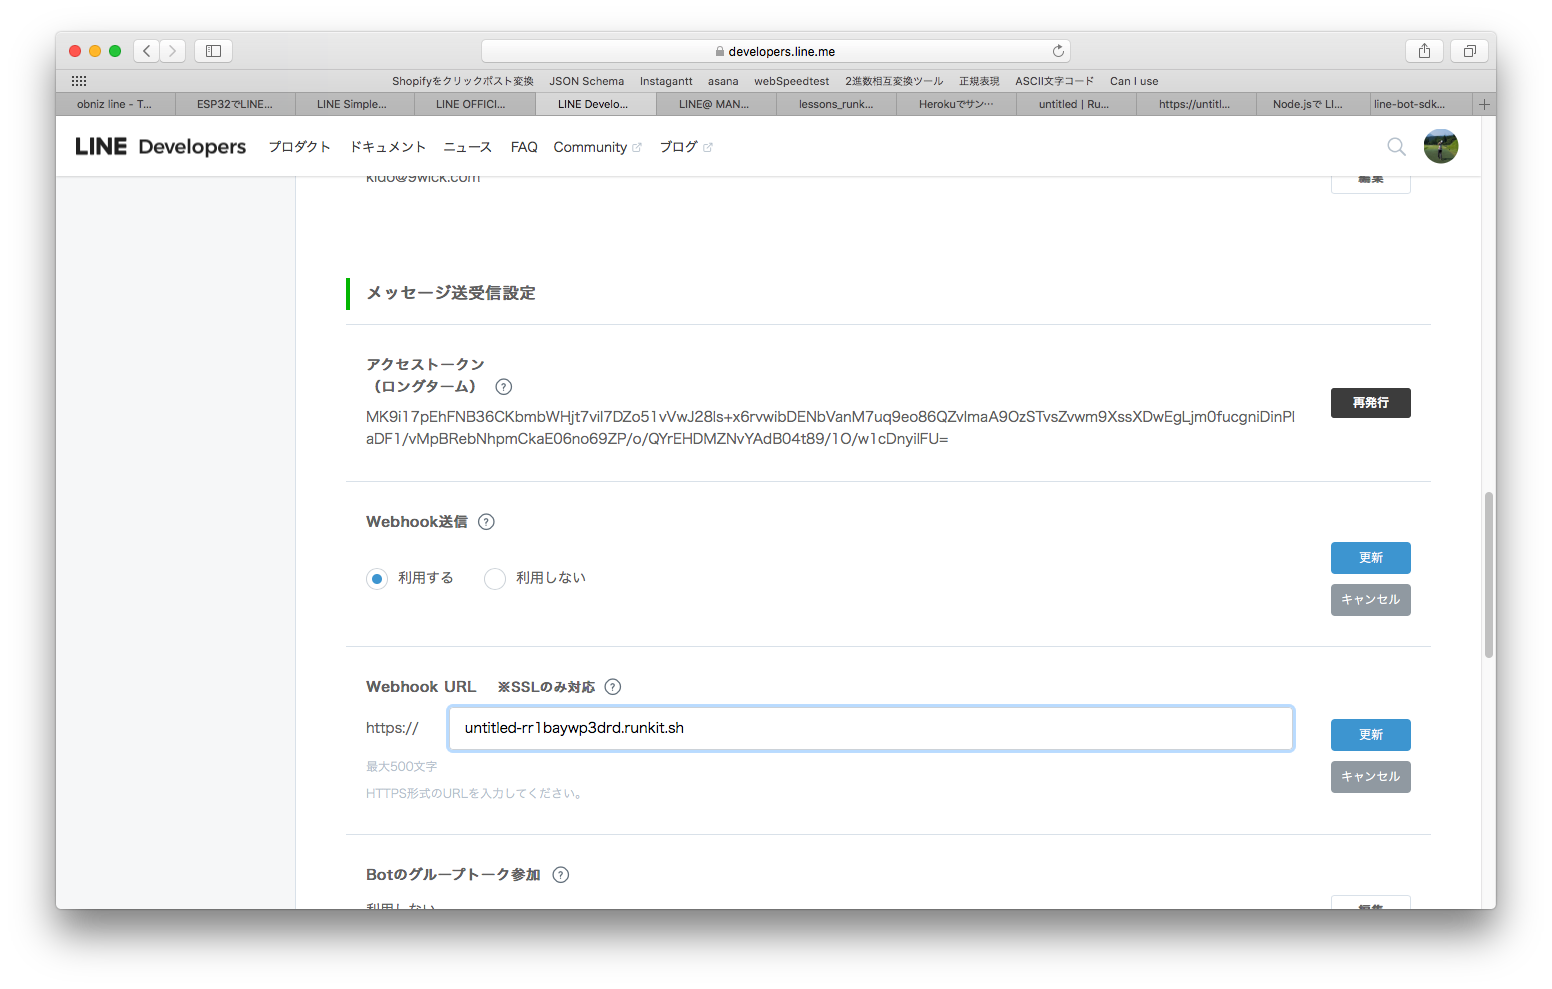
Line Developerのサイトで,messaging apiを使ったbotを作成します
通知がきたときの処理をするために,LINE Developersのbot設定画面でWebhookを設定します
HTTPSサーバーが必要なので,runkitを使いました
※runkitはnode.jsの無料ホスティングサービスです.httpsのリクエストが受け付けられるので重宝しています
作ったbotとは友だちになっておきます.
そうしないと通知が来ないです
LINE Beaconの設定
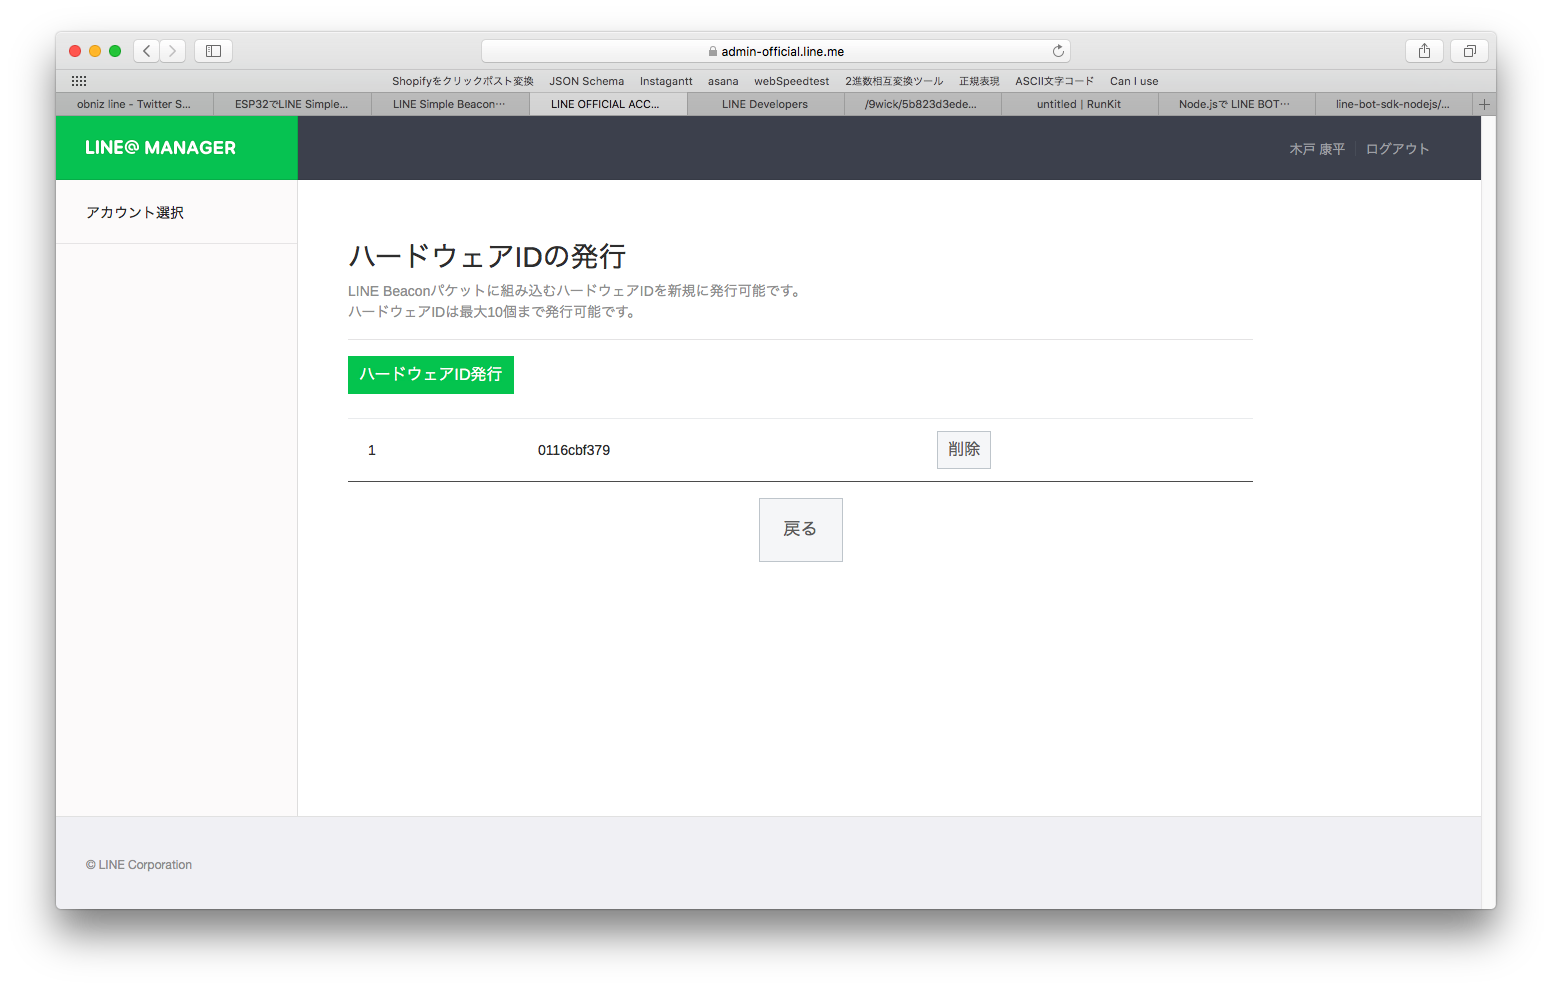
LINE@ Managerのビーコン登録画面から,LINE Simple BeaconのハードウェアIDの払い出しをします,
obnizのコード
advertisementを作るだけなのでobnizの知識というよりは,bleの知識になります.
deviceMessageとhardwareId以外は固定なので,とりあえずはそこをいじれば使えます.
var obniz = new Obniz("XXXXXXXX");
obniz.onconnect = async function () {

  var adv = [];
  var UUID_FOR_LINECORP = [0x6F, 0xFE];
  var deviceMessage = [01,02,10];  //サーバーに送るメッセージ 1~13byte
  var hardwareId = [0x01, 0x16, 0xcb, 0xf3, 0x79 ]; //払い出されたID(元:0116cbf379)


  // flag
  adv = adv.concat([0x02, 0x01, 0x06]);  //LE General Discoverable Mode & BR/EDR Not Supported

  //16bit uuid
  adv = adv.concat([0x03, 0x03]);
  adv = adv.concat(UUID_FOR_LINECORP);

  //simple beacon
  adv = adv.concat([1+9+deviceMessage.length, 0x16]);
  adv = adv.concat(UUID_FOR_LINECORP);
  adv = adv.concat([0x02]);
  adv = adv.concat(hardwareId);
  adv = adv.concat([0x7F]);
  adv = adv.concat(deviceMessage);


  obniz.ble.advertisement.setAdvDataRaw(adv);
  obniz.ble.advertisement.start();
}
adv = adv.concat([ ... ]);でadvertisementを作り, obniz.ble.advertisement.setAdvDataRaw(adv);でそれをobnizにセットし, obniz.ble.advertisement.start();で開始しています.
サーバー上のコード
runkitで書きました.そのため,生のnode.jsとは少しだけ違いますが,ほとんど同じです.
(expressのlistenをしてなかったり,requireするものが違ったりする程度です.)
const express = require("@runkit/runkit/express-endpoint/1.0.0");
const app = express(exports);
const line = require('@line/bot-sdk');

// create LINE SDK config from env variables
const config = {
  channelAccessToken: "",
  channelSecret: "",
};

// create LINE SDK client
const client = new line.Client(config);

// register a webhook handler with middleware
// about the middleware, please refer to doc
app.post('/',  line.middleware(config), (req, res) => {
  Promise
    .all(req.body.events.map(handleEvent))
    .then((result) => res.json(result))
    .catch((err) => {
      console.error("ERROR");
      console.error(err.message);
      res.status(500).end();
    });
});

// event handler
function handleEvent(event) {
  console.log(event);
  if (event.type === 'message' && event.message.type === 'text') {
    const echo = { type: 'text',  text: event.message.text };
    console.log(echo)
    return client.replyMessage(event.replyToken, echo);

  }else if(event.type === 'beacon' && event.beacon){
    const message = { type: 'text', text: `beacon device(${event.beacon.hwid})から${event.beacon.dm}が届いたよ` };
    console.log(message)
    return client.replyMessage(event.replyToken, message);

  }
    return Promise.resolve(null);
}
重要なのはhandleEvent(event)の中身です.
event.typeがbeaconだったらbeacon情報なので,返信のメッセージを変えています.
通常はエコーにしています
これに,channelAccessTokenとchannelSecretをつければ動きます.
動かした

さいごに
obnizにはスイッチを押したらプログラムを走らせる機能もあるので,スイッチを押す→beaconを出す→LINE beaconで検知→LINEになにか出す ということもできそうです
動的にdeviceMessageの中身を変えることもできるので,今までの独立型beaconではできなかったことがいろいろできるかもしれませんね

