はじめに
今回はVue.jsを使ってQiitaのホーム画面っぽいものを作ってみます。
Vueは簡単に作成できるフレームワークとして知られています。またAPIとの親和性が高く、一般公開されているAPIを使ってひょいっとページを作成することが可能です。
今回はこのような画面を作ってみます。Qiitaの新着記事の一覧を表示する画面です。

画面は1コンポーネントのみ、APIの読み込みにaxiosを使ってみます。早速セットアップからやってみましょう。
Vue CLIのセットアップ
簡単にVue.jsの環境を作ることができるVue CLIのセットアップからですね。Nodejsがある環境が前提です。
npm install -g @vue/cli
vue create .
以下、質問に答えていくと、環境が整うはずです。
npm run serve
node_moduleに入っているパッケージを起動させます。
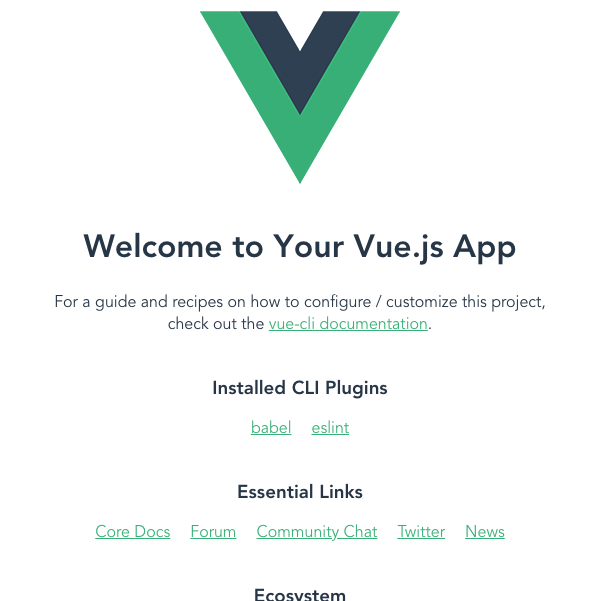
以下の画面が出れば成功です。開発を始めていきましょう。
画面の作り込み
この画面はApp.vueに記載された画面が出ているのですが、今回は不要なのでその中の画面は一旦消してしまいます。 (参考のため別ファイルに名前を変更してもよいです。つまりApp.vueの空のファイルさえできていれば問題ありません)
さて、この状態だと何も表示されなくなるので、とりあえずHelloworldだけ出力しましょう。
ちなみに、単一コンポーネントについては、vue-loaderこのあたりで補足しながら読んでいくと良いでしょう。
Vueのコンポーネント単位での書き方は、この辺りです。
コンポーネントの基本 — Vue.js
App.vue
<template>
  <div>Hello World</div>
</template>
templateタグに入れたものはビューとしてページに反映されます。
左上にHello worldの文字が確認できたら大丈夫です。

次はレイアウトですね。記事一覧ページっぽくなるようにスタイルを整えていきましょう。
<template>
  <div class="container">
    <ul class="articles">
      <li class="article">this is sample article</li>
    </ul>
  </div>
</template>

<style scoped>
  .container {
    width: 100%;
    height: 100vh;
    background: #dedede;
  }

  .articles {
    width: 600px;
    margin: 0 auto;
    background: white;
    list-style: none;
  }

  .article {
    height: 50px;
    padding: 6px;
    font-size: 16px;
    font-weight: bold;
  }
</style>

それらしきレイアウトにはなったでしょうか。もう少し調整が必要そうですね。実際のデータが欲しいので、API連携の方に移ります。
API連携
https://qiita.com/api/v2/docs#get-apiv2items
こちらからデータを取得して画面に表示するまでをやってみます。
とりあえずscriptタグが機能するかどうかから見てみます。templateタグの下にscriptタグを書いて、その中に処理を書きます。
...
</template>

<script>
import axios from 'axios'

exports default {
  data() {
    console.log('sample log from scripts')
    return {}
  }
}

</script>
ページを更新して、DevToolsのconsoleを確認してみてください。
consoleに入力した文字が入っていれば成功です。

次は実際のAPI連携ですね。
Qiita APIはGETのみであれば認証キーが不要です。(2018年12月現在)
https://qiita.com/api/v2/docs#get-apiv2items
先程掲載したこちらのリンクから、https://qiita.com/api/v2/itemsにアクセスして、その結果をconsoleで確認します。
<script>
import axios from 'axios'

export default {
  data() {
    console.log('sample log from scripts')
    return {}
  },
  mounted() {
    this.fetchArticles()
  },
  methods: {
    fetchArticles() {
      axios.get('https://qiita.com/api/v2/items')
        .then(res => {
          console.log(res)
        })
    }
  }
}
</script>
まず、mounted、つまりページのレンダリングが始まる前の時点でfetchArticles関数を走らせます。そのfetchArticle関数ではaxios.getでAPIに接続し、その結果をconsole.logで出力します。
ページを再読込みします。APIからのデータが取得できていればconsoleに出力されます。
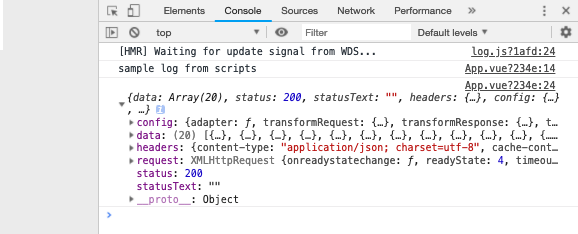
dataに20個ほどの記事が配列になっているのが確認できます。次はその記事を表示させてみましょう。
<script>
import axios from 'axios'

export default {
  data() {
    return {
      articles: []
    }
  },
  mounted() {
    this.fetchArticles()
  },
  methods: {
    fetchArticles() {
      axios.get('https://qiita.com/api/v2/items')
        .then(res => {
          console.log(res)
          this.articles = res.data
        })
    }
  }
}
</script>
dataにarticlesを登録し、先ほど取得できていた記事一覧をその中に入れます。
そして、その中身をに反映させます。v-forで、記事ごとにli要素の中に入れていきます。
<template>
  <div class="container">
    <ul class="articles">
      <li v-for="article in articles" :key="article.id" class="article">{{ article.title }}</li>
    </ul>
  </div>
</template>
確認します。
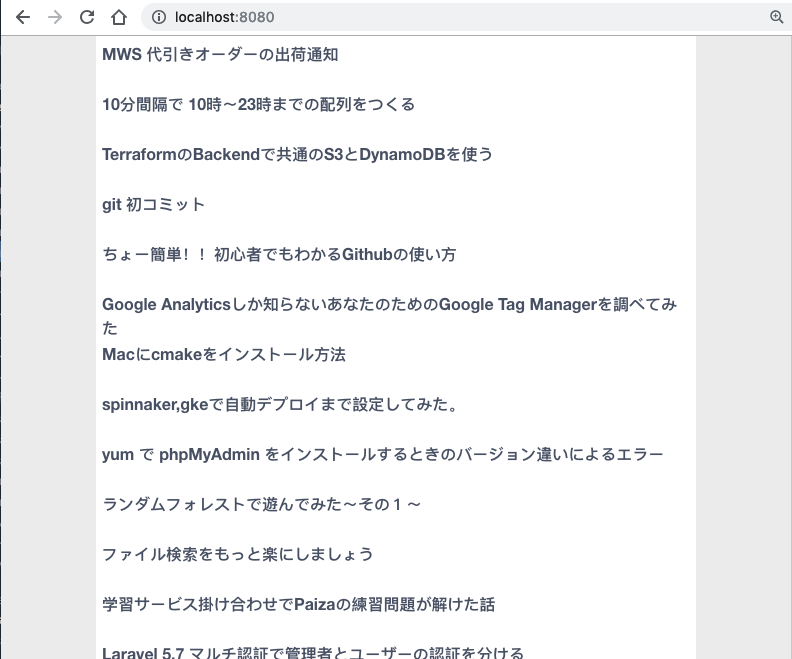
タイトル一覧ができましたね。
そうしたら、残りのスタイルを組み立てていけば完了です。
スタイルを調節して、articleオブジェクトの中に、記事作成者のサムネイル、ユーザid, いいね数が出るようにして、記事をクリックしたらその記事を開くように変更しました。
<template>
  <div class="container">
    <ul class="articles">
      <li class="article">新着記事一覧</li>
      <li v-for="article in articles" :key="article.id" class="article">
        <img :src="article && article.user.profile_image_url" width="30" height="30" />
        <a :href="article && article.url" target="_blank" class="article-link">{{ article.title }}</a>
        <div class="article-detail">by {{ article && article.user.id }} 👍 {{ article.likes_count }} </div>
      </li>
    </ul>
  </div>
</template>

<style>
  .container {
    width: 100%;
    height: 100%;
    background: #eeeeee;
  }

  .articles {
    width: 600px;
    margin: 0px auto;
    background: white;
    list-style: none;
  }

  .article {
    min-height: 40px;
    padding: 10px;
    font-size: 14px;
    font-weight: bold;
    border-bottom: 1px solid #dedede;
  }

  .article-link {
    color: inherit;
    margin-left: 20px;
  }

  .article-link:hover {
    color: gray;
  }

  .article-detail {
    font-size: 11px;
    color: #9e9e9e;
  }
</style>
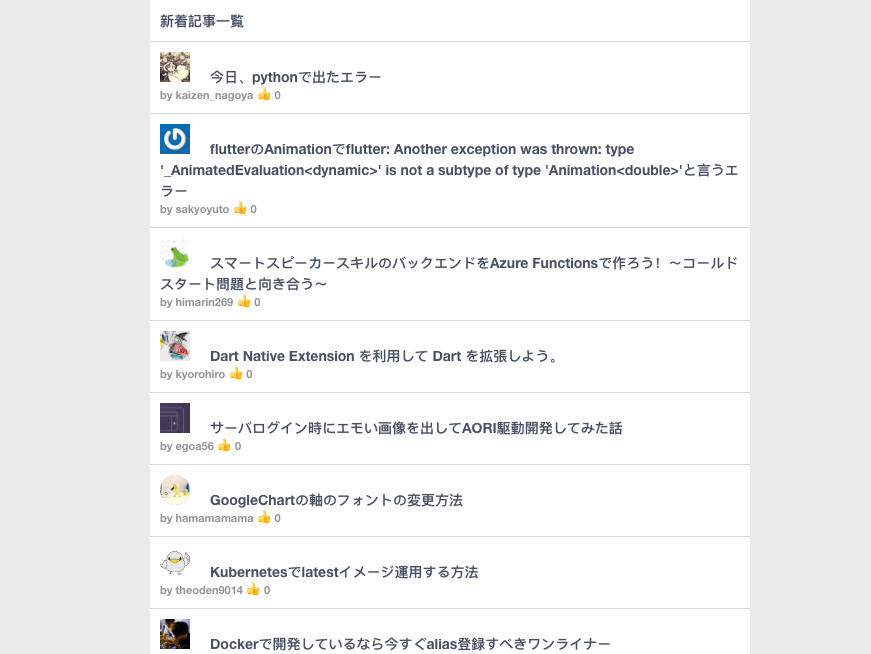
このようになりました。
最後に
今回はこのページにサムネイル、ページ遷移、作者名、いいね数を加えてqiitaっぽくしてみました。今回はここまでですが、かなり簡単にページを作れることがわかったかと思います。また、qiitaの他にもいろいろな箇所でAPIが公開されているので、そのAPIを使って画面を作ってみると良いと思います。最後に今回のファイルを貼っておきます。
<template>
  <div class="container">
    <ul class="articles">
      <li class="article">新着記事一覧</li>
      <li v-for="article in articles" :key="article.id" class="article">
        <img :src="article && article.user.profile_image_url" width="30" height="30" />
        <a :href="article && article.url" target="_blank" class="article-link">{{ article.title }}</a>
        <div class="article-detail">by {{ article && article.user.id }} 👍 {{ article.likes_count }} </div>
      </li>
    </ul>
  </div>
</template>

<script>
import axios from 'axios'

export default {
  data() {
    console.log('sample log from scripts')
    return {
      articles: []
    }
  },
  mounted() {
    this.fetchArticles()
  },
  methods: {
    fetchArticles() {
      axios.get('https://qiita.com/api/v2/items')
        .then(res => {
          console.log(res)
          this.articles = res.data
        })
    }
  }
}
</script>

<style>
  .container {
    width: 100%;
    height: 100%;
    background: #eeeeee;
  }

  .articles {
    width: 600px;
    margin: 0px auto;
    background: white;
    list-style: none;
  }

  .article {
    min-height: 40px;
    padding: 10px;
    font-size: 14px;
    font-weight: bold;
    border-bottom: 1px solid #dedede;
  }

  .article-link {
    color: inherit;
    margin-left: 20px;
  }

  .article-link:hover {
    color: gray;
  }

  .article-detail {
    font-size: 11px;
    color: #9e9e9e;
  }
</style>