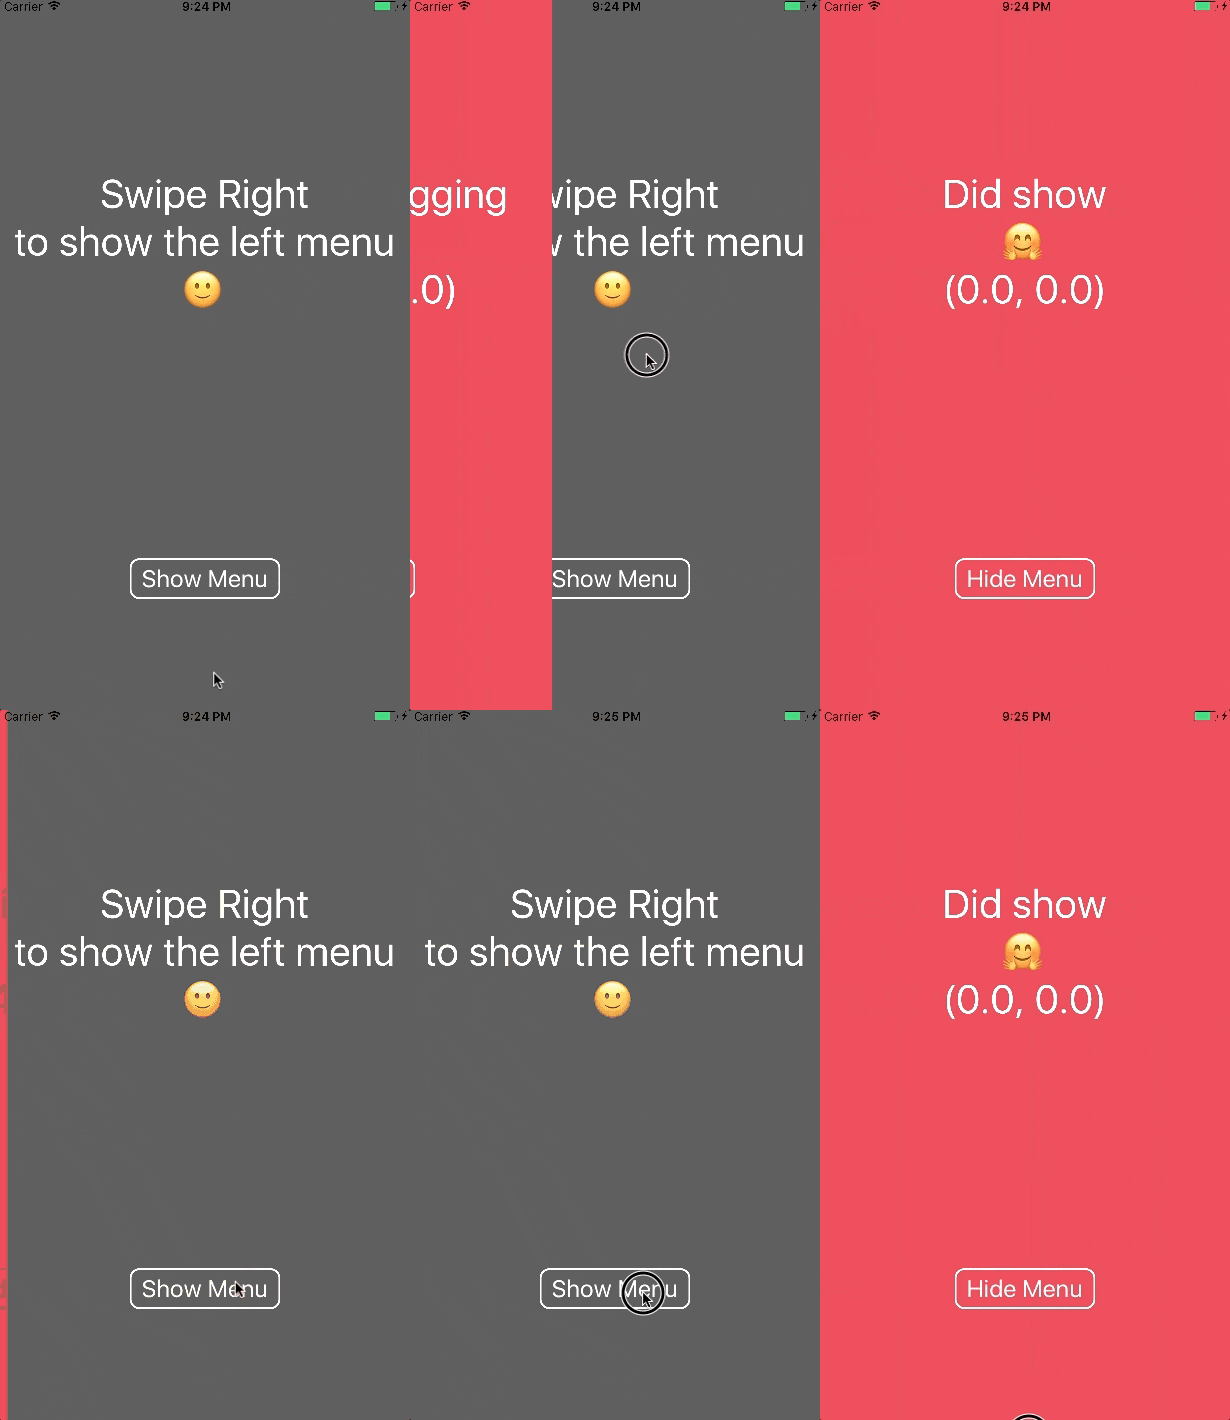
初投稿になります。よろしくお願いします。
Snapchatみたいな上下左右から出てくるスライドメニューライブラリつくりました。
Multi Slide Menu
ライブラリはこちらにあります
特徴
・上下左右の4箇所にスライドメニューを設置できる
・ドラッグしている間の座標がとれる
・メニューが出た、隠れたのタイミングがとれる
・ボタンアクションからスライドメニューをトグルできる
・UIのカスタマイズが簡単
インストール
Xcodeに手動でドロップします。こちらのソースをとりこんでください。
サンプル
-
MultiSlideMenuViewControllerを継承したクラスを作成します。
class ViewController: MultiSlideMenuViewController {
- SlideMenuView を初期化して、ポジション、サイズを指定します。
let sideMenu = SlideMenuView(position: .Left, bounds: view.frame)
sideMenu.backgroundColor = .yellow
super.setupSlideMenus(views: [sideMenu])
こちらの例では、ポジションは Left、 スライドメニューのサイズは view.frame、背景色は黄色になります。
カスタマイズしたい
スライドメニューのカスタマイズも簡単です。
SlideMenuView を継承したビューを作り、override func draw(_ rect: CGRect)内でカスタムUIを実現できます。
import UIKit

class CustomSlideMenu: SlideMenuView {
    override func draw(_ rect: CGRect) {
        super.draw(rect)
        // your code here for the custom UI...
    }
}
トグルさせたい
SlideMenuView クラス の show(), hide()をコールすることで可能です。
サンプルコードはこちらにあります
座標をとりたい
SlideMenuView クラス に 座標を感知する関数を用意しています。
・willShow(point: CGPoint)
・didShow(point: CGPoint)
・willDisappear(point: CGPoint)
・didDisappear(point: CGPoint)
・startDragging(point: CGPoint)
・continueDragging(point: CGPoint)
・endDragging(point: CGPoint)
サンプルコードはこちらから
開発環境
iOS 8+
Swift 3.0+
Xcode 8.0+

