はじめに
この記事は「忙しい人用 初めてのAndroid開発」の続きです。
今回はUIを作っていきます。
ついでにAndroidフレームワークにおけるData Bindingにも触れていきます。
Data Binding Libraryの公式ドキュメントはこちら
事前準備
build.gradleを修正してData Bindingを有効化します。
build.gradle
android {
    ...
    dataBinding {
        enabled = true
    }
    compileOptions {
        sourceCompatibility = '1.8'
        targetCompatibility = '1.8'
    }
}

dependencies {
    ...
    implementation 'androidx.lifecycle:lifecycle-extensions:2.2.0-alpha01'
}
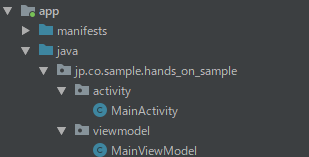
ViewModelクラスを作成する
MainViewModel.java
public class MainViewModel extends ViewModel {

    private MutableLiveData<String> name = new MutableLiveData<>();

    public MutableLiveData getName() {
        return this.name;
    }
}
Layoutファイルを編集する
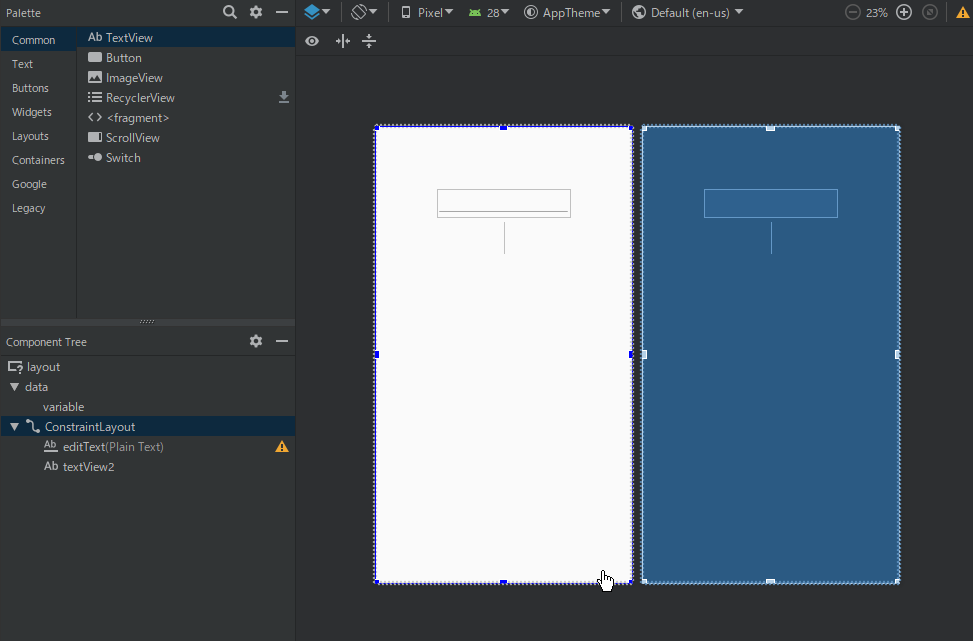
activity_main.xml
<?xml version="1.0" encoding="utf-8"?>
<layout xmlns:android="http://schemas.android.com/apk/res/android"
xmlns:app="http://schemas.android.com/apk/res-auto"
xmlns:tools="http://schemas.android.com/tools"
android:id="@+id/layout">

    <data>
        <variable name="mainViewModel" type="jp.co.sample.hands_on_sample.viewmodel.MainViewModel" />
    </data>

    <androidx.constraintlayout.widget.ConstraintLayout
        android:layout_width="match_parent"
        android:layout_height="match_parent"
        tools:context=".activity.MainActivity">

        <EditText
            android:id="@+id/editText"
            android:layout_width="wrap_content"
            android:layout_height="wrap_content"
            android:layout_marginStart="8dp"
            android:layout_marginTop="100dp"
            android:layout_marginEnd="8dp"
            android:ems="10"
            android:inputType="textPersonName"
            android:text="@={mainViewModel.name}"
            app:layout_constraintEnd_toEndOf="parent"
            app:layout_constraintStart_toStartOf="parent"
            app:layout_constraintTop_toTopOf="parent" />

        <TextView
            android:id="@+id/textView2"
            android:layout_width="wrap_content"
            android:layout_height="wrap_content"
            android:layout_marginStart="8dp"
            android:layout_marginTop="8dp"
            android:layout_marginEnd="8dp"
            android:text="@{mainViewModel.name}"
            android:textSize="36sp"
            app:layout_constraintEnd_toEndOf="parent"
            app:layout_constraintStart_toStartOf="parent"
            app:layout_constraintTop_toBottomOf="@+id/editText" />

    </androidx.constraintlayout.widget.ConstraintLayout>
</layout>
Activityクラスを編集する
MainActivity.java
    @Override
    protected void onCreate(Bundle savedInstanceState) {
        super.onCreate(savedInstanceState);

        Log.i(TAG, "onCreate");

        mainViewModel = ViewModelProviders.of(this).get(MainViewModel.class);
        ActivityMainBinding binding = DataBindingUtil.setContentView(this, R.layout.activity_main);

        binding.setMainViewModel(mainViewModel);
        binding.setLifecycleOwner(this);
    }
Run!
実行ボタンを押してアプリを立ち上げましょう。
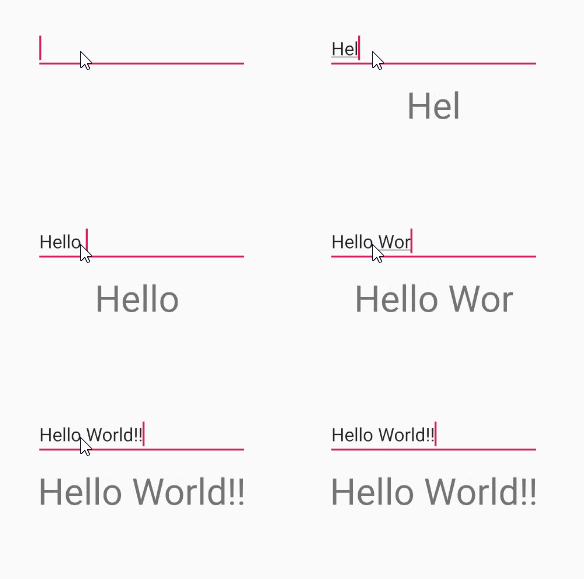
入力ボックスに値を入れると同時に、テキストラベルが更新されていることがわかると思います。

応用編
ViewModelが変更されたことを捕捉して何かしらの処理を行ってリアルタイムに画面に表示する方法を見てみます。
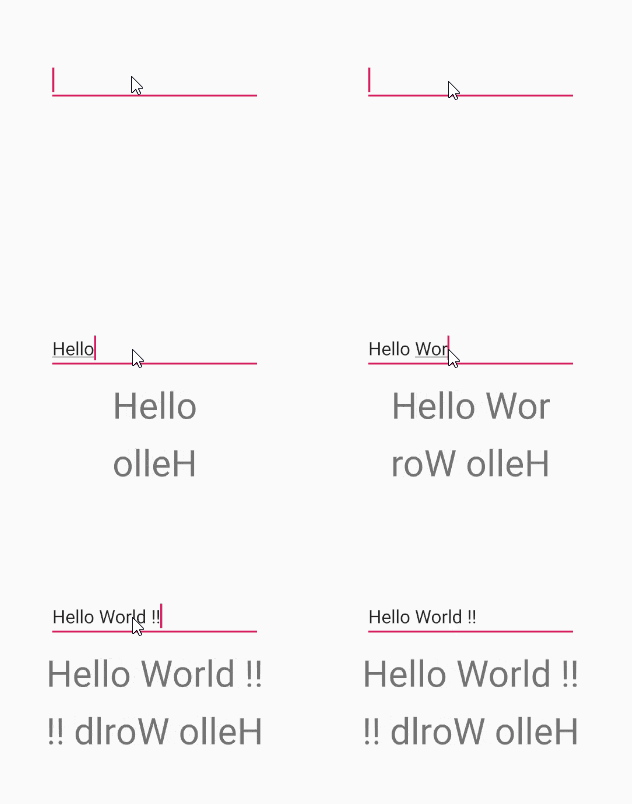
今回は入力した文字を逆転して表示する処理をやってみます。
MainViewModel.java
public class MainViewModel extends ViewModel {

    private MutableLiveData<String> name = new MutableLiveData<>();

    private MutableLiveData<String> reverseName = new MutableLiveData<>();

    public MutableLiveData<String> getName() {
        return this.name;
    }

    public MutableLiveData<String> getReverseName() {
        return this.reverseName;
    }
}
activity_main.xml
<?xml version="1.0" encoding="utf-8"?>
<layout xmlns:android="http://schemas.android.com/apk/res/android"
xmlns:app="http://schemas.android.com/apk/res-auto"
xmlns:tools="http://schemas.android.com/tools"
android:id="@+id/layout">

    <data>
        <variable name="mainViewModel" type="jp.co.sample.hands_on_sample.viewmodel.MainViewModel" />
    </data>

    <androidx.constraintlayout.widget.ConstraintLayout
        android:layout_width="match_parent"
        android:layout_height="match_parent"
        tools:context=".activity.MainActivity">

        <EditText
            android:id="@+id/editText"
            android:layout_width="wrap_content"
            android:layout_height="wrap_content"
            android:layout_marginStart="8dp"
            android:layout_marginTop="100dp"
            android:layout_marginEnd="8dp"
            android:ems="10"
            android:inputType="textPersonName"
            android:text="@={mainViewModel.name}"
            app:layout_constraintEnd_toEndOf="parent"
            app:layout_constraintStart_toStartOf="parent"
            app:layout_constraintTop_toTopOf="parent" />

        <TextView
            android:id="@+id/textView2"
            android:layout_width="wrap_content"
            android:layout_height="wrap_content"
            android:layout_marginStart="8dp"
            android:layout_marginTop="8dp"
            android:layout_marginEnd="8dp"
            android:text="@{mainViewModel.name}"
            android:textSize="36sp"
            app:layout_constraintEnd_toEndOf="parent"
            app:layout_constraintStart_toStartOf="parent"
            app:layout_constraintTop_toBottomOf="@+id/editText" />

        <TextView
            android:id="@+id/textView"
            android:layout_width="wrap_content"
            android:layout_height="wrap_content"
            android:layout_marginStart="8dp"
            android:layout_marginTop="8dp"
            android:layout_marginEnd="8dp"
            android:text="@{mainViewModel.reverseName}"
            android:textSize="36sp"
            app:layout_constraintEnd_toEndOf="parent"
            app:layout_constraintStart_toStartOf="parent"
            app:layout_constraintTop_toBottomOf="@+id/textView2" />

    </androidx.constraintlayout.widget.ConstraintLayout>
</layout>
MainActivity.java
    @Override
    protected void onCreate(Bundle savedInstanceState) {
        super.onCreate(savedInstanceState);

        Log.i(TAG, "onCreate");

        mainViewModel = ViewModelProviders.of(this).get(MainViewModel.class);
        ActivityMainBinding binding = DataBindingUtil.setContentView(this, R.layout.activity_main);

        binding.setMainViewModel(mainViewModel);
        binding.setLifecycleOwner(this);

        mainViewModel.getName().observe(this, name -> {
            mainViewModel.getReverseName().postValue(new StringBuilder(name).reverse().toString());
        });
    }


