背景
これまで、AWS の検証環境は主に AWS コンソールを操作して構築していた。
単一サービスの検証や、ひとりで作業する分にはそれで問題なかった。
しかし、扱うサービスが増えるにつれて、検証サイクルが長くなることが気になり始めた。また、他のメンバーと共同で開発する可能性も考え始めた。
そこで、効率的な環境構築を実現するため、そろそろ CDK を導入すべきだと考えた。
AWS CDK Immersion Day ワークショップ
CDK に入門するにあたり、AWS CDK Immersion Day ワークショップ の TypeScript 編を試してみた。これがとても良かった。
ワークショップでは以下のようなトピックが扱われており、分量もちょうど良いハンズオンだった。
- 基本的な CDK コマンド
- API Gateway、Lambda、DynamoDB
- テスト
- CD(継続的デプロイメント)
ワークショップを終えた後は、公式ドキュメントを読んだり、aws-cdk-examples をレシピとして活用しながら、目的の環境を構築できるようになるだろう。
これから CDK に入門する方は、ぜひワークショップに取り組まれると良いだろう。ここではワークショップの詳細には触れない。
ただ、ワークショップと異なるアプローチをとった部分があるため紹介しておきたい。
ひと工夫 : GItHub リポジトリの使用
ワークショップで構築する CD パイプラインでは AWS CodeCommit が使用されている。
しかし今後、新規に AWS CodeCommit を使用することはないと思ったため、代わりの Git リポジトリとして GitHub を使用することにした。
参考:How to migrate your AWS CodeCommit repository to another Git provider
GItHub コネクションを作成する
AWS CodePipeline から GitHub に接続するためには、接続 を作成する必要がある。
-
AWS CodePipeline コンソールにアクセスする
-
左ペインの 接続 をクリックし、接続を作成 をクリックする

-
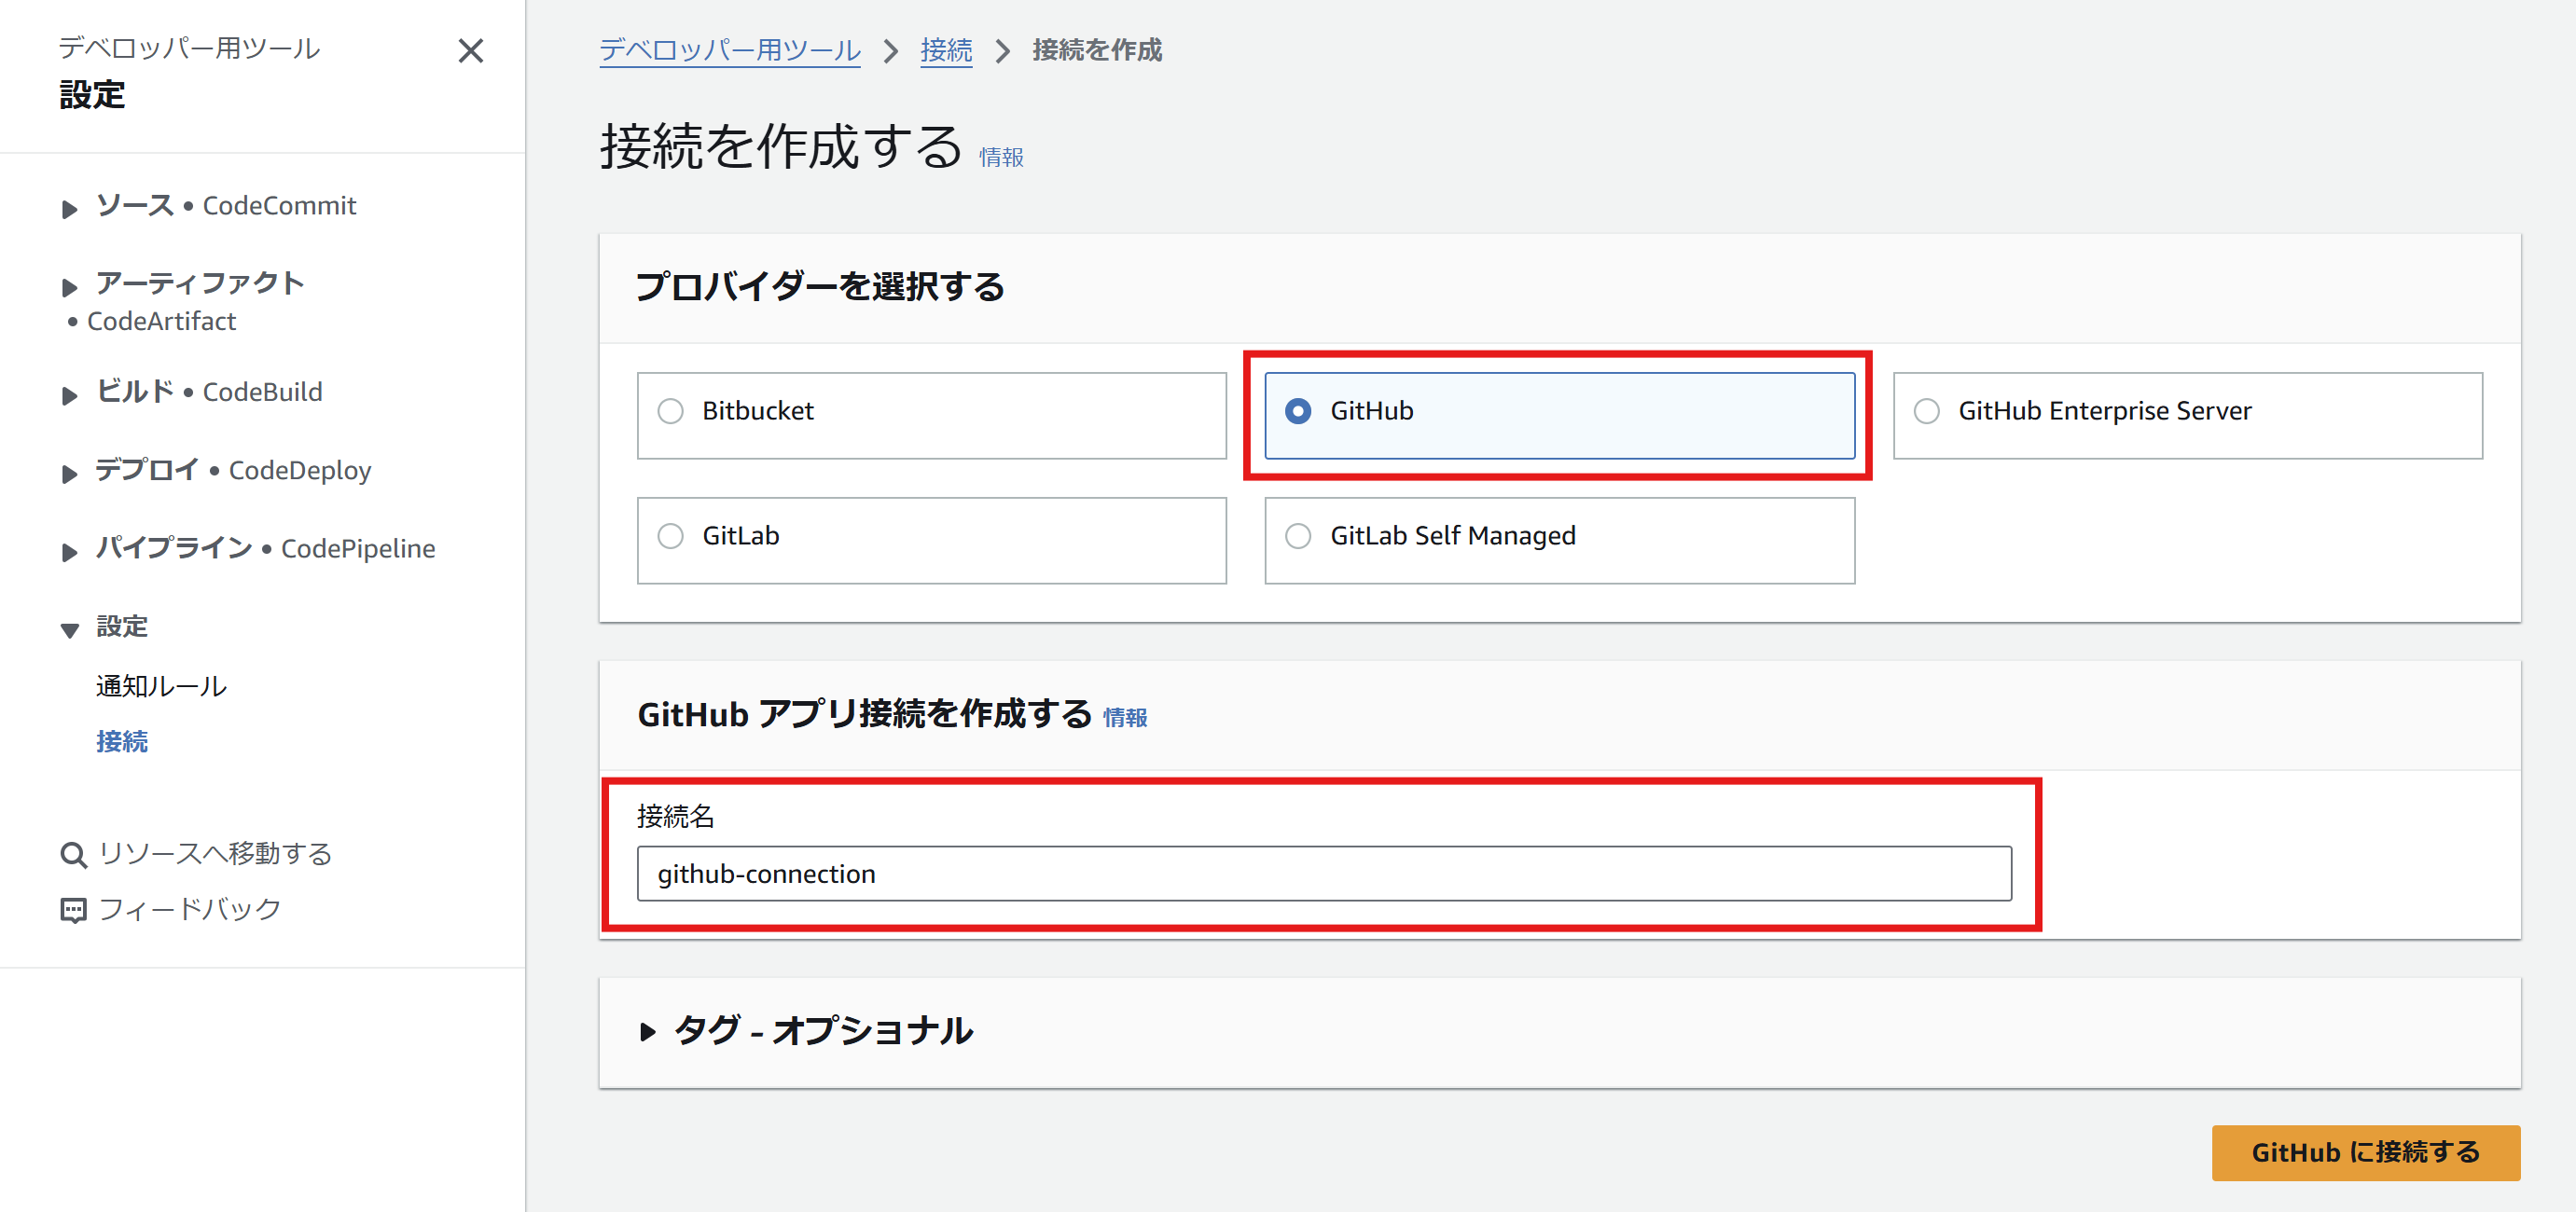
プロバイダーを選択する で以下を設定する
- GitHub を選択する
- 接続名 を入力する
-
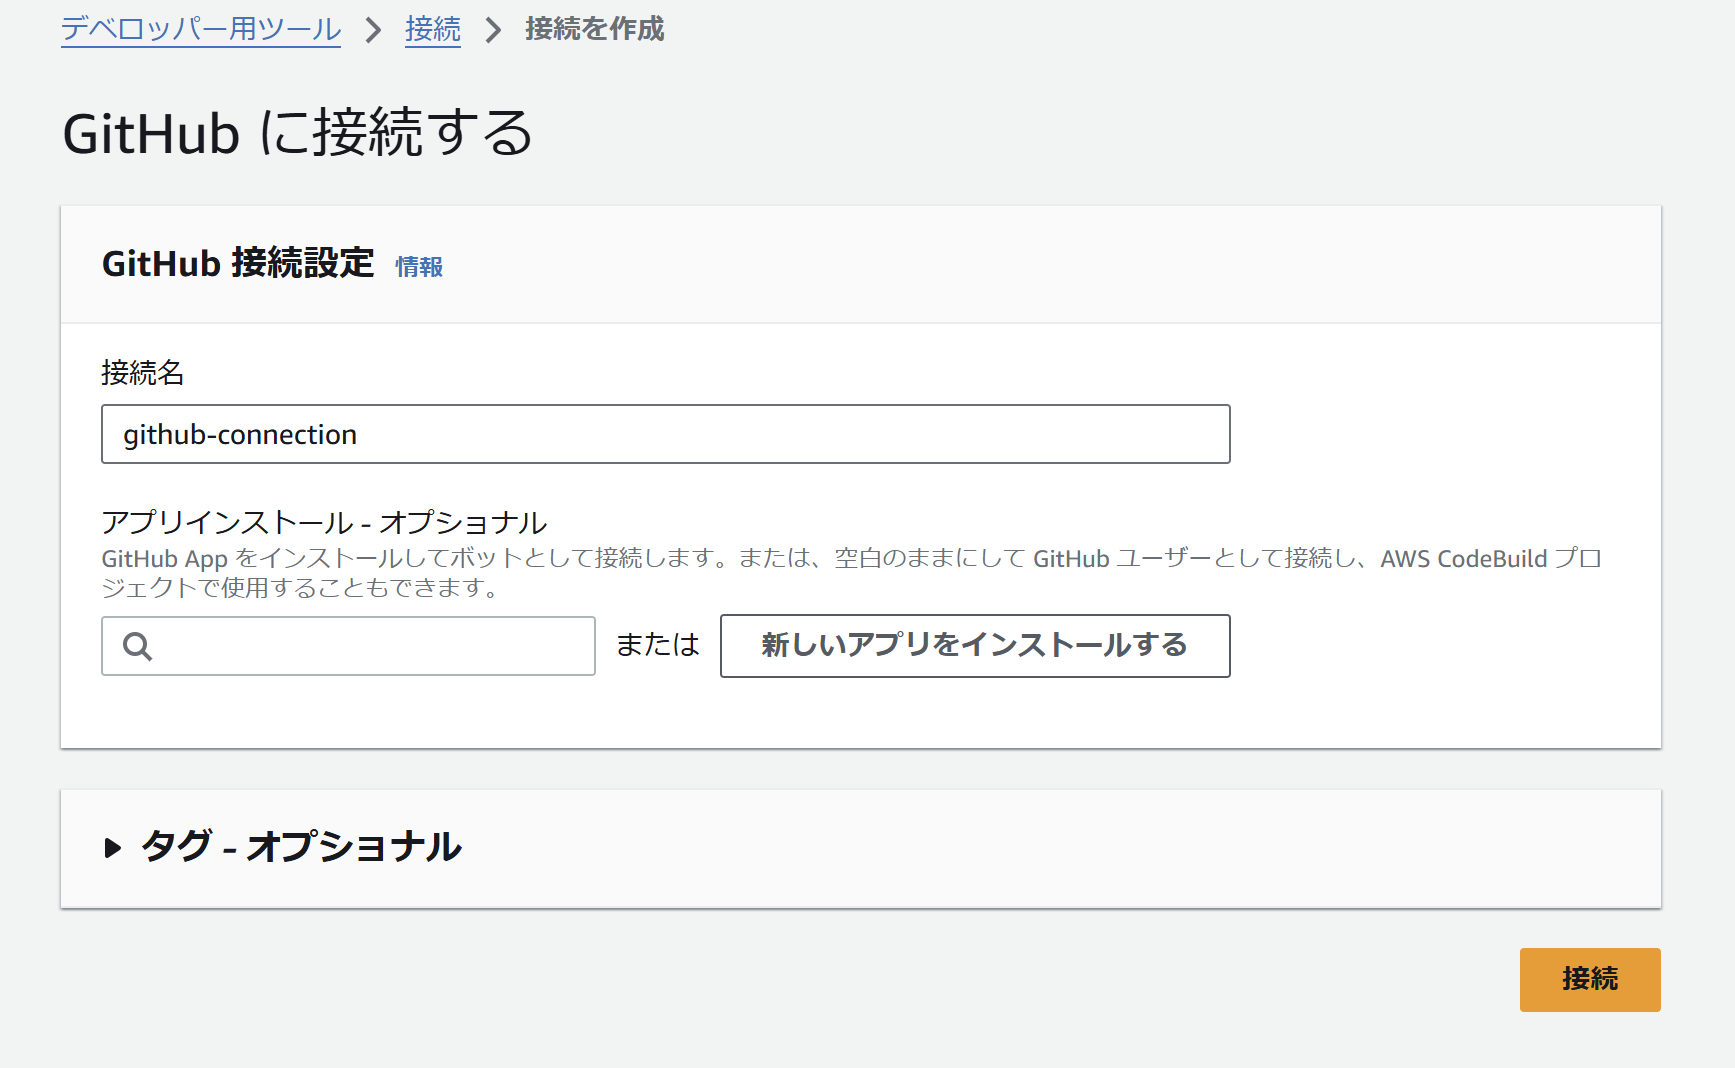
GitHub に接続する をクリックする
-
GitHub の画面が表示されるため、Authorize AWS Connector for GitHub をクリックする

-
接続 をクリックする
-
完了!

表示された ARN を後で使用するため、控えておく。
pipeline-stack.ts を変更する
Create New Pipeline で作成する pipeline-stack.ts を、以下のように変更する。
import { Stack, StackProps } from "aws-cdk-lib";
- import { Repository } from "aws-cdk-lib/aws-codecommit";
+ import { Pipeline, PipelineType } from "aws-cdk-lib/aws-codepipeline";
import { CodeBuildStep, CodePipeline, CodePipelineSource } from "aws-cdk-lib/pipelines";
import { Construct } from "constructs";

export class WorkshopPipelineStack extends Stack {
  constructor(scope: Construct, id: string, props?: StackProps) {
    super(scope, id, props);

-   // Creates a CodeCommit repository called 'WorkshopRepo'
-   const repo = new Repository(this, "WorkshopRepo", {
-     repositoryName: "WorkshopRepo",
-   });

    // The basic pipeline declaration. This sets the initial structure
    // of our pipeline
    const pipeline = new CodePipeline(this, "Pipeline", {
-     pipelineName: "WorkshopPipeline",
+     codePipeline: new Pipeline(this, "PipelineV2", {
+        pipelineName: "PipelineV2",
+        pipelineType: PipelineType.V2,
+      }),
      synth: new CodeBuildStep("SynthStep", {
-       input: CodePipelineSource.codeCommit(repo, "main"),
+       input: CodePipelineSource.connection(
+         "<your-github-username>/<your-repository-name>",
+         "<your-branch-name>",
+         {
+           connectionArn: "<your-connection-arn>",
+         }
+       ),
        commands: ["npm ci", "npm run build", "npx cdk synth"],
      }),
    });
  }
}
2025/01/12 時点の公式ドキュメントでは、CodePipelineSource.gitHub を使用した方法が紹介されている。
CDK Pipelines を使用した継続的インテグレーションと継続的デリバリー (CI/CD)
しかし、CodePipelineSource.gitHub は非推奨となっていたため、ここでは CodePipelineSource.connection を使用した。
Returns a GitHub source, using OAuth tokens to authenticate with
GitHub and a separate webhook to detect changes. This is no longer
the recommended method. Please consider usingconnection()
instead.
上記の変更を加えることで、GitHub リポジトリを使用した CD パイプラインを構築できた。
感想
ワークショップを通じて CDK に入門した。
CDK はサービス間の接続が直観的で、わかりやすいと感じた。
サンプルやドキュメントも充実しているため、今後の検証やチーム開発が捗りそうだ。
今回は GitHub コネクションの部分でコンソールを操作した部分もあったが、今後しっかりと CDK を活用してコンソール「ポチポチ」から卒業したい。
CodePipelineSource.connection を使用するにあたり、以下の記事を参考にさせていただきました。
ありがとうございました!