はじめに
この記事は、Thymeleafletを体験するハンズオンです。
最初にsampleを起動し、そのあと少しずつ改造します。
- まず動くものを見る
- 小さく変更する
- 変更が画面に反映される体験を得る
この順で進めます。
手っ取り早くデモがみたいというかたはこちら。
「なぜThymeleaf/MPAを今あえて選ぶのか」という話は、Zenn記事にまとめています。
https://zenn.dev/wamukat/articles/why-thymeleaf-in-2026
Thymeleafletとは
![]()
ThymeleafフラグメントをStorybookのようにカタログ化するツールです。
- フラグメント一覧の表示
- パラメータ編集とライブプレビュー
- JavaDocコメントからのドキュメント生成
- ストーリー定義(YAML)による状態管理
- レスポンシブ確認
前提
- Java 17+
- Maven 39+
ステップ1: sampleを取得して起動
まずはThymeleafletのサンプルをローカルで起動します。
リポジトリを取得
git clone https://github.com/wamukat/thymeleaflet-spring-boot-starter.git
sampleを起動
cd thymeleaflet-spring-boot-starter/sample
../mvnw spring-boot:run -DskipTests
起動後、次へアクセスします。
http://localhost:6006/thymeleaflet

ステップ2: 画面の見方を把握
- 左: フラグメント一覧
- 中央: プレビュー
- 右: パラメータと使用例
この時点で「何ができるか」を一通り見ておくと、以降の改造が速くなります。
ステップ3: パラメータをいじる
まずはコードを書かずに、画面上で体験します。
右側の Custom Parameters で、例えば次を変更します。
-
label:送信→保存 -
variant:primary→danger -
disabled:false→true
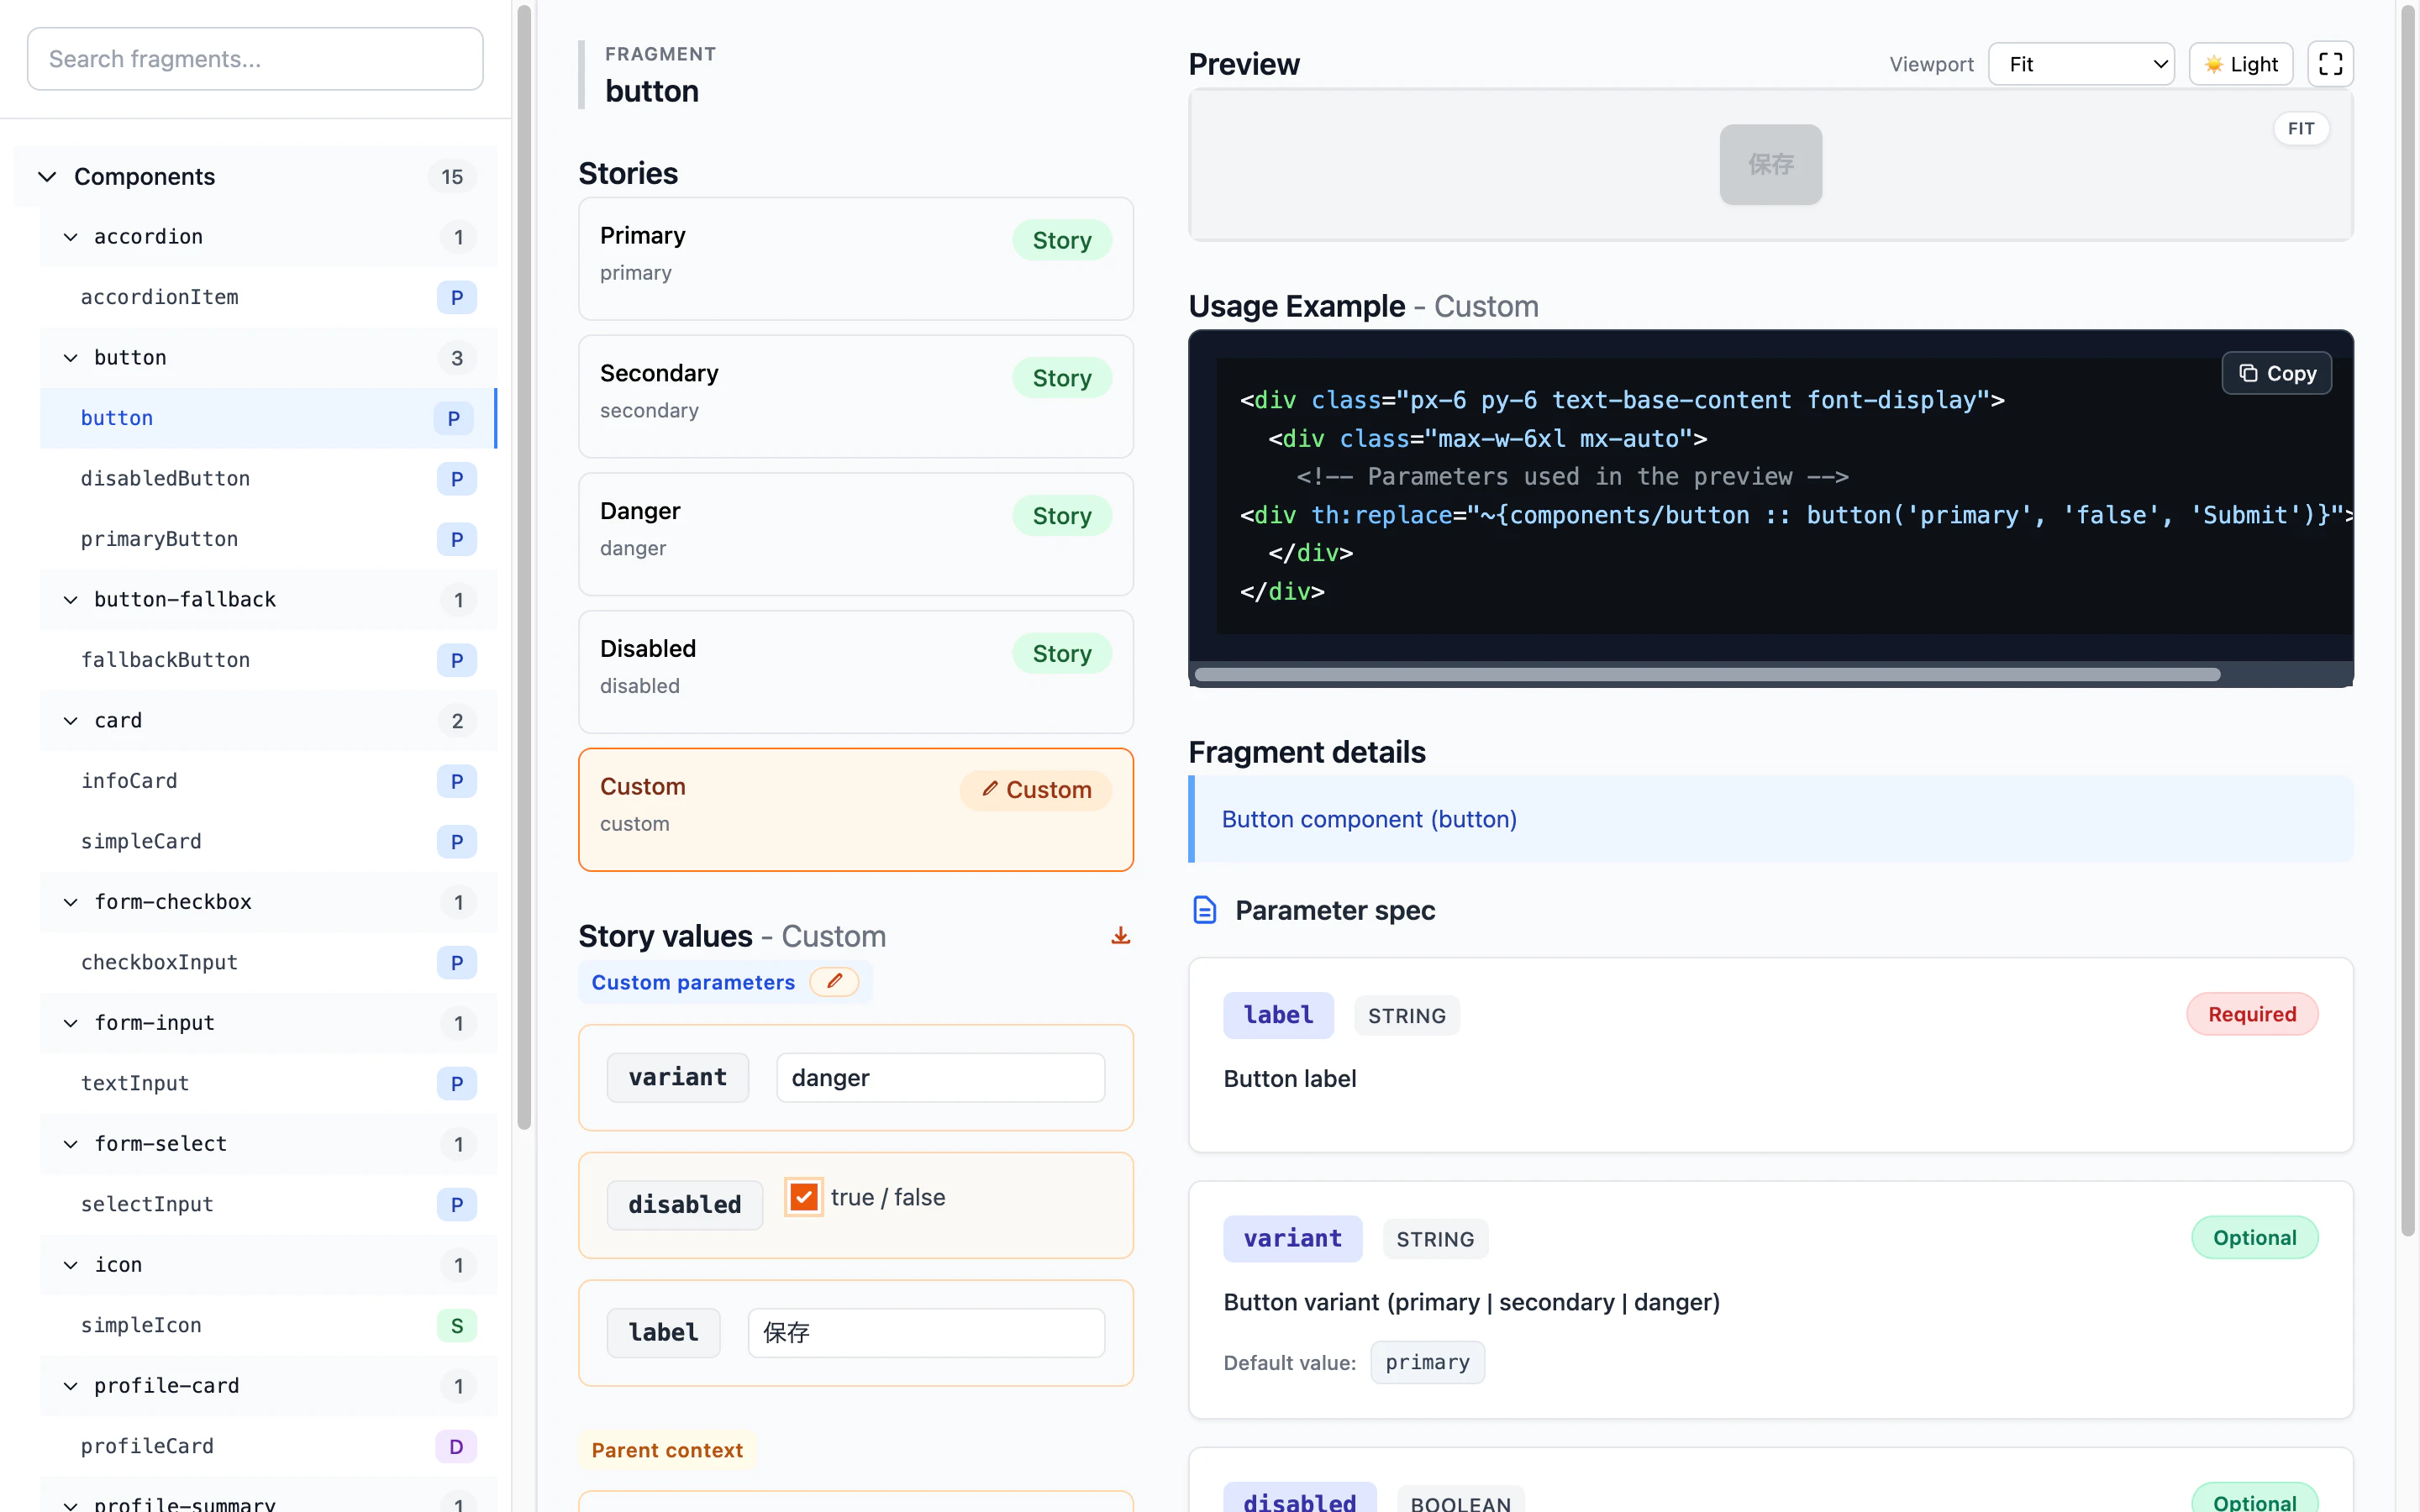
ポイント: 変更が即プレビューに反映されるので、UI部品の仕様確認がとても速くなります。
ステップ4: フラグメントを1つ追加する
次はsampleに新しい部品を1つ追加します。
例として、sample/src/main/resources/templates/components/badge.html を作成します。
<!DOCTYPE html>
<html xmlns:th="http://www.thymeleaf.org">
<body>

<!--
/**
 * ステータスバッジ (statusBadge)
 *
 * @param text {@code String} [required] 表示テキスト
 * @param tone {@code String} [optional=info] 色テーマ(info | success | warning)
 * @example <div th:replace="~{components/badge :: statusBadge(text='ACTIVE', tone='success')}"></div>
 */
-->
<span th:fragment="statusBadge(text, tone)"
      th:style="|display:inline-block;padding:4px 8px;border-radius:999px;color:white;
                background:${tone == 'success' ? '#16a34a' : (tone == 'warning' ? '#d97706' : '#2563eb')}|">
  [[${text}]]
</span>

</body>
</html>
保存後にsampleを起動し直すとメニューにフラグメントが追加されます。
ステップ5: ストーリーを追加する
「状態ごとの見え方」を固定して管理したい場合は、YAMLでストーリーを定義します。
配置例:
sample/src/main/resources/META-INF/thymeleaflet/stories/components/badge.stories.yml
内容例:
storyGroups:
  badge:
    title: ステータスバッジ
    description: 状態別のバッジ表示
    stories:
      - name: info
        title: 情報
        parameters:
          text: INFO
          tone: info
      - name: success
        title: 成功
        parameters:
          text: ACTIVE
          tone: success
      - name: warning
        title: 注意
        parameters:
          text: PENDING
          tone: warning

ステップ6: 既存プロジェクトへ適用する
ハンズオンで感覚を掴んだら、既存プロジェクトに入れます。
pom.xml:
<dependency>
  <groupId>io.github.wamukat</groupId>
  <artifactId>thymeleaflet-spring-boot-starter</artifactId>
  <version>0.2.5</version>
</dependency>
build.gradle:
dependencies {
  implementation 'io.github.wamukat:thymeleaflet-spring-boot-starter:0.2.5'
}
起動後は http://(あなたのアプリケーションURL)/thymeleaflet で確認できます。
本番環境での注意
Thymeleafletは開発支援ツールです。本番では無効化を推奨します。
application-prod.yml:
spring:
  autoconfigure:
    exclude: io.github.wamukat.thymeleaflet.infrastructure.configuration.StorybookAutoConfiguration
まとめ
sampleベースで、次の流れを短時間で体験しました。
- すぐ起動して全体像を掴む
- フラグメントを作ってみる
- 状態管理(stories)を試す
導入前にまず手を動かして試してみてください。
設計思想編(Zenn)
この記事は使い方中心でした。
- なぜ、今 Thymeleaf なのか
- なぜこの Thymeleaflet を作ったのか
このあたりはZennで詳しく書いています。
よかったらこちらも読んでください。
リンク
- Zenn: https://zenn.dev/wamukat/articles/why-thymeleaf-in-2026
- 公式ドキュメント: https://wamukat.github.io/thymeleaflet-spring-boot-starter/
- GitHub: https://github.com/wamukat/thymeleaflet-spring-boot-starter
- ライブデモ: https://demo-thymeleaflet.koyeb.app/thymeleaflet
- Maven Central: https://central.sonatype.com/artifact/io.github.wamukat/thymeleaflet-spring-boot-starter