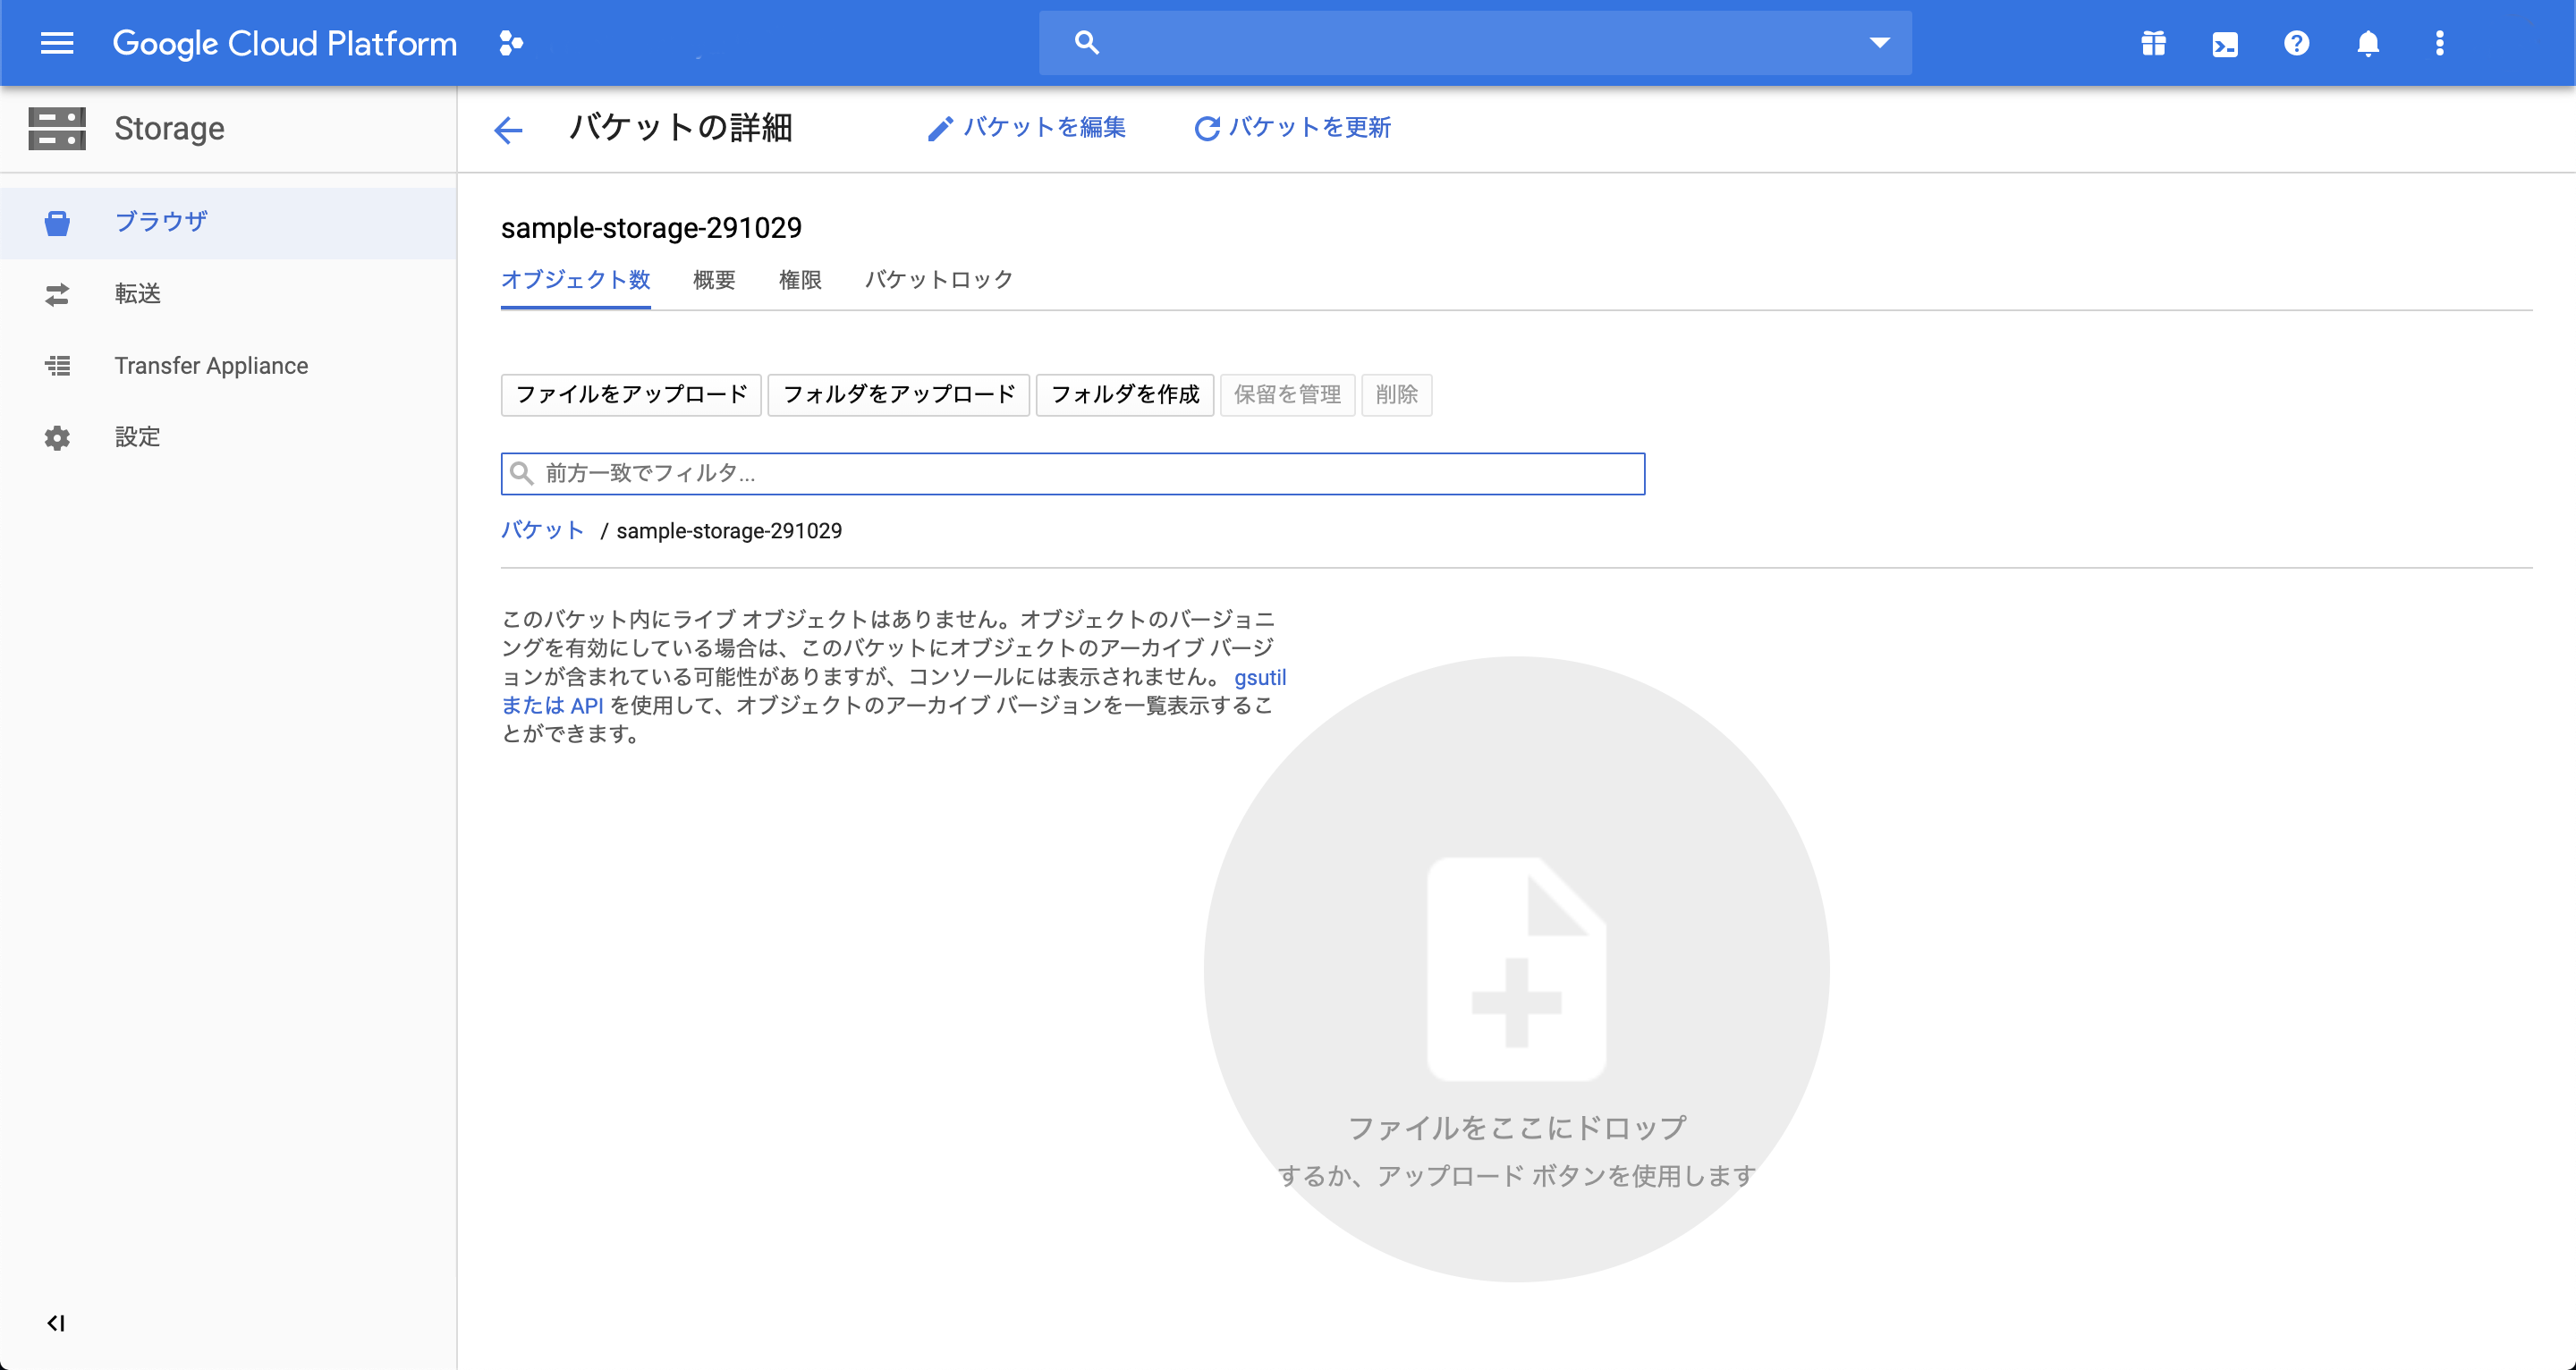
HerokuやGAE(Google App Engine)などのサーバで、ImageFieldを使用しても画像が正常に表示されません。
これは、SQLが画像のアップロードに対応していないためで、これの解決にはGoogle Cloud StrageやAmazon S3などのクラウドストレージに画像をアップロードしなければなりません。
今回は、Google Cloud Storageに画像をアップロードする方法をご紹介します。
Django Strage (Google Cloud Storage) 公式ドキュメント
https://django-storages.readthedocs.io/en/latest/backends/gcloud.html
Django Strage のインストール
Django で Google Cloud Strage を扱うための Django ライブラリ、 Django Strage (Google Cloud Storage) をpipでインストールします。
$ pip install django-storages[google]
Google Cloud Platform で認証情報の取得
Google Cloud Platform から、 Cloud Strageの認証情報の登録と、認証情報の記載された JSON ファイルを取得します。
サービスアカウントの取得
Googleスタートガイド (https://cloud.google.com/docs/authentication/getting-started) から取得できます。
手順1
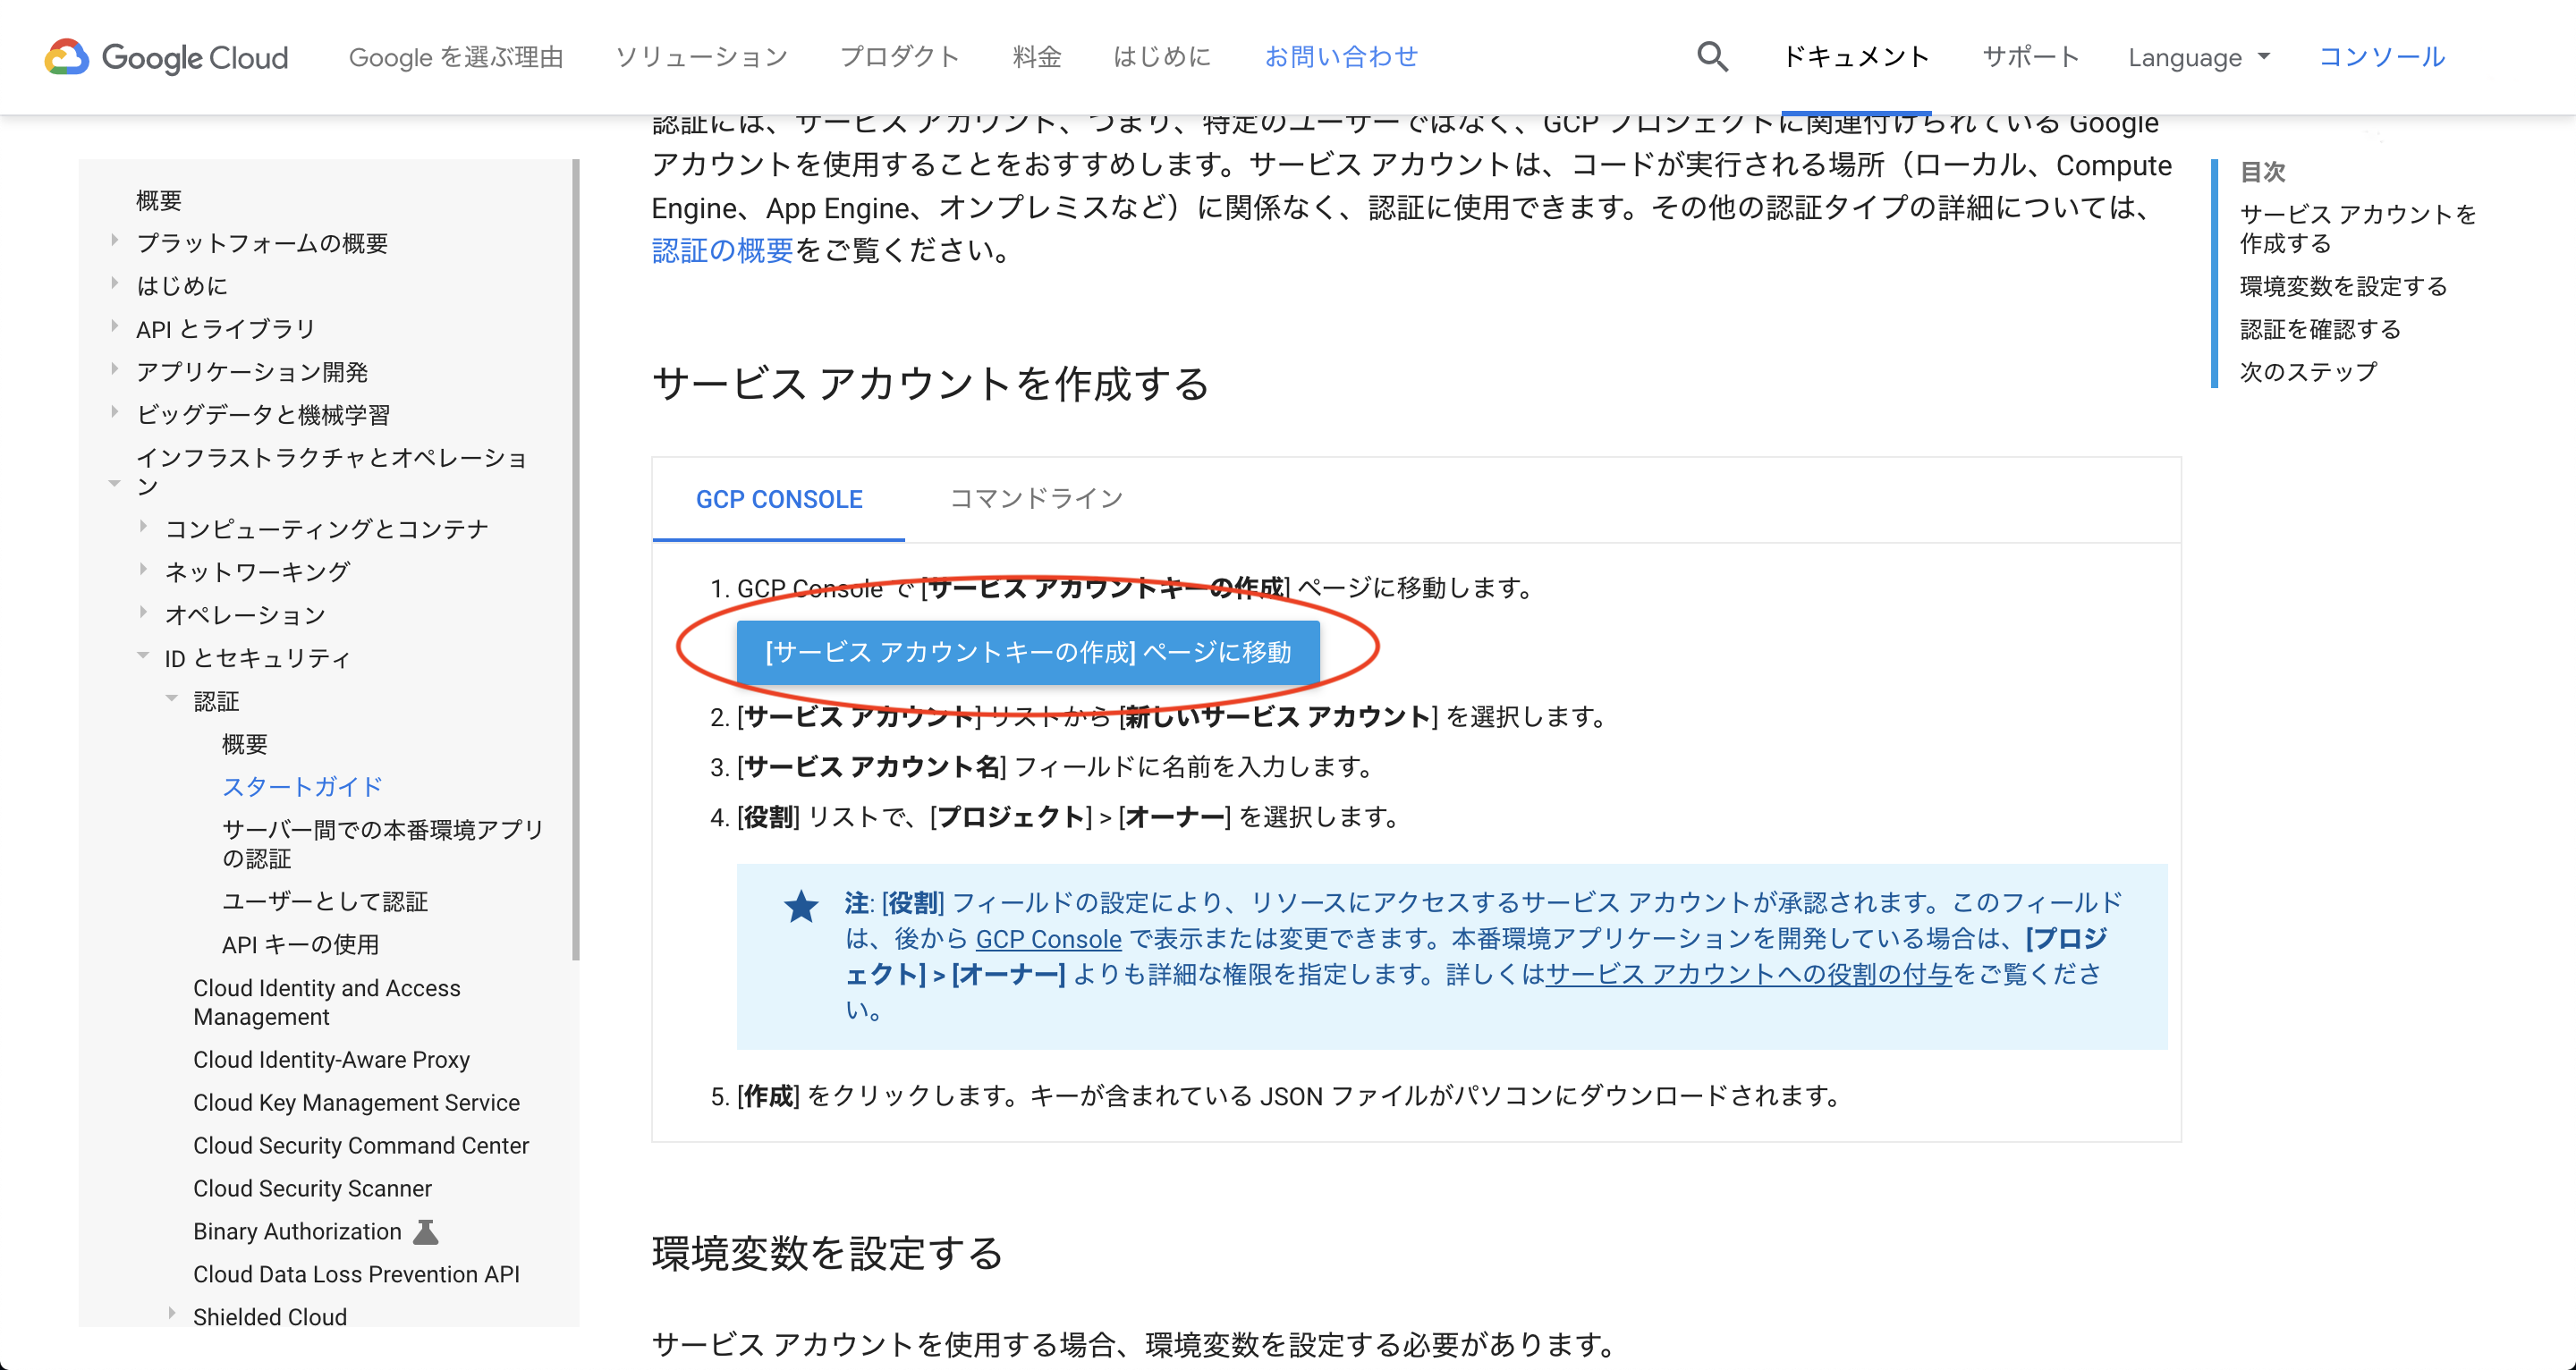
Googleスタートガイド (https://cloud.google.com/docs/authentication/getting-started) のリンクから、「[サービスアカウントキーの作成]ページに移動」を選択
手順2
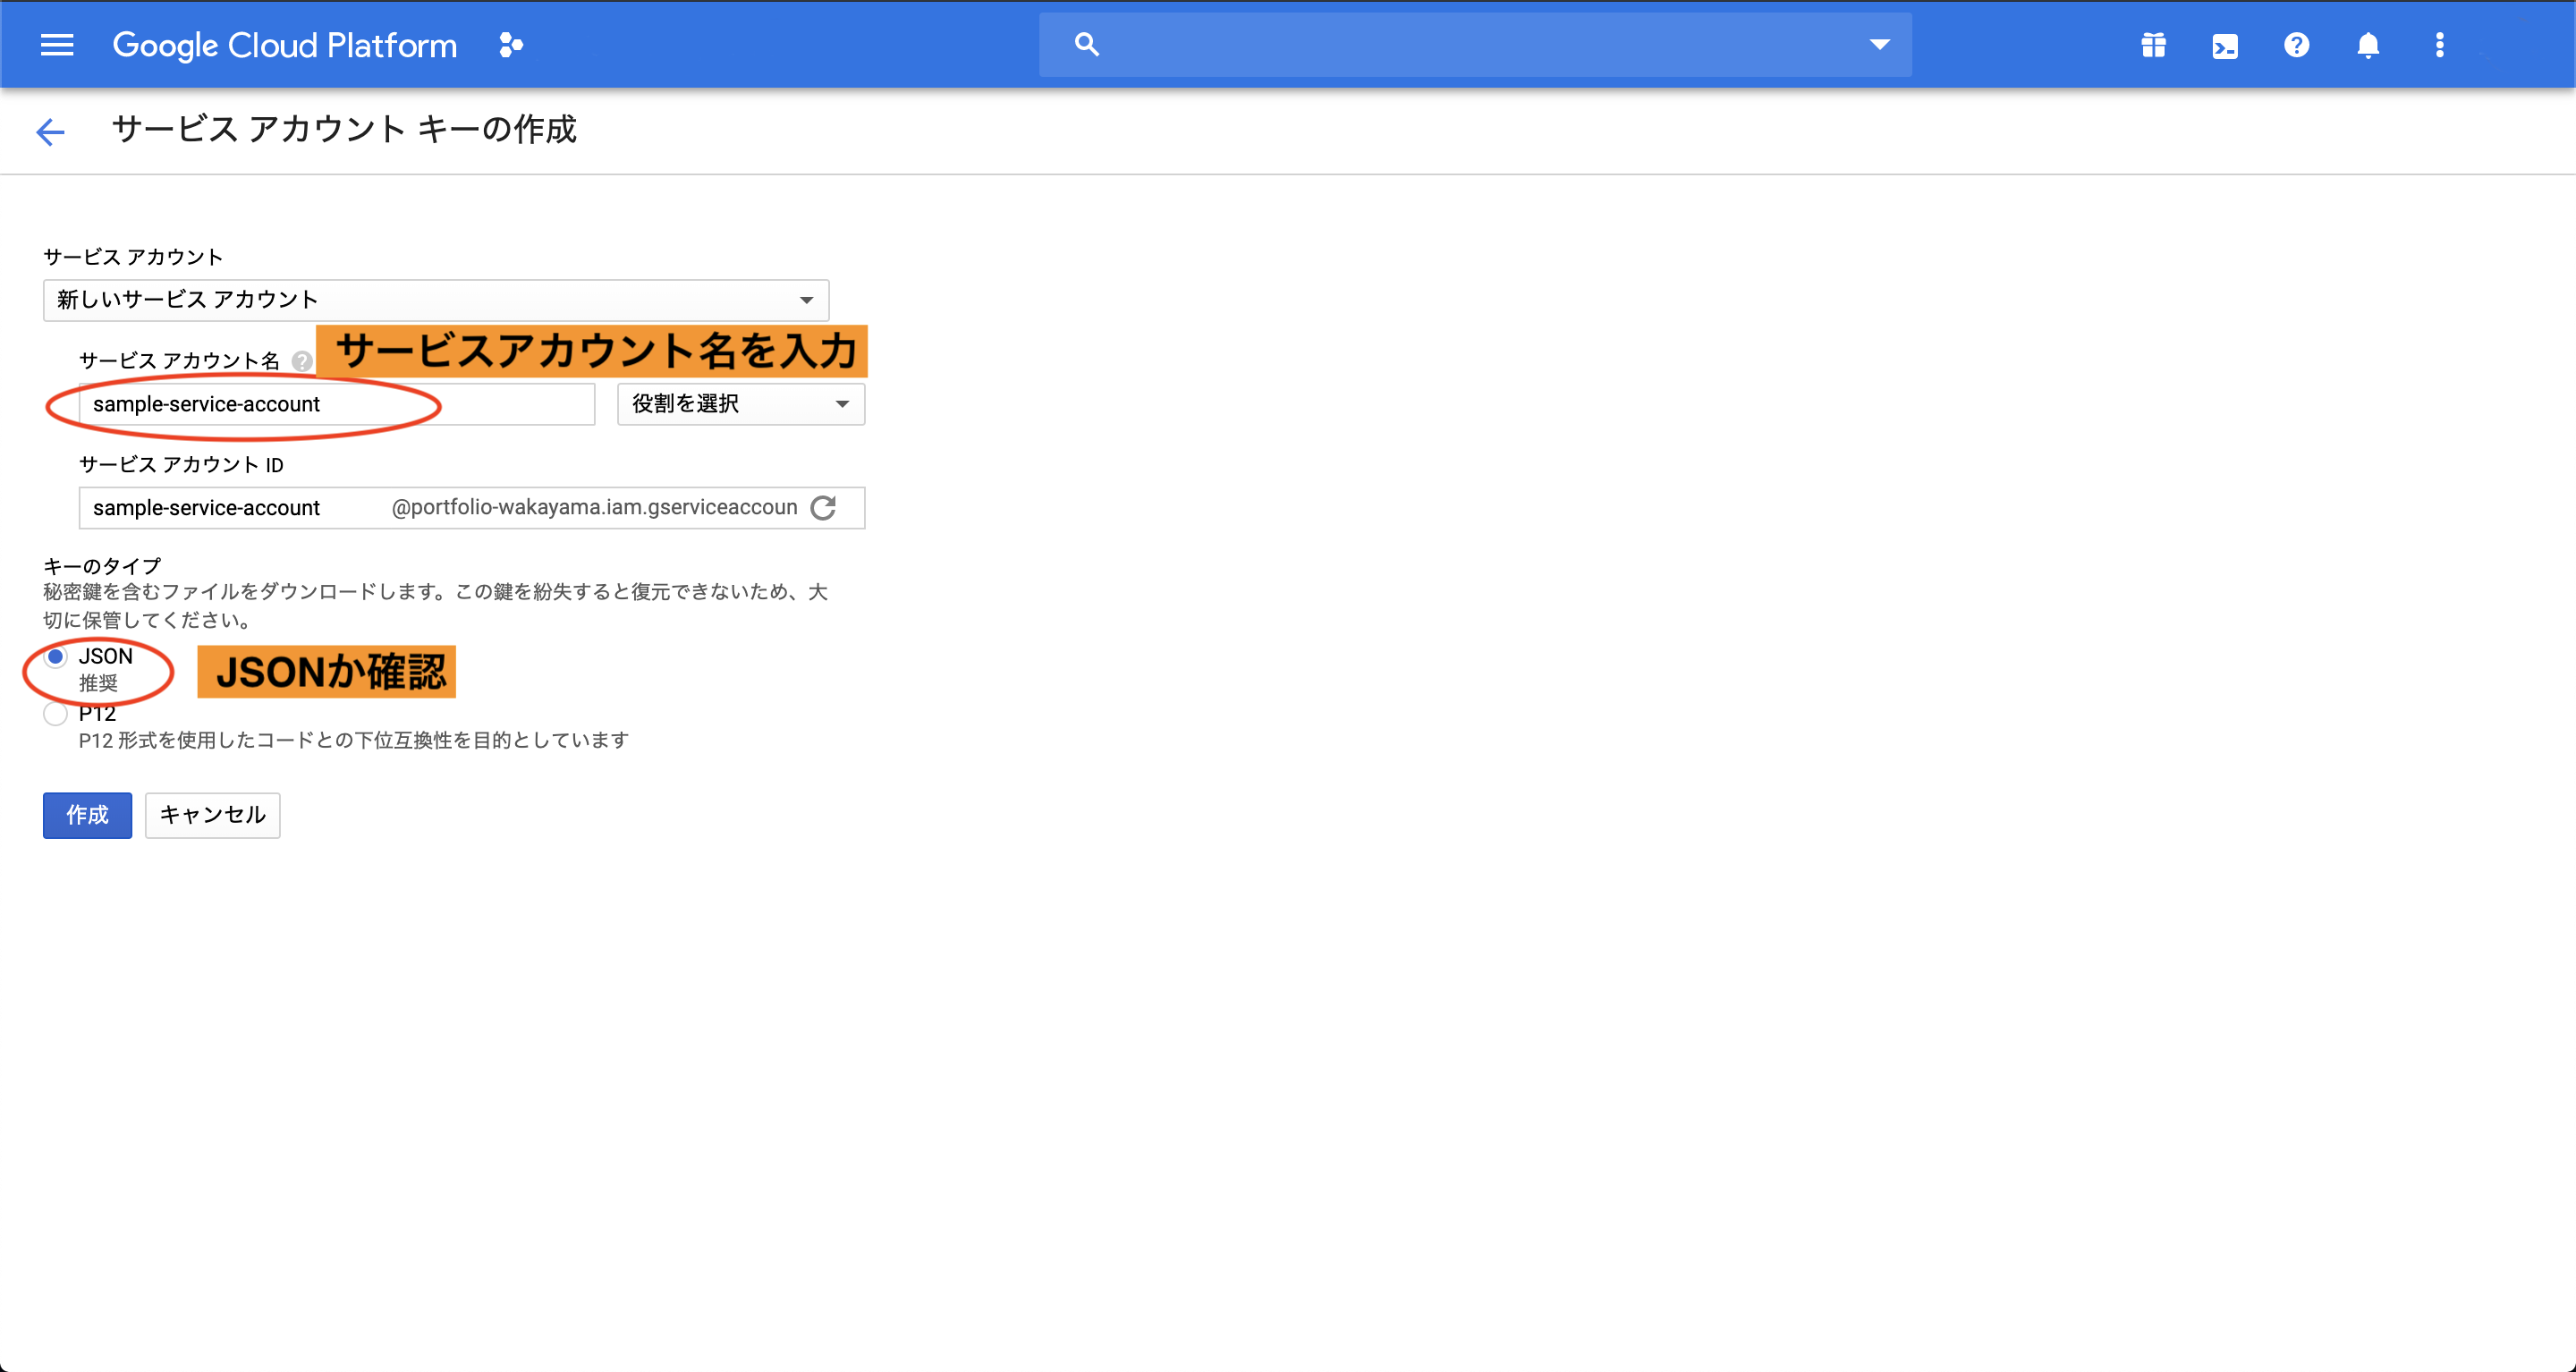
新しいサービスアカウントを作成で、サービスアカウント名を入力。
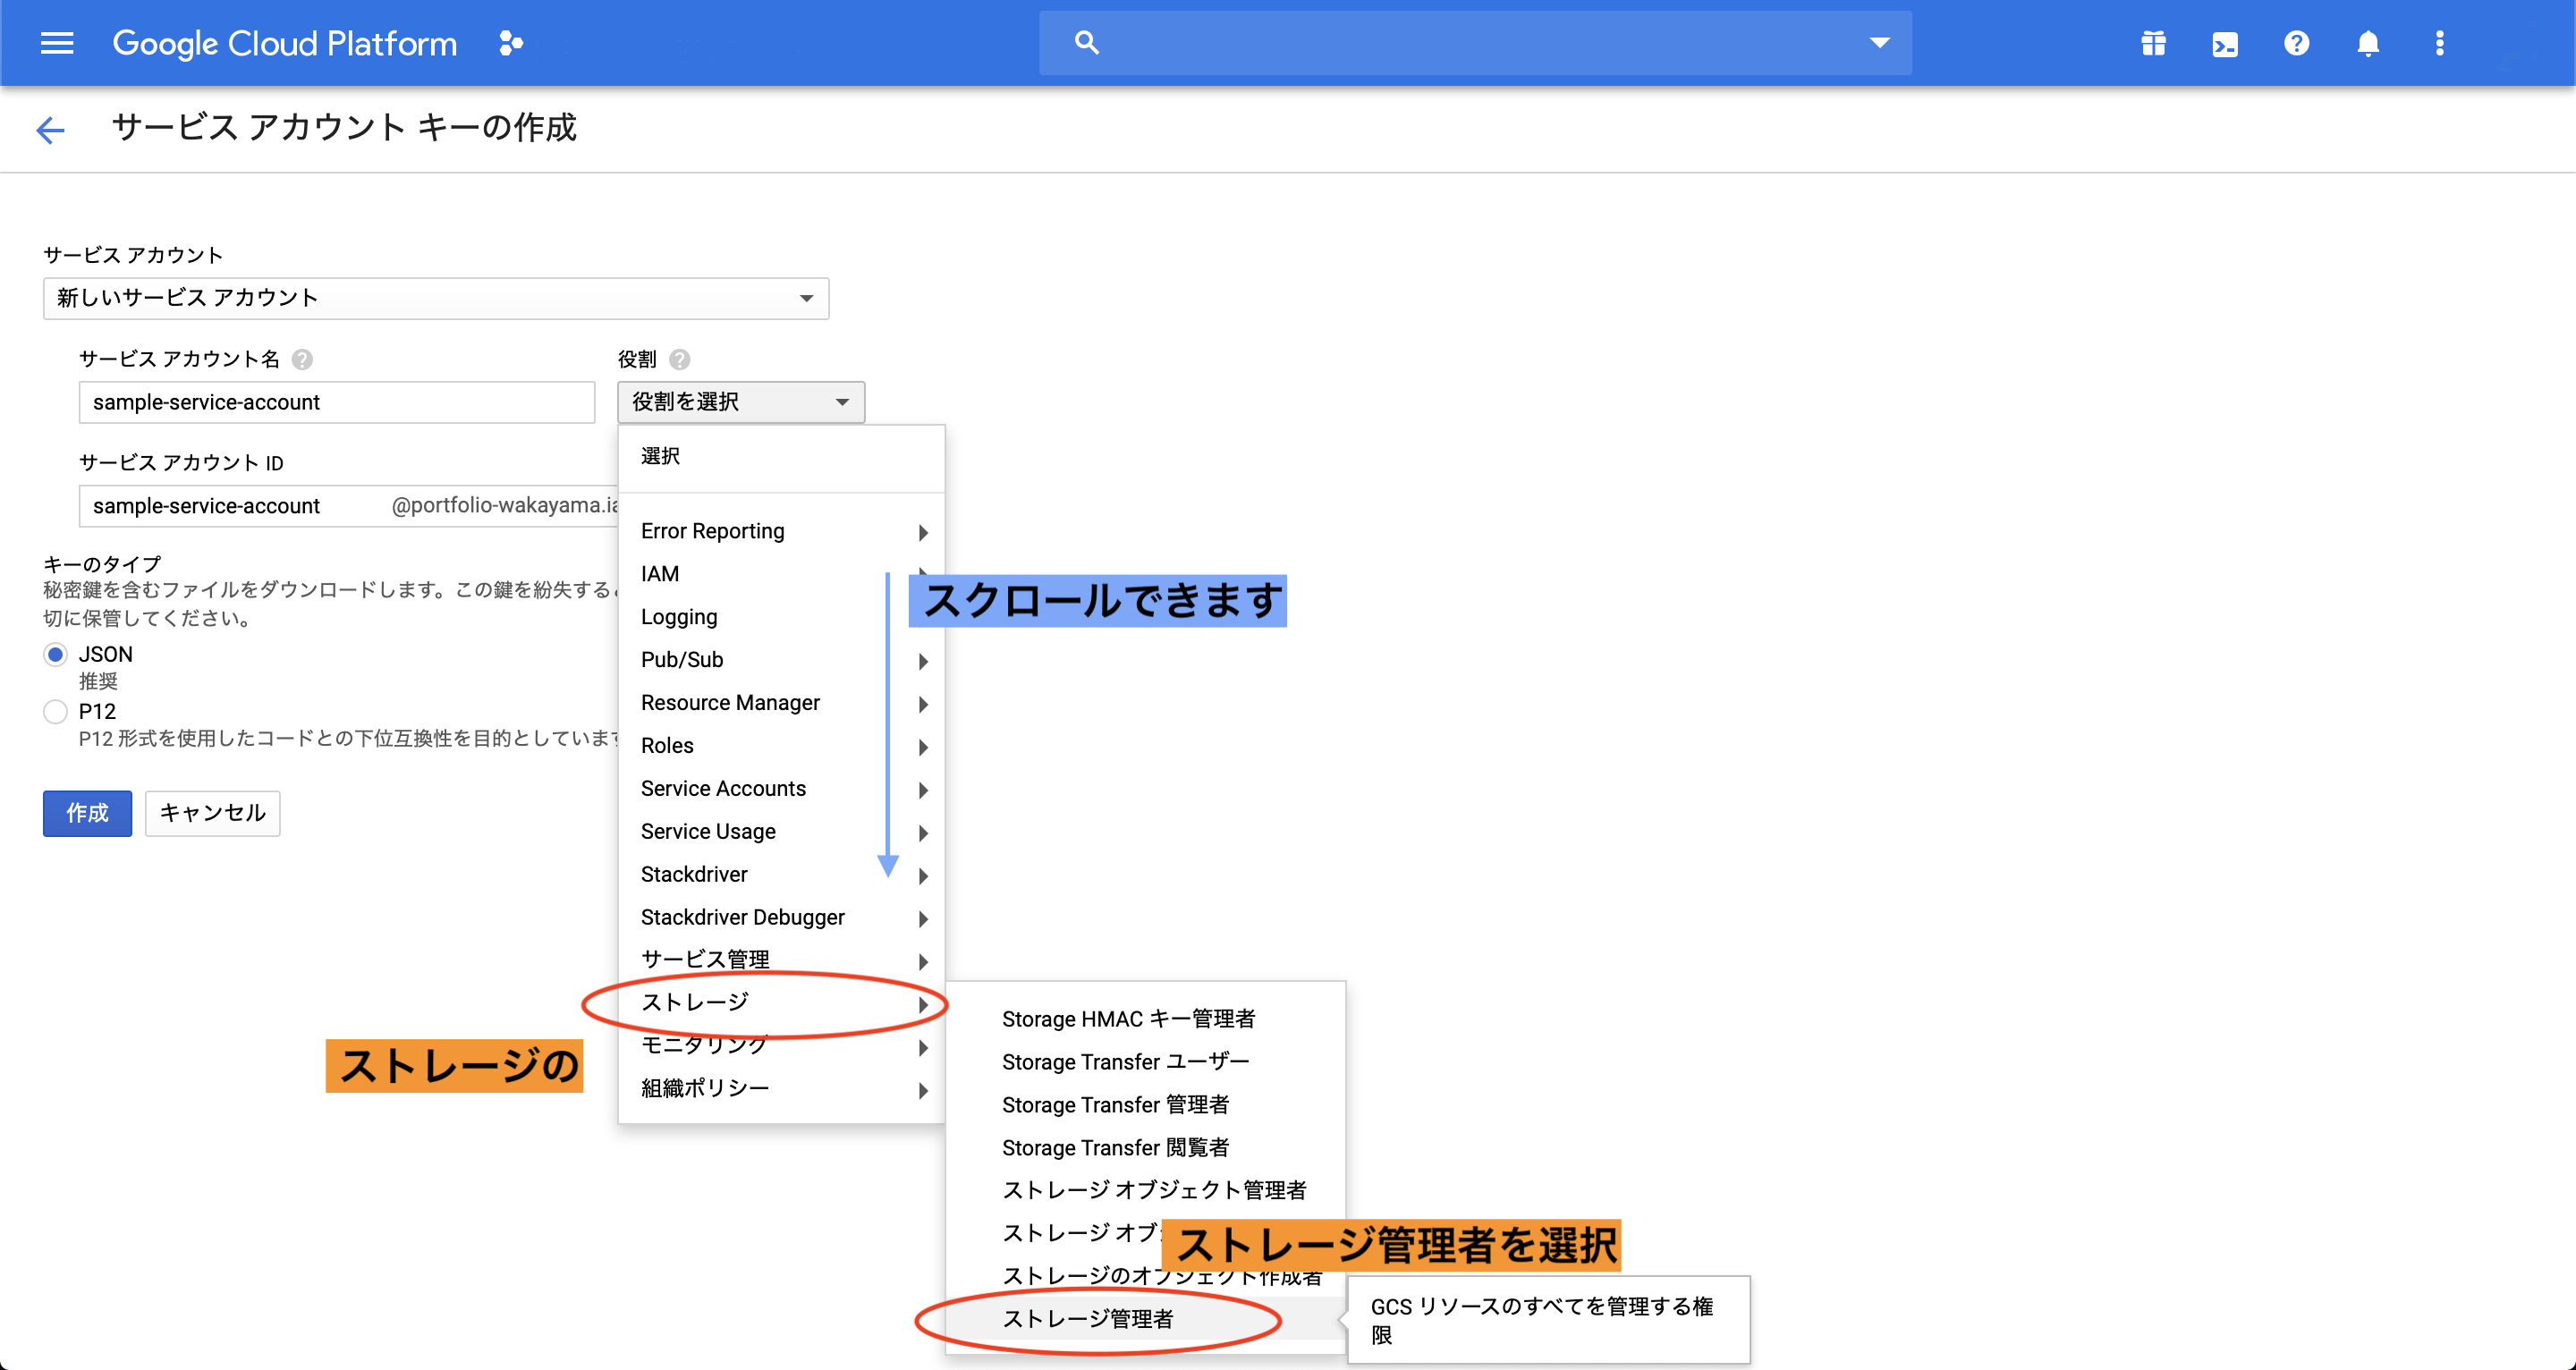
その後、役割から「ストレージ」 -> 「ストレージ管理者」を選択。
キーのタイプがJSONになっていることを確認して、「作成」ボタンを押下してください。
そうすると、JSONファイルがダウンロードされます。
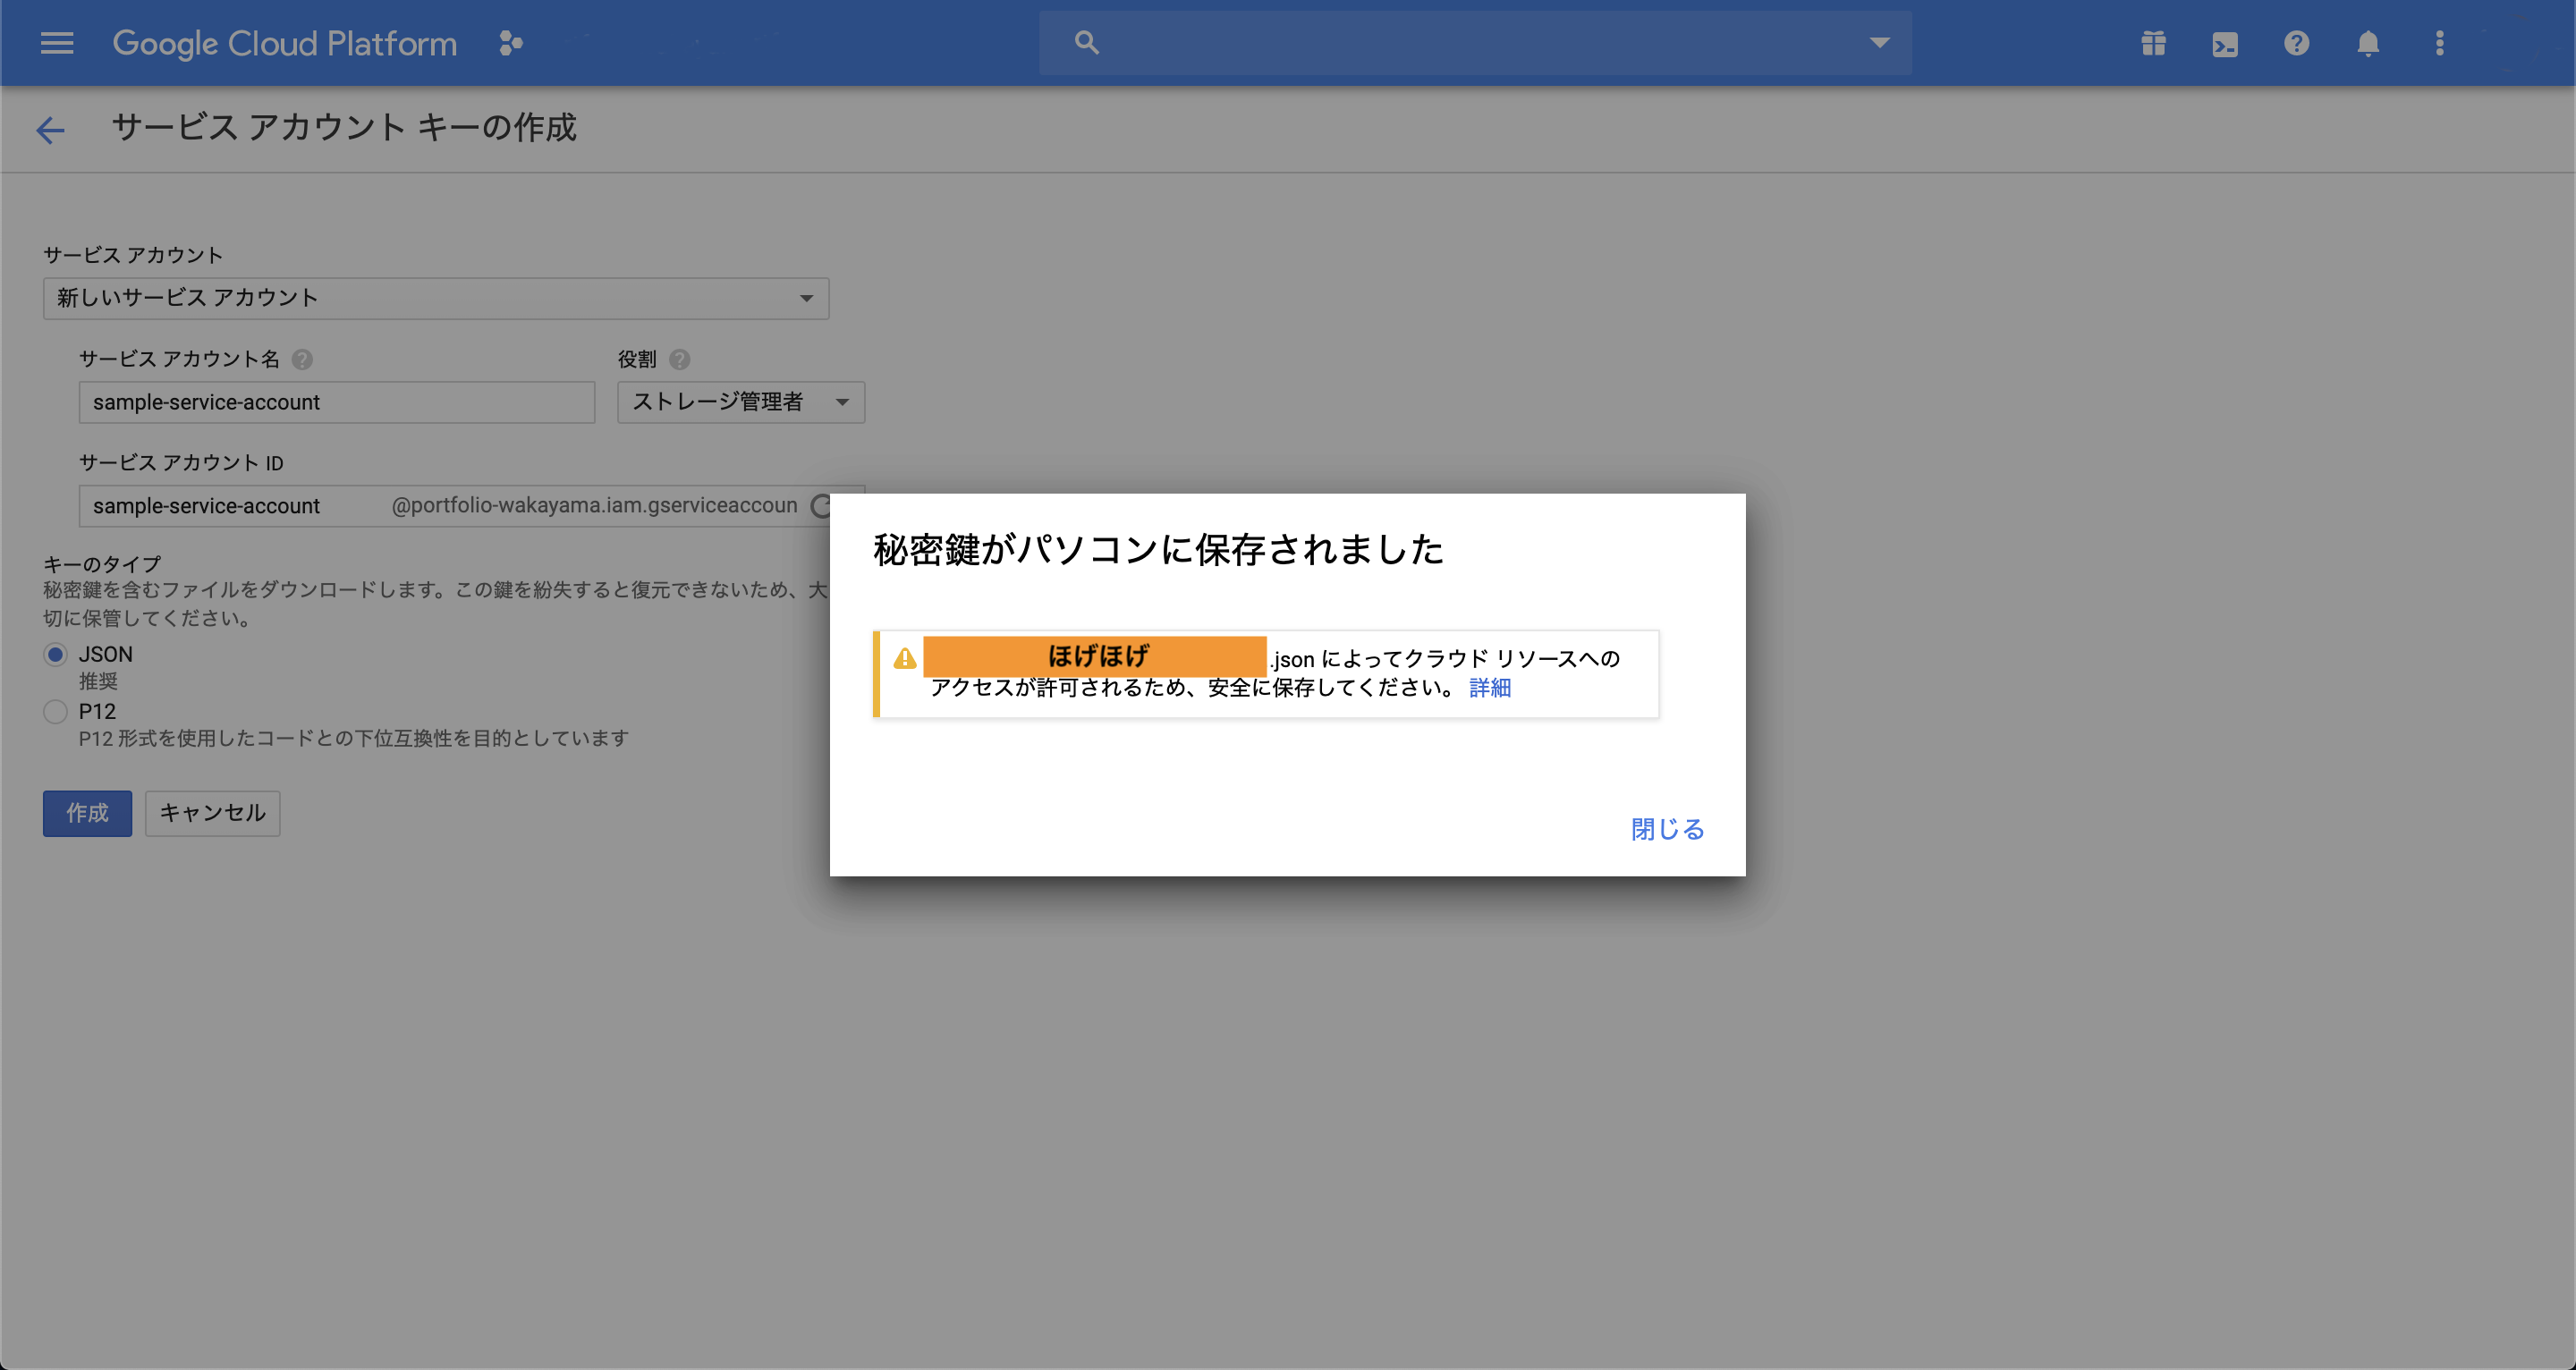
ダウンロードしたJSONファイルは、Djangoプロジェクトのルートディレクトリに配置してください。
Google Cloud Strageのバケットの作成
Cloud Strageの単位をバケットといいます(データを入れるバケツみたいな意味)
これを作成して、データを収納します。
Google Cloud Console (Cloud Strage)
https://console.cloud.google.com/storage/browser
上記URLからアクセスすると、以下のような作成画面に遷移すると思うので、新規バケットを作成します。
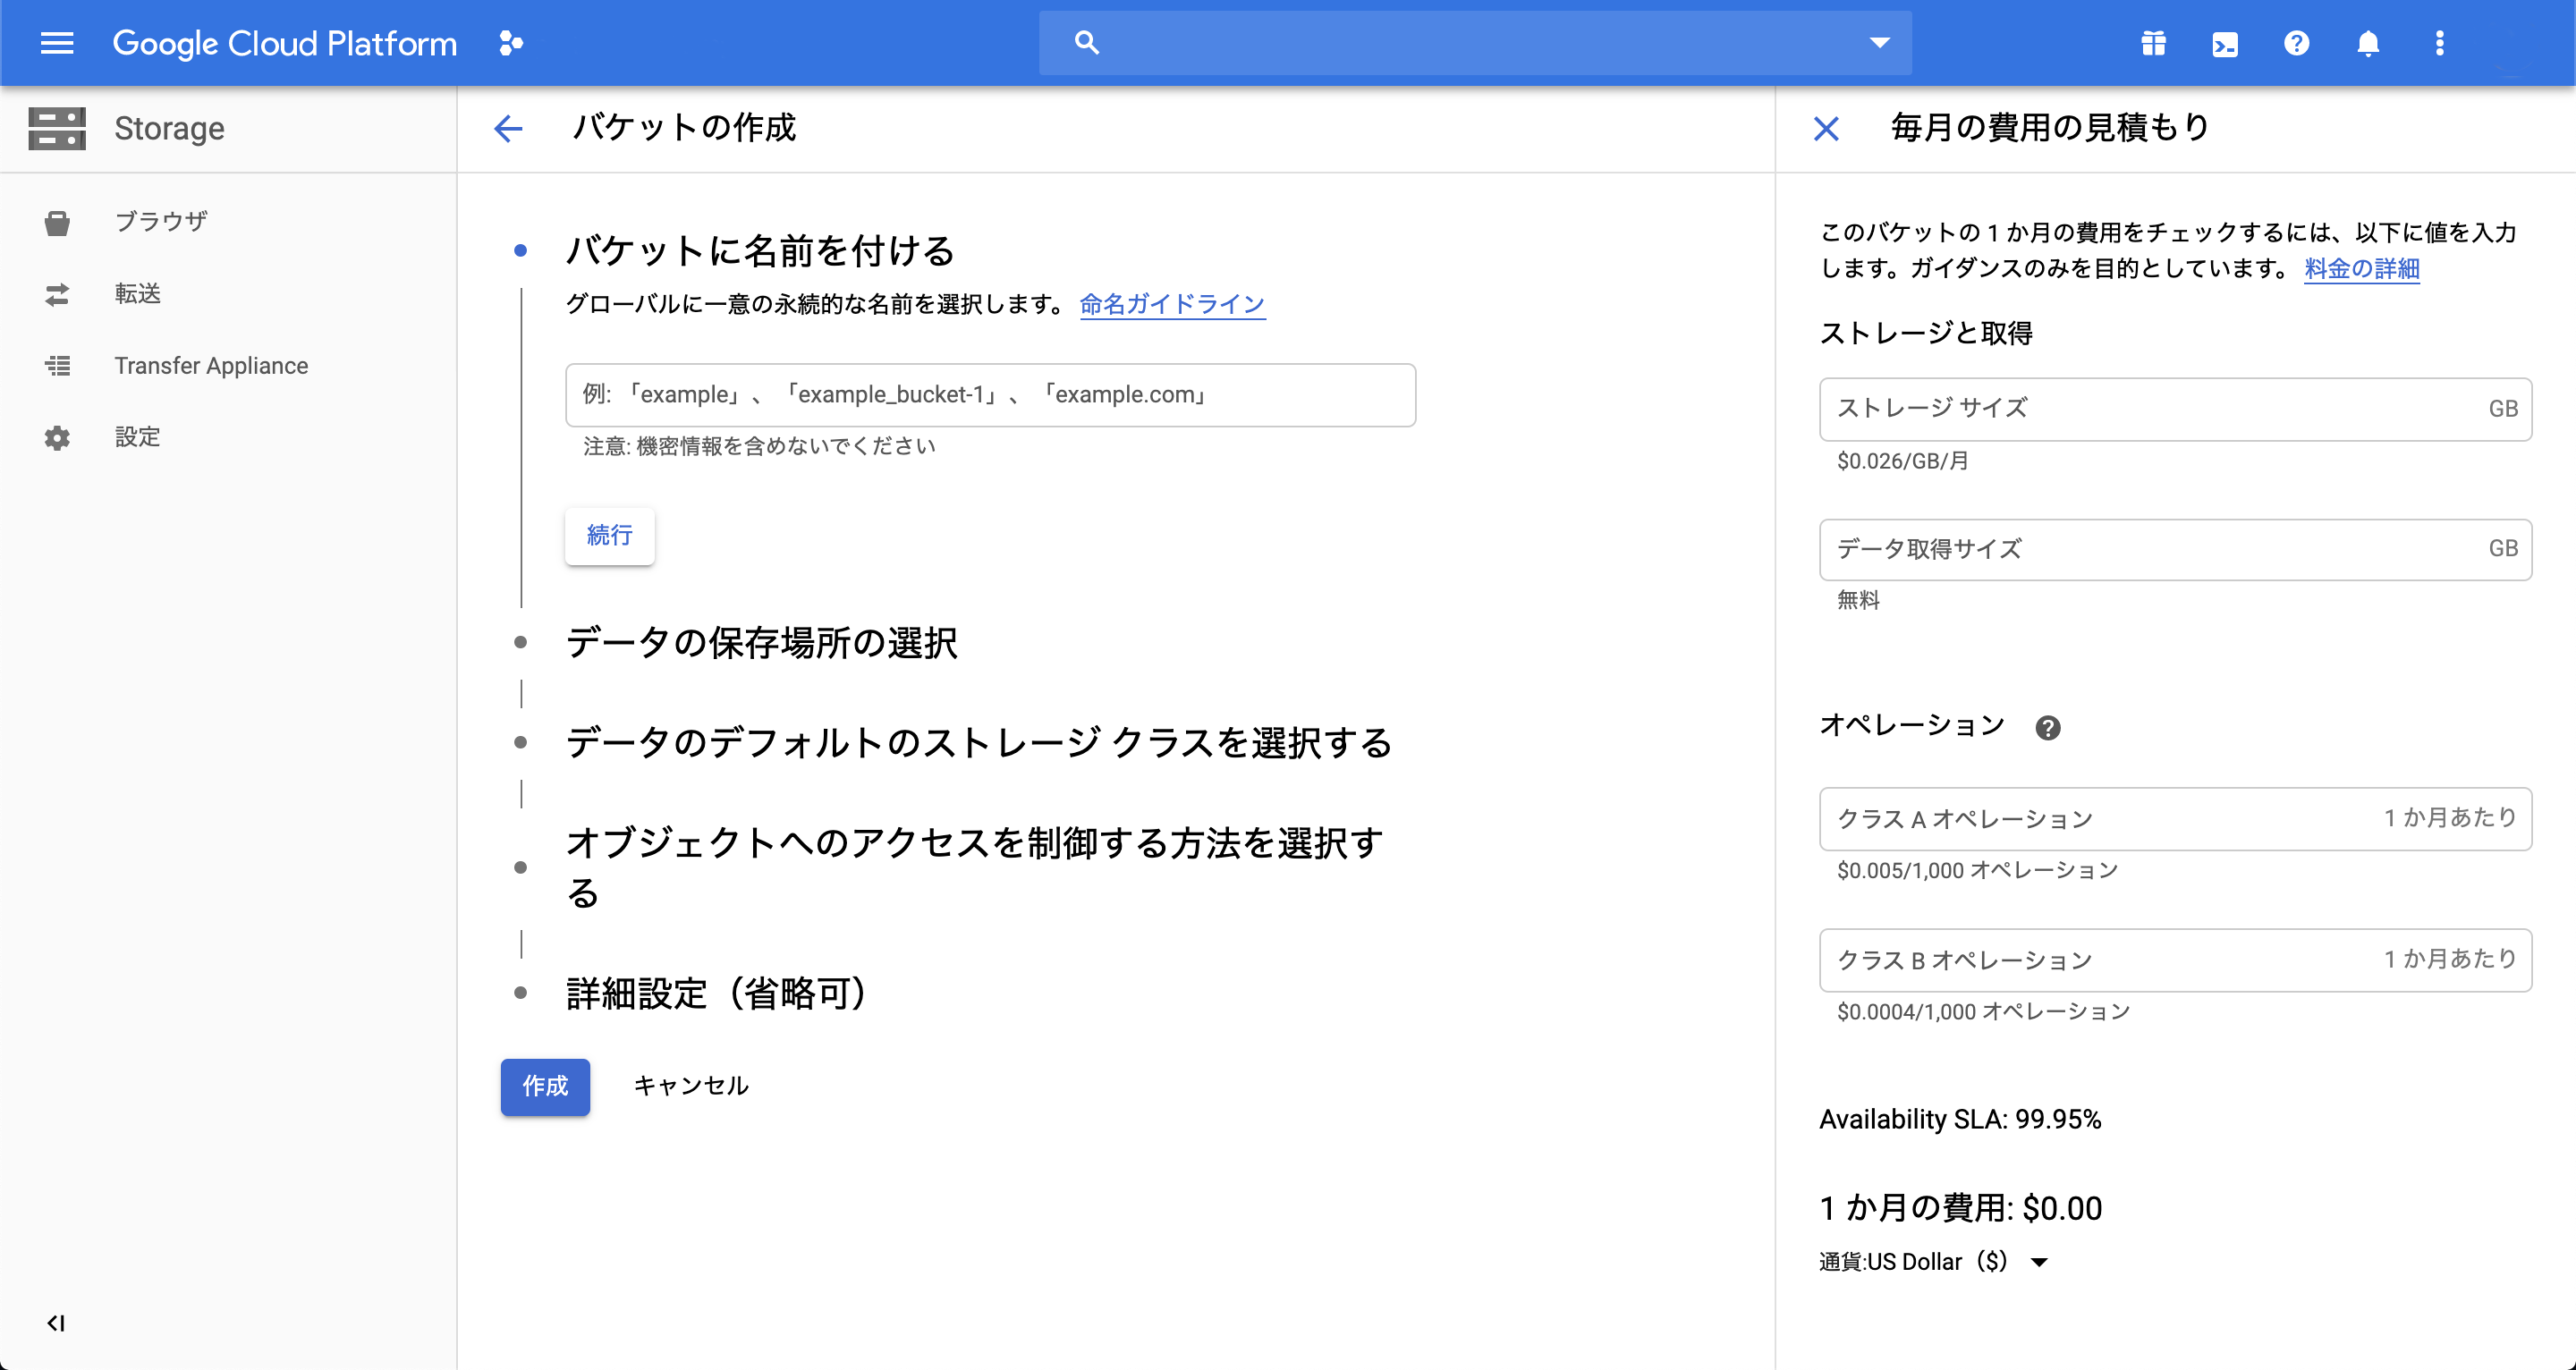
これで、Google Cloud Platform console での設定は完了です。
Djangoでの設定
settings.pyに設定の追加
settings.pyファイルでデフォルトのストレージとバケット名を設定します。
STATIC_URL = '/static/'
STATIC_ROOT = os.path.join(BASE_DIR, 'staticfiles')
STATICFILES_STORAGE = 'storages.backends.gcloud.GoogleCloudStorage'

MEDIA_URL = '/media/'
MEDIA_ROOT = os.path.join(BASE_DIR, 'media')
DEFAULT_FILE_STORAGE = 'storages.backends.gcloud.GoogleCloudStorage'

GS_BUCKET_NAME = '[YOUR_BUCKET_NAME_GOES_HERE]'

from google.oauth2 import service_account

GS_CREDENTIALS = service_account.Credentials.from_service_account_file(
    os.path.join(BASE_DIR, '[YOUR_AUTHENTICATON_KEY_FILE_NAME].json'),
)
以上で設定は完了です。
あとは以下のコマンドを実行しましょう。
$ python manage.py collectstatic
そして設定の変更をサーバにデプロイすると正常に機能するはずです。
お疲れ様でした。
