はじめに
Active Storageを使用して、画像投稿機能を実装する。
本番環境では、AWSが提供しているクラウドストレージサービス S3(Simple Storage Service)に画像データを保存し、Heroku環境で実行できるようにしたい。
前提
| No | 項目 | 内容 |
|---|---|---|
| 1 | OS | Mac |
| 2 | Ruby | 2.6.3 |
| 3 | rails | 6.0.4 |
Active Storageについて
これを使うと、ファイルのアップロードができるようになる。
Railsガイド: Active Storage の概要から引用する。
Active Storageは、Amazon S3、Google Cloud Storage、Microsoft Azure Storageなどのクラウドストレージサービスへのファイルのアップロードや、ファイルをActive Recordオブジェクトにアタッチする機能を提供します。 development環境とtest環境向けのローカルディスクベースのサービスを利用できるようになっており、ファイルを下位のサービスにミラーリングしてバックアップや移行に用いることも可能です。
Active Storageは、アプリケーションにアップロードした画像の変形や、PDFや動画などの画像以外のアップロードファイルの内容を代表する画像の生成、任意のファイルからのメタデータ抽出にも利用できます
実装
Railsチュートリアル 第13章に記載の手順で基本進める。
1. Active Storageをアプリケーションに追加
$ rails active_storage:install
$ rails db:migrate
2. Gemfileに追加し、各機能を実装
下記のようにGemfileに追記する。
# S3クラウドストレージを使う用
gem 'aws-sdk-s3', require: false
# ファイルの加工処理用
gem 'image_processing'
gem 'mini_magick'
# Active Storageバリデーション用
gem 'active_storage_validations'
$ brew install imagemagick
$ bundle install
3. ポストモデルの設定
image_topとimagesメソッドを使用できるように設定する。
・has_one_attachedは、ファイル一つのみ添付できる。
・has_many_attachedは、ファイルを複数添付できる。
# image_topメソッドとimagesメソッドを使用できるようにする。
...
  has_one_attached :image_top
  has_many_attached :images
...
# Active Storageのバリデーション
  validates :image_top, :images, content_type: { in: %w[image/jpeg image/gif image/png],
                                   message: "must be a valid image format" },
                                size: { less_than: 5.megabytes,
                                        message: "should be less than 5MB" }
# image_top のリサイズ済み画像を返す
  def resize_image_top
    image_top.variant(resize_to_limit: [500, 200])
  end
...
4. コントローラーの設定
サムネ用の画像と投稿本文用の画像を許可する。
...
  def create
    @post = current_user.posts.build(post_params)
...
# 下記に:image_topとimages:[]を追加
    # strong parameter
    def post_params
      self.params.require(:post).permit(:content, :title, :image_top , images: [])
    end
5. 投稿フォームの設定
・TLに表示する用のサムネイル画像をアップロードするフォーム
・投稿本文に関する画像をアップロードするフォーム
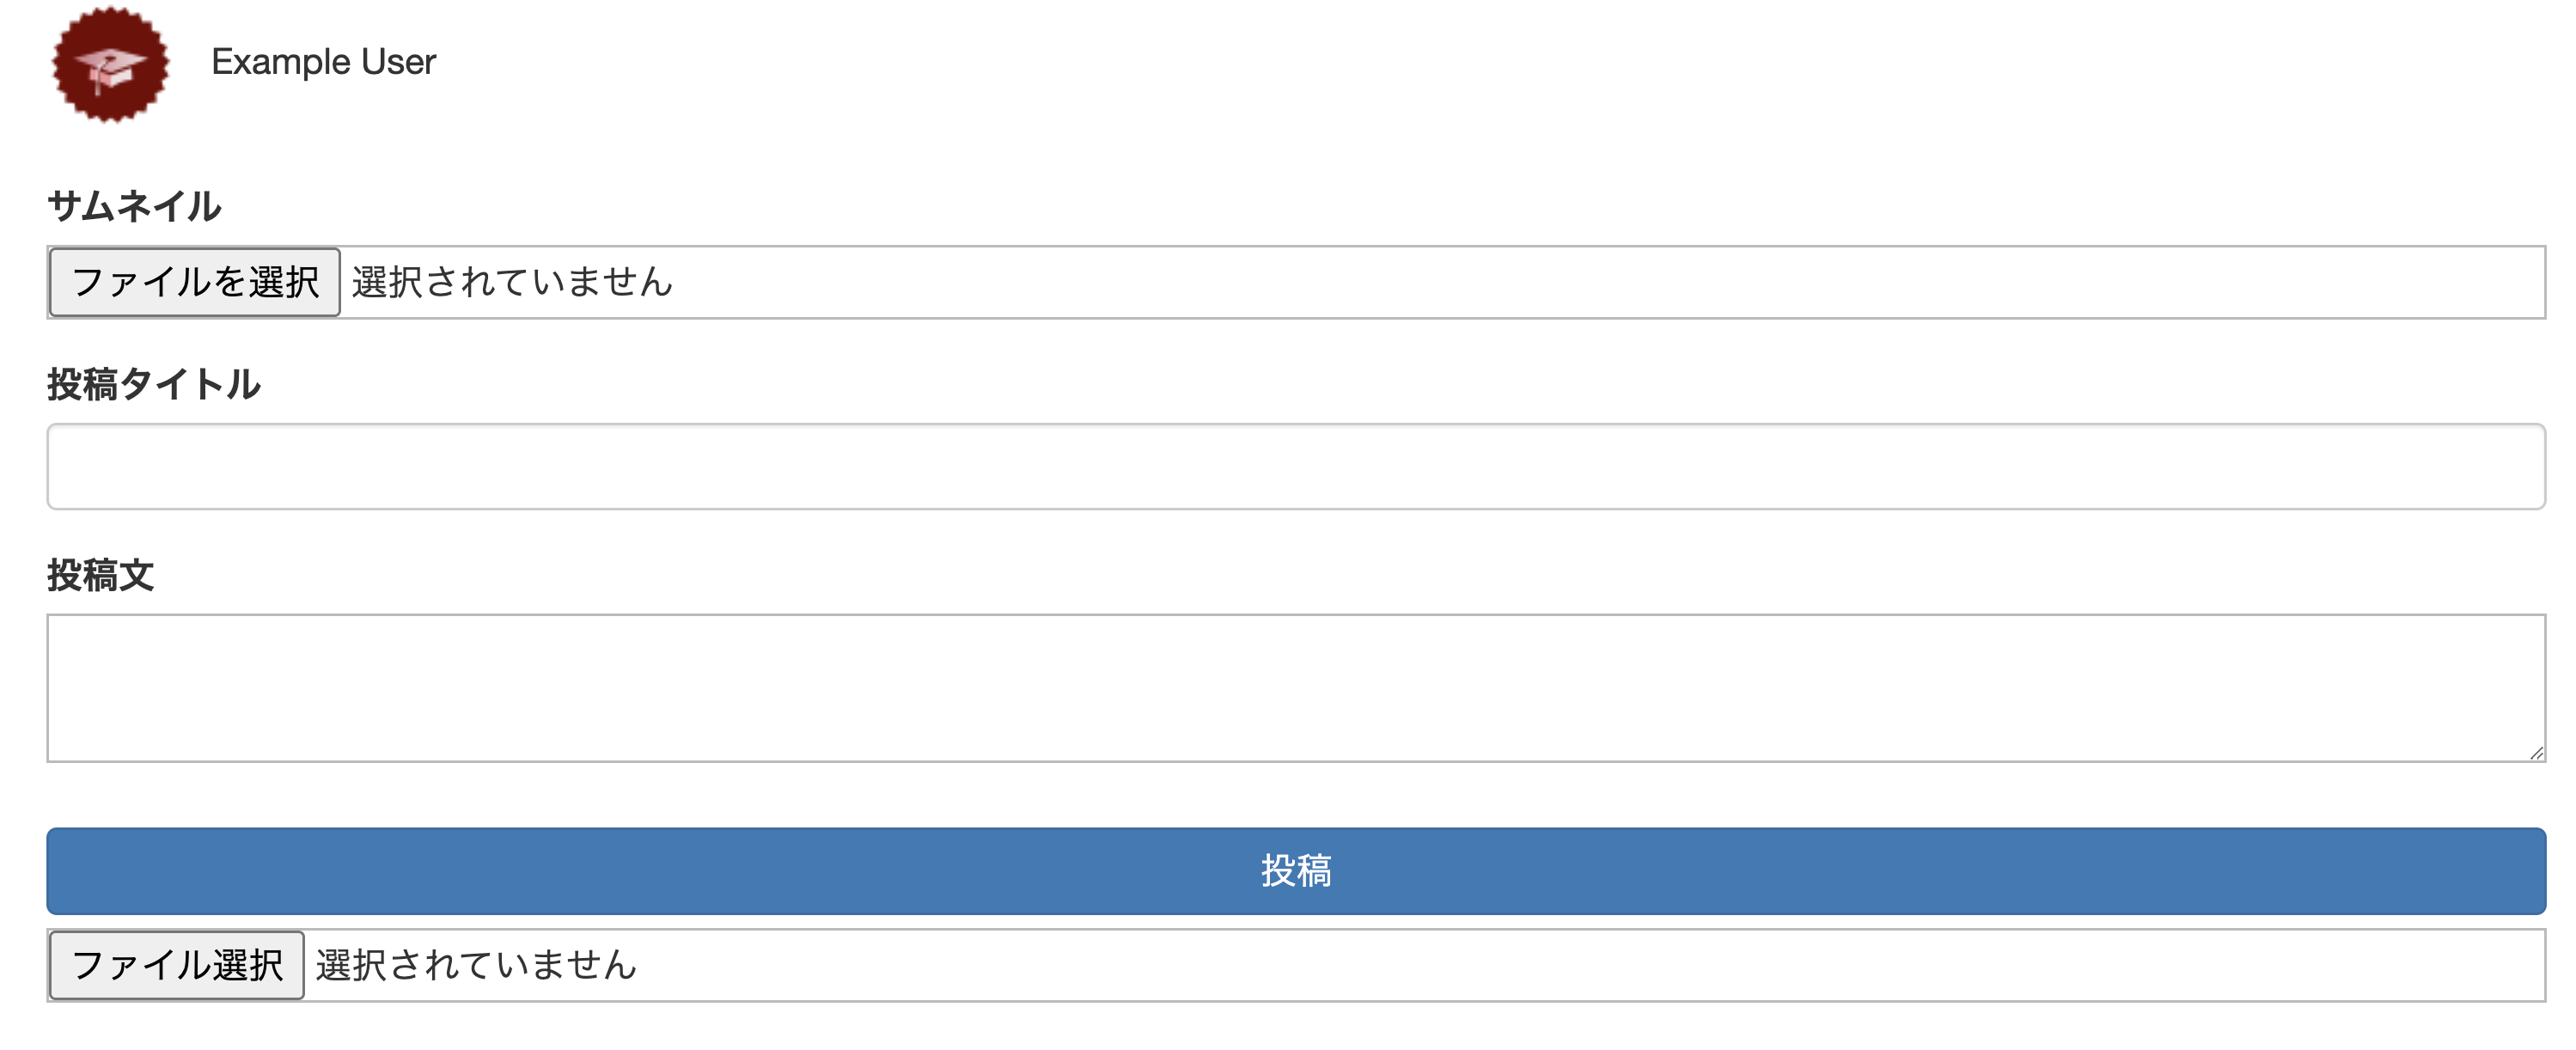
・バリデーションをかける前に、投稿フォームでファイルサイズを規制する。
...
# TLに表示する用のサムネイル画像をアップロードするフォーム
      <span class="image-top">
        <%= f.label :image_top, 'サムネイル' %>
        <%= f.file_field :image_top, accept: "image/jpeg,image/gif,image/png" %>
      </span>
...
# 投稿本文に関する画像をアップロードするフォーム
    <span class="images">
      <%= f.file_field :images, multiple: true, accept: "image/jpeg,image/gif,image/png"%>
    </span>
...
# バリデーションをかける前に、投稿フォームでファイルサイズを規制する。
<script type="text/javascript">
  $("#post_image_top, #post_images").bind("change", function() {
    var size_in_megabytes = this.files[0].size/1024/1024;
    if (size_in_megabytes > 5) {
      alert("Maximum file size is 5MB. Please choose a smaller file.");
      $("#post_image_top").val("");
    }
  });
</script>
6. TLにサムネイル画像を表示
TLにサムネイル画像を表示する。

...
    <div class="image-top">
      <%= image_tag post.resize_image_top if post.image_top.attached? %>
    </div>
...
7. 投稿の詳細ページを設定
・サムネイル画像は一つのみなので、post.rbで作成したメソッドresize_image_topにより、リサイズする。
・本文の画像は複数の可能性があるため、それぞれの画像に対して、variantメソッドを使用してリサイズする。
投稿詳細ページに複数のファイルをそれぞれ表示する。
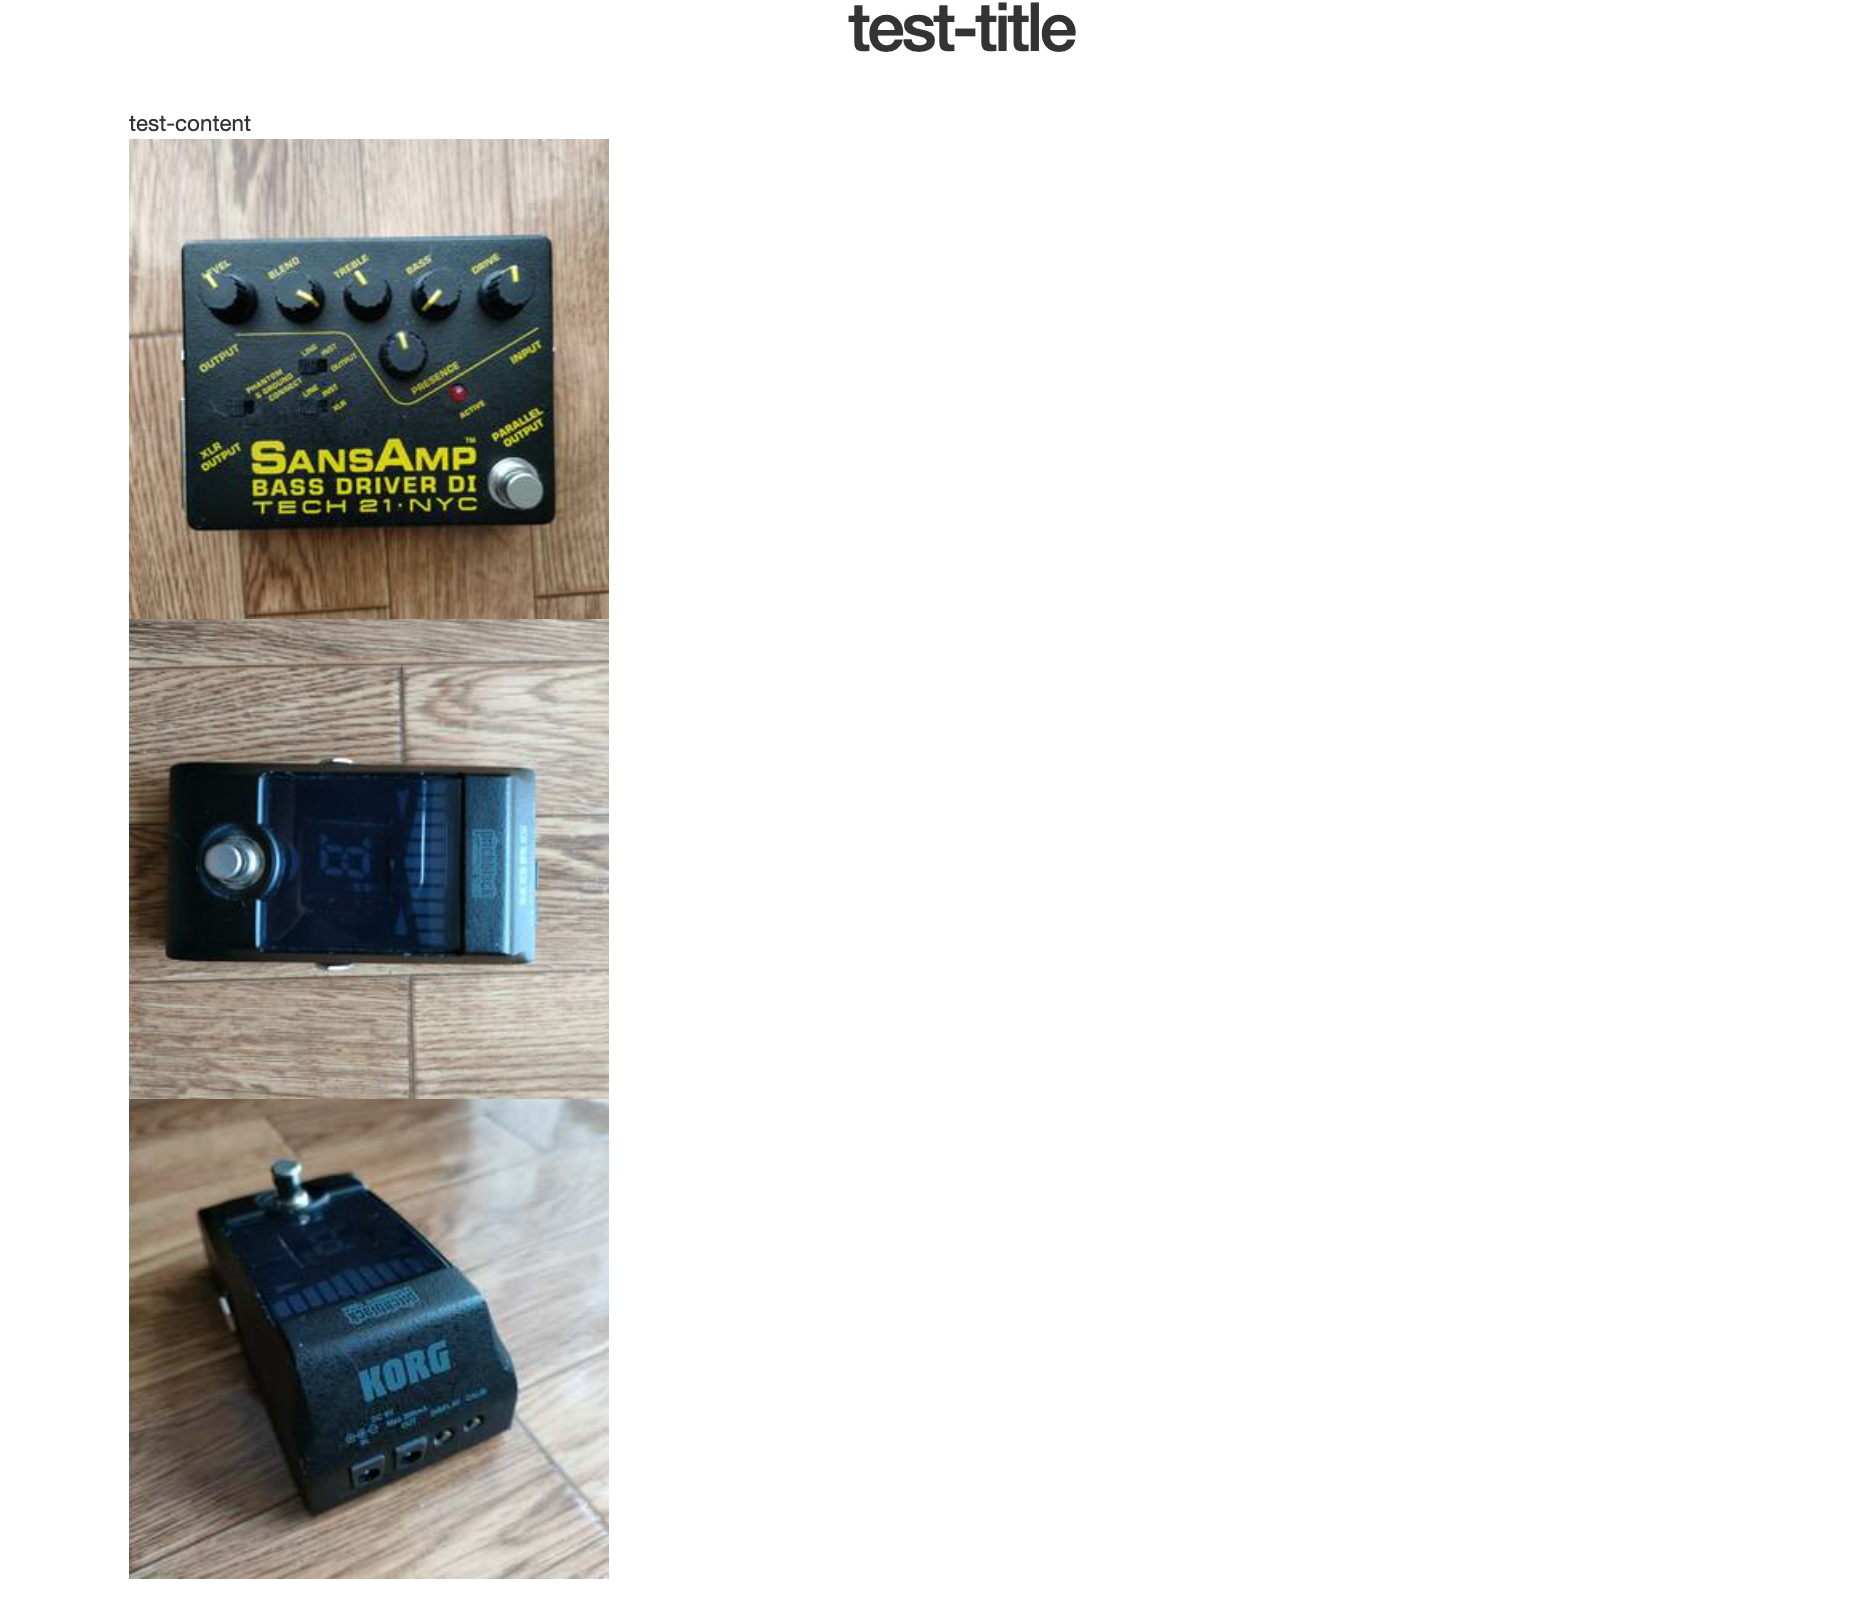
...
# サムネイル画像を表示
  <div class="image-top">
    <%= image_tag @post.resize_image_top if @post.image_top.attached? %>
  </div>
...
# 投稿本文に関する画像を表示
  <div class="images">
    <% if @post.images.attached? %>
      <% @post.images.each do |image| %>
        <%= image_tag image.variant(resize_to_limit: [500, 300]) %>
      <% end %>
    <% end %>
  </div>
...
8. 本番環境の設定
本番環境用のストレージにamazon:という名前で設定をする。
...
amazon:
  service: S3
  access_key_id:     <%= ENV['AWS_ACCESS_KEY'] %>
  secret_access_key: <%= ENV['AWS_SECRET_KEY'] %>
  region:            <%= ENV['AWS_REGION'] %>
  bucket:            <%= ENV['AWS_BUCKET'] %>
...
本番環境で使用するストレージを上記で設定した:amazonを選択する。
  # アップロードされたファイルをAWSに保存する
  config.active_storage.service = :amazon
環境変数の設定をする。
$ heroku config:set AWS_ACCESS_KEY=<accessキー>
$ heroku config:set AWS_SECRET_KEY=<secretキー>
$ heroku config:set AWS_REGION=<リージョン名>
$ heroku config:set AWS_BUCKET=<bucket名>
<>はそれぞれ自分のものに差し替える。(""で囲む必要があることを忘れずに! ex. AWS_ACCESS_KEY="abcdefghijklmn")
accessキーとsecretキーは、IAMアカウントを作成時に発行される。
リージョン名は、S3のコンソール画面のURLに表示されている。resion=以降が該当する。

さいごに
これで、実装が完了した。